
Custom Fit Roof Rack Kit With Y00426 | Y06102 | Y06159 | Y28TR
Item # Y85TB
Our Price: $688.80
Confirmed to Fit
2012 Ford Fusion
Will this fit?
To see if this custom-fit item will work for you please tell us what vehicle you'll use it with.
This item qualifies for Free Shipping
In Stock


- All Info
- Reviews (216)
- Q & A (0)
- Videos (7)
- Photos
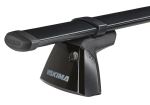
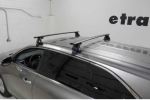
Yakima Roof Rack - Y85TB
- Crossbars
- Aero Bars
- 2 Bars
- 60 Inch Bar Space
- Yakima
- Black
- Overhang
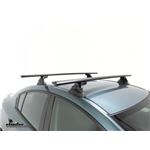
Extremely quiet, aerodynamic crossbars attach to Yakima towers to create a stylish roof rack for your vehicle. Rubber strips in T-slots push down to load carriers or accessories - no need to trim. Full-length aluminum bars maximize carrying capacity.
Features:
Yakima 60" JetStream MD - Black:- Quiet, low-profile crossbars let you build an aftermarket roof rack for your vehicle
- Pair with Yakima towers and a fit kit (sold separately) to create a complete roof rack
- Asymmetrical JetFlow shape creates an extremely aerodynamic roof rack system
- Built-in WindRidges help control air flow over bars to dramatically reduce wind noise and vibration
- Aero-style bars reduce drag to help maintain fuel efficiency
- Full-length design maximizes space for carriers and accessories
- Versatile crossbars accommodate accessories that mount in the T-slots or clamp around the bars
- Works with most universal-mount bike, water, snow, and cargo carriers
- Rubber SmartFill strips in T-slots allow for easy installation of channel-mounted accessories
- Simply push down on the SmartFill strips to slide in accessories - no trimming required
- Bottom channels allow for easy installation on Yakima towers
- Fit BaseLine, RidgeLine, SkyLine, and TimberLine towers (sold separately)
- Etched measurements on bottoms of bars help center rack on your roof
- Lightweight aluminum bars are durable and rustproof
- Internal JetTruss extrusions provide exceptional bar strength
- Black powder coat finish is corrosion resistant
Yakima BaseClip 102:
- Custom-fit mounting clips and pads allow you to mount BaseLine towers (sold separately) on your vehicle with a naked roof
- Padded, stainless steel clips provide secure grip on your door jambs
- Snap onto DropHooks inside towers
- Protect door jambs from scratches and abrasions
- Powder coated for durability and rust resistance
- Molded rubber pads fit the contours of your roof
- Clip onto bottoms of towers
- Protect roof from scratches and abrasions
Yakima BaseClip 159:
- Custom-fit mounting clips and pads allow you to mount BaseLine towers (sold separately) on your vehicle with a naked roof
- Padded, stainless steel clips provide secure grip on your door jambs
- Snap onto DropHooks inside towers
- Protect door jambs from scratches and abrasions
- Powder coated for durability and rust resistance
- Molded rubber pads fit the contours of your roof
- Clip onto bottoms of towers
- Protect roof from scratches and abrasions
Yakima BaseLine Towers (4-pack) (w/new covers):
- 4 Heavy-duty towers mount Yakima crossbars to your vehicle with a naked roof
- Pair with 2 Yakima crossbars and BaseClips (sold separately) to create a complete roof rack
- Tower pitch can be adjusted 6 degrees forward and 6 degrees backward to level your crossbars
- Pivoting bases can be adjusted during installation to ensure towers are seated correctly
- Versatile BarBeds are curved to accommodate the elliptical shape of Yakima CoreBar and JetStream crossbars
- Also fit RoundBar crossbars with adapter (Y03536 - sold separately)
- Safe and easy installation with DropHook system and included torque tool
- DropHook clip holder adjusts on 3 axes for perfect fit on your naked roof
- BaseClips (sold separately) attach to hooks in tower assemblies and tighten for a secure grip
- Torque tool clicks 3 times when clips are secure - eliminates fear of under- or over-tightening
- Lockable with Yakima Same Key System (SKS) lock cores (Y07204 - sold separately)
- Weather-resistant stainless steel, glass-reinforced plastic, and elastomer construction with matte finish
8000426 Yakima Jet Stream Cross Bars - Aluminum - 60" Long - Qty 2 - Black
8006102 Custom Base Clips and Pads for Yakima Base Line Towers
8006159 Custom Base Clips and Pads for Yakima Base Line Towers
8000162 Yakima Base Line Towers for CoreBar, JetStream, and RoundBar Cross Bars - Bare Roofs - Qty 4
Replaces 8000146
Video of Custom Fit Roof Rack Kit With Y00426 | Y06102 | Y06159 | Y28TR

Videos are provided as a guide only. Refer to manufacturer installation instructions and specs for complete information.


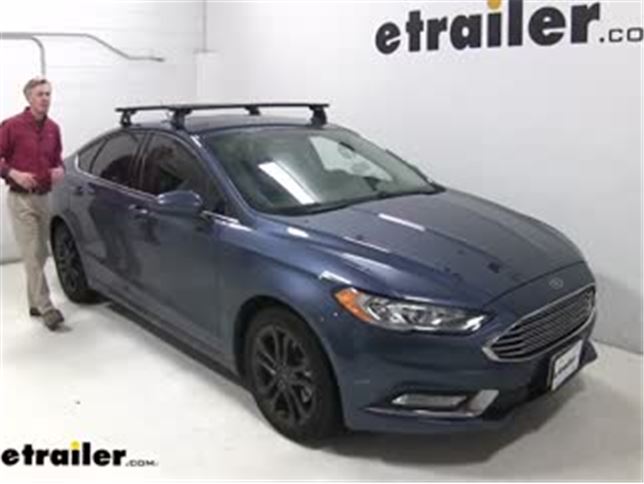
Video Transcript for Yakima Roof Rack Installation - 2018 Ford Fusion
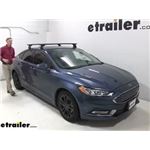
Today, with 2018 Ford Fusion, we're gonna be doing a test fit on the Yakima JetStream Crossbar Roof Rack System. I've already got it in place so you can get a good look. With this system, it's gonna allow you to carry bike racks, cargo carriers, kayak carriers, and more. Now this roof rack is specifically designed to fit the naked roof of your Fusion. The JetStream Crossbars are 50 inches long. You can see how they can span across the entire roof.
This is gonna allow us to carry not one but multiple accessories on our roof. Maybe you'd like to get three bike racks up here or even two kayaks. You'll notice how they have that aerodynamic shape. These are gonna be a lot quieter than your traditional round or square bars.Now they're gonna work with your standard clamp-on accessories, as well as your T-slot accessories. You always wanna remove that end cap.
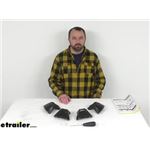
Then, rather than having to trim or remove that rubber strip, that T-bolt just slides right over the top to your desired location giving you that nice clean look. The crossbars are held in place by four baseline towers. You can see here how they feature some padding. That way, they don't harm or scratch our Fusion's roof. Underneath our cover here, you can see it protects our hardware from the elements and it's gonna help the torque fit.Now, right here, you can see our base clip.
This is what attaches the baseline tower to the roof of your Fusion. It, too, is rubber coated. That way, it doesn't harm or scratch that finish. When you've got everything installed, the cover goes back on and you can even upgrade to a lock. That way, no one can remove it from your roof.
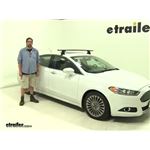
I've opened my door just to give you a shot of that base clip. Again, it is rubber coated all the way to the inside. You can see how it connects. It is specifically designed to fit your Fusion's roof. You can see when we close up our door, that seal just goes around our clip and we don't have to worry about anything getting inside.Now this roof rack system has a weight capacity of 165 pounds. You do rather wanna check with their fusions owner's manual to see if the roof can support that much weight. Now I'll give you some clearance measurements. This will give you an idea how much you've added to the roof of your Fusion. It also may help you when using those clamp-on accessories. From the top of the roof to the other side of the bar is about three and a quarter of an inch. From the top of the roof to the top of the bar is about four and three-eighths of an inch. Now that we've got all the features, I'll go ahead and show you how to get it set up.I've already got my front crossbar in place on the Fusion. Per instructions, you wanna measure up nine inches from the corner of the windshield on each side to the beginning portion of the pad here. That gives you your placement. The rear crossbar installs very similar. Let's go ahead and do it together. Now on the table, I've got one of my baseline towers already installed. We just need to repeat the same process on the side here. We'll start off by grabbing our baseline tower, and we need to remove the cover. Now the way you do this, as you squeeze in on both sides, on the top here, and then it shouldn't just come right apart just like that. We can set that aside. Then we need to open up the little gray door here.By doing so, it's going to allow us to access this bolt here. Now we need to do some assembly here on top. We'll take our plastic adapter. We'll push it in place here. Let me listen for the click that you heard there, and we'll take the metal knot. We're gonna place that right over the top of bolt. You may have to adjust that bolt a little bit. We'll hold it in place. Then we can turn it over, and begin to tighten up the screw through here. Now we don't wanna tighten it down all the way just yet. What we're looking for is for that metal piece to be flushed with the plastic adapter that we put in.Now we can put our pad on the bottom. We need to be sure that the notch portion of it is facing this direction, so away from the tower. One thing about the pad is they are numbered. They're different from the front and the rear crossbar. Since we're working with the rear crossbar, we're gonna be looking for the number three. We can line it up and push it in place. Once we got it on, we're ready to slide it on to our crossbar. Now it's easier if you turn over your crossbar. That way, you can easily see what you're doing when you're sliding in place. If you haven't removed the end cap already, go ahead and do that. Then we need to slide it into the channel here.We're looking for the metal bracket and the plastic bracket to slide into the channel. With it installed, we'll then need to set it to the correct measurement. I don't know if you can see this, but there's a scale printed on the bottom of our crossbar here. Per instructions, we'll need to set it to 39 and three quarters. Now again, this is gonna be for the rear crossbar. The front crossbar has a different measurement. You can find that located in your instructions. We'll take our tool. We'll then need to set the pitch and the toe. That's gonna be here and here. Now you'll notice that they're not labeled, but the first one here is A, second one B, and third one is C. That's for our pitch. For our toe, it's one, two, and three.How you figure that out is you wanna start from the front portion of your crossbar, which is gonna be the rounded portion of your crossroads. That's what's going to face forward. When you know that, that's how you know to start A, B, and C, and one, two, and three. This is all found in your instruction. If it's confusing, be sure and check that out. For my setting, the pitch needs to be set to C so we're going to move it to C. You can see how it kind of changes the angle of our baseline tower, so the bolt is over the line here, which is C, and we'll tighten that up. We're gonna be listening for two clicks on our tool. That's how we know it's properly torqued down.As for our toe, that just needs to be the number two, which is in the center. Again, we can tighten it down. We can replace our end cap, and hen we're ready to set it in place on our Fusion. When you set it in place, again, you wanna be sure that that rounded portion of the bar is facing forward. That's gonna be our front and we're going to gently rest it down in the general area. Per our instructions, we need to be 32 inches from the front of our front crossbar to the front of our rear crossbar. That gives us our placement. We'll go ahead and grab a tape measure and make sure we've got that right. We'll do this for both sides.Now it's time to install our clips. All of our clips are the same, front and back, so we don't need to worry about placing in the right spot. We'll lift up the gray door here and then we need to install the clip up through the bottom, and it needs to hook in place. Our hook here is actually upside down. If that happens, no big deal, just turn it over until that is on the bottom just like that. We'll take that clip, slide it in underneath until it hooks in place just like that. Go and do that for both sides. Now we need to adjust our hook towards making contact with the inside of the doorframe.You can see here how its kind of sticking out. We need to be up against our doorframe like so. So we come up to our bolt here with our included tool and turn that clockwise, and you'll see how it starts to draw in. We don't need to overdo this. We just need to make sure that it's sitting correctly so we can help along until it actually gets there. From there, we can then start tightening it up here. We wanna try to take out as much of that slack as we can on each side. That way, when we start tightening it down, everything is gonna be tightened down evenly.I've already gone ahead and done that side so I'm gonna go ahead and do a few more turns here, and then I will alternate sides and make sure that it gets done correctly. When we have just about got it nice and tight, we'll listen for that audible click in our tool and that's how we know it's properly torqued down. From there, we can close up our two gray doors, got this one here in the front, and then we've got this one here. Last thing to do is to put on our cover, but we can go ahead and close the door. It just clips on just as easy as it came off, push it in place, listen for the click and you're good to go. Once everything's assembled and installed correctly, you're ready to load up your favorite roof mount accessory and hit the road. But that's gonna complete our look, the Yakima JetStream Crossbar Roof Rack System on our 2018 Ford Fusion.
Customer Reviews
Custom Fit Roof Rack Kit With Y00426 | Y06102 | Y06159 | Y28TR - Y85TB
Average Customer Rating: 4.8 out of 5 stars (216 Customer Reviews)
Extremely quiet, aerodynamic crossbars attach to Yakima towers to create a stylish roof rack for your vehicle. Rubber strips in T-slots push down to load carriers or accessories - no need to trim. Full-length aluminum bars maximize carrying capacity.by: TimN03/19/2024
Chevrolet Silverado
Excellent solution for my 2023 Chevy Silverado. In the past, I have had rails installed on the roof of my pickup trucks, but I find the BaseLine towers to be a better solution, since they don't permanently change the truck. Plus, they are much more solid than SkyLine system on the rails.
by: 04/01/2024
Follow the instructions, and you can't go wrong on the self installation
by: Dave02/11/2024
Love my Yakima roof rack!! It exceeds my expectations.great product. Also thank etrailer for the tec support! great staff always there to help thanks again!!
by: DogDoc04/12/2024
Ford Expedition
Easy to install. It probably took 45min. I bought them for my 2024 Expedition to haul a canoe. I have not done that yet but I expect no issues.
by: Paul08/16/2023
Ackage came 2 days early the install was somewhat easy (did it by myself)
Did not get to mount anything to it but seems really sturdy. One thing I can say is mark out your mounting points with provided stickers then put up and make adjustments to the roof rack.
by: Todd06/24/2023
Really easy to install & work as specified. So happy with the customer support/service at etrailer.


by: Bob L11/30/2023
product was just what I needed The folks at etrailer were extremely helpufl!!
by: 10/06/2023
Love it! We've made several long trips with full luggage loads.
by: Roland01/08/2024
Well packaged and on time
by: Richard R02/20/2023
GMC Canyon
So far so good. Purchased these towers to use on a 2022 GMC Canyon with HD bars that I already had, primarily to carry my canoe. Yakima's fitting instructions worked perfectly and the whole system seems really solid.
by: Gary10/10/2023
The design of the connection seems a little sketchy to me. Hopefully I'm wrong and the design engineers have it figured out. etrailer's selection process, delivery ann installation help both online and on the phone was excellent
by: John 09/06/2023
Your notice of schemes was a lot better than the yakima site provided. They did not suggest the scheme you did.
But when the products arrived, the instructions were by yakima. Generally worked as instructed except the tower to tower transverse mounting dimensions needed to be tweaked for a perfect fit.
by: Frank02/10/2023
Ford Edge
Not a bad setup. I dont believe you need the 60" bars i received as they hang over the edge of your Hyundai. You need to watch your head getting in and out of your vehicle. The Jetstream crossbars are very loud at speeds over 65 mph. Im probably used to it by now, but it is definitely noticeable. Much louder than an older Rhino Rack of similar dimensions i had. Install was simple and took about 30 minutes, just take your time and measure correctly like all roof racks.


by: Andrew04/04/2023
Easy to order and quick to ship. Took a bit of time to get these installed correctly so they fit just right.


by: Duane05/17/2023
Perfect fit for our car, much better than any OEM rack I've ever seen.
by: Moparnut22808/20/2023
Great product fast shipping
by: Andrew08/01/2023
Great! Easy to install!
by: Joao07/18/2023
Great service and great staff. They will have all the technical information you need.
by: Ian 07/02/2023
Mazda
Solid build quality and easy installation on my '21 Mazda CX-5.
by: Mike06/20/2018
2017 Ford Edge
Very happy with the Yakima roof top rack kit for my 2017 Ford Edge with glass roof. The instructions were a little confusing at first, but after reading through them a couple of times while working with the product they became much clearer. The Yakima fit site was helpful as well. After the initial cross bar mounting measurements and set up, attaching and detaching the racks from the roof is a very simple process.
by: Diane 07/28/2023
SIMPLE & EASY1
by: Greg 06/07/2023
Nicole was beyond helpful!!!
by: Jason 04/10/2023
They work as advertised and have been holding up great.
by: Greg N.11/18/2021
Ford Expedition
I had a need for the Yakima Crossbars and Towers for my Expedition. With a short delivery time frame, I contacted etrailer knowing they are the best. Justin B. worked with me to get the correct parts then made sure that the products arrived in time, it did. The Towers, Bars and overall excellent customer service from etrailer made for a great experience. Thanks again for exceeding expectations etrailer!
by: Richard 04/06/2023
Good transaction. Arrived quickly, new in box.
25
777
Show More Reviews
See what our Experts say about this Yakima Roof Rack
- Recommended Roof Rack for a 2014 Honda Ridgeline We have a couple of options for roof racks depending on whether or not your 2014 Ridgeline has the raised rails that run down the length of the roof. Both of these options have a 165 lbs capacity. I have listed them below: For a naked roof with no rails. Yakima JetStream Crossbars - Aluminum - Black - 60" Long - Qty 2 item # Y00426 BaseLine Towers for Yakima Crossbars - Naked Roofs - Qty 4 item # Y28TR BaseClip Fit Kit for Yakima BaseLine Roof Rack Towers - Qty 2 item # Y06186 BaseClip...
view full answer... - Recommended Roof Rack for a 2014 Honda Civic Si CoupeTo add a roof rack to your 2014 Honda Civic Si Coupe you will want the roof rack by Yakima and it includes the following parts: Yakima JetStream Crossbars - Aluminum - Black - 60" Long - Qty 2 item # Y00426 BaseLine Towers for Yakima Crossbars - Naked Roofs - Qty 4 item # Y28TR BaseClip Fit Kit for Yakima BaseLine Roof Rack Towers - Qty 2 item # Y06125 BaseClip Fit Kit for Yakima BaseLine Roof Rack Towers - Qty 2 item # Y06143 This roof rack attaches to the groves inside your door...
view full answer... - Roof Rack Recommendation for 2020 Honda PilotThe rack you need will depend on how the roof of your 2020 Pilot is fitted out. I really like the Yakima JetStream roof rack, because of how well they're built and designed. They may not be the least expensive option, but they work very well and are extremely durable which makes them the most popular choice for your vehicle. If you have a bare roof, you'll need the following parts: • Yakima 60 inch JetStream crossbars, part # Y00426 • Yakima BaseLine roof rack towers, part # Y28TR •...
view full answer... - Recommended Roof Rack For A 2023 Toyota RAV4 With A Thule Hullavator Hi Cathy, To ensure that you can get the extra extension to mount the Thule Hullavator # TH898 you'll want to go with a Yakima roof rack system. Yakima crossbars run their mounting track the entire length of the crossbar so you can go with ones that are longer than your typical length without worrying if the mounting feet will be able to connect. You'll want the following components: Yakima JetStream Crossbars - Black - 60" Long # Y00426 or silver # Y00429 SkyLine Towers for Yakima Crossbars...
view full answer... - Roof Rack Recommendation for Raised Rails on a 2011 BMW 3 SeriesI have a way for you to use longer crossbars for a roof rack on your 2011 BMW 3 Series but since the Thule crossbars have a limiting slot on the underside we need to use a different brand roof rack system and for that I recommend Yakima as they're the only ones with a slot all the way through so you can literally fit any crossbar length. I'm only seeing from all of our manufacturers that a 2011 BMW 3 Series has raised rails so for that Yakima recommends the following parts (if you have...
view full answer... - Recommended Roof Rack for a Hullavator on a 2014 Ford Expedition w/ Raised Side RailsTo use the Thule Hullavator item # TH898 on your 2014 Ford Expedition you're going to need to install a set of crossbars that extend 4" - 8" past the roof racks legs. This allows the lift assist function of the Hullavator to work. Since your Expedition has the raised side rails, I recommend the Roof Rack by Yakima and it includes the following parts: Yakima JetStream Crossbars - Aluminum - Black - 60" Long - Qty 2 item # Y00426 TimberLine Towers for Yakima Crossbars - Raised, Factory...
view full answer... - What Roof Rack Can I Use with the Thule Hullavator on My 2022 Toyota Highlander with Flush Rails?I have a great solution for your flush rails on your 2022 Toyota Highlander to use the Hullavator # TH898. Yakima temporarily discontinued the Y00148 because they are updating the feet to fit a wider range of vehicles. Yakima has been changing a lot of fitments lately because of this factor. The landing pads # Y66VR are separate from the Y00148. However, with that being said, Yakima does have a roof rack system that fits your flush rails with a different model of feet. For that system,...
view full answer... - Rola Roof-Rack System for a 2009 Mazda 3 with 4 doorsFor a 2009 Mazda 3 there are several roof rack options depending on how your vehicle is equipped. For a 4-Door with fixed mounting points with no existing rails or crossbars you can use the Rhino Rack roof racks which is made up of the following parts: # RRVA118B-2, # RRRLKVA, and # DK289. For a 4-Door without fixed mounting points with no existing rails or crossbars you can use the Yakima Roof Rack made up of the following parts: # Y00426, # Y28TR, # Y06143, and # Y06111.
view full answer... - Thule Compass Kayak and SUP Carrier Compatibility With Yakima JetStream CrossbarsYes, the Thule Compass Kayak and SUP Carrier w/ Tie-Downs # TH890000 can be used with your Yakima JetStream Crossbars # Y00426.
view full answer... - 2021 Ford Explorer ST Roof Rack Kayak Carrier ComboI like Thule much more than Yakima, I just think they look much better. I recommend getting the Thule WingBar Evo Crossbars - Aluminum - Black - 60" Long - Qty 2 # TH711520 and the Evo Raised Rail Feet # TH710401. These are really nice and simple to use. They will just wrap around your raised side rails of your 2021 Ford Explorer. For your kayaks, I really like the crossbar pads # TH846000 much better especially for larger capacity kayaks. The pads keep the center of gravity a lot lower...
view full answer... - Roof Rack Weight Capacity on 2019 Ford Escape with Moon RoofI checked your owners manual and the weight capacity of 100 lbs without moonroof or 45 lbs with moon roof are for the factory crossbars. Granted, aftermarket crossbars won't greatly increase the capacity, so carrying two kayaks on a moon roof Escape is not a great idea. If you don't have the factory roof rack, then I recommend the Yakima JetStream Crossbars - Aluminum - Black - 60" Long - Qty 2 # Y00426 and TimberLine Towers # Y33TR which are rated for 132 lbs. These ratings are based...
view full answer... - Recommended Feet And Fit Kit For Installing 53 Thule AeroBlade Crossbars On 2012 Honda CivicI would be happy to recommend the correct feet and fit kit required to install your 53" Thule AeroBlade Crossbars on your 2012 Honda Civic. If you Civic is a sedan you will need the Evo Clamp Feet for Thule Crossbars # TH710501 and Fit Kit # TH145180. If your Civic is a coupe there is not an option for mounting any Thule crossbars so you will need to replace them. I recommend going with the Yakima Roof Rack System which uses Crossbars # Y00426, Crossbar Feet # Y28TR, Fit Kit # Y06125,...
view full answer... - Recommended Fairing for Rola Roof rack on a 2009 Honda Accord SedanYes! Out of the variety of fairings that we have to offer I recommend the 40" long Inno Fairing # INA261 because it will fit perfectly with the 38" long Rola Sport Series Roof Rack # 59757 for your 2009 Honda Accord. If you let me know what you are wanting to use the roof rack for I can make additional recommendations for you. I have also attached an installation video and a picture of this roof rack on a 2009 Accord Sedan that you can reference.
view full answer...
- Inno Fork Mount Bike Rack Compatibility with Yakima Roof Rack Crossbar T-Slot ChannelYes, the Inno Fork Lock Roof Bike Rack - Fork Mount - Channel Mounted - Aluminum # INXA391 has t-bolts that are compatible with Yakima aero bars like the JetStream # Y00426 that have the t-slot channel on top for a clean looking install. If you have the Yakima CoreBar crossbar like # Y00421 then they are not compatible because those aero bars don't have the top channel T-Slot.
view full answer... - Two Load-Assist Kayak Carrier Recommendation for a 2015 Jeep CherokeeEach Hullavator requires 28.5-inches of space on the crossbars. So you would need 57" long crossbars with 4-8 inches of crossbar overhang on each side. That can be accomplished with the Yakima Jetstream 60" Roof Rack System with part numbers # Y00426 and # Y33TR. Your 2015 Jeep Cherokee has a load capacity of 150 lbs with a roof rack according to the Owner's Manual. The Thule Hullavator Kayak Carriers # TH898 weigh 40-lbs each by themselves plus your 72 lbs worth of kayak would be a total...
view full answer... - Will Rhino-Rack Vortex Crossbars and SX Legs Fit a 2015 Honda PilotThe 54" Vortex Crossbars # RRVA137B-2 and SX Series Legs # RRSX100 from Rhino-Rack will fit great on your 2015 Honda Pilot as long as you have the raised rails. If you don't have the raised rails then we need to look at a different brand of roof rack as Rhino-Rack doesn't have a fit for the naked roof version of your Pilot. For your application I recommend the Yakima JetStream system which is an improved version of the Vortex bars you were looking at. For a complete roof rack system you...
view full answer... - Roof Rack and Kayak Carrier for a 2018 Chevrolet MalibuWe have plenty of kits that will work great for your 2018 Chevrolet Malibu. I recommend the Yakima JetStream Crossbars # Y00426, BaseLine Towers # Y28TR, and BaseClip Fit Kit # Y06123. These components will make up your roof rack. As far as a kayak rack to haul your kayaks, the etrailer J-Style Kayak Carrier # e98878 is a great option because it comes with straps to tie your kayaks to the carrier and bow/stern straps with anchors. You would need two kits, one for each kayak. If you would...
view full answer... - Roof Rack and Cargo Box Recommendation for 2020 Ford ExplorerI checked with Yakima and they have their Jetstream roof rack part numbers # Y00426 and # Y33TR as a confirmed fit for your 2020 Ford Explorer with raised rails and the moonroof. They recommend carefully watching the setup so that the bars don't interfere with the sunroof as you open it but the bars can be positioned so that it would work fine. Then for an easy to use cargo box that fits this rack and also has best clearance for opening the rear hatch you'd want the Thule Motion XT part...
view full answer... - Best Roof Rack for 2020 Ford Escape with Naked RoofThe best roof rack for your 2020 Ford Escape is from Yakima because it will give your Escape a roof rack that is strong (165 lb weight capacity), durable (all parts have a lifetime warranty), quiet and looks sleek. The roof rack for your '20 Escape is made up of: - Yakima JetStream Crossbars # Y00426 (Black) - BaseLine Towers for Yakima Crossbars # Y28TR - BaseClip Fit Kit for Yakima Roof Rack # Y06137 and # Y06152 - Same Key System Lock Cores (Optional) # Y07204 The aero shape of the...
view full answer... - How to Install Rhino-Rack Pioneer Platform Rack on a 2003 Hummer H2To install a platform rack on your 2003 Hummer H2 we first need a roof rack and for that I recommend the Yakima JetStream system that includes the following parts: - 60" JetStream Crossbars # Y00426 - SkyLine Towers # Y53TR - Landing Pad 4 # Y00224 This installs directly to the fixed mounting points on your Hummer which then allows you to use the Rhino-Rack Pioneer Platform Tray # RR82TB along with 2 of the Mounting Kit # RR43105 to get it installed. The Pioneer Platform # RR85ZW...
view full answer... - Correct BaseClip Fit Kit for Yakima JetStream Crossbars on a 2024 Ford F-350 Crew CabFor your 2024 Ford F-350 Crew Cab using the Yakima JetStream Crossbars # Y00426 you're going to need the BaseClip Fit Kit for Yakima BaseLine Roof Rack Towers # Y06185 with the towers # Y28TR.
view full answer... - How to Add Platform Rack to 2020 Toyota Highlander With Naked RoofWhile you can add a platform rack to your 2020 Toyota Highlander, I checked with our manufacturers and there isn't a direct-mount option for your vehicle. So the only option for your Highlander, assuming it does have a naked roof without flush rails, is to add a roof rack which you can then add the platform rack to. There is one option for this from Yakima, and I verified with them the correct parts for the rack, as well as the correct size of platform needed. The exact parts that will...
view full answer... - Best Roof Rack For A Rooftop Tent On A 2021 Subaru AscentThe best set up for a rooftop tent would be the Yakima JetStream roof rack system because it's easy to use, reliable, and has a weight capacity of 165 lbs. To connect this to the raised rails on your 2021 Subaru Ascent you need the 60" JetStream Crossbars # Y00426 along with the TimberLine Towers # Y33TR. To add locks to the TimberLine Towers you can do so with the kit # Y07204. This will help prevent a passerby from being able to remove the roof rack easily.
view full answer... - Quietest Cross-Bars For A 2017 Ford F-150 Super Crew CabFor your 2017 Ford F-150 SuperCrew Cab, we have several different options that will suit your needs. To start, we offer the Yakima JetStream Crossbars # Y00426. These bars are the quietest, are 60" long, and is rated for up to 165lbs. To go with those bars you will also need the BaseLine Towers for Yakima Crossbars # Y28TR, and the BaseClip Fit Kit for Yakima BaseLine Roof Rack Towers # Y06122. We always recommend using some type of locking system to keep all of your items safe; The Yakima...
view full answer... - Adding A Roof Rack To A 2020 Ford F-350 Crew Cab For Additional Cargo Carrying CapacityYakima OverHaul HD Adjustable Truck Bed Ladder Rack - Aluminum - 500lbs - 68" Crossbars # Y01151-58 has an on-road capacity of 500lbs, off-road capacity of 300lbs, and static capacity of 800lbs. The correct roof rack for your 2020 Ford F-350 Super Duty Roof Rack by Yakima would be the following parts: Yakima HD Crossbars - Aluminum - Black - 60" Long - Qty 2 # Y01157. BaseLine Towers for Yakima Crossbars - Naked Roofs - Qty 4 # Y28TR. HD Bar SL Adapter for Yakima BaseLine, SkyLine, TimberLine,...
view full answer... - Recommended Roof Rack for a 2014 Honda Ridgeline We have a couple of options for roof racks depending on whether or not your 2014 Ridgeline has the raised rails that run down the length of the roof. Both of these options have a 165 lbs capacity. I have listed them below: For a naked roof with no rails. Yakima JetStream Crossbars - Aluminum - Black - 60" Long - Qty 2 item # Y00426 BaseLine Towers for Yakima Crossbars - Naked Roofs - Qty 4 item # Y28TR BaseClip Fit Kit for Yakima BaseLine Roof Rack Towers - Qty 2 item # Y06186 BaseClip...
view full answer... - Recommended Kayak Carrier for 2020 Mazda CX-5The only hitch mounted option wouldn't be an actual carrier, but a support like the Malone Axis # MAL32VR. This would require the installation of a trailer hitch like the # 76138 you looked at. More than likely you won't need this to mount your kayaks on your 2020 Mazda CX-5. Your kayaks will fit completely on a roof rack with a kayak carrier like the one seen in the picture below unless they are incredibly long. If that is the case, then by all means you could add the # MAL32VR to help...
view full answer...
- Recommended Roof Rack for a 2014 Honda Civic Si CoupeTo add a roof rack to your 2014 Honda Civic Si Coupe you will want the roof rack by Yakima and it includes the following parts: Yakima JetStream Crossbars - Aluminum - Black - 60" Long - Qty 2 item # Y00426 BaseLine Towers for Yakima Crossbars - Naked Roofs - Qty 4 item # Y28TR BaseClip Fit Kit for Yakima BaseLine Roof Rack Towers - Qty 2 item # Y06125 BaseClip Fit Kit for Yakima BaseLine Roof Rack Towers - Qty 2 item # Y06143 This roof rack attaches to the groves inside your door...
view full answer... - RetraxONE XR Compatible Ladder Rack and Roof Rack Accessory Recommended for 2020 Ford RangerThe # RTT-60335 RetraxONE XR hard tonneau cover you'd looked at would be a great choice for your 2019 Ford Ranger. For a ladder rack, I'd recommend the Yakima OverHaul HD, part # Y01151-58. You'll also need the adapter mount, part # Y01155 which allows the ladder rack to mount to the rails incorporated into the RetraxONE XR tonneau cover. Yakima tells me that the 68 inch crossbars included with this ladder rack are what's recommended for the Ranger pickup, and would be compatible with the...
view full answer... - Roof Rack Recommendation for 2020 Hyundai Palisade With No Rails or CrossbarsAlthough we don't offer a roof rack option that would provide the side rails, we do offer roof rack options that would work for your 2020 Hyundai Palisade. For a Yakima round bar roof rack, you'd need the following parts: • Yakima 58 inch round crossbars, part # Y00409 • Yakima BaseLine Towers, part # Y28TR • Yakima SL Adapters, part # Y03536 • Yakima Base Clips # Y06145 • Yakima Base Clips # Y06138 You might want to consider going with an aero-style crossbar, however. The round bars...
view full answer... - Parts Needed to Install Yakima Round Bar Roof Rack on 2019 Ram 1500Sounds like you are looking for a way to install a Yakima round bar roof rack on a 2019 Ram 1500 which you'd have to use all Yakima components for since there isn't a way to adapt a Rhino Rack tower to accept a round bar. So you'd need the part numbers # Y00410, # Y28TR, # Y03536, and # Y06135 and you'd be set.
view full answer... - Roof Rack Recommendation for 2020 Honda PilotThe rack you need will depend on how the roof of your 2020 Pilot is fitted out. I really like the Yakima JetStream roof rack, because of how well they're built and designed. They may not be the least expensive option, but they work very well and are extremely durable which makes them the most popular choice for your vehicle. If you have a bare roof, you'll need the following parts: • Yakima 60 inch JetStream crossbars, part # Y00426 • Yakima BaseLine roof rack towers, part # Y28TR •...
view full answer... - Parts Needed to Install Yakima CoreBar and BaseLine Towers on 2022 Ram 1500The parts needed to install a Yakima CoreBar roof rack on your 2022 Ram 1500 include the following: 60" CoreBar Crossbars - # Y00422 BaseLine Towers - # Y28TR Fit Kit Clips - # Y06135 (you need 2 of these) Lock Core Kit - # Y07204 (optional) Since you should already have the 60" CoreBar crossbars and BaseLine Towers for your 2020 Dodge Durango you just need 2 of the Fit Kit Clips. Since the pads for the fit kit just kind of pop in place you should be able to pull them off by hand or pry...
view full answer... - Rola Roof-Rack System for a 2009 Mazda 3 with 4 doorsFor a 2009 Mazda 3 there are several roof rack options depending on how your vehicle is equipped. For a 4-Door with fixed mounting points with no existing rails or crossbars you can use the Rhino Rack roof racks which is made up of the following parts: # RRVA118B-2, # RRRLKVA, and # DK289. For a 4-Door without fixed mounting points with no existing rails or crossbars you can use the Yakima Roof Rack made up of the following parts: # Y00426, # Y28TR, # Y06143, and # Y06111.
view full answer... - Snowboard Carrier Recommendation for a 2019 Honda AccordI really like the Kuat Grip Ski and Snowboard Carrier # GRR6B because it looks sleek and has a slide out feature that makes it easier to load your skis/boards. The Grip has a nice, low-profile build so it compliments your vehicle and there are angle adjustment bolts to make sure both parts of the carrier are level with each other so it's easy to install your skis/boards. This installs on a roof rack so if you don't already have one on your 2019 Honda Accord I recommend going with the Yakima...
view full answer... - Roof Rack And Cargo Carrier Recommendation For 2014 Nissan Altima 4-DoorThe Yakima Roof Rack System Is a good fit for your 2014 Nissan Altima 4 door. The weight capacity for the roof rack is 100 lbs. That would include the weight of any cargo box you choose added to the weight of any cargo you place in the carrier. The front crossbar is placed 15-1/8 inches from the windshield. The crossbar spread is 24 inches. You need the following parts for the roof rack: 48 inch RoundBars # Y00408 BaseLine Towers # Y28TR RoundBar Adapter # Y03536 BaseClips # Y06137 and...
view full answer... - Recommended Roof Rack For 2015 Nissan Altima With A SunroofWe do have a roof rack that's designed to fit your 2015 Altima and also work with your sunroof. I recommend the Yakima Jetstream roof rack. This rack is extremely quiet because it uses aerodynamic crossbars. The crossbars are 50 inches long and constructed of lightweight aluminum and have a black powder-coat finish. It is recommended not to open the sunroof when the roof rack is installed due to interference. To order this roof rack you will need part # Y00425, part # Y28TR, part #...
view full answer...
- Cross Bar Options And Kayak Carrier For A 2022 Hyundai SonataWe do have a couple of cross bar options for your 2022 Hyundai Sonata that will work great for you. -First we have the Yakima JetStream Crossbars # Y00425 with the BaseLine Towers for Yakima Crossbars # Y28TR, the fit kit # Y06180 & # Y06153. These are aerodynamic cross bars that measure 50" long, and have a maximum weight capacity of 165lbs. -Next, we have the Yakima CoreBar Crossbars # Y00421, with the same towers # Y00146, and fit kits # Y06153 & # Y06180. These cross bars share...
view full answer... - Recommended Feet And Fit Kit For Installing 53 Thule AeroBlade Crossbars On 2012 Honda CivicI would be happy to recommend the correct feet and fit kit required to install your 53" Thule AeroBlade Crossbars on your 2012 Honda Civic. If you Civic is a sedan you will need the Evo Clamp Feet for Thule Crossbars # TH710501 and Fit Kit # TH145180. If your Civic is a coupe there is not an option for mounting any Thule crossbars so you will need to replace them. I recommend going with the Yakima Roof Rack System which uses Crossbars # Y00426, Crossbar Feet # Y28TR, Fit Kit # Y06125,...
view full answer... - Correct Yakima Round Bar Roof Rack for a 2013 Ram 3500 Crew CabThe Yakima Round Bar Roof Rack for a 2013 Ram 3500 Crew Cab consists of the following parts; Y00410, part # Y28TR, part # Y03536, and part # Y06135. The RoundBar SL Adapters are for BaseLine, SkyLine, TimberLine, or RidgeLine roof rack towers. The installation points are fixed and cannot be adjusted.
view full answer... - Recommended Fairing for Rola Roof rack on a 2009 Honda Accord SedanYes! Out of the variety of fairings that we have to offer I recommend the 40" long Inno Fairing # INA261 because it will fit perfectly with the 38" long Rola Sport Series Roof Rack # 59757 for your 2009 Honda Accord. If you let me know what you are wanting to use the roof rack for I can make additional recommendations for you. I have also attached an installation video and a picture of this roof rack on a 2009 Accord Sedan that you can reference.
view full answer... - Recommended Roof Rack Solution for 2016 Ford F-150 That Could Possibly Be Used on Different VehicleAs long as your 2016 Ford F-150 is a Super or Super Crew cab, you can certainly use a Yakima CoreBar roof rack. The rack would consist of these parts: • Yakima 60 inch CoreBar crossbars, part # Y00422 • Yakima BaseLine Towers, part # Y28TR • Yakima BaseClip fit kit, part # Y06122 You could install the crossbars on the 2015 Forester, but you'd need different roof rack towers. You'd want to use the # Y33TR Yakima TimberLine towers. This would allow you to use the crossbars with the roof...
view full answer... - How to Use Yakima Round Crossbars on 2017 Honda Ridgeline With Naked RoofThe Q Towers have been retired by Yakima, so while we have a way for you to use your current Round 58" CrossBars for Yakima Roof Rack System # Y00409 on your 2017 Honda Ridgeline with a naked roof, you will need new towers, fit kit, and round bar adapter. The correct parts are the follwing: - BaseLine Towers for Yakima Crossbars - Naked Roofs # Y28TR - BaseClip Fit Kit for Yakima BaseLine Roof Rack Towers # Y06152 - RoundBar SL Adapter # Y03536
view full answer... - Will Rhino-Rack Vortex Crossbars and SX Legs Fit a 2015 Honda PilotThe 54" Vortex Crossbars # RRVA137B-2 and SX Series Legs # RRSX100 from Rhino-Rack will fit great on your 2015 Honda Pilot as long as you have the raised rails. If you don't have the raised rails then we need to look at a different brand of roof rack as Rhino-Rack doesn't have a fit for the naked roof version of your Pilot. For your application I recommend the Yakima JetStream system which is an improved version of the Vortex bars you were looking at. For a complete roof rack system you...
view full answer... - Roof rack for a 2008 Mazda 3 WITHOUT Fixed Mounting Points on the RoofSince your 2008 Mazda 3 sedan does not have the fixed mounting point on the roof you will need to use a different style of roof rack but not a raingutter mount system. I have included a link to all of the options for a 2008 Mazda 3 sedan without fixed mounting points. If you like the Yakima system you will need the following parts: 58 inch crossbars # Y00409 BaseLine Towers # Y28TR RoundBar Adapters # Y03536 BaseClips # Y06143 and # Y06111
view full answer... - Yakima CoreBar Roof Rack System For a 2020 Hyundai Santa Fe SEL Without Factory RailsThe flush mounted rail system must be installed from the factory as there are no aftermarket kits to install them on your 2020 Hyundai Santa Fe SEL. For your Santa Fe I recommend the Yakima Roof Rack System. I have linked a video of this system installed on a similar 2019 Hyundai Santa Fe for you to reference. And you can see that they have the same rubber strips as your Hyundai. You will need the following parts. 2- Yakima CoreBar Crossbars # Y00421 4- BaseLine Towers for Yakima Crossbars...
view full answer...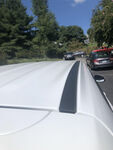
- Aero Bar Roof Rack that Fits 2020 Toyota HighlanderI have a similar Yakima roof rack that fits your 2020 Toyota Highlander with the CoreBar Roof Rack part numbers # Y00422, # Y28TR, # Y06153, and # Y06132 but the Rhino Rack roof rack is not a confirmed fit and won't work so I do not recommend it for your Highlander.
view full answer... - Roof Rack and Kayak Carrier for a 2018 Chevrolet MalibuWe have plenty of kits that will work great for your 2018 Chevrolet Malibu. I recommend the Yakima JetStream Crossbars # Y00426, BaseLine Towers # Y28TR, and BaseClip Fit Kit # Y06123. These components will make up your roof rack. As far as a kayak rack to haul your kayaks, the etrailer J-Style Kayak Carrier # e98878 is a great option because it comes with straps to tie your kayaks to the carrier and bow/stern straps with anchors. You would need two kits, one for each kayak. If you would...
view full answer... - Roof Rack and Kayak Carrier Fit for 2015 Ford EdgeYou are going to need to have a roof rack installed on your 2015 Ford Edge to be able to carry a kayak rack like the Thule Hull-a-Port part # TH834. If you have a totally naked roof that does not have any rails you would want the Yakima Rack part # Y00425, # Y00146, # Y06102, and # Y06139. If you instead have flush rails that are mounted on the roof of the vehicle you would want the # TH711200, # TH460R, and # THKIT4047.
view full answer... - Roof Rack Compatibility On A 2016 Ford Edge With Naked RoofI do have a roof rack option for you, however Thule does not currently make a roof rack system for your 2016 Ford Edge with existing naked roof. In order to attach a roof rack to your vehicle you may want to consider the Yakima CoreBar Crossbars Roof Rack park # Y00421, # Y28TR, # Y06102, and # Y06139. It has an aero style crossbar setup to ensure a quiet ride. I have attached an installation video for you.
view full answer... - Recommended Roof Rack for a 2024 Ford Edge w/ a Glass Roof and No Rails Yes, you can! To add a roof rack to your 2024 Ford Edge with a glass roof you will need the following parts: Yakima BaseLine FX Roof Rack for Naked Roofs - Aero Crossbars - Aluminum - Black - Qty 2 item # Y39UV BaseClip Fit Kit for Yakima BaseLine Roof Rack Towers - Qty 2 item # Y06102 BaseClip Fit Kit for Yakima BaseLine Roof Rack Towers - Qty 2 item # Y06139 I have linked an installation video below so you can see how to get this roof rack set up. This aero bar roof rack system has...
view full answer... - What Roof Rack/Carrier Do You Recommend for Surfboards/Paddleboards on a 2021 Ford Edge?The great thing about having a naked roof on your 2021 Ford Edge is that you have the ability to mount an extremely secure roof rack system even without side rails. You will not need to install factory side rails in order to get the security you need. With that being said, I recommend the following roof rack system for your bare roof (with or without panoramic glass): - Yakima CoreBar Crossbars - Steel - Black - 60" Long - Qty 2 # Y00422 - BaseLine Towers for Yakima Crossbars - Naked...
view full answer... - Why are 2 Different Clip Sets Recommended for Yakima Roof Rack for 2016 Ford Edge, Naked RoofThere are 2 different clip sets recommended for the 2016 Ford Edge with a Naked Roof because one set of clips is needed for the front while a different set is needed for the rear bar. For the 2016 Edge, the BaseClip 102 # Y06102 will be used to secure the front BaseLine Towers # Y28TR and the BaseClip 139 # Y06139 is needed to secure the rear BaseLine Towers. Yakima lists different clip kits for the front and rear towers in order to achieve a more custom fit for the curve of the vehicle's...
view full answer... - Roof Rack Recommendation for 2017 Ford Edge with Glass RoofWe have a Yakima roof rack that is confirmed as a fit for your 2017 Ford Edge with a panoramic glass roof, but I checked with Thule and they stopped making the fit kit that was designed for your vehicle configuration. The Yakima parts you would need are part # Y00421, # Y28TR, # Y06102, and # Y06139. This will give you a roof rack with aero shaped bars that will be better on fuel mileage and wind noise. The install video link I attaches shows this rack installed on an Edge very similar...
view full answer...
- Recommended Roof Rack For 2017 Ford Edge With Panorama Vista RoofThe BaseLine Towers for Yakima Crossbars - Naked Roofs - Qty 4, # Y28TR, the BaseClip Fit Kit for Yakima BaseLine Roof Rack Towers - Qty 2, # Y06102, and the Yakima JetStream Crossbars - Aluminum - Black - 50" Long - Qty 2, # Y00425, make up the roof rack system I recommend for your 2017 Ford Edge with no existing rails or crossbars. According to the Ford owners manual for this vehicle, this rack is limited to the factory specs for load capacity of 45 kg or 99.2 lbs. I've attached...
view full answer... - Quality, Cost-Effective Roof Rack Recommendation for a 2016 Ford EdgeThe Yakima round crossbar system is decent but sometimes it can be hard to mount accessories and get them to stay still, plus they don't help with wind noise and drag. For your application I recommend checking out the Yakima CoreBar roof rack because it has the nice aero-style crossbars but sits at a lower price-point since these aren't the high-end aluminum bars. Here are the parts you'll need for the naked roof of your 2016 Ford Edge: 60" CoreBar Crossbars - # Y00422 BaseLine Towers...
view full answer... - Parts Needed to Install Yakima Round Bar Roof Rack on 2021 Ford EdgeYes we have the parts needed to install a round bar Yakima roof rack on your 2021 Ford Edge that does not have rails or a glass roof. You'd need the following # Y28TR, # Y03536, # Y06102, and # Y06139 since you already have the # Y00409.
view full answer... - Recommended Roof Rack for 2015 Ford Edge With Glass SunroofThe best option for a roof rack that fits your 2015 Ford Edge with a glass, panoramic sunroof and without rails that run front to back is from Yakima and consists of Fit Kit # Y06102 (a quantity of two of these), BaseLine Towers # Y28TR, and CoreBar Crossbars # Y00421. This will give you a complete rack that will work for your vehicle, although it is possible that if you try and open the sunroof with a rooftop box or other accessory that has clamps and hangs under the bars it may interfere...
view full answer...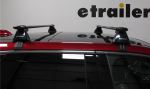
- Roof Rack Recommendation for a 2016 Ford Edge with Vista RoofI checked with Yakima and the Baseline rack part numbers # Y00421, # Y28TR, # Y06102, and # Y06139 that you referenced is a confirmed fit for the 2016 Ford Edge with a Panoramic Vista Roof. I attached a couple pictures that I got from their fit guide that shows that the smaller feet fit perfectly on the top of the metal of the roof and that is how they are able to fit the rack.
view full answer...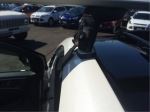
- Best Roof Rack Options for a 2015 Ford Edge with Glass Panoramic RoofYes, we have a few different roof rack systems that will fit your 2015 Ford Edge w/ the glass panoramic roof. For the popular roof rack I recommend the Rhino-Rack Vortex Aero Rack System, # RRVA137B-2 Vortex bars, # RRRLKVA 2500 Series Legs, and the # DK435 fit kit. This Rhino-Rack system has a 165 lbs capacity and aero bar design make the bars aerodynamic to help reduce wind drag and noise. The Vortex system also has a sleeker low-profile design that is aesthetically pleasing to the...
view full answer... - Best Roof Rack and Kayak Carriers to Transport 2 Kayaks on a 2019 Ford Edge with a Glass RoofI have a great roof rack recommendation for you! It's the Yakima HD Crossbars, part # Y01157. These aero-style crossbars are 60" in length, so they will extend past the feet by about 5" on each side. Combine these with the BaseLine Towers, part # Y28TR, and the two BaseClips, part # Y06102 and # Y06139, to complete the roof rack setup. I've linked to a video review of the HD bars for you to look at. As for the kayaks carriers, there may not be enough room to lay two of them down flat...
view full answer... - Will Yakima JetStream Crossbars Work With Thule Rooftop Cargo Box?Almost certainly, yes. You did not specify which Thule rooftop box you have, but a fit should not be an issue due to the small 3-1/8" wide x 1" tall JetStream aero bars. The roof rack you are talking about for your 2017 Ford Edge is made up of BaseLine Towers # Y28TR, Fit Kits # Y06102 and # Y06139 as well as the JetStream Crossbars # Y00425 and will have a spread of 32 inches when installed on your Edge. I do recommend using the Yakima SKS Lock Cores # Y07204 to secure the rack to...
view full answer... - Recommended Roof Rack For 2016 Ford Fusion Compatible With Thule Roof Mounted Cargo BasketFor the Thule Canyon XT Roof Cargo Basket - Steel - 49" x 40" x 6" - 150 lbs, Item # TH859XT on your 2016 Ford Fusion, the crossbars need to be within certain spread distance on center to fit properly. There is not a system that is a perfect fit, however the use of a round bar system will give you the wiggle room you need to make it compatible. I recommend the Yakima Roof Rack consisting of the Round 58" CrossBars for Yakima Roof Rack System (QTY 2) # Y00409, the BaseLine Towers for Yakima...
view full answer... - Recommended Surfboard and Snowboard Carrier for 2015 Ford Edge Titanium with Vista RoofThe glass Vista roof on your 2015 Ford Edge Titanium means you'll need to install a roof rack to carry your surf and snow boards since the glass roof cannot handle their weight. Please click on the link provided to see roof rack options for your Edge. At the top of the page select your roof style, either a bare roof with no rails or bars, or a roof with flush-mount rails that run front-to-back. Once you click on your roof type you'll see all available options. If you have a bare roof we...
view full answer... - Will Yakima Roof Rack Fit 2016 Ford Edge Titanium with Vista Panoramic RoofThe Yakima roof rack you looked at, consisting of the JetStream # Y00426 60 inch crossbars, # Y28TR BaseLine Towers, # Y06102 and # Y06139 clip kits is compatible with your 2016 Ford Edge with the glass roof, according to Yakima. The feet will sit on the painted portion of the roof, not the glass.
view full answer... - Roof Rack for 2018 Ford Edge SEL With Panoramic Vista RoofThe Yakima JetStream Roof Rack part numbers # Y00426, # Y28TR, # Y06102, and # Y06139 would be the most modern roof rack we offer for your 2018 Ford Edge with the totally naked glass roof. It's aerodynamically the best designed crossbar which makes it the quietest and also has a top channel you can attach accessories in that were designed for that type of attachment. I attached a picture of this rack installed on a similar Ford Edge as well as a link to an install video. For a kayak carrier...
view full answer...
- Can the Yakima BaseLine Towers be Used to Carry a Thule Evolution 1600 Box on a 2015 Ford EdgeThe Thule Evolution 1600 cargo box that you referenced has been discontinued, but I spoke with my contact at Thule who was able to confirm some fits for me. The Evolution 1600 is compatible with Yakima round bars so the system that you will want to use includes the 48" CrossBars # Y00408, BaseLine Towers # Y28TR, RoundBar SL Adapter # Y03536, and BaseClip Fit Kit # Y06102. This roof rack doesn't come with locks but they can easily be added with part # Y07204 . If you already have the...
view full answer... - Roof Rack Recommendation for a 2019 Lincoln MKZYes, if you filter through our fitguide system for your 2019 Lincoln MKZ you'll see what roof rack options will fit your vehicle. While we do have a roof rack fit for your 2019 MKZ, the SportRack Semi-Custom Roof Rack for Naked Roofs # SR1003 does not fall into that category. In fact, it looks like SportRack doesn't have this listed as a fit for any Lincoln model out there. For your application I recommend checking out the Yakima CoreBar roof rack as it has a simple yet attractive design...
view full answer... - Will Yakima DoubleHaul Rooftop Fly Rod Carrier Fit 2018 Ford Fusion with Yakima Roof RackThe Yakima DoubleHaul Rooftop Fly Rod Carrier # Y04087 will fit crossbar spreads ranging from 27" - 108", so since the crossbar spread for a Yakima JetStream roof rack (parts # Y00425, # Y28TR, # Y06110, and # Y06102) for your 2018 Ford Fusion is 32" you're good to go!
view full answer... - Recommended Roof Rack for a 2016 Ford Edge Sport with Vista RoofGreat news! Yakima has systems to choose from for your 2016 Ford Edge Sport with Vista Roof. The mounting hardware will all be the same but you have a choice between crossbar styles Round, Steel Corebar, and black or silver Jetstream aluminum bars. For this system you will need the BaseLine Towers # Y28TR, the BaseClips # Y06102 and # Y06139, then your choice of crossbars: # Y00425 Black JetStream Aluminum # Y00421 Steel CoreBar # Y00408 Round Bar will need adapter # Y03536 I really...
view full answer... - Roof Rack for 2017 Ford Edge With Glass Panoramic RoofUnfortunately there are no mounts from Thule that are going to fit a 2017 Ford Edge with the glass panoramic roof. For a roof rack that will fit your Edge with that style of roof the best option is going to be from Yakima. The rack would be made up of: - Yakima CoreBar Crossbars # Y00421 - BaseLine Towers # Y28TR - BaseClip Fit Kit # Y06102 - BaseClip Fit Kit # Y06139 This rack uses aero crossbars which will give your '17 Edge a quiet ride with the bars attached. The bars are made...
view full answer... - Recommendation For Roof Rack For 2018 Ford Edge With MoonroofYes. For the 2018 Ford Edge with Moonroof and flush mounted rails running from front to back, I recommend the Thule WingBar Roof Rack. It has a stylish and very aerodynamic design that makes it very durable and very quiet. The parts needed for this rack are: 53 inch WingBars, Item # TH711400 in silver or # TH711420 in black, Evo clamp feet # TH710501, and Fit Kit # TH145074. Additionally I recommend the Thule One Key locking system, Item # TH450400, sold separately. If your 2018...
view full answer... - Snowboard Carrier Recommendation for a 2019 Honda AccordI really like the Kuat Grip Ski and Snowboard Carrier # GRR6B because it looks sleek and has a slide out feature that makes it easier to load your skis/boards. The Grip has a nice, low-profile build so it compliments your vehicle and there are angle adjustment bolts to make sure both parts of the carrier are level with each other so it's easy to install your skis/boards. This installs on a roof rack so if you don't already have one on your 2019 Honda Accord I recommend going with the Yakima...
view full answer... - Recommended Roof Rack for a 2023 Honda HR-VYakima, like all of the roof rack companies, sells their locks separately. To secure a Yakima roof rack to your vehicle you will want the Yakima Same Key System item # Y07204. The price is on the top right side of the product page. The great thing about Yakima's keys being sold separately is you can buy larger packs of keys 6 item # Y07206 or 8 item # Y07208 to secure other Yakima accessories to the roof rack and still only need one key. All of the components of your roof rack will come...
view full answer... - Roof Rack Recommendation and Options for 2020 Kia Sorento with Naked RoofI attached a link to a page that has all of the roof racks we offer for your 2020 Kia Sorento, and yes the 2019 fits are the exact same. I really like the Yakima Jetstream roof rack part numbers # Y00425, # Y28TR, # Y06159, and # Y06170 as it gives you a very high quality aerodynamic roof rack that has top channels which allow for more flexibility when attach roof accessories. I attached an install video for this rack on a similar Sorento for you to check out as well.
view full answer...
- Will Yakima LoadWarrior Fit on Yakima Roof Rack of 2020 Hyundai ElantraBased on your crossbar span that is 32 inches from outside to outside the Yakima LoadWarrior part # Y07070 will fit and work great on the Yakima roof rack # Y00425, # Y28TR, # Y06175, and # Y06159 that fits your 2020 Hyundai Elantra. This fits the crossbar spread of 24" - 32" which is why is fits.
view full answer... - Will the SportRack Semi-Custom Roof Rack Fit a 2018 Elantra GT Hatchback Bare Roof?I have a great solution for you. Unfortunately, the SportRack Semi-Custom Roof Rack for Naked Roofs # SR1002 will not fit your 2018 Hyundai Elantra GT. However, for a roof rack system that does fit for your Hyundai Elantra GT, I recommend the following parts: - Yakima CoreBar Crossbars - Steel - Black - 50" Long - Qty 2 # Y00421 - BaseClip Fit Kit for Yakima BaseLine Roof Rack Towers - Qty 2 # Y06175 - BaseClip Fit Kit for Yakima BaseLine Roof Rack Towers - Qty 2 # Y06159 This setup...
view full answer... - Yakima Roof Rack that Fits 2019 Kia Sorento with Naked RoofYakima does have a JetStream roof rack confirmed as a fit for your 2019 Kia Sorento with a naked roof with the part numbers # Y00425, # Y28TR, # Y06159, # Y06170. The Jetstream bars are really nice as they are aero shaped and have a channel that runs down the top of it for roof accessories that have channel attachment options.
view full answer... - Can Longer Yakima Crossbars be Used on 2023 Honda HR-V For Thule HullavatorYou can definitely use longer Yakima crossbars on your 2023 Honda HR-V for the Thule Hullavator Pro # TH898, but don't go all the way to the 70 inch # Y00427, as these are 20 inches longer than the recommended # Y00425 and will stick out way too much on your HR-V. So instead use the 60 inch Yakima JetStream Crossbars # Y00426. Then to complete the rack set up on your '23 HR-V you do have the right parts with the BaseLine Towers # Y28TR, and Fit Kits # Y06159 & # Y06181. In regards to...
view full answer... - Roof Rack Recommendation for 2019 Honda Accord with Naked RoofFor your 2019 Honda Accord the Yakima Corebar roof rack part numbers # Y00421, # Y28TR, # Y06123, and # Y06159 is the roof rack I recommend. This rack gives you a rack with aerodynamically shaped crossbars which means you'll have a quieter ride with minimal affected fuel mileage as well. This rack is also easy to install and has plenty of capacity at 220 lbs.
view full answer... - Recommended Roof Rack for a 2023 Honda HR-V w/ a Naked RoofTo attach a roof rack to your 2023 Honda HR-V, with no roof rails, you will want the roof rack by Yakima and it includes the following parts: Yakima JetStream Crossbars - Aluminum - Silver - 50" Long - Qty 2 item # Y00428 BaseLine Towers for Yakima Crossbars - Naked Roofs - Qty 4 item # Y28TR BaseClip Fit Kit for Yakima BaseLine Roof Rack Towers - Qty 2 item # Y06159 BaseClip Fit Kit for Yakima BaseLine Roof Rack Towers - Qty 2 item # Y06181 These crossbars have a 165 lbs capacity....
view full answer... - Roof Rack and Kayak Carrier for a 2017 Jeep CherokeeMany racks will be designed with overhang in mind for a variety of reasons. This can range from intending to have tie-down points for a load to maximizing carrying capacity. I also recommend that people use Aero shaped bars for kayak and watersport applications, as the width of the bars is helpful in controlling and mounting the load. For your roof rack, I recommend a Yakima JetStream kit, consisting of: - Yakima JetStream 50" Crossbars, part # Y00425 - Yakima BaseLine Towers, part...
view full answer... - Roof Rack System to Carry a Bike and Kayak on a 2002 Honda CivicFor your 2002 Honda Civic, I recommend using the Yakima CoreBar Crossbar System composed of part # Y00421, part # Y28TR, part # Y06162, and part # Y06159. The Yakima CoreBars offer a sleek and aerodynamic look which will reduce wind noise and prevent drag. The BaseLine towers are contoured to the roof of your vehicle and can be adjusted to provide a level crossbar surface. For a bike rack that will work well with the above crossbars, I recommend the Yakima HighRoad Roof Bike Rack part...
view full answer... - Trailer Hitch and Roof Rack Cargo Carriers for 2018 Honda AccordYou can use the Curt Class I hitch # C11525 on your 2018 Honda Accord as long as you do not have the Hybrid version, then you can install a hitch cargo carrier. I have attached installation instructions and an installation video for you. For a compatible cargo carrier I recommend the Curt fixed carrier # C18110. In this hitch carrier you can load up to 170-lbs of cargo. To protect more delicate items you might add a water-resistant cargo bag # e98990 or perhaps a cargo net like # C18200....
view full answer... - Recommend Roof Rack and Roof Mounted Tandem Bike Rack for 2001 Honda AccordI do have a solution for you to carry a tandem bicycle on your 2001 Honda Accord, but the item you selected, Yakima ForkLift Roof Bike Rack # Y02098, is not designed for tandem bicycles. First, if you do not already have a roof rack on your Accord you will need to install one. If you have the 4-door model, I recommend the Yakima Roof Rack: # Y00408, # Y28TR, and # Y03536. In addition you need parts # Y06159 and # Y06143 if your Accord is the 4-door model or parts # Y06123 and # Y06170...
view full answer... - Roof Rack Recommendation For 2003 Honda Civic 2 Door With Naked RoofWe do offer roof racks that are designed to fit your 2003 Honda Civic. The reason they are more expensive is because of the shorter roof, and additional components are needed to make sure you have a safe and sturdy roof rack. The least expensive roof rack we offer is the Yakima RoundBar Roof Rack. This system has 48 inch round galvanized steel crossbars. If you decide on this system you would order part # Y00408, part # Y28TR, part # Y06162, and part # Y06159. I have attached a link to...
view full answer... - How to Mount a Tent with a 2017 Kia Sorento with a Bare RoofSince the kit that involves parts # Y00421, # Y28TR, and # Y06159 in your question, I assume you have a 2017 Kia Sorento with a bare roof and no factory rails. If this is the case, while we do have a solution you can use, you unfortunately cannot mount a roof top tent to your roof. This is because all of the roof racks we carry use door jamb clamps to mount the crossbars to your vehicle. Manufacturers strongly advise against using roof racks that use this attachment style because the clips...
view full answer... - Recommended Yakima Roof Rack for 2007 Honda Accord 4 DoorFor your 2007 Honda Accord you would simply select sedan for the 4 door version. The Yakima system for your vehicle will be the Baseline roof rack. The Q-Tower and Q-Clip fit kits were discontinued a few years back. My recommendation for you consists of the following Yakima parts: JetStream Crossbars - Aluminum - Black - 50" Long # Y00425 BaseLine Towers # Y28TR BaseClip Fit Kit (front) # Y06159 BaseClip Fit Kit (rear) # Y06143 I also recommend adding locks # Y07204
view full answer... - Roof Rack Recommendation for a 2019 Kia Sorento with No RailsFor a complete roof rack system of a 2019 Kia Sorrento I recommend the Yakima JetStream roof rack which uses the following parts: - Yakima CoreBar Crossbars - Steel - Black - 50" Long - Qty 2 # Y00421 - BaseLine Towers for Yakima Crossbars - Naked Roofs - Qty 4 # Y28TR - BaseClip Fit Kit for Yakima BaseLine Roof Rack Towers - Qty 2 # Y06159 - BaseClip Fit Kit for Yakima BaseLine Roof Rack Towers - Qty 2 # Y06170 - (optional for extra security) SKS Lock Cores # Y07204 With this setup,...
view full answer... - Instructions for Yakima JetStream Roof Rack on 2019 Honda AccordAbsolutely! I have attached the detailed written installation instructions for the Yakima JetStream Roof Rack system that is confirmed to fit your 2019 Honda Accord. This system consists of # Y00425 for the Black 50 Inch JetStream Crossbars, # Y28TR for the BaseLine Towers, # Y06123 for the Front Fit Kit, and # Y06159 for the Rear Fit Kit. This system will use a clamp-style attachment to secure the feet to the roof of your Accord. I have attached an installation video for this system...
view full answer...
- Recommended Trailer Hitch Receiver for 2015 Lexus IS 250 for a Bike Rack and Light TrailerI recommend the Draw-Tite trailer hitch receiver, part # 24923, for your 2015 Lexus IS 250. It's confirmed to fit both the sedan or convertible models. The hitch is a Class I, 1-1/4 inch receiver so you need to make sure the bike rack you use fits the Class I. The bike rack I recommend is the very popular Thule T2 Pro XTR, part # TH23JV. The T2 is a platfrom rack that carries up to 2 bikes at 50 pounds each. it can be folded up out of the way when you're not using it as well as tilted...
view full answer... - 2019 Kia Sorento Roof Rack Recommendation for Naked RoofSince your 2019 Kia Sorento has the naked roof we will need to use a different brand since the Rhino-Rack roof rack will only fit if your Sorento had the flush rails. The alternative that fits is the Yakima roof rack and I recommend using the JetStream crossbars as they give you the aero-style with the T-Slots for various accessory mounting solutions: 50" JetStream Crossbars - Black # Y00425 BaseLine Towers - # Y28TR BaseClip Fit Kits - # Y06159 and # Y06170 Lock Core Kit - # Y07204...
view full answer...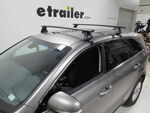
- What Length Roof Rack Crossbars For a 2019 Jeep CherokeeThere are a few different length options of crossbars that are confirmed to fit your 2019 Jeep Cherokee. A great 50 inch crossbar option is the Yakima JetStream Crossbars # Y00425 which are an aluminum aero bar that has a weight capacity of 150lbs. If your Jeep has the factory installed rails the run from to back you will need the Yakima Timberline Towers # Y00147, or the Yakima BaseLine Towers # Y28TR, Yakima BaseClip Fit Kit # Y06123, and Yakima BaseClip Fit Kit # Y06159 if you do not...
view full answer... - Recommended Roof Rack for 2019 Kia Sorento with Naked RoofWe do have a really great selection of roof rack systems that are confirmed to fit the naked roof on your 2019 Kia Sorento. I specifically recommend the Yakima JetStream setup that consists of part # Y00425 for the two 50" JetStream Crossbars in Black, # Y28TR for the BaseLine Towers, # Y06159 for the Front BaseClip Fit Kit, and # Y06170 for the Rear BaseClip Fit Kit. This is going to provide you with an extremely sleek rack that will be really quiet on the road due to the aerodynamic...
view full answer...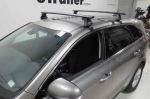
- BaseClip Fit Kit BC159 Needed For Yakima BaseLine Roof Rack TowersThe Yakima BaseClip BC159 you mention, is our BaseClip Fit Kit for Yakima BaseLine Roof Rack Towers # Y06159. This kit contains two base clips, and two pads.
view full answer... - How Does Yakima Baseline Roof Rack Tower Fit Roof of 2019 Kia SorentoThe Yakima BaseLine towers part # Y28TR are a fit for your 2019 Kia Sorento but to install them to the roof of your vehicle requires the fit clip kits part numbers # Y06159 and # Y06170 which are what specifically were custom made to fit the roof of your vehicle. Then for a set of Jetstream crossbars you'd want the part # Y00425 and you'd be set.
view full answer...
Do you have a question about this Roof Rack?
Info for this part was:

Video Edited:
Chris R

Edited by:
Daron K

Written by:
Alex H
At etrailer.com we provide the best information available about the products we sell. We take the quality of our information seriously so that you can get the right part the first time. Let us know if anything is missing or if you have any questions.
Thank you! Your comment has been submitted successfully. You should be able to view your question/comment here within a few days.
Error submitting comment. Please try again momentarily.