
# 1
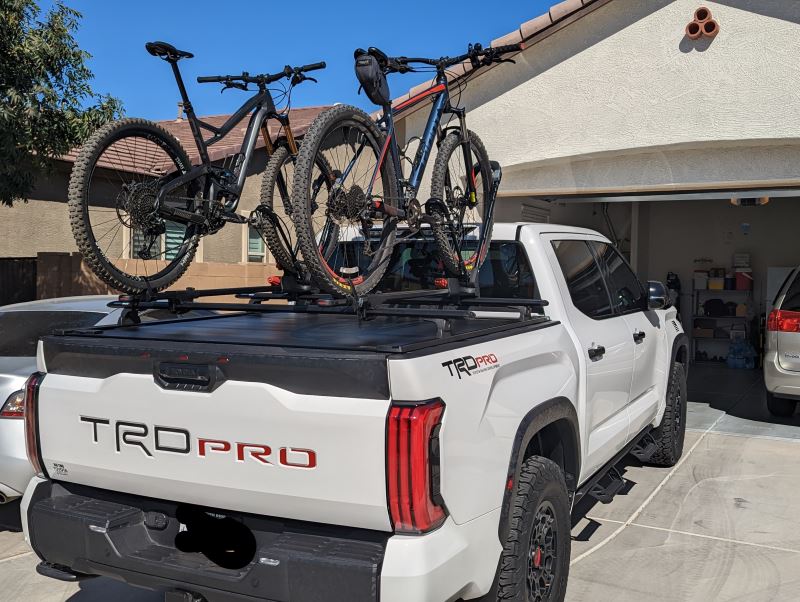
Yakima FrontLoader Wheel Mount Bike Carrier - Roof Mount
Overall I am happy with these bike carriers. They mount to the racks over the bed of my Tundra TRD Pro. Installation is simple. I think they could be just a bit sturdier because there is just a bit of wobbling when driving on bumpy roads but I'm not too worried about them coming dislodged. Take note that although they come with a cable lock to attach the bike to the carrier, the key is sold separately.
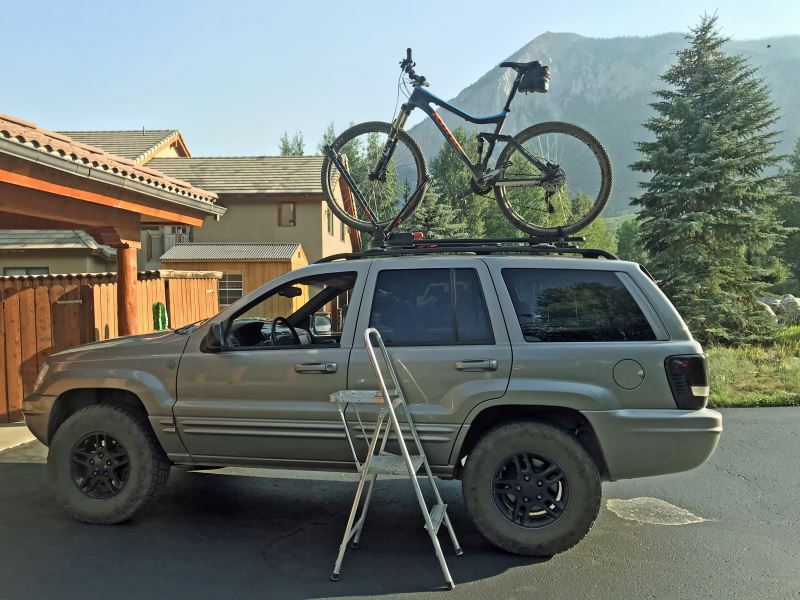
Very good product. It holds the bike securely on the roof without contacting the frame. It is easy to adjust from my road bike to my 29er mountain bike. Our drives are all relatively short, so I like that I do not need to remove the front wheel to lock in the bike. It's also nice that the SKS locking system allows me to use the same key for this rack that I use for my Yakima roof box and hitch rack. This is my first roof rack and I chose this route for a couple reasons. Some of the roads we travel to get to our trail heads are a bit rough and with a roof rack I don't have to worry about bottoming out a hitch rack hanging off the back of the vehicle. Also, it takes up less room in the garage. Our vehicle is a 2000 Jeep Grand Cherokee with an additional 4 inches of ground clearance. That makes it a bit of a reach for my 5'4" wife, so we take our two-step along to help her. This is my third time purchasing from etrailer, and each experience has been very good. They are a very customer service oriented company. I really appreciate all the additional information they provide on their products, especially all the videos they produce to aid in reviews, assembly, and use.
# 2
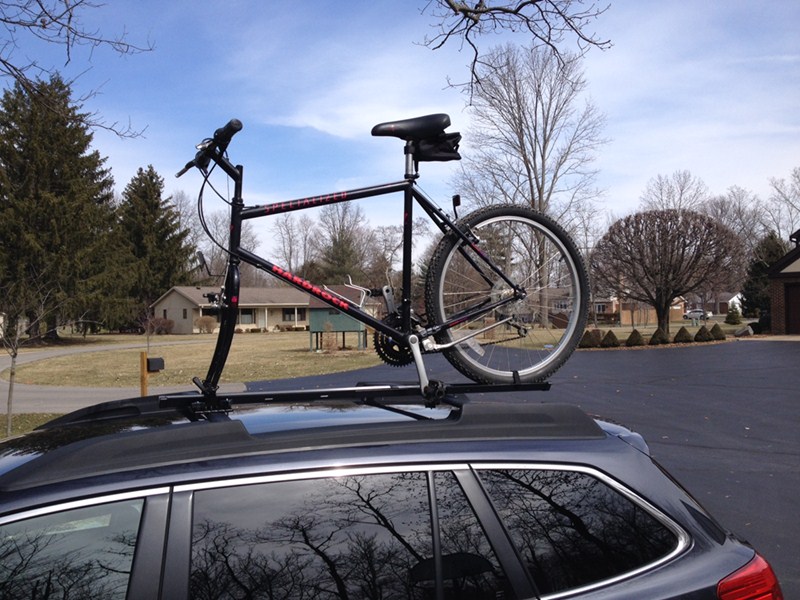
Swagman Fork Down Roof Mounted Bike Carrier - Fork Mount
Goes together quickly, appears that it will fit my needs in terms of being cross-compatible on a variety of vehicles. Fit on a Subaru Outback factory crossbar and transported bike locally with no issues when I got it out to set up and test (not quite warm enough to ride much yet where I live). Instructions are not super, but the assembly is pretty straightforward so that is not a problem. At the price point, if this rack indeed holds up to swapping onto multiple vehicles and lasts me a few years, I'll be thrilled with the purchase.
I purchased two of these racks, along with another rack that is meant to hold bikes with both tires still installed. I am extremely happy with all three of them. This rack specifically is very sturdy. Installation was sort of a pain, but that was mostly due to me installing it on the top of my 2004 GMC Yukon XL...it is so high that it was a little hard to install. But now that it's installed, it's actually very simple to take the bikes on and off. I've made one round trip with these racks, so I've put the bikes up there and removed them twice. Both trips (about 100 miles each way) they bikes were super sturdy and I had no concerns about them falling off or anything like that. I would definitely recommend this rack if you're looking for a fork down roof mounted bike carrier. In fact, I will very likely get another one when we add another bike to the family. I think I'll be able to fit four racks on the top of my Yukon easily. One last note - I was initially concerned about the height of my vehicle when bikes were on top of them. I brushed a couple of tree limbs when pulling into my camping spot, but it was no big deal. I think the total height of my load was about 10 feet, which was lower than the camper that I was pulling.
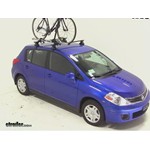
Yakima FrontLoader Roof Bike Rack Review - 2012 Nissan Versa

Today, on our 2012 Nissan Versa we're going to be test fitting the Yakima FrontLoader roof-mounted bike carrier, part number Y02103.To fit this bike carrier up on top of our vehicle, we're going to lay it on top of our cross bars. We'll fit the front clamp at the head of the bike rack around our front cross bar and we use the hand knob to tighten it down.We'll move to the rear cross bar and fit the clamp around our rear bar and use the T-bolt and wing nut to tighten down the rear clamp.One we have done that our bike rack is secured to our roof rack and we're ready to load up our bike.To load our bike, we're going to make sure that the wheel strap at the rear of the carrier is open. We're also going to lay open the front hoop of the bike carrier.We'll pick up our bike, place the rear wheel in the wheel tray, and place the front wheel in the wheel hoop. We'll bring the rear wheel hoop behind the tire and hold it snug against the backside of the tire.We'll use the red hand knob to tighten down the wheel hoops and secure the bike by the front wheel.With that done, we'll move to the back and use the wheel strap to secure the rear wheel.After both wheels are secured, our bike is loaded up and we're ready to hit the road.That does it for our test fit of the Yakima FrontLoader roof-mounted bike carrier, part number Y02103, on our 2012 Nissan Versa.
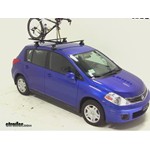
Yakima ForkLift Roof Mounted Bike Rack Review - 2012 Nissan Versa

Today, we have a 2012 Nissan Versa and we'll be test fitting the Yakima ForkLift roof-mounted bike carrier, part number Y02098.To fit our bike rack to the roof rack, we'll place it up on top of our cross bars.We'll fit the front clamp around the front cross bar and tighten it down with the wing nut.Once we have done that, we can slide the cap back into place and re-insert our skewer.At the back, we'll fit the clamp around the rear cross bar and again use the T-bolt and wing nut to tighten it all down.Once we have the bike rack secured to our roof rack we'll be ready to load up to our bike. We want to make sure that the wheel strap at the end of the bike track is open.We'll lift up our bike, place the wheel in the wheel tray and fit the front fork down into the skewer.We'll secure the bike by the skewer first, then we'll move back and secure the rear wheel with the wheel strap, and with that our bike is all loaded up and we're ready to get on our way.That does it for our test fit of the Yakima ForkLift roof-mounted bike carrier, part number Y02098, on our 2012 Nissan Versa.
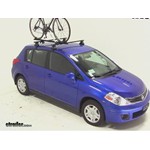
Thule Sidearm Roof Bike Rack Review - 2012 Nissan Versa
Today, on our 2012 Nissan Versa well test fitting the Thule Sidearm roof mounted bike carrier, part number TH594XT. To fit the bike rack to our roof rack were going to set it up on top of our load bars. Well fit the front clamps around our front load bar and tighten it down with the included wing nuts. Well do the same with the rear clamp over our rear load bar. Once weve done that, we can prepare to load a bike. Well open up the sidearm and extend the ratcheting hook all the way out, and well also open up the wheel strap at the back of the wheel tray.
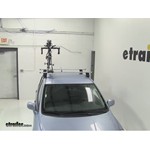
Swagman Fork Down Roof Bike Rack Review - 2012 Nissan Versa
Today, we have with us a 2012 Nissan Versa and were going to be test fitting the Swagman ForkDown roof mounted bike carrier, part number S64710. To secure this bike carrier to our roof rack, well set the head of the bike rack on top of our front load bar. Well use the included U-bolts and wing nuts to tighten down the front clamp around our front load bar. In the rear, we use the U-bolt clamping plate and wing nuts to again secure the rear of the bike rack to our roof rack on our vehicle. With our bike rack secure, we can load up a bike. Well take our bike and place the wheel of the bike into the wheel tray.
SportRack Nomad Roof Bike Rack Review - 2012 Nissan Versa
Today we have with us the 2012 Nissan Versa and we'll be test fitting the Sportrack Nomad Roof Mounted Bike Carrier part number ABR611. To mount the carrier to our roof rack we'll set it up on top of our load bars. We'll fit the U bolts and wing nuts around our front load bar at the head of the bike rack and we'll tighten it down. We'll move to the rear load bar and use the clamp, bolts and wing nuts to secure the rear of the bike rack. Once we've done that we can ready to load our bike. We want to make sure that the wheel straps at the front and back of the wheel tray are open.
Thule Domestique Roof Bike Rack Review - 2012 Nissan Versa

Alright, today on this 2012 Nissan Versa were going to do a test fit of the Domestique Bicycle Rack from Thule, part number TH513. Now this car is already outfitted with the Thule Roof Rack System using the Thule AeroBlades. So well start with the bicycle rack already assembled according to the instructions. Well go ahead and put it in place. Well start off with the clamp loosely installed so we can slide it over the first crossbar. And then we'll go ahead and guide our second clamp to the second crossbar.
RockyMounts TieRod Roof Bike Rack Review - 2012 Nissan Versa

Alright, today, on this 2012 Nissan Versa, we're going to do a test fit on a RockyMounts TieRod Bicycle Rack, part number RKY1014. Now, our vehicle already has a roof rack installed on it and it has elliptical-type bars. So we're going to start off with our bike rack already assembled according to instructions, so it's just a matter of placing it on our roof rack. To start off, we'll take the bike rack lower onto the front crossbar and make sure its straps run underneath. We'll go ahead and make sure we'll line up the clamp with the second crossbar. We can take the straps and put them to the clips on the other side.
RockyMounts TieRod Roof Bike Rack Review - 2011 Nissan Versa
Alright, today on this 2011 Nissan versa, were going to do a quick test of rocky mounts bike carrier. Ok now our versa has already been equipped with a Thule roof rack system using the aero-blades. And our bike rack has already been put together according to instructions, so well go ahead and set it into place, ok so well take the front part of our rack, well slide it onto the first crossbar and run the straps underneath the bar until it catches in front. Now well go the back half of the rack and install a clamp for the second crossbar. All the hardware is attached and now go ahead and make sure the bike rack is centered on the vehicle front to rear and also position the bike rack where you want it left to right. Then we go ahead and tighten down all the hardware.
Thule Domestique Roof Bike Rack Review - 2011 Nissan Versa

Alright today on this 2011 Nissan Versa, were going to do a test fit of Thule Bike Rack part number th513. The Domestique Fork Mount Bike Carrier. We already got our roof rack installed with the Thule AeroBlades. So we will take the domestic bike rack and go ahead and set it into place, and we already have our bike rack assembled pre the instructions. Now we will start with the front of the bike rack, we will put the clamp on from the bottom of the cross rail, and then attach the hardware that is already in the bike rack. Okay we will just get it started and then we will take the clamp part and center it over the AeroBlade, and then we could just go ahead and snug it up.


What our customers are saying:
"A couple months ago, I ordered a hitch & bike rack for my new 2005 Saturn VUE. Everything about the order was fast and easy. When my father bought a 2006 VUE, he wanted the same hitch, but it was not listed on the site. I contacted customer service and quickly received a response informing me that they were waiting for details on the new model. The next day I had another email saying it was available, less than an hour later, my order was placed and I had a "shipped" email. Outstanding service!"