

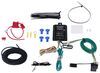
How to Install the Upgraded Circuit Protected Taillight Converter Hardwire Kit with 4 Pole End
Updated 05/03/2020 | Published 04/08/2010
Products Featured in This Question
Question:
I ordered & received part# 119178KIT. I am trying to replace Draw-Title Part# 18193 which I wasnt able to find in your catalog anymore. So I thought the 119175KIT was the correct replacement. My tow vehicle has a flat 4 plug with a 2-wire system. Now I cant figure out how to connect it to a flat 4 plug so I can plug it into my car. Can you please help me. Thank you.
asked by: Tom H
Expert Reply:
The Upgraded Circuit Protected Taillight Converter Hardwire Kit with 4 Pole End, # 119178KIT, is to add a 4 flat connector at the rear of your vehicle but does not come with a powered converter.
If you need a powered converter that draws power directly from the battery, you will need # C59496. I can give you the installation steps. To make sure you have the correct harness, though, I will need the year, make, and model of your vehicle.
Mount the circuit protected converter in a spot near the left taillight, in the trunk, or on the
frame rail, if mounted under the vehicle. Next, locate a suitable grounding point near the converter
such as an existing ground stud or drill a 3/32 inch hole and secure the white wire using the eyelet and screw provided.
Next, disconnect and isolate the vehicles negative battery terminal. On the in-line fuse holder, crimp a ring terminal to one end (3/8 inch for top terminal, 1/2 inch for side terminal). Then, attach the fuse holder (with fuse removed) to the positive battery terminal. Next, route the 12 gauge wire from the fuse holder to the converter passing under or through the vehicle.
Then, attach the wire to the fuse holder and converter with butt connectors. Next, reconnect the your vehicles negative battery cable. Then, use the circuit tester to determine which wire attached
to the left taillight assembly is the left turn wire. Attach the units yellow wire to this wire
using wire taps. You will do the same for the following wires. Brown on the unit is tail/license wire. Red connects to the brake light wire. Green connects to the right turn signal wire. Last, install the 10-amp fuse into fuse holder. Reassemble anything you have not already put back together and installation is complete.
The 4-pole connection can be stowed in the trunk and pulled out when needed. You can close the trunk on it as long as it is not in the latching mechanism. You could also route it through the trunk and mount it at the rear of the vehicle.


Jim P.
4/30/2020
I have a 1999 Mercury Sable wagon. I watched the installation video for part #119175KIT on a 1998 Ford Taurus wagon. I was going to order the #119175KIT part, but #119178KIT is presented to order. Is part # 119178KIT the replacement? What is the difference, if any, between the two parts? I want to order but dont know which one to order. Please let me know asap. Thank you! Jim