
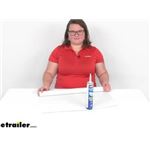
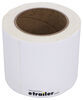
Repair the crack that gradually appeared or the hole worn in your RV roof with this piece of rubber roofing membrane. Single-ply, TPO material matches your Alpha Systems roof membrane's durability and UV-resistance. Measures 3' x 2'.
Features:
Specs:
RV Roof Maintenance Over the Years
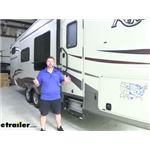
Most RV roofs will last around 30 years, but after about 10 years, it's a good idea to start looking closely for leaks, cracks, or other damage that may lead to replacement of the entire roof. For the best results and the longest-lasting roof, it's best to check the seals and edges of the rooftop at least once a year.
Over time, parts of your RV will begin to wear down, especially the roof which receives daily beatings from all weather conditions. In these spots you'll begin to see holes or cracks appear. To prevent leaking and further damage to your RV, you can use Alpha System's patch kit for Superflex membranes. The kit includes a small piece of roofing membrane and a tube of self-leveling sealant, which you can use to seal the edges of the membrane.
California residents: click here
Customer Satisfaction Score:
98% were satisfied with this product
2% of customers were not satisfied
Ratings & Reviews

First time customer. Package arrived on time and in good shape. Great customer service and follow up. Repeat customer here for sure.
Glad you had this. Just need a small piece to patch where my old ladder mounters. Thank you.
Very Quick shipping,items as described, pleasure doing business with

I didn’t use the adhesive; rather, I used a hot air gun used to heat seal TPO to itself (existing TPO). Only issue was the lack of information re, required heat as this stuff is super thin compared to industrial roofing TPO.
Right product, fast shipping and the price is fair.
Instructions on here aren’t great. As in, there are none. I had to read through the reviews to find out that people used spray adhesive to stick this down, because this doesn’t come with an adhesive.
Perfect match for my RV roof repair!
This product was exactly what I needed to repair 2 quarter sized holes and a few smaller holes that developed on our Winnebago roof over the winter. However the kit does not include an adhesive to attach the membrane to the roof, the adhesive I used (Alpha Systems 8019) was only available from etrailer by the gallon (even though I only needed a tiny fraction of that), and exceeds the price of the patch kit. Some reviewers appeared to use the lap sealant included in the kit as an adhesive and reported poor results. The lap sealant is intended to go over the patch edges after it has been adhered to the roof to create a water tight seal around the patch. Using the bonding adhesive to adhere the patch and then sealing the patch seams with the lap sealant was fairly quick and easy for a DIYer, looks good and I expect lasting results as the patch material is guaranteed for 15 years. I spent over twice what I expected and have close to a gallon of adhesive that I’ll have to toss (it keeps up to a year according to the label), but it beats the repair bill. The etrailer reps are helpful, knowledgeable and quick to respond.
Easy to use. Excellent results. I used this this product 4 years ago on my 5th wheel toy hauler and it went on easy and still looks great today. My friend had a leak in is motor home and I suggested this product we received it in a timely manner, installed it before the next rain and he is overly pleased with the installation and results.
The patch membrane material tends to wrinkle up around the edges while the sealant cures. For my first attempt at patching my roof hole I cut the patch piece in a nice oval, laid a nice even 1/4" bead around the bottom side of the patch and pressed it onto the roof until sealant squeezed out all of the edges. The next morning it was all wrinkled up around the edges and there were lots of openings in the sealant. Maybe I was doing something wrong, but I wouldn't know because it didn't come with instructions.
For my second attempt I did the same thing but left a 55lb bag of sand on top of it for three days while the sealant set up. Perimeter seal looks intact so far. Will see how long it holds
Product was exactly as expected. Matched the material on the roof of my 2019 Grand Design Imagine. Packaging needs to be addressed - the box arrived almost completely broken in half because the heavy tube of sealant was at one end. I've seen other reviews that identified the same issue. Some filler material to center the filler tube lengthwise in the package would solve the issue.. but the product wasn't damaged in my case.
To use, buy some good spray contact glue and a small seam roller. Clean damaged area with alcohol or acetone, lay replacement piece over area with a couple inches of overlap after spraying bottom side with contact glue, roll the overlapped part with the seam roller, and apply a generous bead of the sealant over the seam. Good as new!
I have lost track of how many times I have ordered from etrailer
We just purchased our third camper last month so I will be ordering more products soon.
I also read the repair articles and found out what the fix was with my fifth wheel brake problem .the photos I have attached are of spring shackles that were about to fail-replaced with heavy duty parts from etrailer and a new air ride hitch.
Thanks etrailer for your great support and service
This was the 2nd time buying this product. The 1st time I didn't see the included instructions, and ended up using the included tube of self-leveling lap sealant to use as an adhesive. As you may have guessed, it went terribly and I had to rip it out and start over. I used spray contact adhesive and prepared the existing roof with acetone the second time. There are 2 sides to the rubber- one was smooth and 1 was textured- I put the smooth side up (not sure what side goes where) I finished the edges off using ETERNABOND tape (not shown)
Overall I feel confident that the repair will work. Next step is to acetone, Clean, prime and seal using Liquid Rubber
I don't know why there is a tube of lap sealant included, but it did go to use on other areas of the roof
Very disappointed. While easy to cut and fit, the edges started to curl up almost immediately. After sitting for 10 to 15 minutes, large bubbles started to appear despite extensive use of an appropriate roller. Result is I will have to take my RV to a professional shop and have the rubber roof on my slide-out replaced.
The patch membrane was exactly what I need for a repair. I was confused and could not understand why a small quart-sized of adhesive was not part of kit. This would have been more productive for the fix other than the self-leveling sealant enclosed, I applied Eternabond tape to seal the edges. No instructions (or video) for the DIY’s.
Do you have a question about this RV Roof Repair?
Info for this part was:
At etrailer we provide the best information available about the products we sell. We take the quality of our information seriously so that you can get the right part the first time. Let us know if anything is missing or if you have any questions.


Thank you! Your comment has been submitted successfully. You should be able to view your question/comment here within a few days.
Error submitting comment. Please try again momentarily.