


To see if this custom-fit item will work for you please tell us what vehicle you'll use it with.
When the weather turns and the snow starts stacking up, this hydraulic plow gets you moving. Its trip-blade design powers through deep snow, while LEDs light your way. It also has full control from the cab so you can stay warm while you work.
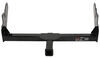
The Quick-Link system connects directly to your truck's 2" Class 3 front receiver, so you can mount or remove the plow without extra tools or downtime. The integrated crank stand lets you adjust height to match your truck's receiver, and the caster wheels make alignment simple. Once you have it pinned in place, connect the 4-pin wiring harness and you're ready to plow. It's a fast, reliable setup that gets you moving when the forecast turns.
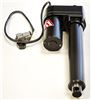
From the driver's seat, the wired pistol grip gives you full hydraulic control to raise, lower, and angle the blade exactly where you need it to go. It's designed for quick response and natural hand shape, letting you manage piles, drifts, or tight clearances without stepping into the cold or cramping your hand. You don't even have to take your gloves off if you don't want to.
The WingMan's 14-gauge, military-grade steel blade is reinforced for impact and finished with Dura-Slick paint to shed snow and fight corrosion. A full-trip edge helps protect both you and your truck by absorbing hits from hidden obstacles, then resetting automatically so you stay productive through the route. Every detail is engineered for consistent performance in the toughest conditions.
 Alternate Instructions
California residents: click here
Videos are provided as a guide only. Refer to manufacturer installation instructions and specs for complete information.
Hi, I am Daniel with etrailer, and today we're gonna take a look at and I'm gonna show you how to install the Meyer WingMan commercial-grade hydraulic snowplow. We got our first snowfall of the year right in December here in Missouri. Now, let's get right into seeing how this works. Now I'm in the cab, and I got the remote control, and I'll press this button on top left, and this will lift the bucket all the way up. Press it one more time, and it'll dip all the way down. So now we're ready to plow.
So just put this in drive. (snow plow dragging) As I'm driving, I can turn the angle. So if I need to go to a curb to put a big pile of snow up, we can do that. And now I'll lift it up, reverse. and it's really pretty simple to use.
(snow plow dragging) This plow system is designed for 1/2 ton trucks or smaller that are only four-wheel drive. Now these are gonna be great for your F-150s, your Silverado 1500s, and your RAM 1500s. Now we have it on a Chevy Tahoe today, so just make sure it is compatible with your vehicle. This plow is more for people who maybe own their own small business or they have a big lot to clear, or you maybe just live in a climate where it snows quite often. So this is just going to be a little more beefed up than your average driveway plow.
Now I'll go ahead and install this on the hitch. Now it comes with castor wheels, so you can't just roll this around. So I'll get this lined up best I can. (metal clacking) Now at this point, this is a little heavy, so you may want to have a couple people help you get this installed. I got Aidan over there helping me.
We're just gonna tilt this top section forward. And I'm gonna get this jack, put this on our middle section, (metal clacking) and I'll start cranking this down. (metal clacking) Now if you are doing this by yourself, you can rest this upper section on your jack just in case, but it is a lot easier to have someone hold it so you can get it lined up properly. (metal clacking) Let's go down a bit. (metal clacking) Aidan Right there. Perfect. This is pretty high for this. If you have a lower hitch, then you should be able to roll it in pretty easy. But something to make it a little easier is I got a jack here to lift up kind of on this intersection, so the weight of this bucket isn't holding it down, making a pinch point. So that made it a lot easier. But now, with that lifted up, I'll go ahead and take our wheels off. Now you may wanna reattach the wheels in this position. Now I'm kind of leery of that, just because if you turn the bucket, this could rub up against your hydraulic line. So I'm just gonna take 'em off and throw 'em in the truck. Take our jack stand, (metal clacking) (metal clacking) take our pin out. I'll go ahead and put this in the stowed position on the side right here. (metal clacking) Put our pin back in. Now at this point, with all the weight up front, you wanna check your front suspension. Now we measured to our wheel well, and we lost about 1 1/2 inch. So we're definitely gonna need some type of suspension enhancement up here like Timbrens. So check out our fit guide to see if you might need those as well. Now you definitely want to get these if this is sagging too much because it's going to basically tilt your vehicle like this, it's gonna make drivability a little worse, and you definitely want drivability when you're plowing in the snow. Now another reason is it's gonna wear down your components way faster and make you have to replace something. Now we'll plug in our connections up front. It's always a good idea to put some dialectic grease on your fittings, make sure they're long lasting, especially in snowy conditions. Now we'll run through some of the functions of the remote. You need to have your vehicle on in order for this to work. So I'll go ahead and press it on. So that's gonna indicate the lights are on. But I'll press it one more time. The green is gonna indicate we're ready to test the functions of the plow. So now go up, I'll take a left, take a right, go back down. And this button up here is gonna do the auto up. So I'll press that. (hydraulic whirring) puts it all the way up. Press it one more time, and that'll set it all the way down. And now we'll test to see if the lights are working. So that'll be high beams. And I'll press it one more time, and that'll just be the regular headlights. So that blue indicates high beams and the green is just the running lights. Now run through the turn signals. So we got left turn and we got right turn. So it looks like everything's functioning properly. A couple things to keep in mind is when you're plowing, you don't want to exceed 20 miles per hour, and we have this in a lift position. Or you're just transporting it, you don't want to exceed 40 miles per hour. Now, once the cutting edge here reaches four inches, now this is six inches here, you're definitely gonna wanna replace this just to make sure everything's functioning properly and you don't start damaging your plow. Now I'd like to take this out in the snow, but we are installing this in October, but hopefully later on at the first snowfall here in Missouri, we can get some cool shots for you of this in action. Now, if you're wanting a fully hydraulic, commercial-grade plow that has a controller inside your cab, then this is gonna be a great option. Now, if you're ready to get this installed on your vehicle, then follow along and I'll walk you through it. This snowplow will ship to your house and it will arrive in a large pallet. And first thing you wanna do is just remove the cover. And once that's removed, we can uncrate it by removing the screws on the top and get this top panel taken off. Now you can use a saw or a pry bar and get the sides removed so you can access your plow. Now, before you can install your snowplow, you are going to need a front hitch. And if you don't already have one, you can check out our fit guide and see which one's going to fit your vehicle. Once you've unboxed your snowplow, now it is time to set up a couple things. First off, I got the wheels here. It's gonna come with three. And really. when you're doing this for the first time, you're just gonna have to lift it up. Now it might be a good idea to have a buddy lift it up while you put this on. There's gonna be three square holes, and I'm just gonna use the middle one for now. But it does come with a jack, so I just want this to be able to get to be rolled. I'm gonna lift it up, slide that on, and put our pin in place. And I already did the other two. But now, we can roll it around. Next up, we got the headlights to install. So I'll just slip these over our brackets, and comes with these small bolts. And I'll just put the bolts through, the head's facing on the inside, and I'll just get a split washer and a nut, and I'll get that tightened down, and I'll get the rest installed here. Leave these hand tight for now 'cause they are adjustable slightly. So until we know the angle it's gonna sit on the vehicle, we can adjust them later. Once you get your lights attached, you can take the covers off of the plugs and get these plugged into your wire harness. So I'll plug these both in. And you may want to just zip-tie these a little bit tighter. I got the plow marker and I'm gonna install this next. I got the smaller hardware. I'm just gonna put that through the outside. And on the other side, let's get a flat washer and a nyloc nut. (metal clacking) Now, using a 13 millimeter socket and wrench, I'll get these tightened down. (ratchet cranking) (ratchet cranking) Now before we get this installed on a hitch, we'll go ahead and tackle the wiring. We're gonna do the wiring on this '96 Chevy Tahoe, but this is gonna fit a large variety of different trucks, but the principle's gonna be exactly the same when we're wiring it. We got our harness, and there's gonna be three main plugs. The white one, that one's gonna be inevitably go into our cab through our firewall. It's gonna connect to our controller. Now, this plug here, it's gonna connect to our snowplow, and we're gonna route this through our grill here. And then we got our four-pole connector that's gonna run all the way to the back and connect to our four-pole on the back. I routed our main plug that's gonna be going to the plow somewhere to the front of the vehicle. Usually, you want it to be in the grill, near the center. Now we had to take the grill off just to get this on. But off this, you're gonna have a red and white wire. Now these are gonna tie into the high beams and your regular headlights, so you're gonna wanna determine what wires those are. Now this step is optional. This is basically gonna allow you to use your headlights on your plow and not your vehicle. Now some states have laws where you can't have these on when your plow lights are on, so this might be necessary. But how you test them is I got a light tester, and this will probe the wire. It's just got a sharp point on there. Now I got our headlights on, so I'll probe this brown wire to show you that this is the headlights. As you can see, we got lights. Now we'll throw on those high beams and test which one we got for that. Got those high beams on, probe this wire. As you can see, that one controls our high beams. Our red is gonna go into our high beams and then our white is gonna go into our regular headlights. So now I'll just splice these in, get these cut, spliced on both sides. Once you get 'em twisted together, you can put your butt connector on. Now, these don't come in the kit, but these heat shrink butt connectors are really good to have since these are outside the vehicle. These will shrink around the wire, make a watertight seal, so these won't corrode. I'll get the other end connected. And I'll do the same thing with our regular headlights. Now I get these shrunk down, I'll just grab a heat source. (heat gun whirring) Now that we have the grill opened up and taken off, I'm gonna run our power wire as well. Now our battery on our vehicle is gonna be on our passenger's side, so I'm gonna run it through this way. And this will plug into our plow. So this is gonna sit roughly the same spot as our other plug. Now all you do is put the red wire to your positive and your ground to the ground post on your battery. I went ahead and routed our four-pole wiring all the way to the back. And this is that wire here. I just routed it. Usually, if it's gonna be up in the engine bay, you just wanna route it down away from anything hot or moving. And I just used the factory wire harness and ran it all the way back on the frame. And that wire harness came all the way back to our four-pole and seven-way plug here. And I just zip tied it all real nice, so nothing's hanging. And now plug it in to our four-way connector here. Now if you don't have a four-way connector, if you just have a seven-way, they do give you an adapter for that. All you do is unplug it from the seven-way and plug this in. It's just gonna be a T-connector. And then you can plug your four-way into this. Now we're gonna route that other part of our wire harness into our cab that's gonna connect to our remote control. I went ahead and already found a good spot and drilled our hole. But what you want to do is make sure there's nothing on the other side when you're drilling. You wanna drill with an eighth inch pilot hole first and make sure you double-check there's nothing gonna be back there when you open this up. And you wanna open this hole up to 1 1/4 inch, and you wanna test fit, make sure your plug's going to fit in and out. We pulled our plug through. And we did extend this blue wire. Now we'll talk about this blue wire next, but it does have a fuse tap on the end, but you always wanna put a grommet on this hole just so the sharp edges of the metal doesn't rub on this over time. Now the blue wire here is so when you turn the vehicle on, your plow turns on. Now, you gonna want to go to your fuse panel and use a light tester, and make sure you find a fuse that's off when the vehicle's off. And then you wanna flip the ignition on, and your light tester should indicate that it has power. So we found one, it's a 20-amp fuse. And we're just gonna cut this. And we found a brass fitting. Now, we don't have these here at etrailer, but we can usually get 'em at your local auto parts store. This did have a nail on there. Now we did cut that off 'cause we need a female end, which we have here at etrailer. So I'll get this crimped on. And I'll plug this onto our brass fitting. Now, something to keep in mind when you're doing this is you wanna make sure your brass fitting is on the right side. So you wanna take your fuse out and test the actual terminals themselves to see which one is getting power. So that might be an issue if you're not getting power. So I'll plug this on. Now, lastly, we have a white and purple wire. Now we're not gonna use these today, but these will be applicable in some RAM and GMC models. Now these will connect to the alternator relay, so just make sure you have that kind of vehicle. But for now, I'm just going to tidy these up, zip-tie it up, and get all this cleaned up. Went ahead and got everything tidied up, and I put the grill back on, and I got our connection points fished through. Now we can slide our plow into position, get it hooked up into our hitch and hooked up into our wiring, and make sure everything's working properly. (metal clacking) We got that hitch pin secured, and now we went ahead and plugged in our wiring harness. I got our control plugged in. I'll go ahead and turn that on. Now, make sure your chain is right in there before you go through all the functions. I'll use a remote and lift it up, (hydraulic whirring) side to side, back down. And now we'll test the lights. So you wanna make sure that your lights are off on the vehicle. We can turn our remote on. Press it a couple times, and we can switch between the high beams and low beams. And as you can see, everything's working properly. Now if you have a vehicle like we did today where the running lights are on constantly, then your lights on your plow aren't gonna work. What you wanna do is find your fuse box, locate your DRL fuse, pull that, and make sure these are working. Once you determine that's the issue, you can get a fuse bypass. So if you don't wanna pull the fuse every time you wanna plow, you can just actually have a manual switch inside your cab. And we can tighten our headlamps. And it's probably a good idea to have these tilted slightly down just so you can see what you're doing when you are plowing some snow. I'll get these tightened down. (ratchet cranking) (ratchet cranking) It's gonna be these bolts here, and they're gonna be on either side. They're basically going to prevent the bucket from lifting up too high. There's gonna be stops. So sometimes they're gonna come tightened down. But if they're not already, I'm just gonna snug them down. They're already preset from the factory. (ratchet cranking) I will just get these tightened down. (ratchet cranking continues) Another question you might be having is, what are these two wires for Now, these are just for the V-plow. Since we have a straight plow, we're not gonna be using 'em. So I would just suggest taping 'em up so that metal doesn't touch anything, and just zip-tying 'em back up here. Something to keep in mind is when you're attaching your chain, you want your plow to be all the way on the ground, and you wanna hold it tight and then go about two to three links lower than that. So I'll put mine right there. And this just ensures that this can follow the contour of the ground when you're plowing. I'll go ahead and take this cover off. There's a couple of maintenance and adjustment things to look at. So let's take 1/2 inch socket, get all these bolts removed. (drill whirring) (drill whirring) (metal clacking) (metal clacking) First thing you wanna check is your hydraulic fluid. So this is where you fill it up. Just make sure you have that property filled. You wanna check the fluid when your lift cylinder is all the way retracted, like ours is. Look at this closed up. This is gonna be a knob here, and this is going to help you determine how fast or slow your bucket rises and drops. There's gonna be a button on your remote control that you can press, and it will automatically rise or drop. So if you want it slower, you want to turn this clockwise. And if you want the drop and rise to be faster, you can turn it counterclockwise. And once you've set it to what you like, you can re-tighten that jam nut. Now, if you have any further questions about if this plow is compatible with your vehicle or if you need some suspension enhancements like Timbrens on your vehicle as well, then please feel free to reach out. We'd love to help you out. That just about does it for the Meyer WingMan snowplow. Thanks for watching.

I used the Meyer WingMan snow plow today, and I was genuinely impressed with how solid it felt and how easy it was to use. It’s high quality for sure, and for how big it is, the installation went pretty smooth. The steel blade looks tough, and the finish seems ready for plenty of winters.
The self-aligning mount made setup quick too. I was able to drive up to it and click it in within a few minutes, totally doable for one person. The heated LED lights are a great touch, especially when it’s freezing out and hard to see through the snowfall. I really liked the auto-angle feature, it automatically adjusts to whichever side has more snow, but you can still lock it in if you want. It's not something you necessarily need but it's a cool feature.
One thing to keep in mind is it’s not meant for heavy-duty trucks. It’s made for half-tons or SUVs. It’s on the lighter side, so it’s not going to be a professional, commercial plow. It’s meant more for parking lots or neighborhood streets.
The WingMan made a strong first impression on me ,easy to mount, smart design features, and plenty capable for its size.
The snow plow install wasn’t bad at all it was mostly plug-and-play with just a few exceptions. Getting to the wires for the high beams can vary depending on the vehicle. The only real challenge was getting the plow in and out of the hitch on vehicles that sit a little higher off the ground, that part was pretty tough, definitely a two-person and floor-jack kind of job. So if your truck sits up higher you will need a buddy to help! Other than that, it went pretty smoothly.
Amazing snow plow..came exactly as advertised and packaged well via delivery. Vendor is very reputable and would definitely purchase from again in the near future.
Abbey and the dock manager are the best!
Do you have a question about this Snow Plow?
Info for this part was:
At etrailer.com we provide the best information available about the products we sell. We take the quality of our information seriously so that you can get the right part the first time. Let us know if anything is missing or if you have any questions.


Thank you! Your comment has been submitted successfully. You should be able to view your question/comment here within a few days.
Error submitting comment. Please try again momentarily.