Replacement Water Filters for Clearsource Ultra or Onboard Pro RV Water Filter System - 3 Canister
- All Info
- Reviews (20)
- Q & A (0)
- Videos (2)
- Photos
Clearsource RV Water Filter
- Water Filter Cartridges
- Triple Cartridge
- Exterior Filter
- Interior Filter
- Clearsource
- 0.2 Micron
- 5 Micron
- Bacteria
- Chlorine
- Cysts
- Heavy Metals
- Lead
- Rust
- Sediment
- Viruses
- Volatile Organic Chemicals
- Carbon Filter
Replaces the first stage, second stage, and VirusGuard filters for your Clearsource 3-canister Ultra or Onboard Pro RV water filter systems. Fits Clearsource Ultra CS87FR and Clearsource Onboard Pro system CS59FR.
Features:
- Replaces the water filters for your 3-canister Clearsource Ultra or Onboard Pro water filter systems
- First stage 5.0-micron filter has large grooves to capture more rust and sediment
- Second stage 0.5-micron coconut shell carbon block filters out harmful chemicals to improve the taste and smell
- Third stage VirusGuard filter traps viruses, bacteria, lead, and other heavy metals
- IAPMO certified
- Made in the USA
Fits:
- Clearsource Ultra RV Water Filter w/ VirusGuard - 3 Canister - Exterior: CS87FR
- Clearsource Onboard RV Water Filter w/ VirusGuard - 3 Canister - Interior: CS59FR
FLTR-3PCKVRS Replacement Water Filter Cartridges for Clearsource Ultra or Onboard Pro RV Water Filter Systems - 3 Canister


Videos are provided as a guide only. Refer to manufacturer installation instructions and specs for complete information.
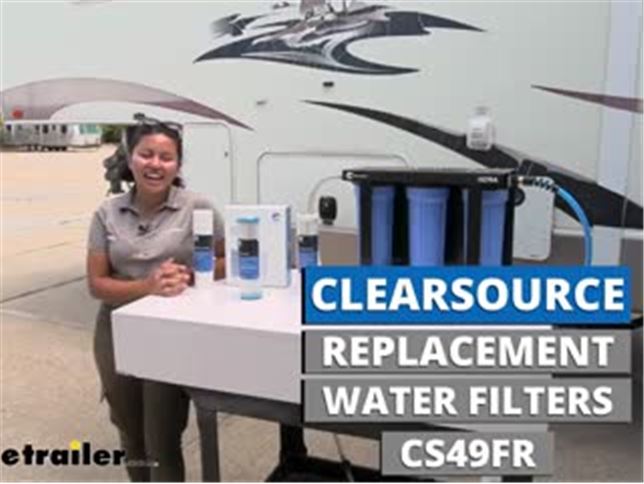
Video Transcript for Clearsource RV Water Filter System Replacement Water Filters Review CS49FR
Hello, everyone, it's Evangeline here at etrailer. And today we're gonna be talking about the replacement filters for your Clearsource water filters. So this is gonna work for your Clearsource Ultra, like what we have here, or your other three-canister filters. So you can replace your filters individually, or you can replace them as a three-pack, which I recommend doing every time just because that way you know you always have fresh water or fresh filters. But if you're gonna do them individually, make sure you have the correct one. How often should you be changing out your filter Well, that depends.
How often do you go out camping If you're a full-time RVer or you're a boondocker, you're gonna hit that 2,000 gallon limit pretty quick. So at least every three months is a good rule of thumb. If you're a weekend warrior, you go out pretty much every weekend, once a week, then I do recommend between three to six months as a good time. And finally, if you're a seasonal camper, you only go out a couple times a year, then whenever you set up your RV or camp before the season, once a year, that's when you should replace your filters. So before we get into the individual filters, I just like to say I really like the packaging for the three-pack because it shows which filters and what order they go in, and then it explains which filter is what and what it does.
So let's talk about that. So look at your Clearsource water filter, and this is gonna be your RV side, this is gonna be your water hookup side. So, this is the first step. And for the first step, you have your five micron rust filter. So, this is the first step.
And if you have, let's say, dirty water or maybe water that has rust or sediment in it, that's what's gonna filter it out. You have these large grooves, which will help with that filtration process and make sure that those larger compounds are filtered before you go to the second step. At second stage of filtration is the 0.5 micron filter. And this has a coconut shell and carbon technology. And that way, if you notice that your water smells or tastes funny, you want this filter.
This is what's gonna take out the things like the insecticides, the pesticides in the water, just those harmful chemicals. So your Clearsource Premiere and your Clearsource OnBoard, or your two-canister filters have something similar to this, although they take this an extra step and those have a 0.2 micron filter. Now what we have for our three-canisters is they combine that technology and have an extra virus guard filter. And that's your third step of filtration. Very similar to your second step, but all that bacteria or any viruses or compounds or chemicals that somehow, someway make it past the 0.5 micron, this is gonna get it. So when you're replacing filters, this will be the order that you're gonna replace. It'll help you figure out which filter goes in which canister. Speaking from experience, it can get confusing a little bit, And that's what this video is for. Now, to switch it out, they made the process super simple. All you need to do is twist the canister, and it loosens. If you have a hard time the first time, they give you a little tool just to crack it open a little bit. Once that's loose, you now have access to your filter. And before you touch any filters or do any replacing, I do recommend washing and sterilizing your hands first. And then you're gonna take out the older filter. Now this is still very, very, very new and it looks very clean. But we're gonna show you how to replace it anyways. You're gonna get your new filter, and they have a hole on top as well as a rubber washer. So just pop that into the canister, line it up with that hole inside the canister, push it in just to make sure it's seated. And now you can put your canister back into your filter. Now, when you do replace your filters, I recommend letting it run for about one minute before you connect it to your RV. That way, it fills up with water, it's in prime flow condition, and once you turn it off and then plug into your RV and turn the water back on again, it's filtering that fresh water. And just like that, super simple process, super easy. And that's why I recommend picking up a couple of these so that they're ready. And once you hit that 2,000 gallon mark, you can switch 'em out, and you know you'll always have fresh water. So that was a very easy process. Again, whether you need a single-filter or a three-pack, you can find them right here at etrailer. If you wanna see those filters in action, check out our Clearsource water filter product videos, where we show you how to use the filter as well as how well it works. And that was a look at the replacement filters for your Clearsource Ultra or your Clearsource OnBoard Pro water filters here at etrailer.com..
Customer Satisfaction Score:
99% were satisfied with this product
1% of customers were not satisfied
- Arrived Damaged
- Wrong item was ordered
Ratings & Reviews
4.7
20 reviews
ask me next year as by then I’ll have some experience with your product.
Same packaging issue as per my comments on the valve stem and wheel.
Switching from Flo-Pur because these are much easier to find and less expensive.
These filters work perfectly to give us good, clean water to use on my 5th wheel to eliminate any potential contaminates associated with campground water systems.
Purchased as replacement for original filters included with Clearsource 2-canister system. They fit and work as expected.

It was a night and day difference with these filters. The water at the park we were at had a bad taste. These filters did a fantastic job removing any tastes and smells. We change the filters once every 6 months. The old filters show what they removed.
As you can see in the photo I installed the filters right behind the wet bay. The water pressure regulator is right behind the filter so the pressure is not adjusted until after the filter.
These water filters do a good job. The RV park has well water and these filters do work for filtering the water.
After using these filters for a year now they have greatly increased the taste of our tap water in our RV, and reduced the odor of some water connections dramatically.
This whole system works great.

See what our Experts say about this Clearsource RV Water Filter
- Is The Clearsource Ultra RV Water Filter System Designed For Occasional Use/ Tips For StorageThe Clearsource Ultra RV Water Filter System # CS87FR really is designed for "weekend warriors" such as yourself, who would only be using it occasionally, and are not living in the camper full time. It is very easy to set up and take down, and it is pretty lightweight, at least as far as water filtration systems go. We do not recommend leaving it full when in storage though. What you will want to do is remove the filters and blow out the system with pressurized air (do not exceed 30 PSI)....
view full answer... - Are Filters for Clearsource Ultra and Nomad Water Filter Systems the SameThe Clearsource Ultra RV Water Filter System w/ VirusGuard # CS87FR uses the replacement filter kit # CS49FR while the Clearsource Nomad RV Water Filter System w/ VirusGuard # CS67FR uses the replacement filter kit # CS39FR. The VirusGuard Filter # CS69FR is the same for both kits but the Nomad uses the 1st Stage Filter # CS79FR while the Ultra uses the 2nd Stage Filter # CS29FR as well as the Rust and Sediment Filter # CS89FR so the complete filter kits are not compatible with each other.
view full answer... - Recommended Water Filtration System To Prevent Heavy Metals And Sediment Yes, the Clearsource Onboard Pro RV Water Filter System w/ VirusGuard # CS59FR is a great permanent filter system to provide clean drinkable water for you and to prevent heavy metals and sediment from corroding your Excel RV Tankless On-Demand Water Heater # EX93FR. This water filtration system has 3-stages; First stage 5.0-micron filter has large grooves to capture more rust and sediment. Second stage 0.5-micron coconut shell carbon block filters out harmful chemicals to improve taste...
view full answer... - Can The Clearsource Onboard Pro RV Water Filter System # CS59FR Be Mounted Upside Down? The Clearsource Onboard Pro RV Water Filter System # CS59FR can be mounted in any orientation as water pressure is what pushes the water through the filter. It is best to position the blue canisters hanging down as this will reduce the amount of water which drains out of the Canister # CS28FR when you change the Filters # CS49FR.
view full answer... - Can a Water Filtration System Be Used to Keep Sediment Out of the Excel RV Tankless Water HeaterYes, you can use a water filtration system like the Clearsource Onboard Pro RV Water Filter System # CS59FR to provide clean drinkable water for you and prevent heavy metals and sediment from corroding your Excel RV Tankless On-Demand Water Heater # EX93FR. This system comes with a mounting bracket to easily install in a utility bay or a clean, enclosed, and accessible space. The filter life is rated for up to 2000 gallons of use and the filters can easily be replaced with part # CS49FR.
view full answer...
Do you have a question about this RV Water Filter?
Info for this part was:


At etrailer we provide the best information available about the products we sell. We take the quality of our information seriously so that you can get the right part the first time. Let us know if anything is missing or if you have any questions.


Thank you! Your comment has been submitted successfully. You should be able to view your question/comment here within a few days.
Error submitting comment. Please try again momentarily.