


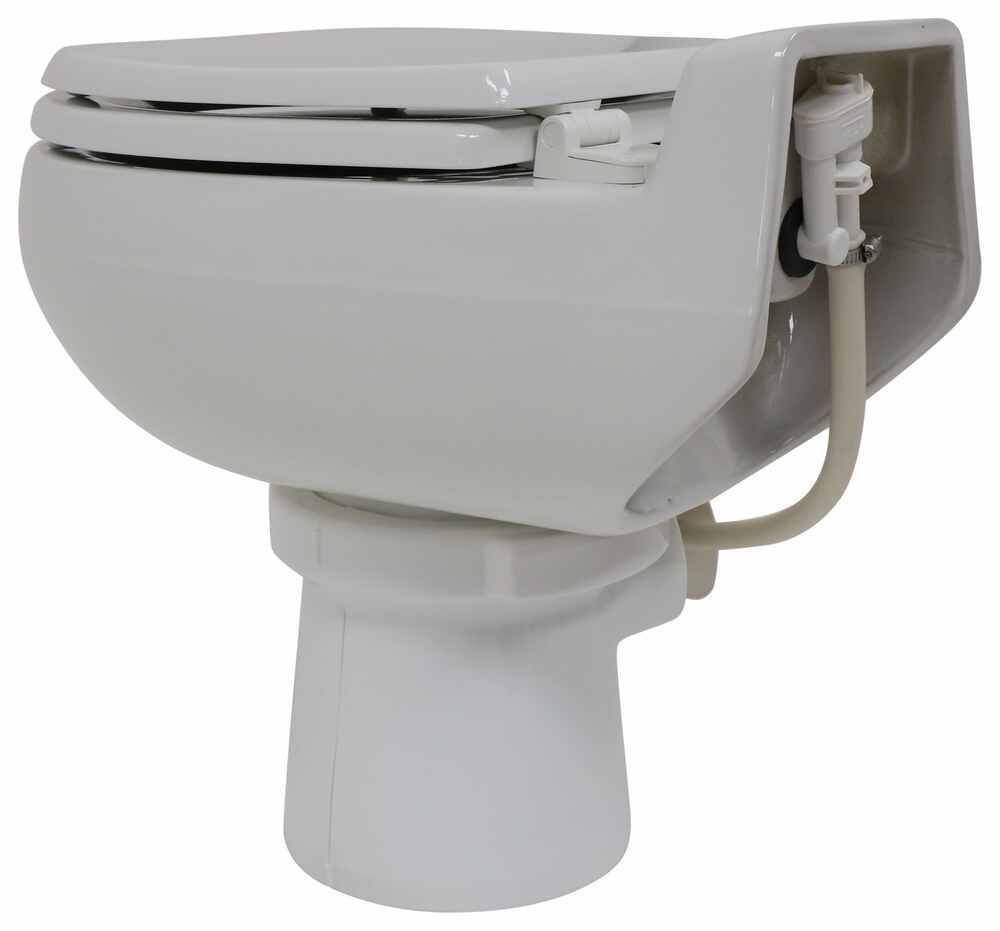
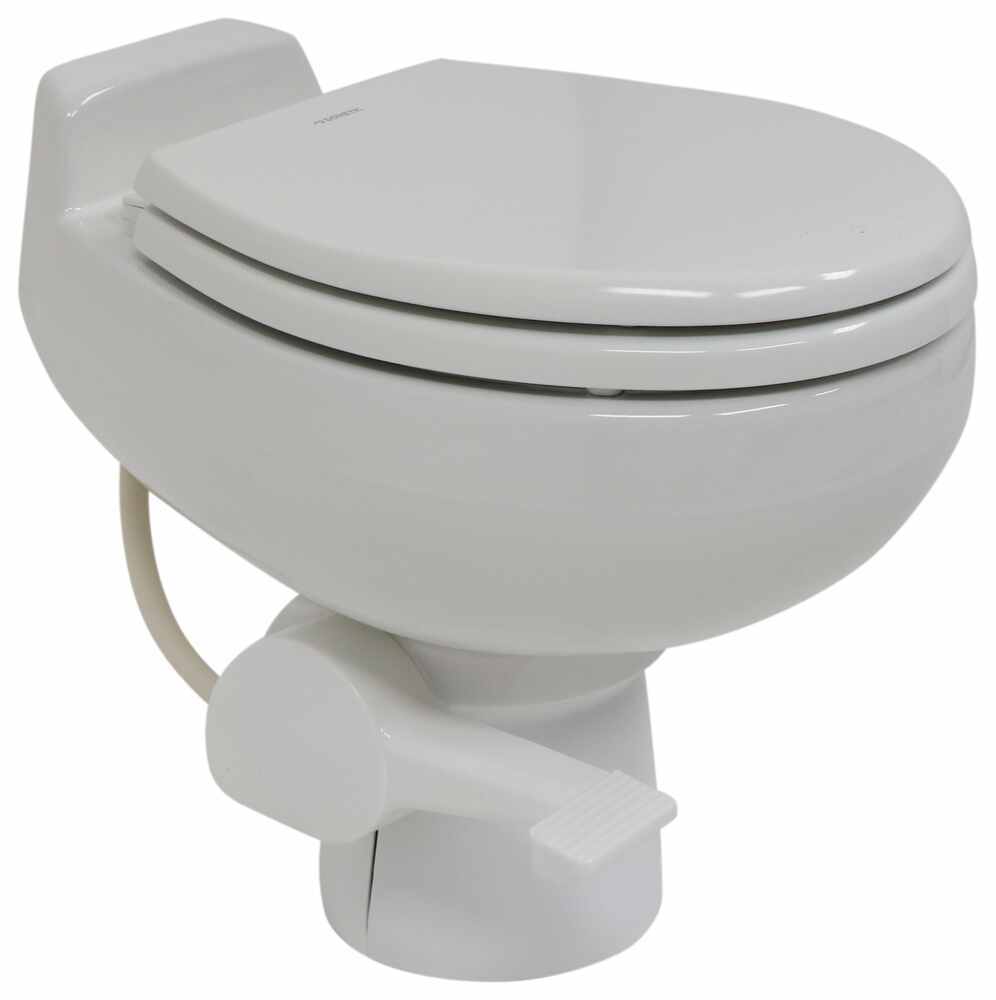
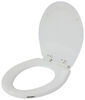
Perfect for full-time RV or boat living, this durable, standard-height toilet uses less than 1 pint of water per flush. Elongated wooden seat provides comfort while you're on the road or the water. Ceramic bowl is easy to clean.
Features:
Specs:
Living in your RV or boat can be a real adventure, and you'll want your facilities to live up to that lifestyle. This toilet easily handles everyday use, making it great for when you're living in your RV or boat full-time. It's just as tall as a standard residential toilet, so it's easy to sit down on and get up from. The durable wooden seat holds heat for those chilly nights. And the sturdy ceramic bowl is easy to clean. If you call your camper or houseboat your home, this is the toilet you'll need when nature calls.
Videos are provided as a guide only. Refer to manufacturer installation instructions and specs for complete information.
Hi there, RVers. Today we're gonna be taking a look at Dometic's line of Full-Timer RV Toilets. These are available in either white or tan, either low profile or standard height. We're gonna be showing off the standard. and then with or without a cleaning sprayer. And we're also gonna be showing off the sprayer.
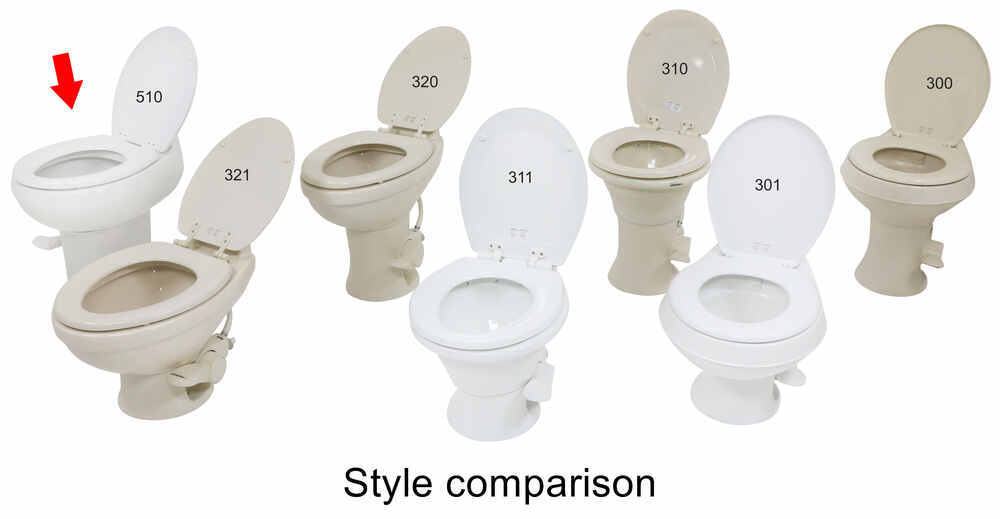
Dometic calls this the Full-Timer because it's designed to be just like your toilet at home. When you're sitting on it, you almost can't even tell the difference. It's elongated design is very comfortable to sit on, just like your one at home, and if you have the standard height, it's gonna be the same height as one you would have at home. If you do opt for the low-profile toilet it's gonna have a height of 16 inches. Your standard's 19-1/4".
The other real difference is that you're not gonna have a tank on the back of this, 'cause that takes up a lot of real estate and we don't need it in the RV. And this is gonna be significantly easier to install than a home toilet would be. And to give you that feel like you're sitting on a toilet at home, they've got similar dimensions. It is 12 inches on the inside, from front to back, and eight inches from side to side on the inside cut out. From the seat to the bottom of the bowl, it's 8-3/4".
Since there's no tank, it features a foot lever flush. You can push it down halfway to add more water to the bowl. If you desire, and if we go all the way down, it'll open it up to empty out whatever's inside. When you finish flushing, it's gonna fill up with about a pint of water to help you conserve for the next time. If you've opted for the model with the sprayer, you can take it off of its mount and it'll help you clean up any extra messes.
Now the sprayer doesn't work when you're not pressing on the flush mechanism, so you don't have to worry about any accidents. But when you are ready to use it, you can go ahead and press that on the flush lever and take care of whatever you need to. Once you're all done we can just store it right back into its mounting position. And since this is a gravity-flush design, unlike the toilets home, it doesn't need all that extra water to get everything down. See it opens up, and everything's just gonna drop right down into the tank. It's designed to be a direct replacement for your existing toilet, but it's going to be much nicer than your existing one 'cause most of the ones that come with your RVs and your campers are going to be a cheaper, smaller model. It's not gonna be quite as comfortable to sit on. A lot of times they're made out of mostly plastic material. With our Dometic here, it does have a plastic base down here at the bottom, but it has a nice porcelain bowl, which is gonna look nicer. It's gonna be easier to clean up. And our seat here is made of wood. So on those cold winter mornings we don't have to worry about any surprises. And since it has a porcelain bowl, it's also going to be resistant against stains. And if you opt for the model with a sprayer you can keep it shiny just like this all year round. So if you call your RV home, this is the toilet you'll need when nature calls. We'll begin our installation by removing our old toilet. The removal procedure may be slightly different, if you have a different toilet, but they're all fairly similar. Before we start disconnecting anything, you do wanna make sure that you've got your water supply turned off. The location of your valves is gonna vary, just make sure you've got that all turned off. And then what I'd like to do afterwards is just flush and confirm that we've got nothing coming out. So we're nice and nice and dry right now. There's gonna be a hose on the back that we're gonna disconnect. This is our hose right here that we're gonna be disconnecting, it just unthreads. You could put a rag down if you want, to catch any little bit of dribbles, but as long as you've got it drained, there's not really gonna be any bulk water coming out of here. And that just disconnects right there. Now we can start removing the toilet from its base. There's little caps over the screws. You can just take your screwdriver, pair of pliers, your fingernails, whatever you need to just pop this little cap up. It'll be a little bit easier depending on how much room you've got inside. So I'm gonna remove that and then we can remove the nut. We're gonna do the same thing on the other side. Now that we've got both the nuts off of there, we can just lift the toilet out of here. Now we'll just set this outside. We can go ahead and replace the studs with the ones that it comes with. Sometimes you can just slide 'em right out of there. Sometimes it's a little tight and you may need to loosen up some hardware to slide it out. Slide our new ones in. You can snug it back down. We'll do the same thing over here on the other side. We don't wanna cause any damage to our seal, so we're not gonna take any of these screws or our seal completely off, we're just loosening the hardware up just enough to be able to slide those out. Now before we install our new toilet, we wanna make sure we've got the seal on it. It should come shipped with the seal on it, but you know how shipping can go. The seal might have fallen off. If it did, you wanna make sure you put it back on. It does stay on the seal, which side is which. So you just wanna read that to make sure you've got it on correctly. We can then set the toilet in place onto our studs. And now that we've got it sat on there we can start tightening it down with our hardware. One of the things you're gonna notice is that the toilet's not quite all the way flush with the floor and that's because of that seal. And as we tighten these down we're gonna compress that seal, bringing it flush to the floor. When you're doing this, you wanna make sure you tighten down your hardware evenly, going back and forth to ensure you don't over tighten it on one side and that we've got a nice, good, even seal. So normally what I like to do, I put a washer on first, followed by our nut. Those come included with your kit. And I like to get 'em as tight as I can by hand first, 'cause I'm not gonna be strong enough with just my little fingers here to damage the toilet. So now I'm just gonna tighten these down with my 7/16th's wrench. Again, making sure to go back and forth and tighten them down evenly. I like to use the stud kind of as a gauge. You can count the number of threads to try to make it even on each side. Another way you can check yourself is to just check by the tightness. So we're just gonna gently push on the front of the toilet here and you can see that we've got a rock, and we're not even all the way on the ground where we gotta get. So we're gonna just snug it down just a little bit more to ensure that we're setting the nice and even on the ground. Now that we've got the toilet down nice and even and we give a little push on it, doesn't rock back and forth anymore. So we can install our caps on top that come included with our toilet. Those just push on. We can now reach round back and we're gonna reinstall our water line. Just wanna line that up and then tighten it down. At this point now, depending on the toilet you've got, your installation could be complete. If you've got the models that have the sprayer, follow along with us here, and we're gonna get the a sprayer mounted up on the wall. But if you don't have a model with a sprayer, your installation's complete, you're ready to hook up back to your water and test everything out. Ours does have a sprayer. It sits in the mount just like this. The hole in the top's gonna be larger than the hole in the bottom, for it to sit down in. And it does come with hardware to get the bracket mounted to the wall. We're gonna be putting ours back here behind the toilet where it's out of the way. This spot in the bathroom's a little close to the wall so you don't want it in a spot where you're actually gonna knock it and bump it off the wall. So we first wanna find our position. We're gonna be putting ours right here. We're then gonna go ahead and drill out for the upper hole, 'cause we know where we want it, so we'll just kind get an idea. We'll just get that upper hole going. I'm using a size that's very similar to our hardware that comes with it. I just wanna match that up. This is a 15/64th's. So we can just poke this in place. We want it to be close to flush with the wall, but we don't wanna push it in the wall. If it's a little bit sticking out, that's okay we can adjust that later. Now that I have the one in there, I'm gonna hold this one up to where it's lined up and I wanna get it nice and level. And then I'm just gonna use the screw that it comes with to just push it through the hole, just to dimple the wall. A little spot right there so I know where to drill for the second hole. And once again, we're going to push our piece in there and we're now ready to install the mount. Then we can just put our screws in and tighten them down. And then we'll get the other one snugged down. And we don't wanna over tighten these, just until it snug. Now we've got it mounted up. Our hose will just sit right in there and it's ready when we need it. And we can have it in a spot where we can easily open the lid and it's not gonna contact it. It'll be out of our way whenever we're doing our business in here, whenever we need to clean up a mess, we can easily do so. Now we've got it fully mounted up. All we need to do now is hook up to a water supply and we're gonna test everything out. And that completes our look at Dometic's line of Full-Timer RV toilets..
Customer Satisfaction Score:
91% were satisfied with this product
9% of customers were not satisfied
Ratings & Reviews

excellent product , totally satisfied
Exactly as described. Exactly what I wa nted
I replaced a 4 year old Dometic 320 that had an internal failure leasing us to believe that the toilet ring was bad. Both toilets are called elongated but the 510 is not really. That is why I didn't give it a 5 rating. It does look a lot more repairable and that is important. The plastic cover that snaps on the flush pedal is cracked out of the box, shown it pictures. Note, I do not have the bottom cover installed as I want to use the toilet multiple times and check for leaks prior to installing the cover.
etrailer is always good and they deserve their usual 5 star rating.
Ordering was a breeze and the tracking information providid made tracking easy. The package arrived a day early (only 2 days to receive). When i opened package I was impressed with the care taken to package toilet with all the extra support inside box. Installation was easy and all parts were there for install except I had to get a length of hose and a splice fitting with clamps for water line. That is to be expected though. My old toilet flush was on right side and not as much hose was needed. The only reason I did not give five stars is that the toilet seat was cracked where it screws to lid. I am replacing it anyway because I prefer a no slam lid. Other than that first rate service and product. Thank you!!
This is a great toilet works perfectly. Very easy install in my case, I removed a Dometic model 210 and installed the 510.
Was thinking about the 320 that also has great reviews until I found out if the foot pedal breaks you need to replace the the toilet. Dometic doesn’t make any replacement pedal parts.
I ordered a new toilet for my camper and it showed up damaged from shipping.
They had another one in the mail that day. It showed up damaged as well. Jim had another one shipped right out and it showed up perfect. They stand behind their products and their service is outstanding! etrailer has all my business and would recommend them to any one.
So here's the story, I ordered this commode from the trailer paid for express shipping and I received it in 2 days. When I open the box to install it had a crack in the ceramic Bowl. I called the trailer at a 5:00 p.m. in a panic as we were leaving in 3 days for our trip of 5 weeks. They immediately responded and sent me a replacement, overnight at their expense. Happy ending to this Saga is I received the replacement with 36 hours to spare. Everyone I talk to on the phone was more than accommodating and concerned that I was happy. I am!.
Excellent toilet and sprayer. Works great. Easy to install. Only problem is sprayer is over priced. It is not RV specific. It is the same one you find in your kitchen. You can pick one up from any hardware store for half the price. Just being honest.
etrailer offered this specific toilet and had it in stock. It promptly shipped and was a comprehensive kit including flush valve, vacuum breaker, seat, flange bolts, and floor seal. However there was no sprayer wand or connection for one. I had to salvage parts from my old toilet and swap them out to have the sprayer. Critical to the install was the floor flange. In pursuit of trying to acquire a replacement floor seal for my old toilet I could never get the one that was made specifically for the model 510. The correct seal was in the install kit and I have a dry bathroom floor for the first time in months. And now that I know what I am looking for in a floor seal I see that I can buy (the correct) seal from etrailer.
Really looking for one year follow up. Toilet broke other day. Had to pay for another to get the warranty reimbursement. Plus I have to pay the shipping back on the toilet u sold me. Hmm great deal. Hope I get another 2 year warranty. No faith in this product.
installed easily, its kinda weird that the foot pedal is on the oppossite side as to what I'm used to and at 45psi the water comes out along the rim about a third of the way around so you kinda have to use the sprayer every time and they have installed all the foot pedal valve assembly on the outside of the pedestal so if you ever need to change it out the toilet can stay bolted to the floor it has a nice chrome sprayer that works well
I love it. Perfect size
Just put it in today and it fit perfect ly
Such a dissapointment. For the arm and leg it cost to purchase, we expected better. A few months after purchase, the seal failed. We were told to contact Dometic, which we did and they sent a new seal. So here we are again, a few months down the road and the seal has again failed!! My husband works long hard hours and changing the seal every few months is NOT what we planned for. The “Full Timer” must stand for full time maintenance. We do live in our motorhome and I am a stay at home retired wife. The toilet looks nice, has a large bowl which, by the way, needs more frequent cleaning. The bowl is flatter at the bottom so water does not rinse as well as our old toilet which had steeper sides allowing more water to flow down the sides, and in mho, makes for a cleaner rinse. If this makes sense. So would not purchase again and will most likely sell the RV for a larger more roomy RV. Which means by by Dmetic.
If you have ever had problems with the ball valve on MOST RV toilets you know many times they are not fixable. Well the Dometic 510 does have a replaceable ball valve. We've had this toilet for over 1 year and it is a great toilet. Here are some things you might want to know:
1. It mounts a little further from the wall than most RV toilets. So you may need to modify the plumbing slightly.
2. The Dometic 510 flush pedal is on the left side which is different.
3. To fill the bowl with water, you lift the pedal rather than just step on it lightly.
4. The lid and seat are heavy.
5. The toilet comes with a very nice trim piece to hide all the hoses and valve.
6. They call it elongated seat but it's not.
I think this is a must have toilet for 1 simple reason: You can get repair parts for everything on this toilet.
Toilet works great in our motorhome.
Excellent service and speedy delivery! I delt with Amy J. and she was more than Awesome!! I received exactly what I ordered in perfect condition.
Thanks Amy J.
This Toilet Stinks!
We are full-timers and wanted the best toilet we could find.
2x (TWICE) the "hose clamp" that holds the bowl to the plastic base has loosened up and the toilet has leaked its contents all over the floor (and down into the "basement"). Also, I have had to overhaul the seal, spring, ball valve already. Short story long, I expected so much more from a VERY pricey crapper!
I am a little disappointed with the 510 it did not arrive with the supposed spray hose that was supposed to be included. It seems not to different than the much cheaper 320. It is supposed to be more like a regular residential toilet but it falls short in many ways. I had to buy my own spray hose and tee connectors to complete my installation. I could not wait to talk with you about getting a replacement and had to do what was needed at the time.
I just feel like I have been taken. This was not what I expected. I am usually not one to make a complaint. I usually chalk it up to a bad purchase and forget about it .
But it seems you wanted my comments so this is why I have responded.
Very much like a home toilet: solid with a deep bowl. The two-way flush pedal is especially handy for filling the bowl when adding Happy Campers tank treatment. The bowl-encircling water inlet aids cleaning the bowl.
fast service well made
As advertised! Very happy.
Fast shipping
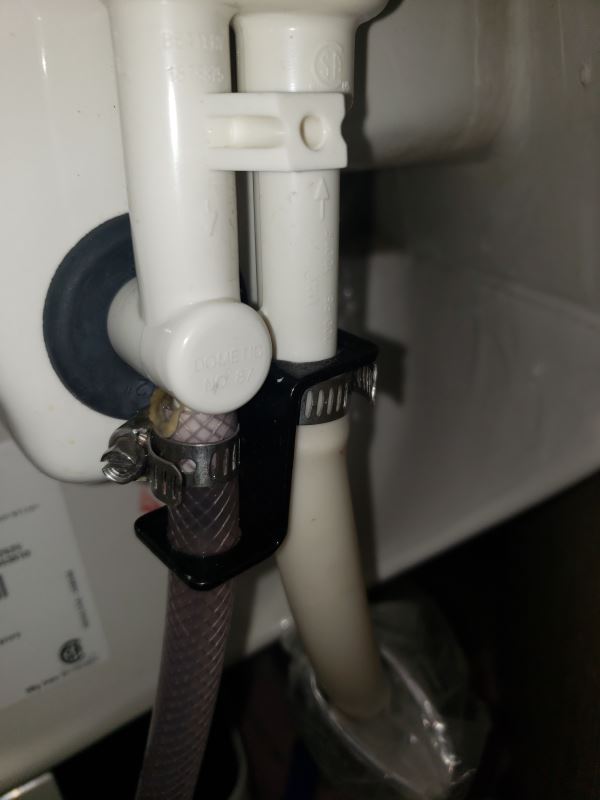
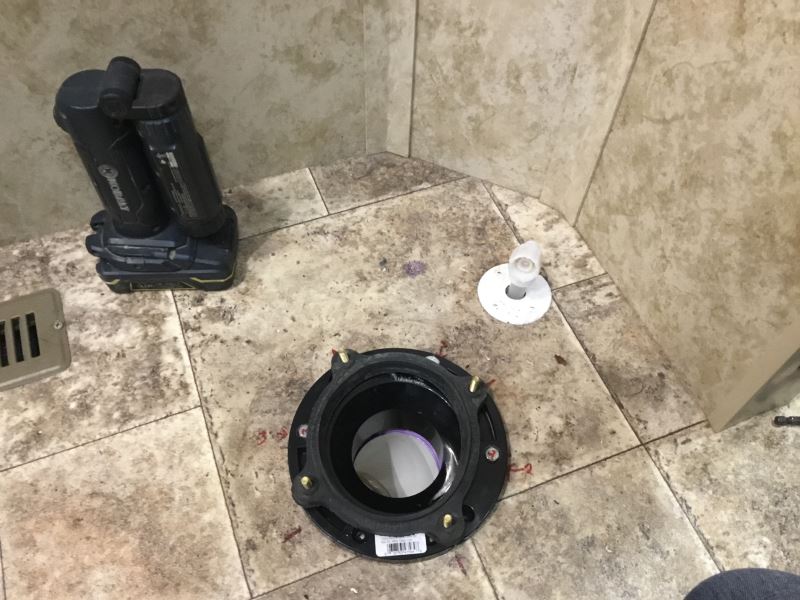
Putting in the toilet was not easy. The water closet flange did not match up with the new Dometic toilet. So I had to cut the pipe out and reposition the flange for the new toilet. Next you may need a extension hose. Well when it came to putting it on the water line knob rubbed the exit water line on the toilet so I more or less had to put it in backwards. After only a few days of use it is good,
Info for this part was:
At etrailer we provide the best information available about the products we sell. We take the quality of our information seriously so that you can get the right part the first time. Let us know if anything is missing or if you have any questions.



















Thank you! Your comment has been submitted successfully. You should be able to view your question/comment here within a few days.
Error submitting comment. Please try again momentarily.