
Most Popular Roof Bike Racks for Chevrolet Malibu
change vehicle# 1
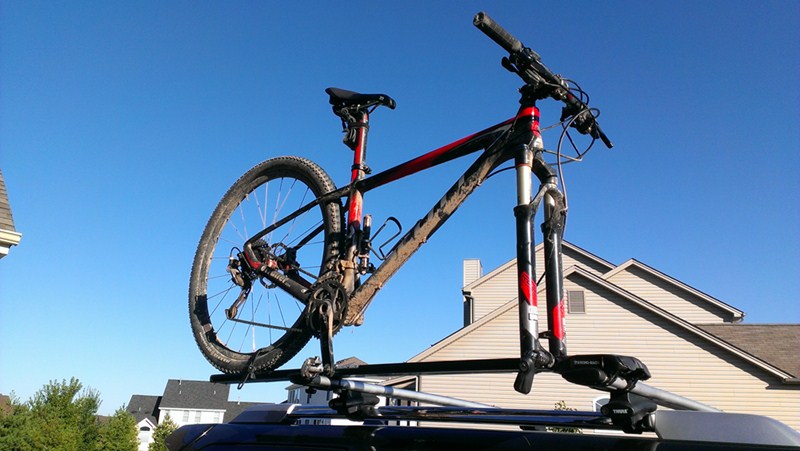
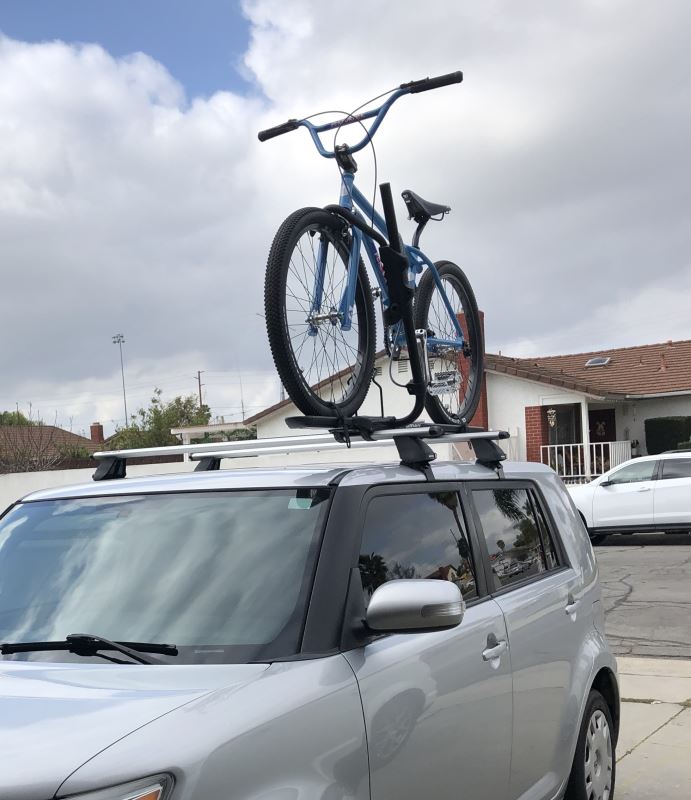
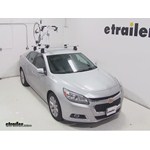
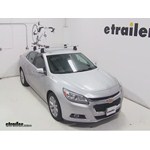
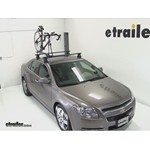
Rhino-Rack MountainTrail Rooftop Bike Carrier - Fork Mount

- view all Roof Bike Racks
- Fork Mount
- 9mm Fork
- Bike and Rack Lock
- Aero Bars
- Factory Bars
- Round Bars
- Square Bars
- Disc Brake Compatible
- Clamp On - Quick
- Black
- Rhino Rack
More Information >

by: Jordan09/05/2016
Love this bike rack! It fits perfectly with my Rhino Rack Cross Bars. I'm very impressed by the lack of wind noise. With the bike mounted on the rack, you can barely hear the wind noise at 60mph. With the sunroof open you can hear wind noise, but as long as the window is closed, you can only slightly hear anything if the radio is off and you are trying to hear it. Amazing! Can't wait to get more use out of it in the future!


View More
View Less
by: Kevin B - etrailer.com employee10/04/2013
I have used a lot of bike racks and this is the one I keep on my 4Runner. It just works. It is the easiest to take on and off, which is important for me because between me, my wife and kids I have 4 bikes that need to be rearranged often. We also use a roof box, kayak racks and a SUP rack so I am always taking things off and on. The front straps loop over the bar and tightens with an allen key, the back is a couple wing nuts. Since there are 2 straps up front the rack is very stable when a bike is on it. I like that it comes with locks and the skewer is super easy to adjust, clamp and unclamp. If it is cold, dark and damp at 6am and I am tired, late for a ride and still waking up this is the rack I go for because it is easy. There are a couple things to be aware of though... You will need to put a drop of oil in the skewer every 6 months or so to keep it opening and closing smoothly. Otherwise is can stick. Sometimes if the skewer is turned just right there will be a bit of whistle because of a hole in the clamping mechanism. If I turn it to a different angle the whistle stops. And after going through the car wash with the rack on my roof a dozen times or so the black paint began to have a bit of a rainbow sheen. Not sure if it is the bike rack or the soap my car wash uses.


View More
View Less
# 2
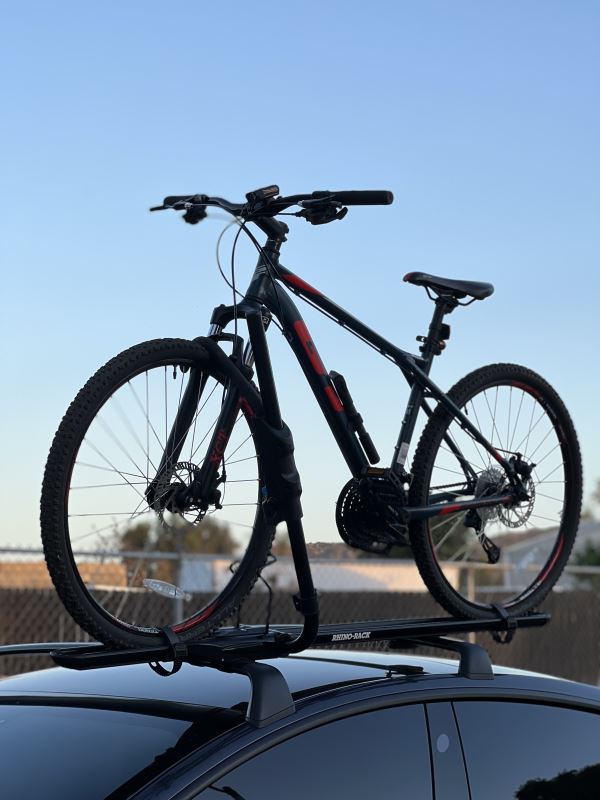
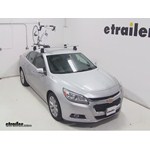
Rhino-Rack Hybrid Roof Bike Rack - Wheel Mount - Clamp On - Aluminum

- view all Roof Bike Racks
- Wheel Mount
- 15mm Fork
- 15mm Thru-Axle
- 20mm Thru-Axle
- 5mm Fork
- 9mm Fork
- 9mm Thru-Axle
- Bike and Rack Lock
- Aero Bars
- Factory Bars
- Round Bars
- Square Bars
- Disc Brake Compatible
- Clamp On - Standard
- Black
- Rhino Rack
More Information >
by: Marcovargas16_10/14/2023
Great bike carrier! Etrailer always provides me with high quality products with fast deliveries.


View More
View Less
by: Antoni Q.02/23/2020
I love the racks, instructions were understandable, one of my end caps came in bad, it can wiggle off after locking but I emailed etrailer and they arranged a replacement quick with rhino rack, pretty nice of them, comes with rhino rack decal and just have to decide where to put it, out my bike up and took it for a test drive and it was very nice, I love their package because it comes with locks and way cheaper than the competitors, very satisfied

View More
View Less
Bike Rack Videos
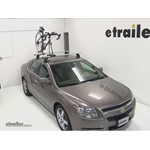
Rhino Rack Road-Warrior Roof Bike Racks Review - 2015 Chevrolet Malibu
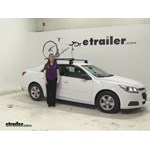
Today on our 2015 Chevrolet Malibu, we're doing a test fit of the Rhino-Rack Road Warrior Roof Top Bike Carrier. That part number is RBC036. Now we already have our bike on our rack. We're first going to show you how we strap that down. Back here in the back, we have our ratcheting strap that you're going to see on most of your roof mounted bike racks. To release that, we're just going to push down and then lift up.
Rhino Rack MountainTrail Roof Bike Racks Review - 2015 Chevrolet Malibu
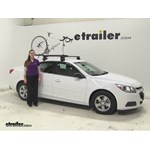
Today on our 2015 Chevrolet Malibu, we're doing a test fit of the Rhino Rack Mountain Trail rooftop bike carrier, part number RBC035. Now, we already have our bike on our rack. We're first go over how that's strapped down. Here in the back, we have a ratcheting strap that you'll see on most of your roof mounted bike racks. To release that, we're just going to push on the black button and lift that out of place. Up at the front, we have a skewer for our fork mounts.
Yakima FrontLoader Roof Bike Rack Review - 2014 Chevrolet Malibu
Today on our 2014 Chevrolet Malibu we're going to be test fitting the Yakima FrontLoader, a wheel-mount roof bike rack, with part number Y02103. With our Rhino-Rack 2500 series roof rack already on the Malibu, we'll begin our test fit by placing our bike rack directly onto the cross bars. At the front we'll bring the clamp around the bar. We should have two tabs on the front side of our load bar and one tab on the rear. We'll then tighten the black T-handle to secure it to our rack. With our front secure we can move to the rear. Here we're going to loosen the black T-handle, remove the T-bolt from the slot in the lower portion of our clamp, bring our clamp around our bar, reinsert the T-bolt into the lower portion of our clamp, and tighten down the black T-handle until it's secure. With the rack secure to our vehicle it's now time to load our bike. We'll begin by undoing our rear wheel strap and extending our front wheel cradle all the way out.
Yakima ForkLift Roof Mounted Bike Rack Review - 2014 Chevrolet Malibu

Today on our 2014 Chevrolet Malibu we're going to be test fitting the Yakima ForkLift, a fork mount roof bike rack with part number Y02098. With our Rhino Rack 2500 Series Roof Rack already installed on the Malibu, we'll begin our test fit by placing our bike rack directly onto our crossbars. Here at the front we're going to remove the skewer, slide back the black plastic cover, and loosen the t-handle located here. We'll then remove the t-bolt from the lower half of the clamp, bring the clamp around our load bar, reinsert the t-bolt, and tighten down the black t-handle until the front of the rack is secured to our bars. We'll then slide forward the black cover and replace our skewer. With our front secure we'll move to the rear and again we're going to loosen the black t-bolt, remove the t-bolt from the lower half of the clamp, bring the clamp around our bar, reinsert the t-bolt in the appropriate slot, and tighten it with the black t-handle. With our rack secured to our vehicle it's now time to load our bike. We'll first undo our rear wheel strap and make sure that our front skewer is loose and open.
Thule Sprint Fork Mount Bike Rack Review - 2014 Chevrolet Malibu
Today on our 2014 Chevrolet Malibu we're going to be test fitting the Thule Sprint, a fork mount roof bike rack with part number TH528. With our Thule Rapid Traverse roof rack system already installed on the Malibu, we'll begin our test fit by placing our bike rack directly onto our load bars. Here at the front we'll bring the black rubber coated metal strap around the underside of our load bar and fit it back into the head of the carrier. We can then turn the small black lever to tighten it in place. We found that initially it's better to have it straight to get the slack out and then turn it at a 90 degree angle to get some good torque on it. With the front secure we'll now move to the rear. Again, we'll bring the black rubber coated metal strap around the underside of our load bar, fit it back into the foot of the carrier, and then use the black lever to tighten it down. With our rack secured to our vehicle, it's now time to load our bike. We'll begin by undoing our rear wheel strap and loosening our front skewer by turning the knob on the front.
Swagman Upright Roof Mounted Bike Rack Review - 2014 Chevrolet Malibu

Today on our 2014 Chevrolet Malibu, were going to be test fitting the Swagman Upright Roof Bike Rack, part number S64720. With our Thule Rapid Reverse Roof Rack system already installed on the Malibu, well begin our test fit by placing our bike rack directly onto our load bars. Here at the front, well bring one of the U-bolts around the underside of our load bar, fit it through the head of the carrier, and hold it in place with two wing nut. Well take a second U-bolt, bring it around the underside of our load bar, fit it through the other side of the head of the carrier, and secure it in place with two wing nuts. Well then tighten down all four wing nuts to secure the rack to our front load bar. Here at the rear, well place our U-bolt down through the rack, being sure that it comes out on both sides of our load bar. Well then place the black rubber coated metal plate onto the U-bolt and hold it in place with two wing nuts. Well then tighten these down to secure the rear of our rack. With our rack secure, its now time to load up our bike. Well first undo our wheel straps and make sure that our frame clamp is open.
Swagman Fork Down Roof Bike Rack Review - 2014 Chevrolet Malibu
Today on our 2014 Chevrolet Malibu, we're going to be test fitting the swagman fork mount, a fork mount roof bike rack with part number S64710. With our Tully Rapid Traverse Roof Rack system already installed on our Malibu we're going to begin our test fit by placing our bike rack directly onto our load bars. Here at the front, we'll bring one of the U-bolts around the underside of our load bar, fit it through the head of our carrier, and hold it in place using two of the wingnuts. We're going to take a second U-bolt, again fit it around the underside of our load bar through the head of our carrier, and secure it as well using the two wingnuts. We'll now tighten all four of our wingnuts down to secure the head of our carrier to our rack. We'll now move to the rear. Here we're going to place the U-bolt through the rack, being sure that it comes out on both sides of our load bar. We'll then place on the black metal plate and hold it in place using two wingnuts.
Kuat TRIO Roof Bike Rack Review - 2014 Chevrolet Malibu
Today on our 2014 Chevrolet Malibu were going to be test fitting the Kuat Trio, a fork mount roof bike rack with part number RU01. With our Thule Rapid Traverse roof rack system already installed on the Malibu well begin our test fit by placing our bike rack directly onto our load bars. Here at the front well bring the black rubber coated metal U bolts around the underside of our load bar, put it through the head of the carrier and hold it in place with the two cylinder nuts. Well take the second black rubber coated U bolt, and again bring it around the underside of our load bar, through the head of our carrier and place two cylinder nuts on it. We can then take our provided Allen tool and tighten how all four of these cylinder nuts down, firmly securing our rack to our front load bar. At the rear were going to completely remove one of the wing nuts, slide our clamp into position to where we have one of the bolts coming down on both sides of our load bar, bring the metal plate up, fit the bolt through it and replace our wing nut.
RockyMounts TieRod Roof Bike Rack Review - 2012 Chevrolet Malibu
Alright, today in this 2012 Chevrolet Malibu, we're going to test fit the TieRod Bicycle Rack from RockyMounts, product number RKY1014. This bike rack will fit a variety of low bars. In this case, we'll be using elliptical-shaped bars. This will also work with round and square bars. So they're easy-to-install racks so we'll get right to it. We'll take the front end of the rack and slide the straps underneath the crossbar until it catches on the other side, and then we'll install a clamp on the back crossbar.
Thule Domestique Roof Bike Rack Review - 2012 Chevrolet Malibu
Alright, today in this 2012 Chevrolet Malibu, we're going to do a test fit of the Thule Domestique Bicycle Rack, product number TH513. A couple of quick notes about the bicycle rack is that will fit square bars, fit round bars and electrical bars as well. In this case on our car, we already have a Thule Roof Rack installed with the square bars. We'll go ahead and start off with our bike rack assembled according to instructions and we're going to put it into place. We'll take the front clamp, put around the front crossbar, and then we'll slide the second clamp over the second crossbar, ok. And then we'll go ahead and get the hardware started to clamp it to the back as well as to the front.
Thule Domestique Roof Bike Rack Review - 2011 Chevrolet Malibu

Today on our 2011 Chevrolet Malibu, we'll be test fitting the Thule Domestique Fork Mounted Bike Carrier, part number TH513. We can take our carrier and set it up on top of our vehicle. We'll fit the front clamp around the bar and use an Allen key to tighten the bolt at the rear. We can then also snug up the front tube bolts as necessary. Now, we can reinstall our skewer and prepare to mount our bike. We want to make sure that the skewer is open and the wheel strap at the back of the carrier is also open.
RockyMounts TieRod Roof Bike Rack Review - 2011 Chevrolet Malibu

Today on our 2011 Chevrolet Malibu, we'll be test fitting the RockyMounts TieRod Roof Mounted Bike Carrier, part number RKY1014. To mount our carrier to the vehicle, we'll set it up on top of our load bars. We'll fit the rubber coated steel straps at the front around the front bar and fit them back into the head. We'll use an Allen Key to tighten the bolt and pull the straps snugger on the bar. We can then reinstall our front cover. We also want to make sure that our skewer is unlocked and open.


What our customers are saying:
"Found your site on google, after a quick search I found the bike rack I wanted at a great price. Placed my order, and just under a hour 3 emails,1, order recieved,2, order in stock,3, order shipped. Never have I had such luck with a online shop. Thank you"