
# 1
Yakima FrontLoader Wheel Mount Bike Carrier - Roof Mount
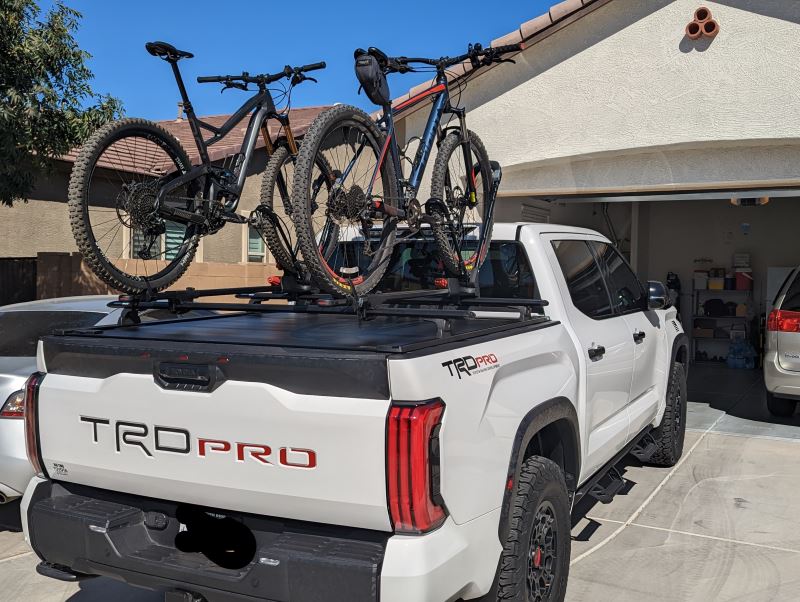
Overall I am happy with these bike carriers. They mount to the racks over the bed of my Tundra TRD Pro. Installation is simple. I think they could be just a bit sturdier because there is just a bit of wobbling when driving on bumpy roads but I'm not too worried about them coming dislodged. Take note that although they come with a cable lock to attach the bike to the carrier, the key is sold separately.
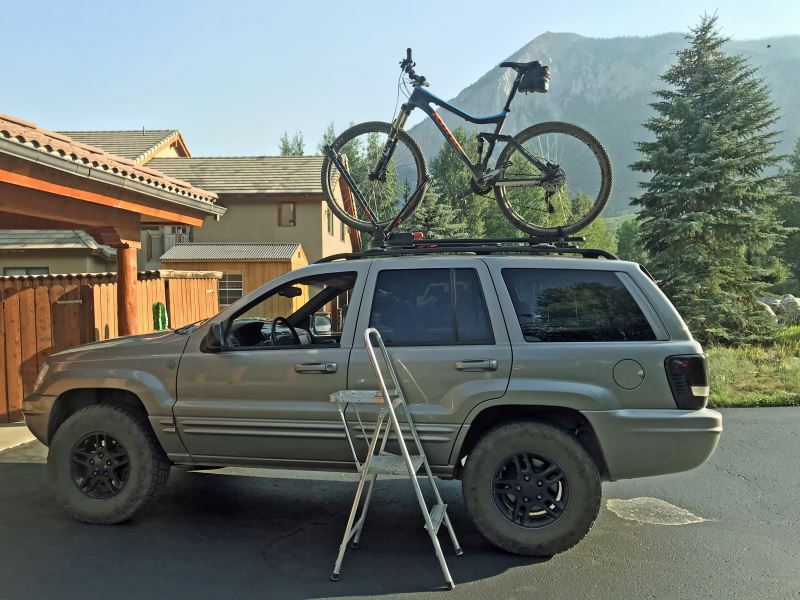
Very good product. It holds the bike securely on the roof without contacting the frame. It is easy to adjust from my road bike to my 29er mountain bike. Our drives are all relatively short, so I like that I do not need to remove the front wheel to lock in the bike. It's also nice that the SKS locking system allows me to use the same key for this rack that I use for my Yakima roof box and hitch rack. This is my first roof rack and I chose this route for a couple reasons. Some of the roads we travel to get to our trail heads are a bit rough and with a roof rack I don't have to worry about bottoming out a hitch rack hanging off the back of the vehicle. Also, it takes up less room in the garage. Our vehicle is a 2000 Jeep Grand Cherokee with an additional 4 inches of ground clearance. That makes it a bit of a reach for my 5'4" wife, so we take our two-step along to help her. This is my third time purchasing from etrailer, and each experience has been very good. They are a very customer service oriented company. I really appreciate all the additional information they provide on their products, especially all the videos they produce to aid in reviews, assembly, and use.
Thule Sprint Roof Bike Racks Review - 2005 Mini Cooper

Today on our 2005 Mini Cooper, we're going to be test fitting the Thule Sprint, a fork mount roof bike rack, part number TH528. With our Thule Rapid Traverse Roof Rack system already installed on our Cooper, we'll begin our test fit by placing the bike rack directly onto our load bars. As we do this we want to bring our black rubber coated metal straps around the underside of our load bars and this will position our foot packs directly on top of our load bars. Here at the front, we're going to fit the strap into the head of the carrier and then tighten down the black lever to secure it. We'll move to the rear and repeat that same process. With both of our clamps secure, we're now ready to load up our bike. We'll begin by undoing our rear wheel strap and making sure that our front skewer is open. We'll now grab our bike, place it onto the bike rack, we'll guide our front forks down onto our front skewer, we'll secure it here first by tightening that black and grey knob back down.
Swagman Upright Roof Bike Racks Review - 2005 Mini Cooper

Today on our 2005 Mini Cooper we're going to be test fitting the Swagman Upright roof bike rack, part number S64720. With our Thule Rapid Traverse roof rack system already installed on our Cooper we'll begin our test fit by placing the bike rack directly onto our load bars. Here at the front we're going to bring two of the silver u-bolts around the underside of our load bar, fit them through the head of our carrier, and thread two wing nuts onto each one to hold them in place. We'll then tighten down all four of our wing nuts to secure the front of our rack to our vehicle. With the front secured we'll now move to the rear. Here we'll place one of the silver u-bolts down through the rack. We want to make sure that the threaded portion comes out on both sides of our load bar.
Thule Big Mouth Roof Bike Rack Review - 2005 Mini Cooper

Today on our 2005 Mini Cooper, we're going to be testing the Thule Big Mouth, a frame clamp roof bike rack with part number TH599XTR. With our Thule Traverse Roof Rack System already installed on the Cooper, we'll begin our test fit by placing our bike rack directly onto our load bars. Here at the front, we'll remove the two black T bolts from the lower portions of the clamp, bring our clamps around the underside of our load bar, reinsert the T bolts, then tighten down both black wing nuts to secure these clamps around our bars. With the front secure, we can now move to the rear here. We'll loosen both wing nuts and remove one completely. Then we'll position our clamp over our load bar so that we have one threaded bolt coming down on both sides. We'll then replace the lower portion of our clamp, thread on our wing nut, and tighten both of them down to secure it. With our rack secure, we're now ready to load up our bike.
Swagman Fork Down Roof Bike Rack Review - 2005 Mini Cooper

Rate your transcript OrderClientKevin BrossRef #20668Order #TC0760601794 Today on our 2005 Mini Cooper were going to be test fitting the Swagman Fork Down, a fork mount roof bike rack with Part Number S64710. With our Thule Rack and Diverse Roof Rack system already on the vehicle we'll begin our test fit by placing our bike rack directly onto our load bars. Here at the front we'll bring two of the silver u-bolts around the underside of our load bar, fit them through the head of the carrier, and thread two wing nuts onto each one to hold them in place. We'll then tighten down all four of our wing nuts to secure the front of the rack to our front load bar.We can now move to the rear. This time we're going to place the u-bolt down through the rack being sure that one of the threaded portions comes out on both sides of our load bar. We'll then take the flat black metal portion, place it up unto to the u-bolt and hold it in place by threading on two the wing nuts. At this point we'll tighten down both of our wing nuts.
Kuat TRIO Roof Bike Racks Review - 2005 Mini Cooper

Rate your transcript OrderClientKevin BrossRef #20666Order #TC0751270775 Today on our 2005 Mini Cooper, we are going to be test fitting the Kuat Trio, a fork mount roof bike rack with part number RU01. With our Thule rapid traverse roof rack system already installed on our Mini, we'll begin our test fit by placing our bike rack directly onto our load bars. Here at the front we are going to bring the two black rubber coated metal U bolts around the underside of our load bar, fit them up to the head of the carrier and thread two cylinder knots onto each one. We'll then use the provided Allen tool and tighten of four of these down. That will secure our front. We'll now move to the rear, here we are going to loosen both wing nuts and remove one completely. We'll position our clamps we have one bolt in front of our load bar and one bolt behind it. We'll then place the lower portion of our clamp back on to the bolt that we separated it form and thread on our wing nut.


What our customers are saying:
"Found your site on google, after a quick search I found the bike rack I wanted at a great price. Placed my order, and just under a hour 3 emails,1, order recieved,2, order in stock,3, order shipped. Never have I had such luck with a online shop. Thank you"