
Summer Starts Here - Save up to 70%
To see if this custom-fit item will work for you please tell us what vehicle you'll use it with.
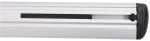
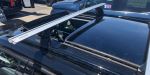
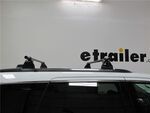
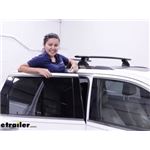
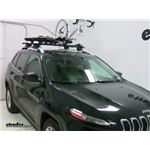
Extremely quiet, aerodynamic crossbars attach to Yakima towers to create a stylish roof rack for your vehicle. Rubber strips in T-slots push down to load carriers or accessories - no need to trim. Full-length aluminum bars maximize carrying capacity.
Features:
Yakima 50" JetStream SM - Silver:Videos are provided as a guide only. Refer to manufacturer installation instructions and specs for complete information.
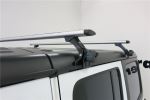
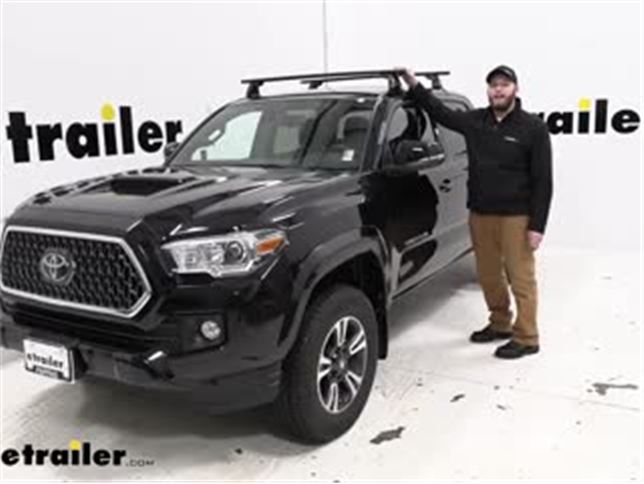
John: Hey guys, John here from etrailer.com, and today we're installing the Yakima JetStream Crossbar System on our 2019 Toyota Tacoma. This is a great way to add more carrying capacity to our vehicle if our truck bed is all loaded up, or maybe we don't want to add a cargo carrier to the hitch and extend the length of our vehicle. It is a great option for us.The JetStream bars come in both black or silver. So as you can see our Tacoma here is black, so the black finish looks really good. If you have a different color, silver might be better for you. We have that as well.
Our Tacoma here has a bare roof, and so we do use the clamping system for the installation. This would be the same for any other roof rack out there. I will say that the BaseLine towers, they have a little bit more of an involved installation. It's not really difficult, just a little more time consuming, but I do feel like it has a much better fit compared to other roof racks out there.One of the best features of this roof rack of the crossbars here is this rubber strip. A lot of other crossbar systems, you have to cut that to fit your accessories.
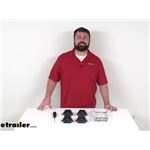
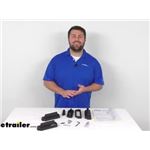
With this system, we simply remove the end cap. Then we press down the rubber strip, and our accessories slide on here so we don't have to cut any rubber strips, and it still helps cut down on that wind noise and drag.This roof rack has a 165 pound weight capacity, which should be plenty for any accessories you'll be carrying, and the BaseLine towers here, you're able to put lock cores in to match other Yakima accessories, so you're only using one key for everything. The JetStream bars are aerodynamic. As you can see, it kind of tapers here at the end, which does also help cut down on wind noise and drag compared to other models, especially the older square or round crossbar systems. Now that we've gone over some of the features, let's go ahead and install this together.To begin our install, I recommend taking all the different components and laying them out on a clean working surface just so it's easier to keep yourself organized and to find the parts when you need them.
You'll have instructions included with your BaseClip kit and with the BaseLine towers. The BaseClip part, the instructions that come with that are going to be more measurements and where you're going to put them on the roof. The BaseLine towers are going to be a little more useful for the actual install.To start off, we will remove our cover here. There are two points at the top that you pinch and you rotate it down. Then we'll pull this gray tab out which reveals the head of this bolt here.
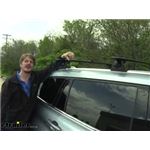
We'll place this plastic piece in the seat till it clicks, and then we're going to install the T bolt here. We'll place it in that cavity, flip it over, and we use our tool to tighten this down. You don't want to torque this down all the way because the next step is to flip our crossbar over and install the BaseLine foot onto the crossbar.If you flip your crossbar over, you can see here there is an arrow that points one direction. That means that's the direction that the vehicle is going to face, which will be important when we adjust our feet later. But for now, let's get our foot pack on the bottom of the crossbar here. We'll slide these two black tabs and our T bolt into the T slot here underneath. And on the bottom side of the crossbar there are measurements here. If you look in your instructions, it will tell you how far apart your feet need to be spaced, and you can use this to help get you pretty much right on point.Once you have your BaseLine feet where they need to be on the crossbar, the next step is to adjust the inner bolt here. The arrow that I pointed out earlier on the crossbar, you'll refer to that to find out which of these locations is going to be considered A, B, or C, and then look in your instructions for the BaseClip to make sure you have it adjusted correctly. Once we get this in the correct position, go ahead and tighten this down until you hear three clicks from our torque wrench here. There we go.Now with the first bolt tightened down, we will take the rubber foot pack and put it on the bottom of our leg. Be sure that this opening faces towards the outside of the vehicle, and press down. You'll hear the audible clicks. Then we make sure that the indicator is lined up with the correct tick and tighten this down until we hear our torque wrench click three times. The last step before putting our crossbar on top of our vehicle is to put the end cap on our crossbar, and be sure that this tab here sits on top of the T slot and not inside of the T slot. Repeat the same process for the other feet. Make sure you're consulting your instructions for each one, and then we'll place our crossbars on top of our roof.Yakima does include some stickers and a tape measure with your roof rack kit. So I do recommend taking the stickers to mark which feet are for the front of your vehicle and which are for the back, and then you can use this to help you figure out exactly where your towers need to be. You will install the front crossbar first. So with our front crossbar already installed and where it needs to be, you measure from the front of that crossbar back to the front of your rear crossbar and then adjust it to the specs. This will be the N4 00:06:12 measurement in your instructions.Now that we have our roof rack where it needs to sit, let's open up this gray cover and then we will install the clip here. There is a slot for right under here this bracket that we slide this under till you hear it click. And then we will go and start making a few adjustments with this bolt and this bolt. This bolt here swings the arm down, so we'll just that until it's making contact with the roof, and then this bolt here will bring the clip up into the door jamb. I would like to point out, make sure that the rubber piece here at the bottom of your foot pack, there's kind of a ridge on it. Make sure that's seated properly. The first time I put this on, wasn't making sure of that and it messed up the other side where it sits. Now, it is important not to torque this down yet like you we're hearing the clicks. Just get it snug, and then we'll go over to the other side and put that clip on as well.So we went over to the passenger side and got that clip all snugged up. Now let's go ahead and torque down both of these bolts we we're first messing with. Again, you'll twist it until you hear the three clicks. We'll torque that one first and then we'll torque the lower one. Place our gray cover here. Just take these hooks, put it here at the bottom, and rotate it into place.With all of our covers in place, that completes the installation of the Yakima JetStream Crossbar System on our 2019 Toyota Tacoma. Now we're ready to toss on any accessories that we need and we're ready to hit the road.
Average Customer Rating: 4.8 out of 5 stars (94 Customer Reviews)
Extremely quiet, aerodynamic crossbars attach to Yakima towers to create a stylish roof rack for your vehicle. Rubber strips in T-slots push down to load carriers or accessories - no need to trim. Full-length aluminum bars maximize carrying capacity.Fit our Subaru Forester perfectly. Install was a breeze. For the money I wish they came with the core locks.
Very nice quality towers. Very heavy duty! They have a cool "snap" on / off mechanism for quick removal and installation.

You guys provide great products and excellent customer service.
Thanks
These crossbars were easy to install and adjust. Be sure to get all the pieces you need. There is no mention of the Landing Pads necessary to use these.
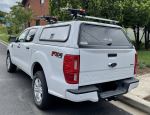
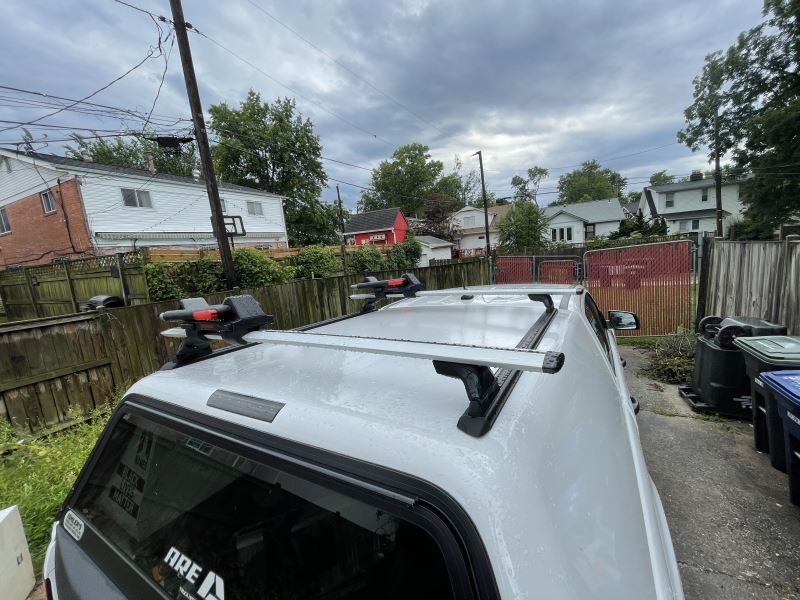
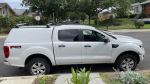
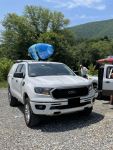
The 50” jetstream cross bars were perfect for my 2019 Ford Ranger with my ARE cap. They are paired with the Yakima Skyline towers and appropriate landing pads (protip: call etrailer when you order to ensure you have the correct setup;)
These cross bars are SILENT on my cap. Zero wind noise. My daughter and I installed them on a Friday (I do recommend watching etrailer’s installation video in addition to the paper instructions) and left for a 700 mile weekend road trip the next day to pick up a kayak, paddle with friends downstate then drop her off at summer camp.
Even with empty Yakima Jaylows on top, no wind noise. Even with a boat in the Jaylows, no wind noise.
These are the sweetest rack’s I’ve had. With the Skyline towers and landing pads, they are also easy to take off and put on. Click click done.
They look good, too;)
etrailer customer service for the win, too. When I originally ordered, I did not order all the items I needed for installation. When I realized this, I called and they got me squared away.
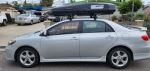
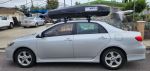
Yakima Baseline with Yakima CBX 18 Cargo Box fitted on my 2012 Toyota Corolla S Sedan 2012.
Instructions were clear and roof rack was easily installed.
Yakima SkyLine Towers are well-designed and well-executed. They easily fit into the Yakima Landing Pads and form a tight fit when closed. And they also fit nicely into the Yakima JetStream Crossbars when following the Yakima instruction manual and various YouTube videos. I did run into a snag at first where I found the rubber seal on one SkyLine Tower getting caught on the JetStream Crossbar track, but after that I was careful not to let that happen with the other towers.
I find the appearance of the Yakima SkyLine Towers to match their level of quality in materials and design.
Great company. Fast delivery.
Great product - very good quality. I liked the fact that I could keep the risers mounted on my car, but could remove the cross bars. It took me awhile to install - but I'm not very mechanically inclined.
I was seriously disappointed ?? the landing pads are not made for the Tacoma and sit on the roof with a gap that looks bad and will let water and trash into the bolt parts of the rack to roof juncture. For the amount of money it should be made correctly. I was also shocked to find that the landing pads upper parts were plastic… I have used Yakima for over 30 years and never expected a “cheap out “ like that! I was so disappointed I have never used the racks! They also only have provisions for one of the two bolts at each landing pad roof juncture. Disappointed ??!
I needed crossbars for my new 2018 Mazda CX5, which came with flush side rails. The Yakima crossbars, along with the RidgeLine Towers and the the vehicle specific kit worked great. The installation (10-15 min) is super easy. They look cool, and performed great (I strapped 160-lbs rooftop tent on them!). Removing them is also super easy (10 min tops). Highly recommend.
I chose the Yakima roof rack, because It spanned 50 inches, rather than the leading competitor's 47 inches, making it better for tying down 4 ft x 8 ft sheets of building material. It also seemed to be about half the price. It took me about 2 hours to put it all together and mount it on my car. The instructions were all visual and there was one little pic I didn't understand, but the equipment seemed to go together correctly anyway. Now that it's adjusted, it should be fairly easy to remove and replace next time. I did need to put on super tacky gloves to get the covers off. Although it seemed unnecessarily complicated, I would still choose this product again.
These really look so much better then the factory racks! Easy to install. Easy to order! Great product!
Good condition quality. Good and detailed instructions but aittle tedious install.
Worked well.
Arrived quickly; easy instal!
I’m using these towers in conjunction with the JetStream cross bars. Assembly and setup was easy, all the tools you need are provided, except perhaps a tape measure for mounting. Looks and feels solid and well made. This is my second set of Yakima towers and cross bars. I plan to use this setup for an old roof top hard shell case and for my mountain bike to get to the trail head.
After completing the installation I took it out for a spin to check for wind noise at highway speeds. No discernible noise, I’m very happy about that as I really don’t want to remove these when not needed. For reference these are mounted on a 2019 Subaru Forester Touring with factory raised rails. Plenty of clearance for attaching equipment and gear.
Side note: the gentleman that assisted me on the phone while ordering was very pleasant and helpful, got me the right products very quickly as I was in a time crunch. Two thumbs up!
Easy to install. No noticeable noise from the bars. Seem to be very sturdy.
As said in my other review these etrailer guys helped me where the Yakima customer service and sales people couldn't.
Excellent service!! I needed new crossbars as I purchased a new vehicle and l needed them in a hurry and I did receive them thank you.
Installation was a bit of work but they’re still in place and working well!
etrailer installation videos were very helpful in selecting the product and first installation, although in practice, minor adjustments to method were required. Now after more than a dozen set ups, mounting the crossbars takes 15 minutes, and taking them off, 10. The system is well made, and when mounted, precise, strong, and reliable. Expensive perhaps compared to alternatives, but well worth the money. Used to carry a 50# sailboard 40 miles to the beach on weekends. ('11 Honda Fit)
One minor shortcoming: rubber sheet glued to base clips where they touch the car body have torn and moved sideways 1/16", but expect will be easily replaced with readily available 1/16" sheet rubber (e.g., shower pan liner) when the time comes.
Used in rain at least once, (sustained 60mph), with no leaks.
Installation was relatively easy, instructions were clear and easy to follow. These are medium duty mounts, secured by a single bolt per pad, and suitable for kayaks and other moderate loads on-road, which is exacly what I'm using them for. The manual specifically calls out against using these for off-road applications.
I'd suggest that anm installer cleans all surfaces to be sealed (bolt holes and the area around them)thoroughly with isopropanol to guarantee a long-term leakproof bond for the silicone sealant. Vibration, tensile and shear stresses, thermal cycling and other environmental factors really stress sealants in these sorts of applications.
All in all, I'm satisfied with the mount design's suitability for its intended application. I just wish Yakima would manufacture their stuff anywhere other than mainland China.

Do you have a question about this Roof Rack?
Info for this part was:
At etrailer.com we provide the best information available about the products we sell. We take the quality of our information seriously so that you can get the right part the first time. Let us know if anything is missing or if you have any questions.


Thank you! Your comment has been submitted successfully. You should be able to view your question/comment here within a few days.
Error submitting comment. Please try again momentarily.