
Custom Fit Roof Rack Kit With DK283 | RB1250B | RRRLKHD
Item # RR35WP
Our Price: $565.89
Confirmed to Fit
2012 Kia Optima
Will this fit?
To see if this custom-fit item will work for you please tell us what vehicle you'll use it with.
This item qualifies for Free Shipping
In Stock


Need help with installation?
Locate installers near me- All Info
- Reviews (64)
- Q & A (0)
- Videos (2)
- Photos
Rhino Rack Roof Rack - RR35WP
- Crossbars
- Square Bars
- 2 Bars
- 50 Inch Bar Space
- Rhino Rack
- Black
- Overhang
These heavy-duty, aluminum crossbars work with Rhino-Rack legs to create a sturdy roof rack. The square bars include built-in C-channels for mounting Rhino-Rack heavy-duty, contractor-grade accessories.
Features:
Rhino-Rack HD Crossbars - Black - Qty 2:- Heavy-Duty square crossbars let you build a roof rack system from scratch
- Built-in C-channel on top of each bar is designed for mounting Rhino-Rack Heavy-Duty accessories and carriers
- Rubber strip in the channel helps to cushion load and provide slip resistance
- Built-in channel on bottom of each bar for mounting to Rhino-Rack Heavy-Duty roof rack legs
- Lightweight, extruded, structural-grade aluminum construction for strength and durability
- Black color
DK Fit Kit for Rhino-Rack 2500 Legs - Heavy Duty:
- Padded, metal clamps provide secure grip on your door jambs
- Bolt onto leg assemblies and tighten for secure fit
- Protect door jambs from scratches and abrasions
- Powder coated for durability and rust resistance
- Molded-rubber pads are custom designed to fit the contours of your roof
- Clip onto the bottoms of your roof rack legs
- Protect your roof from scratches and abrasions
Rhino-Rack 2500 Legs - Heavy Duty - Qty 4:
- Legs let you mount Rhino-Rack Heavy-Duty crossbars to your vehicle's naked roof or fixed mounting points
- Leg bases pivot to ensure the crossbars are level on your roof
- Locks secure system to your roof
- UV-stabilized, glass-reinforced nylon is durable and weather resistant
- Allen key included to ensure legs are securely mounted to your roof
DK283 Custom DK Fit Kit for Rhino-Rack 2500 Series Roof Rack Legs - Naked Roof
RB1250B Rhino-Rack Heavy Duty Roof Rack Crossbar - Black - 50" Long - Qty 1
RLKHD Rhino Rack 2500 Series Leg Kit for HD Cross Bars - Qty 4
Video of Custom Fit Roof Rack Kit With DK283 | RB1250B | RRRLKHD

Videos are provided as a guide only. Refer to manufacturer installation instructions and specs for complete information.


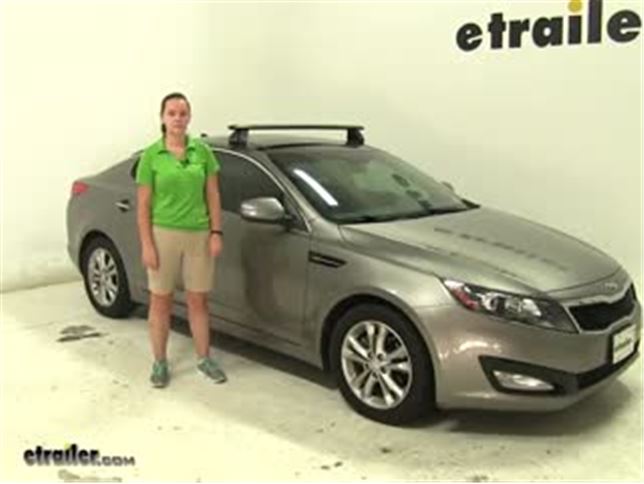
Video Transcript for Rhino Rack Roof Rack Review - 2013 Kia Optima
Today on our 2014 Kia Optima we're doing a test fit of the Rhino Rack Vortex Arrow Crossbars. The part number for our crossbars today is RRVA126B-2. For our foot pack we're using RRRLKVA, and for our fit kit for our Optima we're using DK283. We have all 3 pieces, our crossbar, foot pack, and then our fit kit here, the clamp and the rubber portion on the bottom. These are a great aerodynamic bar. They're available in silver as well with the same part number, just replace the B with S.
These are going to be aerodynamic, going to reduce wind noise and drag. The lock for the end cap here on the foot pack is included, and then we also have a lock on the end cap of the crossbar. We have our weather strip in there that's going to help prevent any dirt, debris, or liquid from getting inside of our crossbar. Those are also adjustable. You can cut them up and place in any kind of channel mounted accessories as well. We've got that front bar on.
We're going to show you how to put together our last foot pack and fit kit. We've got one of them already installed. Then we'll show you how to put our back bar on our vehicle. We've got our fit kit here, our foot pack, and then the crossbar. Everything you see on this table is included with the kit.
The only thing you will need to provide is a flat tape measure, or a regular tape measure will work as well. We're going to start off grabbing our foot pack. We're going to pull off this bottom piece. It just snaps right off. We're going to take our rubber piece, this one is a 506, M506 there, and all these instructions will be with your fit kit.
We're just going to make sure both of our arrows are facing the same way on the rubber portion and on the plastic portion. We're just going to squeeze that together so that it fits in completely. Just like so. We want to make sure that our arrows are facing out when we put them on our foot pack. They're facing towards the opening. Now we'll remove our bolt here on the back of our foot pack. We're going to take our clamp and we're going to just simply set it in place and start to tighten our bolt down just enough so that it holds our clamp in place. With that tightened down we'll take our nut here and we're going to slide it into our channel along the bottom. We'll loosen that bolt up just a bit. Slide that on and now we'll take our measurement. This is going to give us a even bar overhang on each side so that our bars are sitting evenly. This is going to be 16.5 centimeters which is there. Tighten down the bolt on the inside here to hold that in place. Double check my measurement. Perfect. Now I like to place on my end caps so I don't have to worry about it later. It just snaps right on into place. Then we can take our included key and we're just going to lock those up. These are actually great. It helps prevent theft and tampering of any channel mounted accessories because you can remove that weather strip on the top here, place it on, and not have to worry about that. We'll move this off to the side. We're going to make sure that the 506 pad that we put on our crossbar is towards the driver's side, or the left hand side of the vehicle. We'll just start by opening up our doors. Then we can grab our crossbar and place it on. We're just going to loosely place it on. Make sure that it's fitting evenly. Now we'll take our measurement. We're going to measure from the center of the front foot pack to the center of the back one. We're going to have 70 centimeters. Make sure we measure both sides. Perfect. Now we can start to tighten these down. You'll notice that whatever we do to one side we do to the other. That's to make sure that our crossbars are sitting evenly from one side to the other. We also want to make sure we tighten these down evenly. We don't want our foot pack to pull the crossbar towards one side or else it won't be completely secured down and we can cause damage to our crossbars. I like to start by tightening down my clamps so that they're sitting just up against our door jamb area. Now we'll start to tighten them down evenly. I do about 5 to 10 turns on each side, going back and forth, until they're completely secure. What's great about this crossbar spread is it's going to be perfect for any kind of Rhino Rack roof mounted accessories that you may have. Whether that's roof mounted bike racks, ski and snowboard carriers, cargo baskets, or anything. You'll notice it does get a little more difficult. You'll see now that the blue portion of our torque tool, the skinnier part, has completely straightened out. That's when we know we have enough torque behind our bolt so this side is completely tightened down. Just want to check the other side and make sure that one's torqued down. That one's coming out straight as well. We can close up our door and we'll grab our foot pack end caps. This is going to help prevent theft and tampering of the actual crossbars, the whole kit itself. We'll just place it on, lock that down, and remove the key. Now, with everything completely secured down you're ready to load up your gear and hit the road. That's going to be our completed look at the Rhino Rack Vortex Arrow Crossbars and how they fit on our 2014 Kia Optima.
Customer Reviews
Custom Fit Roof Rack Kit With DK283 | RB1250B | RRRLKHD - RR35WP
Average Customer Rating: 4.4 out of 5 stars (64 Customer Reviews)
These heavy-duty, aluminum crossbars work with Rhino-Rack legs to create a sturdy roof rack. The square bars include built-in C-channels for mounting Rhino-Rack heavy-duty, contractor-grade accessories.by: ashley10/22/2021
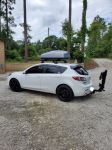
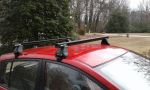
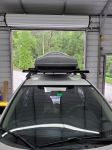
I got the roof rack mounted anyways. Better pics to come when it's all finished!


by: Michael05/31/2022
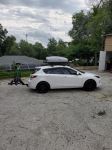
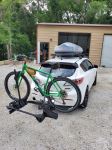
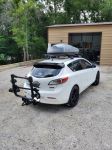
Thanks to etrailer, I am ready to do some serious summer exploring with my 2013 Mazda 3! Rhino Racks, Malone top box, and Kuat bike rack!


by: Craig10/13/2023
The rack fit well and was easy to install. Seems to be made well. The problem is the amount of road noise. I never even put the basket on. It was so loud, it roared. I repositioned it several times but the noise was way too much and I finally just removed it. I spent a lot of money for the rack and the basket and now they are in storage. I wish it would have worked out better because I thought it looked really good.
by: Grant Renne06/03/2020
love it, no problem and easy to install and take on and off, 47,000 miles on the highway and not a single issue. I even like the song the ladder hums to me driving down the interstate. This is my second Rhino and both have preformed to a high standard.


by: Bill Boedeker05/05/2015
Ordered a Rhino Rack for my 2014 GMC Sierra 2500HD Denali. Rack arrived in very good shape and all items were there. Installing at this time and see no problems ahead.
by: Eric 06/12/2023
Good quality and locks are included. The plastic lock covers are flimsy but they will keep an honest person honest.
by: Chad 09/16/2023
Things went well. Customer service was great.
by: Billy T09/09/2016
2016 Kia Optima
I purchased these with the Rhino-Rack for a 2012 Kia Optima SX. Thy work great and are easy to install and remove from vehicle. I use the Yakima Skybox 16 with it and have seen all elements of weather from snow, sleet, thru rain. All have held up great.
by: Kenneth08/07/2022


by: RO02/05/2017
Nissan Versa
This rack works perfectly on my Nissan Versa for carrying my two Perception Sound 9'6" kayaks. The Rhino-Racks look good to me. The kayaks can rest directly on the rubber pads on the rails, unlike the Yakama racks I had in the past that had bare pipe rails. Also, I expect I can buy parts to adapt this product to a different car without having to buy new towers. I am sorry there are not hooks or loops to attach bungees when carrying lumber. They are noisy in the wind, but less so when carrying the kayaks.


by: Mark08/14/2018
This is my second Rhino-Rack. They go on very easily and hold the bikes/kayaks and even an extension ladder very well....thanks for a great product
by: Tomcat04/14/2019
2006 Jeep Wrangler
This harness fit perfectly on my 2006 Jeep Wrangler. Very easy to install and plent of extra wire to run it correctly. Has worked flawlessly.
by: Brandon12/15/2017
Two items I received surprised me when I unpacked the box were the rails because they were not black like I saw in the picture, and the rubber insert that I am having a hard time sliding in the rail. Should this rubber insert have come already installed in the rail or is there a top on how to put in with ease?
by: John04/29/2023
Fast service and was everything I expec ted
by: Michael05/31/2022
Mazda
Thanks to Etrailer, I am ready to do some serious summer exploring with my 2013 Mazda 3! Rhino Racks, Malone top box, and Kuat bike rack!


by: Mike08/01/2017
Great product everything fit perfectly. With the heavy duty bars almost all the hardware for anything you put on the rack is too short


by: ashley10/22/2021
I got the roof rack mounted anyways. Better pics to come when it's all finished!


by: Glenn 06/11/2021
Needed the Rhino-Rack parts and they were delivered when promised. Great service.
by: Claire 02/05/2023
Thank you for the very speedy customer service! My roof rack is already here!
by: Bryce03/11/2022
Rock solid with over 120 pounds on them daily, 1 year later.
by: Cheuk04/27/2022
Found Package was broken after delivered, and missing 2 end cap
by: Andrei09/28/2018
2015 Nissan Rogue
This is an excellent product. It was the only product that would fit my truck. I was able to mount it by myself, it took me longer than I thought it would, but it helps if you watch first a video on line about how to put it together. The support staff is excellent if you miss any parts. I highly recommend it for the 2015 Nissan Rogue.
Andrei
by: Kenrick08/03/2020
National
I was in a roof rack jam. There was a national shortage of the rack I needed for my car and our summer vacation was a week away. I went to etrailer.com when I couldnt find the roof rack anywhere else on the web. Another website actually suggested that they might have what I needed.
I spoke to Ashley E on the phone to make sure that I was picking the right parts. Ashley was very helpful and knowledgable. She helped me find the right roof rack and made sure that I received it in record time. I am a customer for life!!!
by: Tom M.10/23/2014
These are as advertised. Once the leg kit is in place, super simple to install. Great finish, I believe will give great service. The only test to be determined is if they "Howl" in the wind. If so, I believe a second set of rubber fillers, installed in the underside will solve the problem. Another modification expense. Thanx.
by: Art 08/22/2022
Chevrolet Silverado
Perfect fit for the 2022 Chevy Silverad o.
25
2867
Show More Reviews
See what our Experts say about this Rhino Rack Roof Rack
- Roof Rack Recommendation for 2010 Toyota Corolla with Naked Roof for Snowboard CarrierFor your 2010 Toyota Corolla sedan with a naked roof we have the 2010 Toyota Corolla Roof Rack by Rhino Rack which includes part numbers # RB1250B-2, # RRRLKHD and # DK152 as a confirmed fit which would work great for a snowboard rack like the Rhino Rack # RR574 which can carry up to 4 pairs of skis or 2 boards.
view full answer... - Weight Capacity and Bike Rack Options For 2018 Nissan RogueIn that question, the customer may have been referring to the towing capacity of their vehicle being a maximum tongue weight of 110lbs. That information can be found in your owners manual. So even if Draw-Tite Max-Frame Trailer Hitch Receiver # 75902 has a 3,500 pound towing capacity and 350 pound tongue weight capacity, the towing capacity of the vehicle takes precedent. So the lowest of the two numbers is what you go with in regards to towing capacity. So please check the towing capacity...
view full answer... - Will Yakima SkyBox 21 Fit on Rhino-Rack Heavy-Duty Roof Rack CrossbarsThe max dimensions for a crossbar that the Yakima SkyBox 21 # Y07337 can accommodate is 3-1/2" x 1-11/16". The Rhino-Rack Heavy-Duty Roof Rack Crossbars # RB1250B-2 are a little too tall for that so if you want to stick with Rhino-Rack you need the Vortex crossbars like part # RRVA137B-2. If you let me know the year/make/model of your vehicle I can make a roof rack recommendation for you. The Rhino-Rack HD bars are much taller than typical crossbars so none of the Yakima boxes will work,...
view full answer... - Do Rhino-Rack Roof Rack Tracks Fit 2015 Chevy EquinoxThe Rhino-Rack RTC-Style Roof Rack Tracks # RTC95JW will fit your 2015 Chevy Equinox; they are a universal fit so you just need to mount the tracks to your roof and add the correct feet and crossbars. Here is what you will need for an entire rack system: - Rhino-Rack RTC-Style Roof Rack Tracks # RTC8JW - Track Mount RLTP Legs # RLTP - Rhino-Rack Heavy-Duty Roof Rack Crossbars # RB1250B-2
view full answer... - What Setup Do I Need to Install a Rhino-Rack Pioneer Platform Rack on My 2005 Porsche Cayenne?I have a solution for you. Unfortunately, the Rhino-Rack Universal Pioneer Platform Rack for Crossbars - Aluminum - 58" Long x 47" Wide # RR42115BF does require crossbars, but it is not compatible with HD crossbars. With that being said, we do carry the Rhino Rack Aero Crossbars # RRVA126B-2 that have a maximum weight capacity of 175 - pounds when mounted on your 2005 Porsche Cayenne. This is the exact weight rating as the Rhino-Rack HD bars # RB1250B-2. For a compatible roof rack with...
view full answer... - Roof Rack to Carry Ladders on a 2001 Ford EscapeYour 2001 Ford Escape could have 1 of 3 possible roof configurations. I will provide recommendations for each type. Since you are using the rack to carry ladders it doesn't have to be a fancy rack so I will provide good economical options. First, if your Escape does not have any rails or bars at all on the roof the most quality option is going to be a Rhino-Rack using the following parts: Vortex Crossbars # RRVA126B-2 Feet # RRRLKVA Fit kit # DK099 If your Escape has factory tracks,...
view full answer... - Bike Rack Options on a 2009 Porsche Cayenne?There is a confirmed fit for a trailer hitch on your 2009 Porsche Cayenne, so long as it does not have a rear-mounted spare tire. The Curt Trailer Hitch Receiver, # 13220, is a two-inch hitch with a class III rating, which will be more than adequate for the use of a bike rack. I have included a link to a video install of this hitch. If you are looking for a bike rack to attach to your hitch, I recommend the Kuat NV 2.0 2-Bike Platform Rack, # NV22G. This is a platform-style rack which...
view full answer... - Rhino-Rack Heavy Duty Roof Rack for 2018 Volkswagen PassatThe Rhino-Rack # Y01-140B-NT is designed to fit roof mounted tracks such as what would be found on a camper shell, it's not typically used on a vehicle roof. You can install a similar rack using the following parts: • Rhino-Rack Heavy Duty 50 inch crossbars, part # RB1250B-2 for black or # RB1250 for silver • Series 2500 Legs, part # RRRLKHD • Vehicle-Specific fit clips, part # DK323 This rack has a 165 lb capacity and is custom designed to fit your vehicle.
view full answer... - Rhino Rack Roof Rack Fits for 2015 Infiniti Q40Rhino Rack's online fitguide isn't always up to date. We know for certain that the Rhino Rack part # RR47SR that you referenced and the # RB1250B-2, # RRRLKHD, and # DK211 is a confirmed fit.
view full answer... - Does Rhino-Rack HD Roof Rack for 2020 Toyota Corolla Sedan Have Static Load RatingI checked with Rhino-Rack and they specifically mention they only have dynamic (moving) load ratings, and that is exactly what the 165 lb capacity is with the rack that fits your 2020 Toyota Corolla sedan. Rooftop tents generally only call for a rack to have a certain dynamic capacity so I recommend checking out your tent's manual to find out. As for the roof rack for your 2020 Toyota Corolla, here are the parts you need: - Rhino-Rack Heavy-Duty Roof Rack Crossbars # # RB1250B-2 (Black)...
view full answer...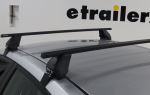
- Recommended Roof Rack For A 2012 Nissan Versa Hatchback Hi Chris, Rhino-Rack has a heavy duty roof rack compatible with your 2012 Nissan Versa Hatchback with the following components: Rhino-Rack Heavy-Duty Roof Rack Crossbars # RB1250B-2 Rhino-Rack 2500 Series Legs for Heavy-Duty Crossbars # RRRLKHD Custom DK Fit Kit for 4 Rhino-Rack 2500 Series Roof Rack Legs # DK047 I've attached a short video below so you can see how this rack installs and how it works.
view full answer... - Recommended Roof Rack for 2000 Honda CR-VLadder racks are only for trucks, so your 2000 Honda CRV will instead utilize a roof rack. I recommend the Rhino Rack roof rack consisting of the following that are confirmed to fit your vehicle: Vortex Aero Crossbars - Aluminum - Black - 46" Long # RRVA118B-2 2500 Series Legs # RRRLKVA Custom DK Fit Kit # DK053 This rack is rated for 110 lb capacity maximum. I recommend also using the metal lock cores # RRVA-LEC4 for security when utilizing the top channels of the bars. If you want...
view full answer... - Recommended Roof Rack And Ladder Mounting Kit For 2016 Nissan Versa NoteThe roof rack I recommend for your 2016 Versa Note is the Rhino-Rack Heavy-Duty Roof Rack. This roof rack has 50-inch long crossbars that have a rubber strip in the crossbar channel to help cushion any items you carry on the roof rack. The roof rack has a 165-lb weight capacity. To order this roof rack you will need part # RB1250B-2, part # RRRLKHD, and part # DK382. to make it easier to secure the ladder on your roof rack I recommend part # REGLK2B. This kit fits the C-channels on...
view full answer... - Will the Rhino-Rack HD Crossbars Allow Me to Transport 2 Kayaks on My 2014 Kia Sorrento LX?Yes, the Rhino-Rack Heavy-Duty Roof Rack Crossbars - Black - 50" Long - Qty 2 # RB1250B-2 (black) and # RB1250 (silver) are compatible with the bare roof on your 2014 Kia Sorrento LX without a vista roof. For a complete roof rack system, you will need the following parts: - Rhino-Rack 2500 Series Legs for Heavy-Duty Crossbars - Naked Roofs or Fixed Mounting Points - Qty 4 # RRRLKHD - Custom DK Fit Kit for 4 Rhino-Rack 2500 Series Roof Rack Legs - Naked Roof # DK179 For a J-style carrier...
view full answer... - Can I Use My Existing Rhino-Rack Crossbars From Gutter Mounted Leg With SX Series LegsIf your existing Rhino-Rack crossbars are the 49" Vortex Aero Crossbars, part # RRVA126B-2, all you will need is the Rhino-Rack SX Series Legs for Vortex Aero Crossbars - Raised Factory Side Rails - Qty 4, part # RRSX100. If your roof rack has the Rhino-Rack Heavy-Duty Roof Rack Crossbars Black - 50" Long - Qty 2, part # RB1250B-2, you will need to add the aforementioned Vortex Aero Crossbars to the SX Series Legs to complete your roof rack. I have included product description links and...
view full answer... - Using Rhino Rack 50 Inch Crossbars on 2011 Honda AccordYou can certainly use 50 inch load bars on your Accord. Rhino Rack offers a Heavy Duty rack system that uses 50 inch load bars. You can assemble a system by using the following parts: Heavy Duty 50 Inch Crossbars, part # RB1250B-2 Leg Kit, part # RRRLKHD Vehicle Specific Clamp Kit, part # DK184 The rack has a 110 lb capacity, which might be limited by the capacity of your Accord's roof if it is less.
view full answer... - Roof Weight Capacity of 2005 Toyota Highlander Fitted with Rhino-Rack Heavy Duty Roof RackThe Rhino-Rack Heavy Duty Roof Rack for your 2005 Toyota Highlander, which consists of parts # RB1250B-2 and # CXB, does carry a 200-lb weight rating. Your vehicle itself will also have a roof weight capacity that could be more, the same or less. Your manual's indicated weight limit of 100-lbs could be for an OEM roof rack, or it could be for the overall roof structure itself. If Toyota says the roof itself can handle 100-lbs and no more, then you will have to abide by that lower rating....
view full answer... - Does Rhino Rack HD Roof Rack Fit 2011 BMW X3 with Naked Roof and SunroofThe Rhino Rack HD part numbers # RB1250B-2, # RRRLKHD, and # DK295 is a confirmed fit for your 2011 BMW X3 with a naked roof and would not interfere with the sunroof. You aren't going to want to open the sunroof with this rack installed though as it will make quite a bit of noise. If you keep the roof clean as well as the mounting pads of the feet there would not be any long term damage done to the vehicle.
view full answer... - Roof Rack Recommendation for a 2007 Chevy Trailblazer for Carrying LaddersI would recommend going with the Rhino Rack HD crossbar roof rack as it will have plenty of strength for your ladders. You would need the part numbers # RB1250B-2, # RLTP-2, and # RRVA-FK2-2 which have been confirmed as a fit for your 2007 Chevy Trailblazer raised side rails.. For load stops for the ladders you would then want the part # RRRLH. For 10 foot cinch straps you could also use the part # RTD3. Be sure not to exceed the roof weight capacity of your vehicle.
view full answer... - Roof Rack for 2013 Mazda 3 Five Door to Carry a Rowing ShellThe most cost effective and aerodynamic (thus quiet) roof rack would be a Rhino Rack system, that would consist of the following: 44 inch Silver Vortex Aero Crossbars # RRVA118S-2 (also available in black as # RRVA118B-2) Leg Kit # RRRLKVA Vehicle Specific Fit Kit for vehicles with fixed roof mounted attachment points, # DK289 The rack would be easily removable when needed. Rather than resting your rowing shell directly on the crossbars, I'd recommend using a foam block system like the...
view full answer... - Rhino-Rack Heavy-Duty or Vortex Crossbars for 2019 Ford Transit ConnectThe primary difference between the Rhino-Rack Heavy-Duty Crossbars and the Rhino-Rack Vortex Aero Crossbars has to do with what they are designed to carry and what accessories work well with them. The Heavy-Duty Crossbars feature built-in C-channels that are made specifically for Rhino-Rack Heavy-Duty accessories like the Hi-Lift Jack Mounting Brackets # RJHB. Because the bars are larger than most other systems they will not be compatible with a lot of accessories that aren't specifically...
view full answer...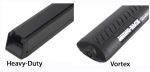
- Do I Have To Drill Afer Installing The Tracks On The Rhino Rack Roof Rack System # Y01-120-NT?The foot # RRRLKHD to crossbar # RB1375B-2 is adjustable along the bar with the kit you're looking at # Y01-120B-NT. The only drilling required is to install the tracks so if they are already installed no need to do any more drilling.
view full answer...
- Roof Rack Recommendation for 2010 Toyota Corolla with Naked Roof for Snowboard CarrierFor your 2010 Toyota Corolla sedan with a naked roof we have the 2010 Toyota Corolla Roof Rack by Rhino Rack which includes part numbers # RB1250B-2, # RRRLKHD and # DK152 as a confirmed fit which would work great for a snowboard rack like the Rhino Rack # RR574 which can carry up to 4 pairs of skis or 2 boards.
view full answer... - Mounting the Rhino-Rack Batwing Awning to a 2013 Toyota TacomaThe Rhino-Rack Batwing Awning, # RR33200 is designed to bolt to a Rhino-Rack Pioneer platform or crossbars with top channels, using hardware sold separately. For your 2013 Toyota Tacoma, you will need the Batwing and Foxwing Awning Relocation Kit for Rhino-Rack Heavy-Duty Crossbars, # RR31102 and note that this awning is only compatible with crossbars that extend past the roof rack's legs. I suggest the Rhino-Rack Heavy-Duty Roof Rack Crossbars - Black - 54", # RB1375B-2 with the Rhino-Rack...
view full answer... - Will the 65" Rhino-Rack HD Crossbars # RB1650 Fit on My 2010 Mazda 3 Hatchback?I have an answer for you. Unfortunately, the 65 inch Rhino-Rack Heavy-Duty Roof Rack Crossbars # RB1650 are too long for your 2010 Mazda 3 Hatchback with fixed mounting points. With that being said, you can still have shorter Rhino-Rack Heavy-Duty crossbars on your vehicle. Our installation team here at etrailer has tested these shorter bars with your vehicle so that they will fall within the required dimensions of local traffic laws. For this system, you will need the following parts:...
view full answer... - Rhino Rack Heavy Duty Roof Rack for 2003 GMC Sierra Crew CabAll three items you mentioned, the 71 inch Rhino Rack Heavy Duty Crossbars # RB1800B-2, the # RRRLKHD roof rack legs and the # DK227 vehicle specific fit kit are compatible with your 2003 GMC Sierra Crew Cab. I've linked to an insatllation video showing the roof rack being installed on a 2010 Chevy Silverado, but the procedure would be very similar for your older Sierra.
view full answer... - Parts to Install Rhino-Rack HD Roof Rack to 2013 Nissan CubeThe 54" Rhino-Rack HD Bars # RB1375 will fit your 2013 Nissan Cube but you also need the 2500 Series Legs # RRRLKHD and the Fit Kit # DK263. The legs are what hold your crossbars and the fit kit together while the fit kit secures the whole assembly to your vehicle using clamps for the door jambs. If you check out the standard review video you can get an idea of how this will install but it's important to follow the instructions you receive with your parts as well.
view full answer... - Roof Rack Recommendation for a 2007 Chevy Avalanche for Transporting LadderFor your 2004 Chevy Avalanche the Rhino Rack roof rack part numbers # RRVA137B-2, # RRRLKVA, and # DK227 has been confirmed as a fit and would work well. Your sunroof wouldn't be an issue either. I would recommend keeping it closed since it will be very loud transporting a ladder up there from the wind noise. However, I have a better solution for you in terms of a roof rack for securing a ladder. Instead I would recommend the Rhino Rack HD bar roof rack part numbers # RB1375, # RRRLKHD,...
view full answer... - Can Rhino-Rack HD Crossbars Be Mounted Over the Bed On a 2022 Toyota TacomaI do have options for you but we don't offer any options to mount Rhino Rack HD Crossbars over the bed of a 2022 Toyota Tacoma without drilling into the bed rails, there are no attachments for the rail system for these bars. In order to utilize the Rhino-Rack Heavy-Duty Roof Rack Crossbars part # RB1375B-2 you'll need to place them on the roof using the Rhino-Rack 2500 Series Legs part # RRRLKHD and Custom DK Fit Kit part # DK174. The other option is the Rhino-Rack Reconn-Deck Overland...
view full answer... - Will the Rhino-Rack Heavy-Duty Roof Rack Fit 2015 Ram 1500 Crew Cab with SunroofYes, the Rhino-Rack Heavy-Duty Roof Rack, which consists of parts # RB1500, # RRRLKHD, and # DK043, will fit your 2015 Ram 1500 crew cab with a sunroof. Placement of the crossbars is very specific and I have included an attachment which illustrates the measurements for your Ram, as well as the measurement process. With these measurements you will be able to determine exactly where the crossbars will sit in comparison to your sunroof.
view full answer...
- Height Added to Vehicle with Rhino Rack Foot # RRRLKHDWe've had a similar question to this in the past and we've found that the Rhino Rack HD roof racks that use the feet part # RRRLKHD and also part # RB1500B-2, # RRRLKHD add right at 4-1/2 inches of additional height that would mean the feet without the bar would be a little less than 3 inches in overall height.
view full answer... - Recommended Roof Rack for 2016 Mitsubishi Outlander SportIt sounds like your wife's 2016 Mitsubishi Outlander Sport is equipped with factory flush rails that run front to back on the roof without any crossbars. Just let me know if this is not correct. If this is the case then we do have a nice selection of roof rack crossbars that are confirmed to fit but they are all designed to still mount at specific locations along the side of the roof. There is not a roof rack available for your vehicle that will let you adjust the feet front to back to...
view full answer... - Weight Capacity and Bike Rack Options For 2018 Nissan RogueIn that question, the customer may have been referring to the towing capacity of their vehicle being a maximum tongue weight of 110lbs. That information can be found in your owners manual. So even if Draw-Tite Max-Frame Trailer Hitch Receiver # 75902 has a 3,500 pound towing capacity and 350 pound tongue weight capacity, the towing capacity of the vehicle takes precedent. So the lowest of the two numbers is what you go with in regards to towing capacity. So please check the towing capacity...
view full answer... - Sturdy Roof Rack Recommendation for 2008 Chevy CobaltFor a vehicle like your 2008 Chevy Cobalt I would not want to recommend a track style of rack as the best option. The tracks aren't going to flex enough to fit well and the clamp style racks are much sturdier than one might think so even though that's not the option you listed wanting it would be your overall best option still. Rhino Rack does offer a heavy duty roof rack that fits your vehicle with the # RB1250, # RRRLKHD, and # DK181 if you have a sedan or part # DK182 for a coupe but...
view full answer... - Tonneau Cover and Rack Options for 2007 Honda RidgelineThe tonneau cover manufacturers do offer some covers for other trucks that have the T-slots in the side rails that can be used tor installing a ladder rack like the Yakima OverHaul HD, but unfortunately they don't offer anything like this for your 2007 Honda Ridgeline. If the 165 lb capacity of a standard roof rack would work for you, your best bet would be to go with a tonneau cover like the BAK BAKFlip F1 you'd looked at, part # BAK72601 and use a roof rack on the vehicle. I'd recommend...
view full answer... - How to Measure for Mounting Shorter-Than-Recommended Rhino-Rack Vortex Bars on a 2016 Honda CR-VWith a 2016 Honda CR-V, the appropriate Rhino-Rack crossbar system for the naked roof is: 54" Heavy-Duty Roof Rack Crossbars, part # RB1375B-2 2500 Series Legs, part # RRRLKHD Custom DK Fit Kit, part # DK284 It looks like you have the right legs and fit kit but have the shorter crossbars. This isn't a tested fit, so there's a chance it will not work. However, if your are trying this, then your solution would be the best route. Take the difference divided by 2 (3" on each side), and subtract...
view full answer... - Dual Kayak Carrier For 2017 Ram 1500 With Tonneau CoverI would recommend getting the Rhino-Rack Heavy-Duty Roof Rack Crossbars # RB1500, the Rhino-Rack 2500 Series Legs for Heavy-Duty Crossbars # RRRLKHD and the Custom DK Fit Kit for 4 Rhino-Rack 2500 Series Roof Rack Legs # DK043. I've included a video to help you install if you wanted to go that route. Then the most cost effective carrier would be four of the Malone Rack Pads # MPG314, two per crossbar. The foam pads will be less rough on your kayaks whenever you're going down gravel roads....
view full answer... - Recommended All Black Roof Rack System for 2012 Ford EdgeI recommend using the Rhino Rack Roof Rack that uses parts # RRVA137B-2, # RRRLKHD and # DK228 because Rhino Rack is a really durable and high quality rack at a bit better price point than some of the other racks available. This is an all black roof rack kit that will allow you to mount a variety of accessories that attach via clamps or the T-channel mounting slots, so you'll be able to put cargo boxes, bike racks, or even a Pioneer Platform like the # RR42114BF. I've linked a review video...
view full answer... - Rhino Rack HD Roof Rack that Fits 2013 Ram 3500 Crew CabYes, the Rhino Rack HD rack fits directly to your 2013 Ram 3500 crew cab with the part numbers # RB1500, # RRRLKHD, and # DK043. This rack uses included clamps to secure by clamping to the door frame of the truck which is very secure and also easy to set up without permanent modification.
view full answer... - 2023 GMC Sierra 1500 Parts for Rhino-Rack HD Roof Rack SystemIn order to install Rhino-Rack HD bars on your 2023 GMC Sierra 1500 you'll need the following parts: - 59" HD Crossbars # RB1500B-2 - 2500 Series Legs for HD Bars # RRRLKHD - DK Fit Kit # DK427 I'm not 100% sure what multi-purpose holders you're referring to but if you send me some photos of the parts you have I'd be more than happy to help you minimize the amount of parts you're needing to purchase so you can have a roof rack on top of your truck!
view full answer... - Does a Rhino-Rack Roof Rack Using Factory Mounting Points on a 2013 Honda RidgelineRhino-Rack Leg Kit, # RRRLKVA, mounts to the roof of your 2013 Honda Ridgeline using fit kit # DK155 which are clamps so it will not use the factory mounting points. The correct bars for this application are # RRVA150S-2. All of the roof racks install the same way on your Ridgeline.
view full answer... - Roof Rack Recommendation for 2019 Ford F-150 Crew Cab for Carrying LaddersThe SeaSucker roof rack part # 298-SX6000B that you referenced has a weight capacity of 150 lbs and has a pull strength per vacuum cup of 210 lbs. Which this rack has a total of 6 cups so it would easily be rated to carry a 30 foot ladder. I'd rather recommend you the Rhino Rack Heavy Duty roof rack that is a confirmed fit for your 2019 Ford F-150 crew cab that consists of # RB1500B-2, # RRRLKHD, and # DK427. This heavy duty style bar is better suited for carrying ladders as it's a larger...
view full answer... - Rhino-Rack Pioneer Platform & Backbone Mounting System That Fits 2014 Ram 1500 Crew CabWe do have a Rhino-Rack Pioneer Platform and Backbone Mounting System that fits your 2014 Ram 1500 Crew Cab, though it is different than the part number you mentioned, and crossbars are not able to be mounted to it, as this is only for the Pioneer Platform. For your Ram, the platform and mounting that fit are the following: - Rhino-Rack Pioneer Platform Rack with Backbone Mounting System # JB0702 You can mount bars to the platform with the Rhino-Rack Accessory Bars for Pioneer Platform...
view full answer... - Rhino-Rack HD Roof Rack Fit For 2022 Honda Ridgeline With Naked RoofWe do indeed have the Rhino-Rack roof rack with HD crossbars that fits your 2022 Honda Ridgeline with a naked roof, and load stops as well. The correct parts for your truck are the following: - Rhino-Rack Heavy-Duty Roof Rack Crossbars - Silver # RB1500 or Black # RB1500B-2 - Rhino-Rack 2500 Series Legs for Heavy-Duty Crossbars # RRRLKHD - Custom DK Fit Kit # DK470 This will give you the heavy-duty Rhino-Rack roof rack for your '22 Ridgeline, and then for load stops for these crossbars,...
view full answer... - Roof Rack for a 2013 Kia Optima HybridI do have a solution for you but the Sport Rack roof rack for naked roofs # SR1002 is not a confirmed fit for your 2013 Kia Optima. I recommend going with the Rhino Rack 2500 series # RRVA126B-2 because they are very lightweight and made from aluminum. The weight capacity is 165 pounds but it is always a good idea to check your owners manual to confirm the weight capacity of your Optima. Also, it has a nice price point too. To install the crossbars you also need # RRRLKVA and # DK283. I...
view full answer... - Roof Rack and Kayak Carriers for 2013 Kia Optima with Panoramic Glass RoofWe do have a roof rack that will fit your 2013 Kia Optima with the Panoramic glass roof. However you will not be able to open the roof while the roof rack is installed. You will need the following parts for the roof rack: Crossbars, # RRVA126B-2 Feet, # RRRLKVA Clamps # DK283 Then for a 2-kayak compatible carrier you can use 2 of the J-Style Kayak carriers # S512. Be sure to consult the vehicle owners manual and/or Kia for the roof capacity before loading.
view full answer... - Roof Rack Recommendation for 2011 Kia Optima with SunroofYes, actually all of the roof racks we carry for your 2011 Kia Optima are confirmed to fit with the panoramic roof like our most popular option the Rhino Rack roof rack part numbers # RRVA126B-2, # RRRLKVA and # DK283. I really like this rack because you get the quality of the higher end roof racks like Thule and Yakima but at a much more affordable price. For a kayak carrier the Thule part # TH834 would be a great option confirmed as a fit for this rack as well.
view full answer... - Roof Rack and Surfboard Carrier Recommendation for 2013 Kia OptimaWhen it comes to a roof rack for your daughter's 2013 Kia Optima, we have several options available. I have attached a link which includes all of the roof racks for her Optima. For a basic but quality option, I recommend taking a look at the Rhino-Rack 2500 Series Roof Rack with Vortex Crossbars, # RRVA126B-2, # RRRLKVA, and # DK283. This system is lightweight yet durable and easy to install. For an aerodynamic rack that provides a much quieter ride, take a look at our Thule WingBar...
view full answer... - Correct Rhino Rack Roof Rack for a 2015 Kia OptimaYes, the Rhino-Rack Vortex Aero Crossbar System part # RRVA126B-2, part # RRRLKVA, and part # DK283 is a confirmed fit for a 2015 Kia Optima (All Models) and an excellent option at that. It has some great premium features but at an affordable cost. It also comes with locks for security which are no extra charge. It will work well for pretty much anything from bike racks to cargo boxes or kayak carriers.
view full answer... - Economical Roof Rack Recommendation for a 2013 Kia OptimaThe closest roof rack we offer that has been confirmed to fit your vehicle to the part # SR1002 that you referenced would be the Rhino Rack that consists of part numbers # RRVA126B-2, # RRRLKVA and # DK283. The # SR1002 has not been confirmed to fit your 2013 Kia Optima so I cannot recommend it for you.
view full answer... - Recommended Roof Rack For 2013 Kia OptimaMost manufacturers do not list the roof capacity in their owner's manual. I checked out the owner's manual for your Optima and no roof weight capacity is listed. You may want to check with your dealership for the roof weight capacity for your vehicle. The roof rack I recommend for your Optima is the Rhino-Rack Vortex. This roof rack has aluminum aerodynamic crossbars that are designed to reduce wind drag and noise. The roof rack has a 165 lb capacity, but you will not want to exceed the...
view full answer... - Rhino Rack Vortex Aero Roof Rack Recommendation for 2015 Kia Optima Turbo with Glass RoofWe do have a roof rack that will fit your 2015 Kia Optima with the Panoramic glass roof. However you will not be able to open the roof while the roof rack is installed. You will need the following parts for the roof rack: Crossbars # RRVA126B-2 Feet # RRRLKVA Clamps # DK283
view full answer...
Do you have a question about this Roof Rack?
Info for this part was:

Edited by:
Daron K

Updated by:
Alex H

Written by:
Bethann B
At etrailer.com we provide the best information available about the products we sell. We take the quality of our information seriously so that you can get the right part the first time. Let us know if anything is missing or if you have any questions.
Product Experts Available Now!
Call 1-800-940-8924
Thank you! Your comment has been submitted successfully. You should be able to view your question/comment here within a few days.
Error submitting comment. Please try again momentarily.