
LaSalle Bristol RV Roof Replacement Kit w/ XTRM Membrane - 35' Long
(9 reviews)
Price: $823.11
LaSalle Bristol RV Roof Replacement Kit w/ XTRM Membrane - 35' Long
Item # 344270KIT35
Retail:$1,141.07
Our Price: $823.11
You Save: $317.96


Need help with installation?
Locate installers near me- All Info
- Reviews (9)
- Q & A (0)
- Videos (1)
- Photos
LaSalle Bristol RV Roof Repair - 344270KIT35
- Roof Replacement Kit
- Roof Membrane
- White
- 35 Feet Long
- LaSalle Bristol
Replace or upgrade the roof of your RV with this complete roof installation kit. Includes everything you need - 1 bucket of adhesive, 1 roll of roof membrane, 2 rolls of butyl tape, 4 tubes of non-sag sealant, and 8 tubes of self-leveling sealant.
Features:
- Installation kit includes everything you need to replace the damaged roof on your RV
- Durable PVC roof membrane resists punctures, tears, and UV rays
- High solar reflectivity keeps your RV cooler
- No maintenance - no reconditioning, no treatments, and no special cleaners
- Acrylic, water-borne adhesive creates a strong bond between roof membrane and your RV roof
- Pre-formed, synthetic polymer butyl tape holds your rooftop accessories firmly in place
- Adhesion improves with age
- White, weather-resistant sealants are paintable and require no primer
- Non-sag sealant for roofs that install over the side of your RV
- Self-leveling sealant for replacing rooftop accessories after installation
- Kit includes:
- (1) 35' Roll of roof membrane
- (1) 2 Gallon bucket of adhesive
- (1) 45' Roll of butyl tape
- (1) 60' Roll of butyl tape
- (4) 10.1 oz Tubes of non-sag sealant
- (8) 10.1 oz Tubes of self-leveling sealant
3441700534142711435 LaSalle Bristol XTRM Roof Membrane - 35' Long
344270341410 LaSalle Bristol XTRM Butyl Tape - 60' L x 3/4" W
344270341411 LaSalle Bristol XTRM Butyl Tape - 45' L x 1-1/2" W
344270341415 LaSalle Bristol XTRM Adhesive - 2 Gallon
344270341437 XTRM Universal Non-Sag Sealant - White
34427034145 XTRM Universal Self-Leveling Sealant - White
Video of LaSalle Bristol RV Roof Replacement Kit w/ XTRM Membrane - 35' Long

Videos are provided as a guide only. Refer to manufacturer installation instructions and specs for complete information.

Video Transcript for LaSalle Bristol RV Roof Replacement Kit with XTRM Membrane Installation
Shane: Hey guys. Shane here with etrailer.com. Today we have a 2005 KZ New Vision fifth wheel travel trailer, and I'm going to be replacing the roof membrane. Our customer's old membrane was severely damaged and it needed to be replaced. Luckily, they caught it in time that it didn't cause any damage to any of the wood underneath it. What are some other reasons that we can find that we would need to replace our roof membrane Maybe we find a small leak, a lot of those times, those leaks can be easily fixed by simply replacing the silicone sealer around all of your trim pieces.
Let's say we get up on the roof, we go to replace that sealer, we find that our roof membrane is brittle, soft, it is starting to break apart.There are three different types, or there are actually several different types of membranes. You have a harder membrane that's kind of a fiberglass, and we're going to have a few different soft ones. You're going to have a synthetic rubber, we're going to have a rubber, and then we're going to have a PVC. Synthetic rubber is what you're going to find on most of your campers, sometimes you'll find rubber. With the rubber and synthetic rubber, what most people don't know, and what most of your dealers are not going to tell you, is that the rubber roofs have to be sealed or treated every two years, if they're not the sun bakes down on them and it breaks them apart.You look at it like this, in the winter time, your skin gets dry, you scratch it, it starts to flake, you put lotion on it, you're treating that surface.
If you don't treat it, scratch it some more, that skin starts to break down cause it's getting weak. It's kind of along the same lines of what those rubber roofs. Say we go to a campsite, a really nice campsite. It's got a lot of trees in it. We haven't treated our roof because we didn't know we had to, a tree limb falls on it, puts a tear in it, there's temporary patch kits that are available that you can put on those tears, keep in mind they're not the best, they don't stay on very well and they are temporary.
You're going to have it in your mind wondering if that patch is working.Let's say it doesn't work, water gets in there, leaks through that spot, goes down your roof, down your wall. You're not going to know because you don't see a spot on your ceiling. You move your couch out like you're getting ready to clean it and your wall is warped. Well now that whole wall has to be replaced. Let's say you can live with that spot, you push your couch back, keep in mind your ceiling and your walls have insulation in them, anywhere that was saturated by that water is going to get mold on it, now you've just cost yourself a ton of extra money, and possibly your whole camper because it's not livable anymore.
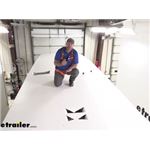
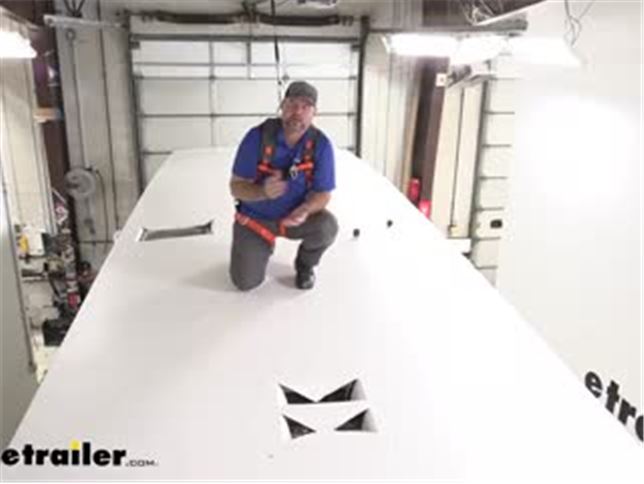
If we fix it right the first time, we'd save ourselves a lot of money. That's what I'm going to recommend, the PVC roof membrane, It's going to be more durable and it's going to be much thicker.This is going to be our PVC membrane, this is going to be our rubber roof membrane. Our synthetic rubber is going to be similar only it's going to have a white back instead of a black. What I want to show you is this synthetic membrane or this rubber roof membrane what it's doing, you kind of stretch it here, you can see how it's kind of pulling apart. See all this on top that's coming off, that means it's getting thin and it's getting weak.With the PVC membrane, as I mentioned, much more durable, much thicker, it's going to be a lot easier to patch, and it's not going to require any maintenance. We're not going to have to get up here every two years to treat it, we can enjoy camping knowing that our roof is going to hold up. It's also going to have a 15 year warranty.Your kit's going to include your sealer, your roof membrane, self-leveling sealant, non-sag sealant, two widths of butyl tape, you're going to get a skinny one and you're going to get a wider one it's an inch and a half. One thing I do recommend is check your trim pieces, and you may require you to pick up either an extra roll of the wide or an extra roll of the skinny. Also, when you remove your screws, if any more damage, it may be better to go ahead and get new ones and replace all of them.Couple of things you're going to need to help you get the job done. You're going to need a white squeegee, a caulk gun, trim panel tool, you can either use a scraper like this or you can use a razor blade. You're going to need to get some seam tape, and also a stapler. Now the stapler, if you're going to use a stapler like this, make sure it's a heavy duty enough that it's going to go through the wood pieces to hold your top down, if not, an air stapler is probably the better way to go.You follow along with me through this video, I'm going to walk you step by step on how to get yours installed on your camper. The installation process is not hard, even though it looks intimidating, it's a big camper, it's not, I promise you. It is time consuming, it's not going to be an hour job, but if you follow me step by step through this video, I'm going to walk through how to get it installed, and I'm betting that you're going to be proud of the way it looks. I've done enough talking, I'm excited to get started. Let's get going.To start your installation, we're going to come inside. You need to remove all your vent shrouds, if your air conditioner shrouds on the inside, you need to remove anything inside that is attaching anything from the roof down, so that when you moving stuff on the roof, you're loose inside. The reason we need to remove these, is if you have powered vents, you need to be able to get to the wires to disconnect those. This one is actually not powered, but we have one in the back that is, so it's a good idea to ahead and remove all these, get them out of the way so when we get on the roof we are clean, we can get everything off pretty easily.You can see here our vent in the back does have power. What I will recommend is if you're connected to the shore power, disconnect that, also go ahead and disconnect your power to your 12 volt batteries before you do anything with your wiring so you have no power running through them. Once we disconnect that power, we can go ahead and disconnect our wires and start removing everything off the roof.Then we can come outside and start removing all of our trim from the outside. You're going to have a little plastic piece that runs right here that covers all the screws holding on this trim piece, you may have to take off this corner piece, just take a couple of screws off, take a trim panel tool and peel this out, and you can see this plastic piece, if you're not going to be replacing it, try to save it if you can.We'll pull it out and then we can reinstall it later on. It should just kind of slide out like that and you can work it all the way down from one end to the other, and then you'll notice all of your screws, and we're going to have to remove all of those, take off all your trim pieces on both sides and then lay them aside. What I suggest doing is when you take these off, kind of try and lay them in an order so that when you put them back on, they're going in the back in the same place. If you're not replacing your screws, go ahead and hold onto those also.Once you get these loose, on your end caps you're going to have a trim piece that runs from one side to the other across the top, depending on what you have there, Phillips, a lot of campers they'll have square heads in them. You're going to need to remove this trim piece because your top actually goes underneath of it. Once you get that off in front and back, you're just going to work your way around the camper taking all the trim pieces off to loosen anything that's holding down the rolled edge of your top.Once you get all your trim pieces off, what you want to do is come back with a scraper, plastic trim panel tool works good because it's not going to damage any of the siding, and any of this extra stuff that's on here we want to clean that off, as well as everything along the top because we're going to be putting new sealer on when we put our pieces back in place.The reason we want to do this, is when we put our new top on, we're going to put a piece of butyl tape right here, I want to make sure it's going to stick on there good, we're going to have a good seal on it, to make sure any water doesn't get inside of our screw holes. You want to make sure you clean off these corners really good, because you're going to have a couple different types of sealant that's going to go on here. We're going to have a self-leveling sealant, non-sag sealant, and butyl tape. This is where all three of these pieces come together, this is where you may get a lot of water damage if you don't seal it properly.All you do is just work around the outsides and everywhere where this extra stuff is and just peel it off. Then what I like to do is. You notice this dirt and stuff, maybe take some rubbing alcohol, wet rag, wipe all this off, make sure it's clean, make sure you have a good flat surface to work with.Once you get everything off your roof, you're getting ready to start peeling off your old membrane, to make it easier it might be easier if you cut it in sections. What I did is I kind of cut a strip all the way up the center and then cut it across a couple of places so we can peel it off a section at a time, otherwise you're trying to peel up this whole thing from one end to the other. All you're going to do is take it and start peeling it up. As you're peeling it up kind of keep an eye on spots to see if it pulls up any wood chunks, kind of take note of where those are because what we're going to do is we're going to come back and fill those in and kind of smooth them out. All you do, just kind of peel it up.I also want to show you here real quick, you'll notice this seam tape, if you have any of this that comes up, peel it off, you can buy the seam tape at your local hardware store, and you want to lay new seam tape down. You want to make sure where you lay it down is where your boards meet, and along the edge.Once you get all of your membrane off, what you want to do is go back through, any screw that might be up holding your wood down, you want to make sure you sync those down in so they don't affect the new top you're putting on. As I mentioned, we're going to come back, any of these low spots, we're going to fill it in. We're going to use some extreme self-leveling sealant. This is going to come in your kit. We don't need a whole lot, we just want to smooth it out. Kind of put a little bit in here, and what this self-leveling sealant does, is as we let it sit, it's going to flatten out. Instead of being bubbled like this, it will kind of flatten out. You're going to do this from one end of the camper all the way to the other. Kind of go in and fill out your spots, check any of the screws.If you find that you have the fiberboard underneath, which is a lot of campers that are having those put on when they come out of the manufacturer, if you find that you're pulling up big chunks and maybe some of your wood's damaged, if you want a nice smooth look, what you can do is not go through this, you can buy Lauan board and put it right over the top of it. You can either glue it down or you can throw a couple of screws in it, and then when you put your top on, it'll give you a nice smooth finish. Keep in mind, you may not be up here all the time and you may not worry about it, if you're not going to, again, make sure you fill in your holes like this because you will see some divots in there if you don't.As I mentioned before, this seam tape, if you have any that came up, you can find at your local hardware store, you're going to want to lay some new stuff down before you start applying your sealant and putting your new top on. All you're going to do is take it, line it up with what you have there, and it should stick right on. Kind of walk around, go around your camper, and any spot you may have put a piece in there, any missing pieces go ahead and replace that.Couple of things to have up on your roof before you start applying, is you're going to need a paint roller, put a pole on it if you want, you can get a smaller one, you may or may not need it. Have a paint pan that when you're putting your top on you can lay this down in, a piece of cardboard, a squeegee that's white, you can probably find these at your local auto parts store, just make sure it's white because you are putting a white top on.Before we take our adhesive up, we want to make sure we mix it well. What I found works really well, if you use a yardstick, you just want to make sure you have a stick long enough to get in there, and you want to mix this really, really well. Make sure you get down to the bottom, it's kind of like mixing paint, everything kind of settles at the bottom. Put our lid back on and we can take it up top with us.You may need a couple of people to get your membrane up here. You'll see it's a very large roll. It's going to come in this plastic wrap, I would suggest maybe unwrapping it up here so you don't get it dirty from being on the ground. You don't take a chance of maybe damage it while you're taking it off down on the bottom. Once you get this off, you want to make sure that it's going to roll out like this. You can start in the front or the back, it doesn't really matter. I'm going to start at the back because we have steps here, so I can get this piece tucked underneath it here and overlap this enough, and then we can start rolling from here up.Our big thing here, is you want to make sure we're kind of even on both sides and as we're rolling it, we're rolling it straight to the front, so that when we get to the front it's not going crooked, and we're going to have enough overhang, because what's going to happen is when we put our side pieces on, we want that overhang to come down pass it. Same thing with our front and back, we want this overhang, and then we'll cut off any extra that we're not going to need.We're going to check our side to side, and what we're going to do, is we're going to take our adhesive, we're going to do about a four foot section at a time. You notice we have a hole here, we want to make sure we don't do is when we roll over it we don't want to cut that right away, because it'll leave like a weak spot and as you're pulling it, it may crease up in the middle, so we'll cut these last. What we're going to do is we're going to take or adhesive, we're going to dump some out here, we're going to take a roller, we're going to start spreading this out, and what we want, we what kind of a milky white. I'm going to leave this back part without the adhesive on it for now, because if you remember we have steps, I'm going to have to pull that out, get some adhesive on there to be able to do that.Easier to have a couple of people, but if not, we kind of unroll it here, pass where our adhesive is, we want to kind of stretch it like that, again make sure we're going center, and take our squeegee, start in the center, smooth it out, and then just work your way out to each side. This is where your cardboard is going to come in handy. You want to do that before you move to the next section.Now what we're going to do is we're going to repeat that same process all the way up to the other end. It may be easier if you have a second person up here so that as you get your sealant laid down, then you roll this out, they can grab the roll and kind of lift it, as you're taking the squeegee and run it up to center to make sure it lays down even. You want to make sure you're getting air bubbles and stuff like that out as you're doing it. Again, up the center and take everything out to the outside.When we get to our pipes, we're obviously going to have to cut around those because they're sticking up. If you notice how I have it cut, how we're going to do that, if you take your top, you kind of roll it up, you want to get that as close to that as possible. What I'm going to do is, I'm going to cut a little slit in it here on the backside, kind of across the center there, and kind of just do like an X in it. What we want to do is kind of come down like this, down to each side. Try not to cut too much at first because we want to be able to lay that and get that smoothed out, but keep this top as close to that as possible. Kind of like that. It is going to get a cover, but again we want to make sure that those cuts are underneath our cover and not sticking out the end of it and then we'll just smooth it out like normal.If you notice how this is kind of bunched up but this is smoothed out, this is where your second person might come in handy. If you don't have a second person, kind of roll it back, sometimes you can get this to slide and move yourself. When we get down here to the end, get this smoothed out here real quick, and I'll show you what we've got to do. You have to take this top, we're going to leave about maybe inch and a half to two inches overhang, we're going to cut it off there, we're going to take that flap and we're going to tuck it down underneath this, because this is our airflow direction. I'm going to make sure it underneath so it doesn't take a chance of lifting up while we're traveling. You don't have to be exact on the measurement, you just want to make sure that you're going to have an overlap there, enough that we can tuck underneath.Now we're going to take this and we're just going to get it pushed in underneath. Something to keep in mind. If you feel like you got a little bit too much up here that you cut off, or you have a little bit too much of a flap, it's a little hard to get it under there, we only need enough to get it tucked underneath this edge, so if you need to cut it off, cut it off, just make sure you have enough to get underneath there. I'd rather cut off extra and then go back and cut off a little bit more rather than not have enough, because you can't put it back on. It doesn't necessarily have to go under this rolled piece down on the side just on the top. I can actually cut that little piece off there.You can see I took my shoes off, it makes it easier to walk on here so we don't get it dirty. What you can do now is you can go back through, and any air bubbles you might have missed or may have come up as you're putting it on, you can go back and smooth them out. Honestly, the smaller ones try and get out as much as you can, but what you're really looking for is any of the bigger air bubbles, you want to get those out as much as possible. With the smaller ones, the ones you can't get out, as this dries over a few days, a lot of those air bubbles, this top is going to kind of compress down onto that sealant and it's going to pull a lot of that out, so you can go back through and just kind of work it out.Then come back and we can start cutting our openings. What you want to do is you want to go corner to corner. We'll let these flaps lay down inside like that. We're going to do that with each of our square openings.Now our next step, you're going to take all your overhang, you're going to fold it up on top. I've got a couple of things holding it up there. I don't know for sure, they didn't have tape on here before, but I don't know if the manufacturer did that, or if maybe this roof was inaudible 00:22:11 before, but this is a very important step. You're going to get two kinds of butyl tape, you're going to get thinner stuff, it's kind of like this, not as wide, and you're going to get some inch and a half wide. We're going to use the smaller stuff. What we're going to do is stick it right along this top edge, and you're actually going to get a roll like this in your kit, and we're going to do this from one end to the other on each side.Once we get this stuck on, we're going to come back and peel off our tape. We're going to pull this down and pull it down tight, and we're going to stick it to it. That's what's going to hold our top down.Now we can go ahead and remove our tape, once we get it all the way down to the end, or I'm sorry, our paper backing. Once you got your butyl tape on, your outside paper off, we're going to take our top or we're going to pull it down, what we're going to do, we're going to pull it down tight and stick it to that tape. Then we're going to do this from one end all the way to the other.Next thing you're going to do is take all your trim pieces, you want to clean off any of the old sealer that might've been on there. A easy way to do it, just take a plastic putty knife, or a regular putty knife and just scrape it off.Then what we're going to do is you're going to take butyl tape, this is where your wide tape is going to come in play. You're going to take it and stick it on the backside, and you want to make sure you're covering all the screw holes, and what I did to make it easy is I had numbered them one, two, and three. One is going to be front, two is going to be center, three is going to be the very back. Now we can go ahead and go up and get this put in place.What we're going to do is we're going to line it up. This top edge we're going to take and we're going to push it to the bottom edge of the butyl tape we put underneath our top here, and I don't want to stick it all the way down, I'm going to start on one end and we'll throw a couple screws in to make sure it stays in place. Every once in a while because we want to try to use the same holes if possible. Another thing that I found when I was taking this apart is typically you don't see Phillips head screws, you usually see a square head, so that's what kind of leads me to believe that this had been done before, because a lot of the screws we're actually rusted.What I did is I just am replacing them with the same threads just a little bit longer to make sure that it holds it in place. What the butyl tape on the backside of this is doing, is as we run the screw through it, it's actually grabbing the threads and it's pointing that butyl tape into that hole and it kind of seals that hole, so we're not only getting seal through the hole here, we're getting a seal on the backside, and we're getting seal underneath it, so it's kind of tripled up here so we've got plenty of coverage to keep any water out.Before I put my last screw in here, or the last couple, I'm actually going to be adding a gutter, it's going to look like this. What I'm going to do is I'm going to slide it up back behind here, I'm going to cut this kind of off here a little bit, I'm going to slide this up underneath, I'm going to run my screw through this into the sidewall of the camper. Now what we can do is take our extra flap here now that we have all of our screws in, and we're going to run a knife right up along the bottom edge. Keep in mind if you have any vinyl stickers or anything, you should make sure you kind of pull this out as you do it so you don't cut your stickers. This camper here, all the stickers we're removed so we don't have to worry about that. We want to try to get that as close to that edge as possible because we're going to be putting some sealer along this bottom edge. Going to do that from one end all the way to the other on both sides.What I'm going to suggest is when you cut this off, roll it up, stick it in your camper, because if you ever find a spot gets damaged, you can actually take some PVC cement and chemically weld a piece onto this roof and it makes it permanent bond.Once we have our trim pieces put back in place, we're going to take some non-sag sealant. It's going to come in your kit. What we're going to do is we're going to seal up this corner. What you want to do is get a wet paper towel, keep it kind of moist, get a couple of dry ones, and we're going to start about right here at this first screw and come this way with it. I want to make sure we're covering that, so we get maximum coverage for any water that may get inside. We want to make sure we fill in all of these gaps, so anywhere that water can potentially get in.I didn't mention it before, but when you cut this tip off, don't cut it too wide because you don't want too much of this coming out at one time, cut a very small tip on it. What we're going to start sealing the top and the bottom of our rails. What you're going to do is cut at an angle, kind of take that angle and put it in the corner. We really don't need to squeeze too much, we just want to lay a small bead in there. This is where your wet towel is going to come in. Get your finger wet, and this is a step that I like to do, because you see when I laid it on there's kind of gaps in there. Get your finger wet and take it, we're not going to push, we're just going to run it over the top of it, and it makes it look really smooth. It gives it a really nice finished look when we do that.When you get to where your two pieces meet, you want to make sure you fill that in on top and bottom. Keep in mind it is a gutter so you don't want to get a whole glob down there where your water is sitting in one of the rails, you want to make sure you're still able to flow, we want to make sure that we seal that gap.Once you get the whole rail done, let it sit for a few hours, maybe even a day. What you're going to find, is in some spots you might find a little air bubble. What you want to do is where that air bubble is it might create an opening, take a little bit of a sealant and kind of fill in that spot. You want to make sure you're sealed all the way around on it.Now for our trim pieces on the top, we're going to go ahead and cut off this excess here on the backside, same way we did on the side rails, all the way down to the end, and here we're going to be using self-leveling, it's going to come in your kit. Now there's a couple of different ways you can do this, you can go along this edge on each side and over the screw holes kind of like they did. I myself like to cover the whole thing to make sure that your self-leveler bonds both to the ceiling and to itself. What we'll do is I'm going to run a bead up this center and this one you can do pretty thick. We're going to do this all the way down the rail. It's going to cover the whole thing and what it does, it's going to create a cone over the top of this giving it a very good seal on both sides as well as our screw holes.You notice we stopped with our self-leveler about right here. Our steps come up and they attached to the roof, before reattaching these, you want to make sure you're putting a butyl tape on the bottom side. This is the same thing with the side rails. When we run our screw through, we want it to grab that butyl tape to pull it in that hole to make sure it has a nice seal. Now we can take our self-leveling, we're going to go over the rail and then around each leg to give us plenty of coverage on both.Once you get your back rail done, you're going to do the same thing to the front, and then any other components are going to be putting on like your fans, your skylight, your vents maybe that are coming out of your bathroom, keep in mind you want to make sure you're using self-leveling sealant on any horizontal surface, non-sag sealant on any vertical surface.Next thing we want to do is our flaps that we cut open, we're going to take a stapler, you want to have a fairly good sized stapler, air stapler probably works the best, we're going to push the flap down inside and we're going to staple it to the wood panel, or to the two by sixes that are in there, two by fours, whatever you may have.Once you get your staples in, you can cut off the excess at the bottom. I like to leave a little bit of overhang there just in case we have a problem with some of the staples we can come back and we have something else to staple too. We're going to repeat that on all of our holes on top of our roof before we install any of our other components.Now if you find a spot where you don't have any wood panel to staple to, there's a couple of different options you can do, you can take this and glue it down to that metal surface, or you can take a couple of small self tapping screws and actually drill right into the metal surface to hold this panel down.The next thing you can do is you can go back and you can put in this center vinyl piece that covers your screws that I had mentioned when you pull it out to hold onto it. If it starts falling apart and starts cracking, we do have replacements, you can find them here at etrailer.com. Once you put it back in, go back over everything that you sealed, as I mentioned, if you find any little bubbles, fill those in, and then what we're going to do is we're going to fill in right on the end, on each end, or the end of this vinyl set so it seals that no water can get in there to our screw heads.Now we're going to do a little demonstration to show you how to fix a spot if you get maybe a tear or a cut in your PVC membrane. I've got a piece stapled here, this is your wood top. I've got a piece on here. We'll just go ahead and take a knife and we'll cut that open like that. We don't want to leave that open because water can get in there. We'll take another piece that we have leftover, take some PVC cement, you can find this at any of your local hardware stores, put it over your spot, cover your patch piece that you're putting on, stick it over the top like that, and as that cement dries, it's going to chemically weld the two pieces together, making that permanent bond.Now in my opinion, when you compare doing a patch job like this over the other patch kits that I mentioned before, I think this is going to be a much better seal, it's going to be much better coverage, and you're not going to have to worry about water getting in there, unlike the other patch that may come off after a short period of time.We've let this sit for a few days so that the PVC cement is good and dry. What I'm going to do, is I left a little edge open here, I'm going to pull on this and show you how well this is holding together. When we compare it to some of the other patch kits out there, some of those you can just take and pull off, this is actually, I can't even hold onto it, you can see I'm pulling it and it's not coming apart at all. You can see how well that's going to hold on there if for some reason you have to do a repair job and make a little patch.
Customer Reviews
LaSalle Bristol RV Roof Replacement Kit w/ XTRM Membrane - 35' Long - 344270KIT35
Average Customer Rating: 4.3 out of 5 stars (9 Customer Reviews)
Replace or upgrade the roof of your RV with this complete roof installation kit. Includes everything you need - 1 bucket of adhesive, 1 roll of roof membrane, 2 rolls of butyl tape, 4 tubes of non-sag sealant, and 8 tubes of self-leveling sealant.by: Jeff10/06/2021
by: Dave11/10/2021
by: Heather 07/22/2020
We purchased the 30' xtrm pvc membrane kit based on reviews that pvc is no maintenance and is stronger than the other types of membranes. Membrane shipped separately from the sealant and tape which was unexpected but the membrane was rolled instead of folded so it worked great for when we needed to apply. I would suggest purchasing extra tape, sealant, and screws right along with because we're in the middle of the job and are finding that we're having to look locally for extras. So far it goes on nice and butyl tape is so much nicer to use vs putty tape. Hope this is the last roof we'll ever need to redo and the last Jayco...
by: Harold 09/08/2021
Big job. Spent the the first weekend stripping the old roof, replacing plywood laying down the new roof and getting it weather tight. The second weekend I installed the A/C vents etc and caulking everything. Two to three people four days of work but it came out great. The only problem was I had to buy extra two sided butyl tape as I also used it around all the openings prior to screwing in the vents. Overall very pleased with the results. Looks great and no maintenance compared to the previous rubber roof.
by: Steven 04/10/2020
I have used this product before and I must say that XTRM ply PVC roof is great, easy to take care of, tuff puncture resistant and super easy to patch in the event that it is punctured. I will not use any other RV roofing material.
by: Joe H04/21/2021
Awesome product.Thanks to Bob and his crew for the great install. See the install video.
by: James04/04/2021
by: Richard11/06/2021
by: Richard 01/28/2021
9
9
See what our Experts say about this LaSalle Bristol RV Roof Repair
- Weight of the Roll of the LaSalle Bristol RV Roof Replacement Kit w/ XTRM MembraneJust the membrane roll of the # 344270KIT35 that you referenced weighs 11 lbs. This kit comes with the butyl tape and the sag and self-leveling sealant as well so that would not be needed. You also can put down seam tape if you wanted as well.
view full answer... - What is Width of Membrane of LaSalle Bristol RV Roof Replacement Kit # 344270KIT35The width of the membrane that comes with the # 344270KIT35 is 9-1/2 feet wide and 35 feet long. I attached an install video for this for you to check out as well.
view full answer... - Replacement Roof Kit for a Fleetwood Redline Hyperlite 335FSE 5th Wheel TrailerThe Fleetwood Redline Hyperlite 335FSE 5th Wheel Trailer measures 35' long. Therefore, the LaSalle Bristol RV Roof Replacement Kit w/ XTRM Membrane part # 344270KIT35 is what I recommend to replace the roof membrane. In many cases, the LaSalle Bristol RV Roof Replacement Kit w/ XTRM Membrane will be an upgrade to the roof working to better protect from sun and keep out water. The LaSalle Bristol RV Roof Replacement Kit w/ XTRM Membrane comes with everything that you need. In regards to...
view full answer... - RV Membrane Replacement for Forest River Flagstaff 2013 8528IKWSThe SuperFlex membrane your Forest River came with is a different style than the LaSalle Bristol XTRM part # 3441700534142711435 that you referenced but that doesn't mean this wouldn't work. It's just a different style. We have this membrane as a kit that includes sealants and butyl tape with part # 344270KIT35 which would come with everything you would need to install the membrane. I attached an install video link to this page for you to check out as well. The color is white.
view full answer...
Do you have a question about this RV Roof Repair?
Info for this part was:

Expert Research:
Jameson C

Edited by:
Amanda M

Written by:
Halie H

Updated by:
Cody B
At etrailer.com we provide the best information available about the products we sell. We take the quality of our information seriously so that you can get the right part the first time. Let us know if anything is missing or if you have any questions.
Product Experts Available Now!
Call 1-800-940-8924
Thank you! Your comment has been submitted successfully. You should be able to view your question/comment here within a few days.
Error submitting comment. Please try again momentarily.