
Thank you! Your comment has been submitted successfully. You should be able to view your question/comment here within a few days.
Error submitting comment. Please try again momentarily.
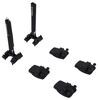
These custom-fit clamps and pads let you mount 4 Inno XS200, XS250, or INSU-K5 feet to your vehicle's naked roof to help create an aftermarket roof rack system. Clamps mount to feet with bolts. Kit includes 4 clamps and 4 pads.
Features:
Specs:

Videos are provided as a guide only. Refer to manufacturer installation instructions and specs for complete information.
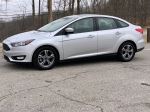
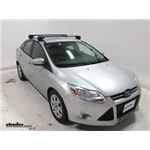
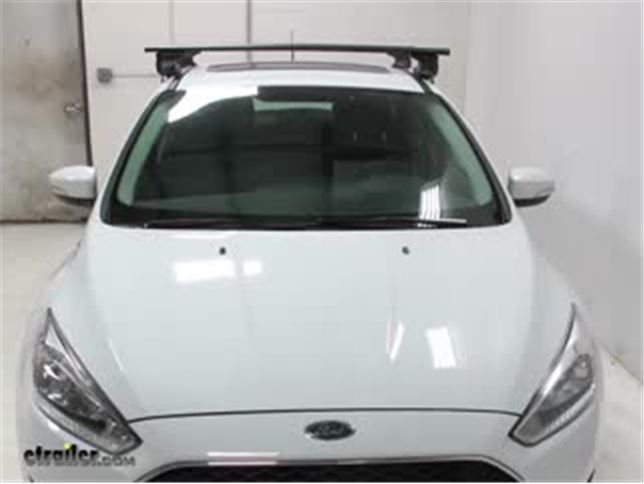
Today in our 2016 Ford Focus we're going to be test-fitting the Inno Aero Crossbar roof rack system, consisting of part numbers INXB130-138, these are the Inno Aero Crossbars 51 and 54 inches long. Part number INXS250, this is the Inno through feet for the Aero crossbars. And part number INK528, which is the fit kit for the Ford Focus. The Inno aero roof rack system is great for carrying a wide variety of accessories on your roof while freeing up space inside your vehicle. Both bars have a combined carrying capacity of 120 lbs, although you always want to double-check with your vehicle's manual to make sure it can withstand those weights. With the end caps, once you remove those, you can see it has a rubber strip in the center here.
Now that combined with the aerodynamic shape of the bar is going to cut down wind noise and drag while you drive. Also, since it has this rubber strip, you can use this with t-track accessories. Instead of having to cut the strip to length and put it around them, you simply just push it down and slide your accessories into place. Also, on each end with our feet here, they are lockable, so once you install this onto your roof it's going to be secure to your roof as well. Now that we've gone over some of the features of this roof rack system, let's go ahead and show you how it installs. We have our rear bar partially assembled on our table here, and next we'll take our through foot and put it onto the end here. We go to the end of our bar here, and slide this piece here all the way out so that bracket is sticking out.
Then we'll take our inner bracket, which comes with our foot kit, we'll push that into place like so, and it will fit properly. We'll push it back in til it gets to that point, then we'll take this top portion of our foot, we'll stick it into this portion here, they'll fit in together like so, and then you push them into place. The next step is we'll take a measurement to get the proper spread between our feet. Measure it out . looks good. Then we'll take our included Allen tool and tighten down our bolts in the center here.
Get that nice and tight. Next we'll install our fit kit, which is going to consist of the rubber pad here and our clamp. These are numbered, so always double check and make sure that they're going to the proper foot. Looking at the bottom of our rubber foot, we can see that it matches up with our foot here. That'll just push into place. Finally, we'll install our clamp.
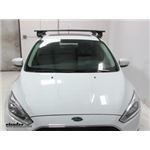
Remove the screw at the end here, place our clamp on, and just reinstall the screw loosely, and now we're ready to set it on the roof of our vehicle. With the bar set in place, now we'll measure for our rear crossbar, and that's going to be from the center of our doorjamb to the center of the bar. You'll find this measurement in our instructions. It actually looks pretty much on spot there. Repeat this on the other side. With our measurements done, now we can start tightening them down. We'll get them snug up against the door first, then we'll tighten them down completely. Once you hear those clicks, it's completely tightened down to your roof. Our next step is to insert this foam piece here to the end to take up the space underneath to help out with wind noise and drag. Then you would cut it to length. But for demonstration purposes, we'll have to leave that out. Our final steps are going to be to install our end caps to our bars, which just push into place like so. Then our locking end caps, which insert like so as well. Once these are installed, we can install our accessories and hit the road. There you have it for our Inno Aero Crossbar roof rack system on our 2016 Ford Focus.

Rack detached from my roof on the highway at about 70mph, taking my cargo container with it. Luckily, no one was behind me as it would have very easily caused an accident. Customer service was terrible and didn’t accept a return. Damaged the contents of the cargo container.Do not buy this product or from this company as they will not help.

Very happy with this this product while I had the vehicle they were on. Etrailers customer service is fantastic and I will definitely purchase from them in the future.
It was an easy install with instructions. The rack has held up well so far and looks good on the car.
Great Roof Rack! Looks very nice on my Ford Focus! Installing a rod pod soon! Quick Delivery! Outstanding product!
Received in good condition
Do you have a question about this Accessories and Part?
Info for this part was:
At etrailer we provide the best information available about the products we sell. We take the quality of our information seriously so that you can get the right part the first time. Let us know if anything is missing or if you have any questions.


Jenny N.
3/4/2022
There are a lot of factors involved when installing and using a roof rack. For the 2018 Ford Focus Sedan the roof rack capacity is 120 pounds although you would want to also check that the manual says for the vehicle. Before tightening anything down you will want to look at the instructions to find the proper spread between the bars and also the feet. Once that is down you will take the included Allen tool and tighten down the bolt. Next you will install the fit kit which will have you start with the foot pad. The foot pad will line up with the holes at the bottom of the foot. These will push into place and are numbered so that the right pad lines up with the right foot. To install the clamp you will remove the screw from the outside and loosely tighten it up to hold the clamp into place. The next step is to measure from the center of the doorjamb you will get the measurement to the center of the bar. You will find this in your instructions. Repeat on the other side. Then you will take the tightening tool and snug it up against the door. You will do this on the passenger side as well. Then you will go back and forth from drivers to passenger side giving about five or six turns each time until its completely tightened down. When it makes the clicking sound you will know its completely tied down. You do not want to over tighten it.