
Most Popular Roof Bike Racks for Volkswagen Routan
change vehicle# 1
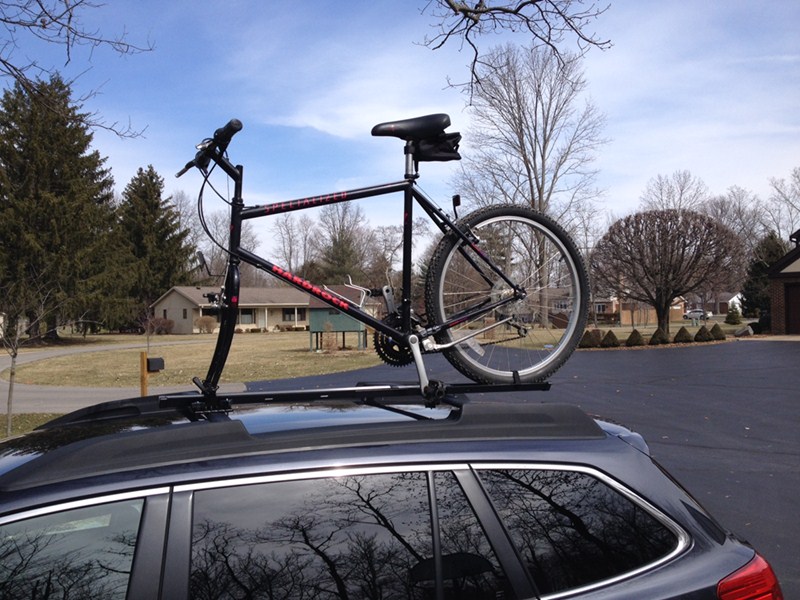
Swagman Fork Down Roof Mounted Bike Carrier - Fork Mount

- view all Roof Bike Racks
- Fork Mount
- 9mm Fork
- Locks Not Included
- Aero Bars
- Factory Bars
- Round Bars
- Square Bars
- No Disc Brakes
- Clamp On - Standard
- Black
- Swagman
More Information >
by: JH03/16/2014
Goes together quickly, appears that it will fit my needs in terms of being cross-compatible on a variety of vehicles. Fit on a Subaru Outback factory crossbar and transported bike locally with no issues when I got it out to set up and test (not quite warm enough to ride much yet where I live). Instructions are not super, but the assembly is pretty straightforward so that is not a problem. At the price point, if this rack indeed holds up to swapping onto multiple vehicles and lasts me a few years, I'll be thrilled with the purchase.

View More
View Less
by: Andrew Cannon06/13/2016
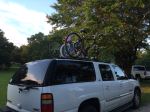
I purchased two of these racks, along with another rack that is meant to hold bikes with both tires still installed. I am extremely happy with all three of them. This rack specifically is very sturdy. Installation was sort of a pain, but that was mostly due to me installing it on the top of my 2004 GMC Yukon XL...it is so high that it was a little hard to install. But now that it's installed, it's actually very simple to take the bikes on and off. I've made one round trip with these racks, so I've put the bikes up there and removed them twice. Both trips (about 100 miles each way) they bikes were super sturdy and I had no concerns about them falling off or anything like that. I would definitely recommend this rack if you're looking for a fork down roof mounted bike carrier. In fact, I will very likely get another one when we add another bike to the family. I think I'll be able to fit four racks on the top of my Yukon easily. One last note - I was initially concerned about the height of my vehicle when bikes were on top of them. I brushed a couple of tree limbs when pulling into my camping spot, but it was no big deal. I think the total height of my load was about 10 feet, which was lower than the camper that I was pulling.

View More
View Less
Bike Rack Videos
Thule Domestique Roof Bike Rack Review - 2011 Volkswagen Routan

Today on our 2011 Volkswagen Routan, we'll be test fitting the Thule Domestique Fork-Mounted Bike Carrier, Part Number TH513. Our Routan already has a factory installed roof rack system.We'll begin by installing our carrier directly on to the factory crossbars. We'll go ahead and place our carrier on the crossbars. We'll need to remove the skewer, so we can access our allen bolts. We'll make sure that our front clamp sits nicely around our front crossbar then we can make sure our bolts are in place and tighten it down using an allen key. Once we have our front clamps secured and tightened. We can then re-install our front skewer.
RockyMounts TieRod Roof Bike Rack Review - 2011 Volkswagen Routan

Today on our 2011 Volkswagen Routan we'll be testing the RockyMounts TieRod roof mounted bike carrier, part number RKY1014. Our Routan already has a factory installed roof rack system so we're going to begin by placing our carrier on top of our factory crossbars. We'll go ahead and make sure that the rubber coated steel straps at the front of our carrier are underneath our crossbar and ready to be secured. We need to remove the front cover, place our steel straps in the correct location, and then tighten the silver bolt using an Allen key. Once we have that tightened down and secured we can then place our cover back onto the front part of our carrier. Now move to the rear where we'll take the rear clamp to fit it around our rear crossbar.
RockyMounts TieRod Stretch Roof Bike Rack Review - 2011 Volkswagen Routan
Today on our 2011 Volkswagen Routan, we'll be test fitting the RockyMounts TieRod Stretch, Roof-Mounted Mountain Bike Carrier, Part Number RKY1011. Our Routan already has a factory installed roof rack system, so we're going to begin by placing our carrier directly on top of our factory crossbars. At the front part of our carrier, now we can remove the front cover and place our straps into position then we can use an allen key to tighten them into place. Now, we're ready to reinstall our cover. Once we have the front part of our carrier secured to our crossbar, we can the move to the rear of the carrier and put the clamp around our rear crossbar. We'll make sure our bolts are set then we'll use an allen key to tighten down our bolts and secure the rear part of our carrier to our rear crossbar. Now, we'll go ahead and make sure that the wheel strap in the rear is undone and that our skewer at the front is open. We'll grab our bike, place the rear wheel on to the wheel tray and drop our front fork down into the skewer. We'll secure it first by the skewer and then move to the rear and secure with a wheel strap.


What our customers are saying:
"Loved the hitch 5-bike bike rack. Came quickly and is as advertised."