
# 1
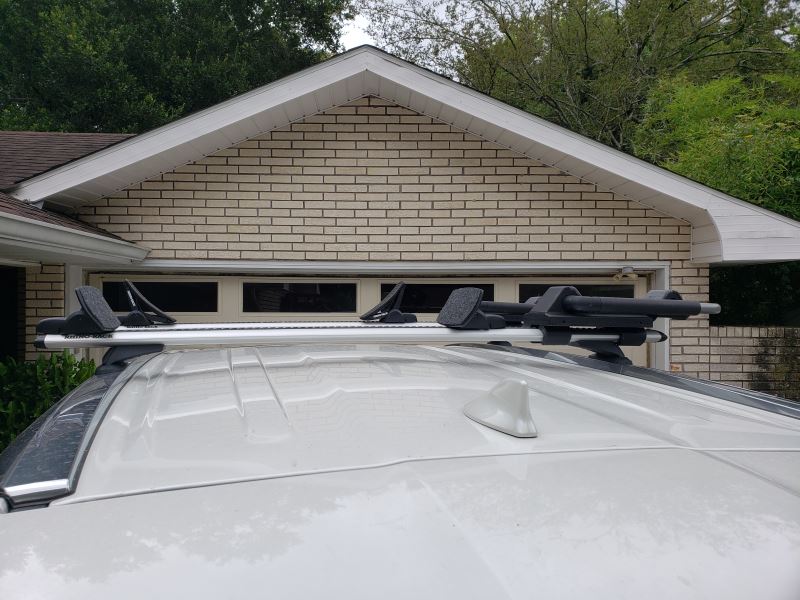
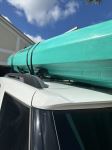
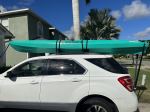
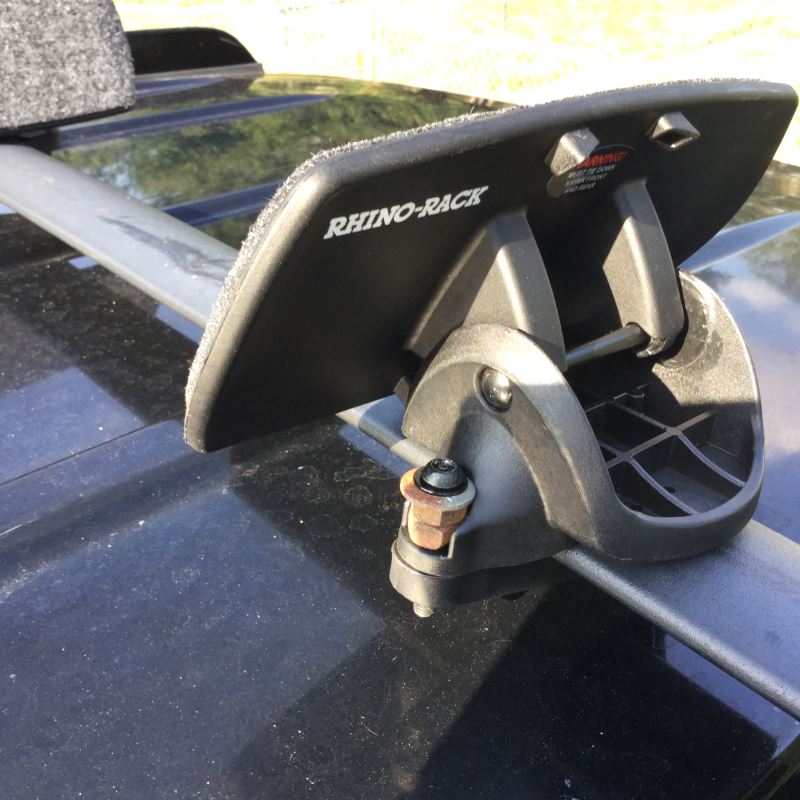
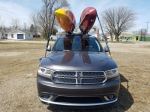
Rhino-Rack Nautic SUP or Kayak Roof Rack w/ Tie-Downs - Saddle Style - Clamp On
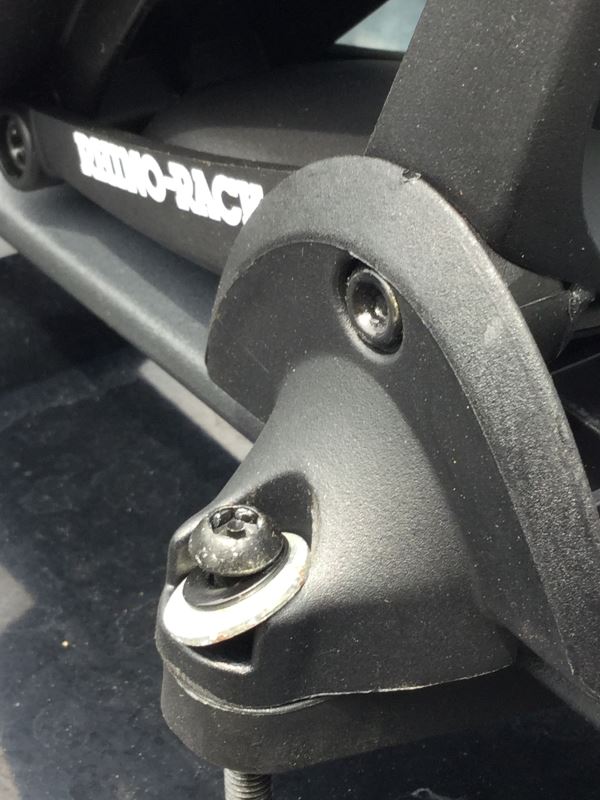
After attempting to mount the individual rack pieces using the “burglar proof” button head screws with the pin in the recess and the short hex wrench with the hollowed out end I discovered that no real burglar would want the rack but would rather have the kayak so the first thing I did after spending 10 minutes trying to insert the hex into the button head screws with the pin inside the recess and attempting to turn the bolts and continually being obstructed by the support pieces and the paint interference on the bolt heads with trying to get the wrench into the recess I knew it was going to be a long frustrating process so I threw them away and purchased new button head stainless steel bolts and a 4mm extended handle hex wrench to turn them. Smartest thing I ever did. You not only have to mount the rack initially but then you have to put the kayak on the roof and remount all pieces again to fit your boat. All kayaks are different to one degree or another. Having to move the individual support and retighten them with the boat on the rack is even more difficult to do than the initial mounting with these “burglar proof” bolts and hex wrench and you will be happy you threw them away before you started the entire process. Try it for yourself at first and then go get the alternate ones. Worth the little investment and stainless steel will not rust away when you want to remove the rack system in the future. Once the rack is on your vehicle and kayak in rack the tie downs supplied are very good quality. Make sure you use the recommended tie down locations and directions, two kayak body ties and ties at front and rear. Due to numerous kayak hull designs it would be nice to have each support pod have a horizontal swivel built into it so it readily conforms to the hull shape. The overall quality of the system should be the last rack you will have to purchase. I only had issues with the supplied bolts and hex wrench. I gave this rack system a three star because of the bolts and hex tool and the individual pods not swiveling and I haven't at this point transported the kayak anywhere so I am waiting to see how it handles long trips with wind loads and constant loading and unloading performances.

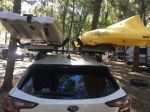
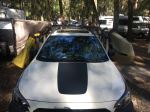
Works great. I’m 5’6” and the pivoting cradles make for easy loading and off loading. I do need a stepping stool to install the carrier on the roof rack.
# 2
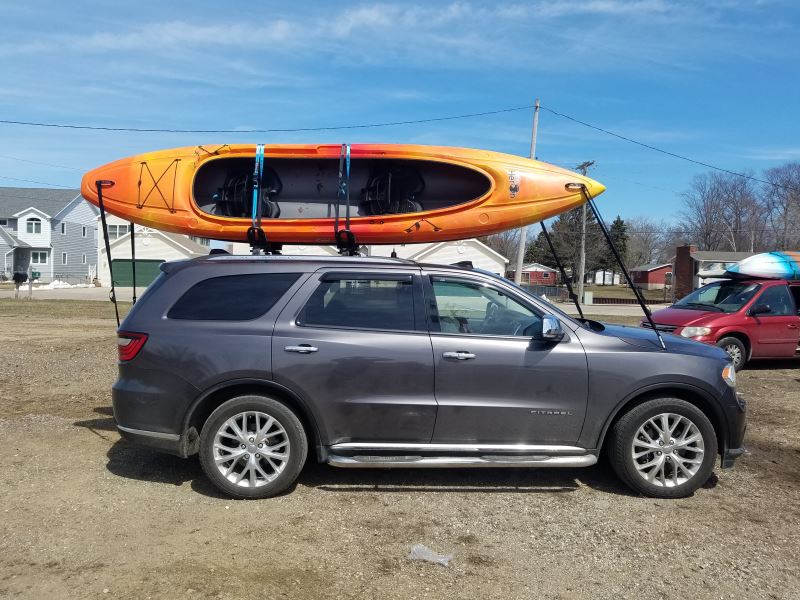
Thule Hullavator Pro Kayak Roof Rack and Lift Assist w/ Tie-Downs - Saddle Style - Universal Mount
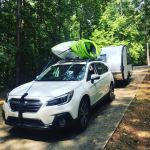
Bought a pair of these to go on 59" rhino rack bars on our Outback Wilderness and am really pleased. I left the bars full width - they are not a head banger on the car - and mounted the Hullavators as far outboard as possible which means the kayaks clear the side of the car and wing mirrors without folding them in. I did have to modify one Hullavator to make the Hobie Lynx fit (36" wide Lynx = 36" max Hullavator width)
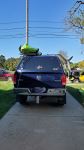
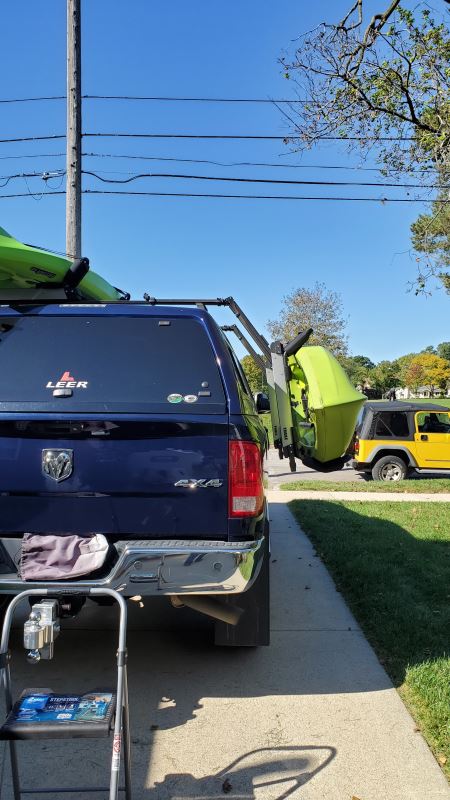
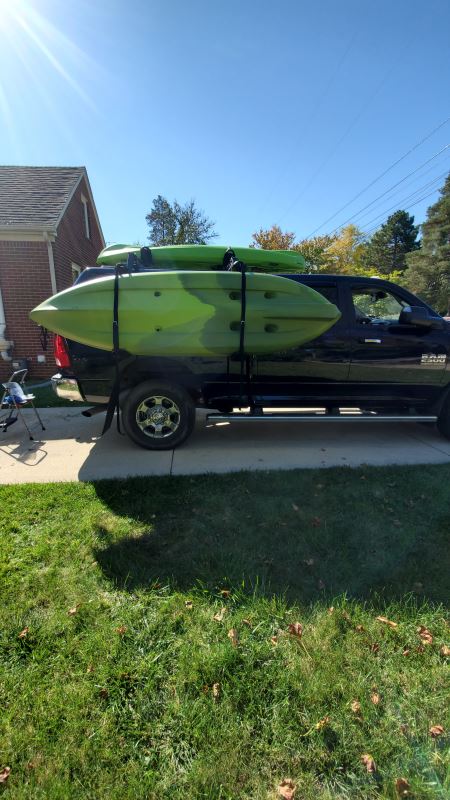
2018 Ram 2500, wanted a way to travel with 2 sit on top kayaks, With my wife and i in our late 60's it was taking a LONG tome to get the kayaks on the roof of the bed cover. With these i can do it with a short stool. Also carrying the kayaks upside down keeps the top cleaner and stops the water from getting trapped in the kayak (and raining down on me when I unload them).
# 3
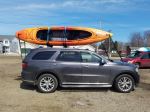
Rhino-Rack Nautic 581 Kayak Roof Rack w/ Tie-Downs - Saddle Style - Channel Mount
My OldTown Sportsman PDL120 was shifting around to much in very windy conditions. I bought the large Yakima kayak saddles/supports from etrailer.
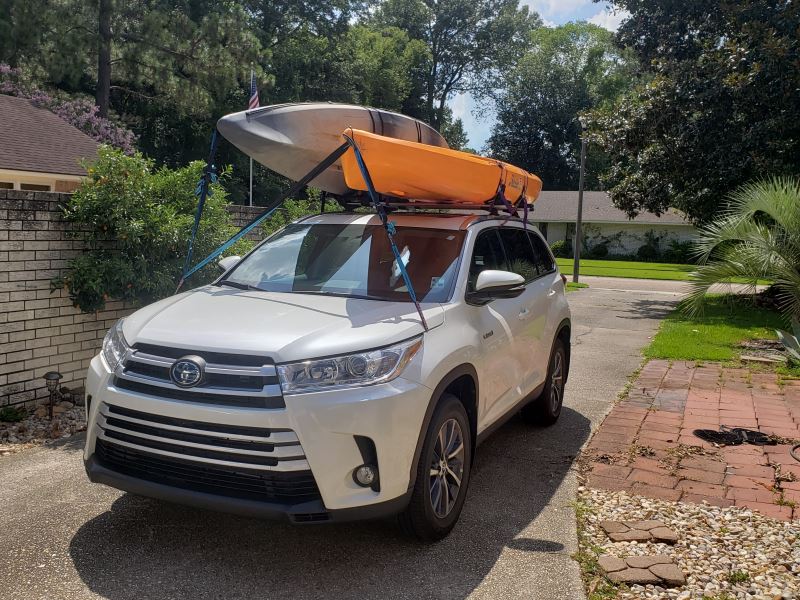
I recently purchased the Rhino rack below with these boat supports: Rhino-Rack Nautic 581 Rear Loading Kayak Carrier - Saddle Style - Rear Loading - Channel Mount Item # RR581 Also, I attached a Yakima Jaylow kayak carrier, all to a 2019 Toyota Highlander Hybrid. On the 54 inch aero bars, I was able to carry a Hobie Compass Duo kayak (35" beam, carried flat on the Rhino pads) and West Marine Pompano 120 (28" beam, propped up as shown on the Jaylow racks). To have enough width, the Jaylows and the Rhino pads are mounted as far out as they can go, and the straps are looped back under the rack pillars on the car. The bow and stern were secured with hood loops on each side (front diagonal straps on the Hobie), on the front placed under the hood where shown (this is the only place I could find a good metal-metal contact under the hood, and no electronics in the way), and in the back, tucked under the rear door. We did a 500 mile round trip to the beach and back, with no problems at all with the mounts. Little noise, no movement. My only recommendation is to figure out some kind of load assist for the large tandem kayak, to make it easier if one of the folks loading is under 5'8" in height or so. We worked it out, but only after a few failed attempts (especially when the boat is wet, and loaders are tired). Carol C at etrailer provided thoughtful, expert, and knowledgeable tech support for our purchase. Many thanks!
# 4
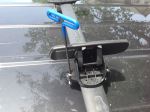
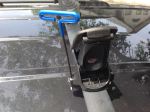
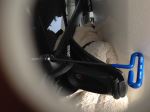
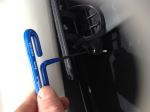
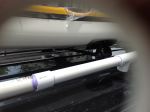
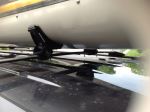
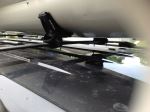
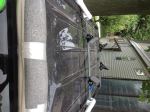
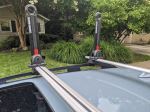
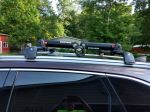
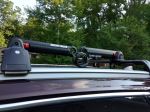
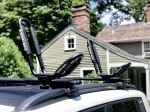
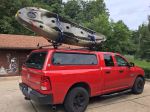
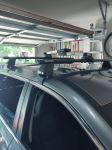
Rhino-Rack Nautic Roof Kayak Roof Rack w/ Tie-Downs - Saddle Style - Clamp On
This product was very easy to install. I had it installed in about 15 minutes and my kayak on the roof a few minutes later. The only issue I had was one of the tie-down straps was broken (stitching was not complete or something). Other than that, this product was great! The customer service (Carol and Neil) were great also, helping with the strap problem. Thank you again!
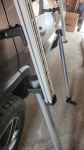
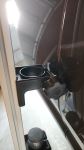
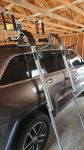
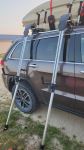
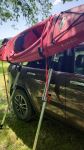
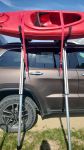
The Rhino Rack cradles, straps and hardware are all good quality and I have no complaints. The only issue I have, and the reason for only a 4 star rating, is the supplied M6 x 40mm Security Head screws are too long for the factory cross bars on my roof rack. When I first installed the cradles if I had tightened the screws all the way, the ends would have dug into the roof and paint, even before I added the weight of the kayak. In checking, I can purchase some M6 x 25mm Security Head screws from Amazon, but frankly part of me feels that for what I’ve already paid for this kit I shouldn’t have to spend another $15 for the correct length screws, plus the package has 20 screws and I only need 8. However, it appears that is exactly what I will have to do. At least they will be stainless steel, rather than the cheaper material the current screws are. Plus I will have extras for when/if the head strips out. I would suggest Rhino Rack consider included in their kit two sets of screws to meet this need. Keep the length they have, Judy add a set of 25mm. I’m still happy with the purchase but not 100%. I do like how the kayak slides easily on the rear felt lined cradles. Plus Rhino Rack includes every tie down strap that you will need, e.g. one each for the bow and stern in addition to two straps intended to secure the kayak directly to the roof rack cross bars. I would highly suggest you get in the habit of using all four straps, you really don’t need to have a gust of wind lifting the nose and tearing the roof rack off your vehicle. Can happen! My brother-in-law lost his roof rack exactly in this manner. So happy yakking and safe travels down the road. By the way I have paired these cradles with the Rhino Rack RTL002 T-Load Hitch Mounted Load Assist and Support Bar for 2” Hitches also purchased from eTrailer. I’ve attached some photos showing my first and second attempts to solve my dilemma. I need to order the replacement screws. First attempt after dark was a large flat washer, then the next day I added some nuts under the large washer. NOTE: Photos may post in reverse order.
# 5
Rhino-Rack Kayak Roof Rack w/ Tie-Downs - J-Style - Folding - Clamp On
First experience with purchasing from etrailer. Absolutely felt that my order was personalized which is a nice touch. The Rhino Rack S512 folding JStyle Kayak holders arrived boxed impeccably with no damage whatsoever and the price was great! Fantastic first time experience. Looking forward to using them. Thank you.
Sturdy cradle and easy to install. Difficult to keep tie down strap looped over top of "U" bar while trying to get it over the kayak, keeps slipping down. We made a channel out of foam to keep the strap in place and now it is easy.
# 6
Rhino-Rack Nautic Stack Kayak Roof Rack w/ Tie-Downs - Post Style - Folding - Universal Mount
've previously used the Yakima Kayak Stacker (old style), which worked fine but I always worried the straps would slip off the hook at the top while I was loading boats. They also didn't fold down, so had to be removed after use unless you wanted to look odd and cause a whistle while you drove down the road. They didn't have a universal attachment option, requiring adapters depending on the style and make of your crossbars. More recently I got the Thule "The Stacker", which is a superior solution. You thread the strap through a closed loop at the top, so you don't worry about straps slipping off while you're loading boats. They fold down after use and have a universal style attachment that fits around most styles and makes of crossbars. Good stuff. I really like the straps that come with these, as there is a rubber cover that slips over the metal cam buckle to protect your car's paint while you're tossing the strap over your boats to strap everything in. In order to shuttle our boats for river trips, we needed stackers to fit on both our cars, so it was time for another set. I had never heard of Rhino Rack before, but the lower price than Thile caught my eye, so I read about them and decided to give them a try. The Rhino Rack Nautical Stack used a closed loop at the top, which I liked better than the Yakima or Malone options, and came with the hardware necessary to install them into the C-channel of my Malone aero crossbars, which I wanted to try. I remember that with the Malone stacker, you had to buy the C-channel mount hardware separately. I really like the Rhino Rack Nautical Stack. They are a single post design, unlike the loop style of the Thule "The Stacker". I don't know if this cuts down on vortex drag, but it definitely saves you a couple horizontal inches up where the boats stack. The Rhino Rack Nautical Stack has textured rubber strips on either side of the post, which I believe is intended to cut down on vortex drag, but is also quite helpful in that boats tend to slip much less when you're just leaning them up against the post as you load up before you strap them. That's smart. The Rhino Rack Nautical Stack feels really solid. The mechanism for folding them down and locking them upright is easy to use and feels solid. Installation instructions were good. I tried to install into the C-channels without removing the rubber tubing in my Malone aero crossbars, but couldn't get the little squares to slide into the slots with the rubber tubing in place, so had to cut the tubing, slide the Nautical Stacks into place, then cut down some of the tubing I had removed and replace it in the remaining unfilled crossbar slot. That's not a knock on the Nautical Stack; just a tip in case you're trying to do the same kind of install I did. The one area in which I was less impressed was the tie-down straps that come with this kit. The metal cam buckles have no covering at all, so I'll probably still use my old Yakima and Thule straps instead and use these as backups. But overall, I think these are going to work at least as well, if not better, than the Thule option, and for quite a bit less money.
My wife and I purchased the Rhino Rack Nautic Stack to transport 4 kayaks. We considered similar products by Yakima and Thule, but the acceptable weight limit for the Rhino Rack was there deciding factor. Each of our kayaks weighs 38lbs, and the Rhino Rack was the only item that could handle this load. We were very pleased with etrailer's service and advice. George was extremely helpful. I would highly recommend buying the hood anchors and an extra set of the down straps. The tire down straps are far superior to ratchet-type tie downs that you buy elsewhere - they are strong and SOOO easy to use. I highly recommend the Nautic Stack and etrailer. P.s. we use a bike lock for the Rhino Rack and for our kayaks and they work great for overnight theft protection when we take the kayaks out of town.
# 7
Rhino-Rack Kayak Roof Rack w/ Tie-Downs - J-Style - Fixed - Clamp On
I installed these as soon as I got them and I’ve got to say, there are some extra holes for screws that are a tad misleading and the pieces that secure it to the cross bars don’t seem super secure. For reference, I do have Rhino Rack’s vortex crossbars so this should fit snug. The rubber tops were tough to get into place and I am worried they’ll snap when I go to remove my rack but Rhino Rack has yet to fail me with their products so I bet it’ll work out great!
This is a great product. As a novice kayaker I was nervous. The assembly was easy with clear instructions. My sales professional Crystal K. was a pleasure to work with. She knew the answers to all my questions. From placing the order to the delivery I am very satisfied. I will be using etrailer again. I can't wait to get my kayaks to the water.
# 8
Thule Hull-A-Port Kayak Roof Rack w/ Tie-Downs - J-Style - Fixed - Clamp On
This product is excellent. I have transported my kayak on these J Hooks several times going 70+ mph down the highway. It never moves. The bolts that come with it are short. If you have a thick roof rack, you will need longer stainless steel bolts. Make sure you you orient the blue straps with the buckle on top so you can pull down to tighten it up.
I think the Thule Hulaport kayak racks are the best, most secure way to transport your kayaks. I had these on my Xterra and hauled two kayaks up to Cape Bretton park in Nova Scotia, Canada from Connecticut, USA no problem. We were even able to store gear in the kayaks for the trip. I’m so excited to have them for my Crosstrek. Highly recommend these!
# 9
Malone DownLoader Kayak Roof Rack w/ Tie-Downs - J-Style - Folding - Clamp On
I had the moulded downloader and needed the folding in order to fit in the garage. The top feed for the tie straps isn't as good as the moulded J-style rack, the strap came out of one, but the kayak stayed where it needed to be. It is easy to raise and lower the rack, but I am not always sure at what angle I am supposed to set them. With the moulded J-style, they are at the perfect angle for holding a kayak. I wish the clamp that goes under the bars were a better fit for the oval bars, but they do send two different size bolts and the longer ones work.
The Malone DownLoader is very good value for the money. The J-style cradle is nice when you have to muscle a kayak on top of a tall crossover or SUV. You can hook the edge of the cockpit onto the base of the cradle and flip the kayak up onto the metal hoop support. Carrier installation and removal is easy and doesn't require any tools. Materials are good, but not great and that's what prevents this product from getting 5 stars IMO. The foam padding is nice enough and has been durable, but the metal plate that attaches the carrier to the roof rails is plastic coated steel and the plastic cracks over time, and leads to rust on the steel plate beneath. Not a big deal, but it might compromise the plate over time. I also wish that the provided nylon straps were longer, and that the ratchet buckles were covered in rubber to protect the roof of the vehicle and the windshield when you're trying to get them around the hull of the boat. We quickly replaced these with longer aftermarket straps that have rubber covers over the buckles. Those minor points aside, the Malone DownLoader kayak carrier gets the job done easily and safely, and does so at a very affordable price point.
# 10
Thule Stacker Kayak Roof Rack w/ Tie-Downs - Post Style - Folding - Clamp On
We needed a better way to haul around 3 kayaks and after looking at a number of options, we settled on the Thule Stacker setup. Installation is simple and the stackers provide a sturdy option for hauling multiple kayaks. One of the best features is that they fold down when you don't need to use them. My shopping experience with etrailer was smooth and shipping was prompt.
My wife uses these to carry two small kayaks in the roof of her Subaru. They work great and we very happy with the purchase. She also likes finding her car easier in the parking lots, even with the carriers folded down.
# 11
Yakima JayLow Kayak Roof Rack w/ Tie-Downs - J-Style - Folding - Clamp On
Great product and great customer service! Very easy to install, but I highly recommend to watch the installation video first. We used typical black office clips to clip the excess straps down since they came untangled when driving. Also, I recommend to purchase locks for the racks since we are concerned someone may steal them because they are so easy to take on and off.
The product seems great but I have not figured out how to get it safely attached to my bars. I have an Agricover Adarac on the bed of my truck and the crossbars are 1-1/2 x 1-1/2 inches square. I thought this would work well since it's for up to 3-1/2 x 1-11/16" crossbars, but it isn't secure on these. I'm going to try and figure out an alternate method for attachment though. Thule Hull-a-port Pro's are the perfect (mounting) solution but don't seem to be made any longer.
# 12
Yakima SUPDawg Stand-Up Paddleboard Carrier w/ Tie-Downs - 2 Boards
I use these 2-3 time weekly for my SUP I fish off my SUP and this rack is a great investment for quickness and ease of strapping. Thing I like best about etrailer is how fast I get my stuff.
After doing some research decided to go with the Yakima roof rack setup for our VW Atlas. Love the look and functionality of it all. Got the SUPDawg paddle board carrier to go with it. Love the locking capability for piece of mind when leaving boards unattended. We are VERY happy with our choice. Drove on highway with two paddle boards and it all went smoothly with zero wind noise whatsoever. Definitely worth every penny. Will recommend.
# 13
Malone DownLoader Kayak Roof Rack w/ Lift Assist and Tie-Downs - J-Style - Clamp On
I can't lift my kayak onto my roof rack like I could when I was younger. This looked like a perfect answer to keep me actively using my kayak. It is simple to use, but it does take some strength as you have to lift your kayak onto the loader and must lift the kayak up onto the roof rack as it only loads to just before the top, so keep that in mind. The legs need to be about 6" - 8" longer as mine don't touch the ground at the connectors. I can only reach the ground with them lowered to where they are almost out of the holder. They also touch the Jeep, so I am going to have to carry something to fit between the loader and the Jeep to prevent scratching the door paint. I think if the legs were longer and they fit with both the holder/connectors then I think they might not touch the Jeep. I would have given 5 stars if the legs were long enough. It works with both my moulded J rack and my fold down J rack. It works with both style of kayaks, rounded and straight hulls.
About a year ago, I purchased one set of the Malone Downloader w/Lift Assist (MPG114MD-351XL) and second set of Downloader J-Style Folding Racks (MPG114MD) for use on a 2014 Subaru Outback with standard Subaru roof racks. I had no issue with installation and use of any of the parts using the enclosed instructions and online videos. Everything seems to fit properly and securely; no broken, unusable, or missing parts. Over the past year we've use the racks extensively for our 10.5 ft recreational kayaks on both short local trips and longer highway trips. We augmented the roof racks with T-handle hood and tailgate tie-downs and some locally purchased camlock tie-down cords. Everything working great with 10's of racking/unracking episodes. We've only used the Lift Assist maybe 1 of 10 trips when there's only a single person lifting, so can't provide as much feedback. However, the Lift Assist does work exactly as advertised and we're happy with the results. In addition, the friendly and well-informed folks at etrailer.com were a huge help with answering tech questions. Well done!
# 14
etrailer Kayak Carrier w/ Tie-Downs - J-Style - Folding - Clamp On
Brought home a new kayak yesterday using this J cradle for the first time. Easy to set up and load. Two complaints: not impressed with the strap buckles - had to tie knots to secure. And the 3-inch bolts weren’t long enough to easily attach the cradle to my Rhino Rack crossbars, so I had to replace them. Also got my finger pinched pretty good adjusting the cradle knobs - my fault for not being more careful, but just saying …
Great product for the price - The cradles were very easy to mount (and lay flat once folded). The videos were helpful in showing how to set the straps in the most efficient way. I test-drove my car today with my fishing kayak on top on a 80-mile round trip (a mix of freeway, country road and dirt tracks). The kayak was perfectly still, no particular wind noise and I was able to muscle to kayak up the roof and take it down on my own (it's a 52 lbs boat). I really recommend that product and I'm glad I went for J-Style cradles!
# 15
Thule DockGlide Kayak Roof Rack w/ Tie-Downs - Saddle Style - Universal Mount
I need replacements when a pair of Dockgrips was was lost or stolen. When others were stocked out, etrailer came through. Fast shipping and courteous service!
The Thule DockGlide Kayak Carrier and the Tie-Downs that came with it are a very functional High Quality Product. Once the DockGlide Carrier was properly positioned on the Cross bars it attached easily and solidly with the associated hardware. The Kayak slides on and off the Carrier very easily and is quite secure once properly tied down. I enjoy Kayaking and the DockGlide Kayak Carrier enables me to get where I want to go.
# 16
Thule MultiLift Cargo Lift and Storage System - Ceiling Mount - 220 lbs
The product itself I would give 5 stars, but it took considerable effort before I could get it installed and tried out. The first obstacle I ran into is that there were no screws included. After opening the box I discovered this, read through the manual, looked at the product listing on etrailer's website, and on Thule's website. I did not see any notice that screw were not included. Finally I did see on one end of the box such a notice, and etrailer's customer service confirmed this to be the case. The second obstacle was how to install the product in my garage. The instructions were of marginal help. They are mostly devoid of words, but rather use pictures to instruct. Once I had a good idea of how all the parts were to fit together and be mounted I discovered my garage ceiling would not accommodate the parts. The ceiling rafters are installed on end, from one side of the garage to the other, and thus not wide enough for the screw holes in the pulleys or center rod mounting brackets. I improvised by installing in the garage attic two 2x8 boards perpendicular to the rafters, then three 2x4 boards snug under the garage ceiling, attached to the 2x8s by way of two 3/8 x 3.5" hex bolts on either end of the 2x4s. The 2x4s were 10', cut in half to allow room for the TH572 mounting hardware between the bolts. With appropriate structure in place (a 12-hour one man job), I started on installing the product. I used eight 1/4 x 1.5" lag screws to attach the pulleys to the 2x4s, and six #10 1.5" wood screws for the center rod mounting brackets. This part of the job took only about an hour... maybe two... it was late. Some suggestions: - make sure your garage can hand the load of the box (What you see in most attics are designed to hold the roof, not have stuff suspended from them -- I got lucky and had access to reinforced headers in the right places) - make sure your garage door can still open with whatever you are storing in place - make sure you can get your car in position under the load (rooftop box, kayak, etc) where everything is installed - make sure you can get your car out of the garage with the load attached So, my main complaints with this product are two: no screws, and minimal instructions. But with a little determination and some help from etrailer customer support, I was able to get the job done. Now I need to find someone who can make my garage door opening taller.
Overall I give this Thule Multilift Cargo Lift a five star rating; however installing this device takes some effort and skill. Maybe more effort and skill than the typical DYI'er can provide. The instructions provided do not have any words or dimensions, only pictures. Other than following the routing of the rope through the pullies it didn't provide me any benefit. Also, my system did not come with any screws or bolts. For me that was not a big deal as I have plenty of hardware I can use. There is one center bracket and four pullies to install. The spacing does not line up with typical dimensions so I had to improvise to get the Multilift installed. My garage ceiling has joist spacing that is 16" on center. That is typical, although some may have 24" on center spacing. Either way the spacing for the screws to secure the various components does not match. I guess you could use toggle bolts to hold the components to the ceiling sheetrock but I didn't trust that idea. What I did was to span my ceiling joists with 1"x4" wood and then attach the components to them. The kit comes with a template so getting the actual components set up on the 1"x4" wood strips was simple enough. Once all the components are installed then the rope is routed through the pullies. As you can see in the pictures I had a close clearance between the roof box and my roll-up garage door. I think it is about 2". Since I don't have a tall roll-up garage door I cannot drive my car in or out with the roof box installed. That didn't matter to me since my only goal was to store the roof box out of harms way. My last comment is that it takes two people to lift the roof box up and get the Multilift ropes in place. I tried to do it by myself but that did not work. I do like this Thule Multilift but it took some effort to install it. I really like the way it is raised and lowered by turning a mechanism with a handle. There is a less expensive lift sold on the internet but it did not use as many pullies to raise and lower the roof box and it relied on a rope to lift and lower it.
# 17
Rhino-Rack Crossbar Pads w/ Tie-Downs - Universal - 21-1/2" Long - Qty 2
I love this rack! I don't think I'll ever take it off my car. Cool and functional. I've used it for my snowboard in the winter and my surfboard and camping gear in the summer.
The product very well made.. I have owned for a year now.. stays in place.. protects my paddle board
# 18
Rhino-Rack Kayak Roof Rack w/ Tie-Downs - J-Style - Folding - Clamp On
The Rhino-Rack 2 Kayak Carrier I ordered from etrailer was easily reviewed and ordered from their website and ALL communication relative to order confirmation and extreme detail included in their tracking was nothing short of phenomenal! The items were packaged with care and arrived intact. These fit our basic Lexus crossbars and is the perfect product for carrying our two (2) kayaks. My hat goes off to the great folks at etrailer -- It doesn't get any better than this!!!
These work great and I was able to install them on the OEM rack for my truck. The only downside is that the threads for the clamp hang down a little too close to the roof for comfort.
# 19
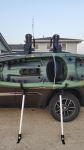
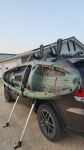
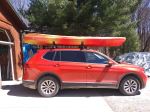
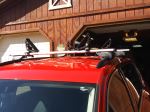
The MPG346 will work perfect! I am too old to lift this 13.5 ft kayak on my car so this will absolutely take the "work" out of my "play". Picture is of the kayak on my car. The cross rails and saddles were purchased thru etrailer.com. Great service, on time, great products. It will also free up some floor space when the kayak comes home for the winter.
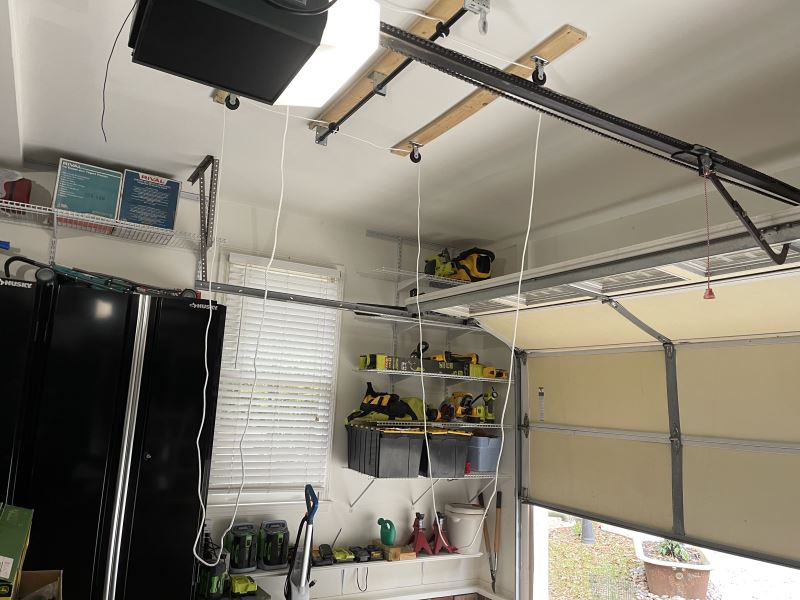
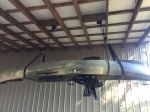
I purchased this to hang my 12 foot kayak up in a place that would keep it out of harms way, but would be easy to load onto my vehicle. Installation went very smoothly... Except, the brackets are designed assuming the support structure (rafter or truss) will run the length of your kayak. Mine run across the kayak from side to side. It was not a problem for me since my rafters are exposed. I installed a couple of short 2X8 blocks between the rafters and attached the brackets to the blocks. If I was installing inside a garage with sheetrock I would not have been able to mount and use this product. I am impressed with the appearance of the system, it seems to be well built. Hoisting my 80 pound kayak 8 feet in the air with the system was not too difficult, but did require a bit of effort. I am pleased with my purchase.
# 20
Swagman Tajo Wall Mounted Kayak Rack
Ordering was very easy and I really like the fact that I had reviews from others "with pictures". That helped me tremendously. The items came within 2 days (WOW). I didn't expect that. They are exactly like show and I will be installing them today. I don't expect any problems. (update after installation) I have now installed and I would have given a rating of Excellent, but I did not because of 1 problem I had. The screws that come with the product are soooo cheap that they all began to strip out as I installed them. And yes I was using the right Phillips head bit and I even had my drill set to stop if it hit resistance. The Phillips head has very small cross threads. If you look at the pics you'll see what I mean. This Phillips head is too small of threads for a larger 2" screw like this. As such, I ended up having to spend $20 on a screw extraction product (Grabit drill extraction) to get 1 of them out. I since replaced all these crappy screws with ones with better heads that are made of actual metal, not paper-mache that looks like metal. By the way, the Grabit screw extraction tool works great... Now that they're up, they look great and do perform exactly like I expected. I would definitely recommend these...
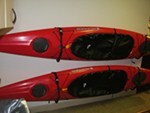
First of all, eTrailer was great, fast shipping and follow-up emails, even after delivery. I have 2 kayaks so I ordered 2 pairs of the Swagman Tajo Wall Mounts. The wall mounts went up fine. I like the way I can pull the pin and swing the empty racks toward the wall. I mounted mine high on the exposed garage studs. Next we picked up the kayaks and turned them and set them in the brackets. They went in easy and secure. Next we just strapped them in just for extra security. The Kayaks stick out about 16" from the wall, well out of the way of the garage doors, our truck and SUV.
Rhino Rack Watersport Carriers Review - 2020 Ram 1500
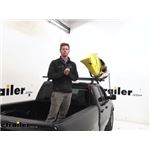
What's going on everybody, Adam here with etrailer. Today, we're going to be taking a look at the Rhino Rack fixed J-style kayak carriers on our 2020 Ram 1500. So this is going to be a great way to get your kayaks to and from your destination all while keeping all the space in your bed for whatever else you guys got. So it's going to be great. And we can even still keep a big old roof mounted basket on here. There's plenty of room to even throw another kayak carrier on there.
Softride Truck Bed Bike Racks Review - 2016 Ram 1500
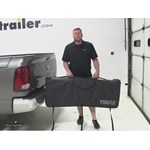
Today, on this 2016 Ram 1500, we're going to be test fitting the Softride Shuttle Pad Tailgate Bike Carrier, part number SR26457. Now to begin we're going to go ahead and take the Shuttle Pad and just set it up and over our tailgate. Then next what we're going to do is we're going to take these straps and feed them in between the tailgate and the bed of the truck. There's a couple ways you can do this. You can either just try to get them through without opening the tailgate or you can open the tailgate and feed them through. Try it this way first.
Thule Watersport Carriers Review - 2015 Ram 1500
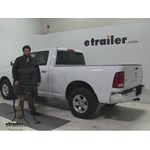
Today on our 2015 Ram 1500 quad cab, we're going to be doing a test fit of the Thule Shuttle SUP Paddleboard Carrier, part number TH811XT. You're going to get two of this. We've already got one installed on our front bar, and we do have installed on the Thule Xsporter, which is also available on our website, and that's going to be part number TH500XT. This is a thicker arrow bar, and because of that, this shuttle has this nice feature, which is the FlipFit Bracket. If you had a narrower bar like a regular arrow bar, or square bar, or round bar maybe, you can fit this over, and this is going to give you a little tighter, snugger fit. Since we do have this bigger Xsporter bar, we're going to flip around this way, and that's going to give us a little bit more length, so that we can get it around our bar. There's only one side that will come out, so this one will stay in there, which makes it nice because then, it's not going to fall out all over the place.
Thule Truck Bed Bike Racks Review - 2015 Ram 1500

Presenter: Today on our 2015 Ram 1500, we're going to be going over the Thule GateMate. This is part number TH824. This is going to be your bike protector, it's going to go over your tailgate. Just slide it on, just like that. You're going to have multiple loops on top that you can run bungees through. You'll still have access to your handle for your tailgate. Simply, what we're going to do is go ahead and take our straps and run them through into the bed of our truck.
Thule Truck Bed Bike Racks Review - 2012 Ram 1500
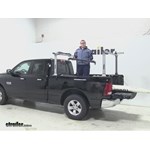
Today on our 2012 Dodge Ram 1500 we're going to be doing a test fit on the Thule Gate Mate. This is going to be your Tailgate Pad for your bicycles, it'll be Part Number TH823. This is the 54 inch edition, there is also a 62, but we're going to be doing the 54 because this truck does have the Ram boxes. The built in toolboxes in the tailgate so this will be for more of the compact bed sizes. Also if you have a bigger one, you'll want the larger of the 2. As you can see this fits in there very nicely, both sides not even making contact.
Darby Extend-A-Truck Hitch Cargo Carrier Review - 2010 Ram 1500

Today on our 2010 Ram 1500, we're going to be test fitting the Darby Extend-A-Truck Load Extender, part number DTA944. This will extend your truck vertically from 53 to 60 inches and horizontally from 13 inches to 20 inches to match up with your truck beds. This is adjustable, as I said, so this does work with a wide variety of vehicles. What you can use this for is if you we're to have, say, a roof rack installed on your truck, you can use this for ladders, lumber, water-sports carriers such as kayaks or canoes, anything you can think of. It also comes with the pins and clips to keep them in place, as well as a red tag or flag, excuse me, to put on the end of your load to let them know that it is an extended load. We have it in the upright position right now, and I would like to point out on the side here, we do have these adjustable points to work out with different vehicles. Let's go ahead and take a couple measurements real quick. With it in the upright position, measuring from the edge of our bumper out, we've added about 9 inches to the rear of the vehicle when it's in this position.


What our customers are saying:
"I like the easy of navigation through the site. It only took me a couple of minutes to place my order. Thank You I will shop this sight again in the future."