
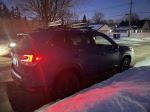
# 1
Rhino-Rack Ski and Snowboard Carrier - Locking - 4 Pairs of Skis or 2 Boards
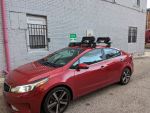
Howzit etrailer.com & staff. the rack itself is sturdy and more aero than comparable units. For my 2017 Subaru Crosstrek (OEM) Aero Bars, it was necessary to shim the (rear) lower/leading edge clamp assembly with two 1/8” x 1.5” x 1.5” (EPDM) rubber pads. The bars are shaped like a wing – and these shims helped to level the rear rack with the one in front. Overall - it looks very clean and functional. I might screw on some rubber ends over the ends of the mounting bolt to complete the project. Time to make some turns. Thank you!!
In what universe can you fit 2 snowboards in this thing?! What a waste of money, but the bigger one if you actually need to carry more than one snowboard!
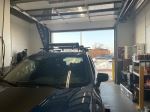
# 2
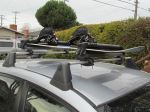
Rhino-Rack Ski and Snowboard Carrier - Locking - 6 Pairs of Skis or 4 Boards
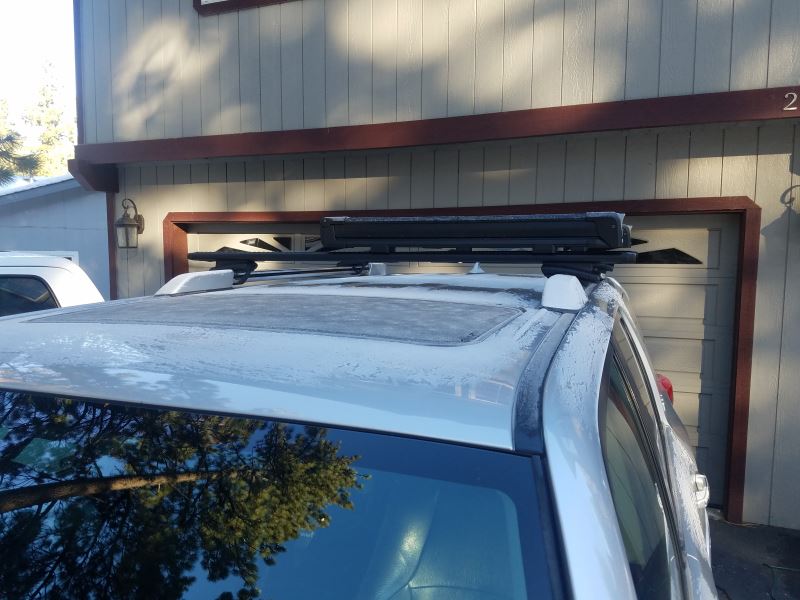
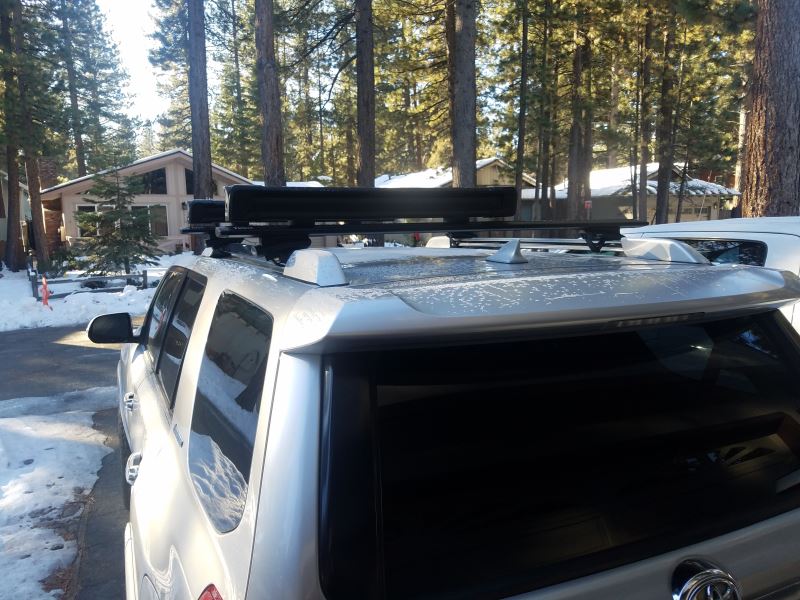
E trailer I have a 2019 Mazda6 and purchased the rhino rack series 2500 parts (fit kit #DK289, foot pack #RRRLKVA, aero crossbars#RRVA126B-2), and the rhino rack snowboard/ski carrier #RR576. My car does have fixed mounting points underneath the strip on the roof so I opted to add them to my roof and not use the clamp for kit that goes in the door jam. Every time I entered the year, make, and model of my car, the parts came up with the clamp fit kit part #DK387 which I did not want. But after some research, I found the correct fixed mounting point fit kit. The site of course told me that this part wouldn’t fit my car but after looking at the customer reviews, I saw them used on Mazdas. All of the rhino rack instructions were not the best. We did have to make some adjustments. One of the instruction packs tells you how long you’re supposed to cut the rubber pieces that go into the crossbars based on your car but unfortunately, the measurements were wrong for my car (picture- front 166mm is wrong). The front bar length was about an inch too short and I had to add more rubber to make it longer to fit the fixed mounting points on my roof. After some time of trying to interpret the instructions, and looking up whatever available instructional videos were online, we finally finished installing them and they do look really nice. At higher speeds on the highway I can definitely hear more noise. The actual snowboard carrier is fine, fits all 4 boards fine. It is a little difficult to close once I have my boards in there because you have to push the top bar all the way down and hold it down to be able to turn the key to lock it. I’m just happy I don’t have to shove the boards in my trunk. I do like that all the parts in this series come with locks and keys. So far no problems. Overall good product.
This rack works great with the four pairs of skis I lugged from Oregon to Alaska. I'm using it on the beef rack cross bars that came with my go fast camper which are very difficult to find mountings for. This one worked great though with a little bit of metal grinding on the bolts that slide into the t-slot of the rack. It locks and unlocks fairly easily (with a little bit of jangling involved), but so far so good!
# 3
Yakima FreshTrack 6 Ski and Snowboard Carrier - Locking - 6 Pairs of Skis or 4 Boards
Looks great on the vehicle. Had a little struggle tightening onto the cross bars but adapted and overcame!

It's a ski rack so its not all that exciting. I like that it is small for storage reasons when not using it. The fastening system to my Toyota Highlander factory rack is secure but a little cumbersome to apply and take off. I like to take it off when not using it to preserve my gas mileage. The boards and skis fit fine although they are stacked in order to get 4 peoples worth of equipment up there. A small price to pay for their compact size on the roof or in the garage.
# 4
Yakima FatCat EVO 4 Ski and Snowboard Carrier - Locking - 4 Pairs of Skis or 2 Boards
I actually ended up buying a second set so I can fit a total of 8 pairs of skis on my jeep. I love the quality and ease of installation. It’s an easy to use system and love that my skis are secured.
These are extremely easy and quick to install. Love the aerodynamics of them as well as it's quality craftsmanship. Very pleased with this item and with the delivery speed! From North Shore Oahu....MAHALO
# 5
Rhino-Rack Ski and Fishing Rod Carrier - Locking - 2 Pairs of Skis or 4 Fishing Rods
Last year I purchased Rino ski racks from etrailer and they work great . The hardware fit my roof racks and all the fittings are tight. Ordering was easy. Shipping was fast and I even got a follow up personal email from George a year later asking how I liked them - which was impressive! I would definitely recommend etrailer as an honest and good outdoor gear company!
Great product! I think it's a bit expensive but well worth it. I bought it to transport my fishing poles. So no long rods in my new SUV.
# 6
Yakima FatCat EVO 6 Ski and Snowboard Carrier - Locking - 6 Pairs of Skis or 4 Boards - Black
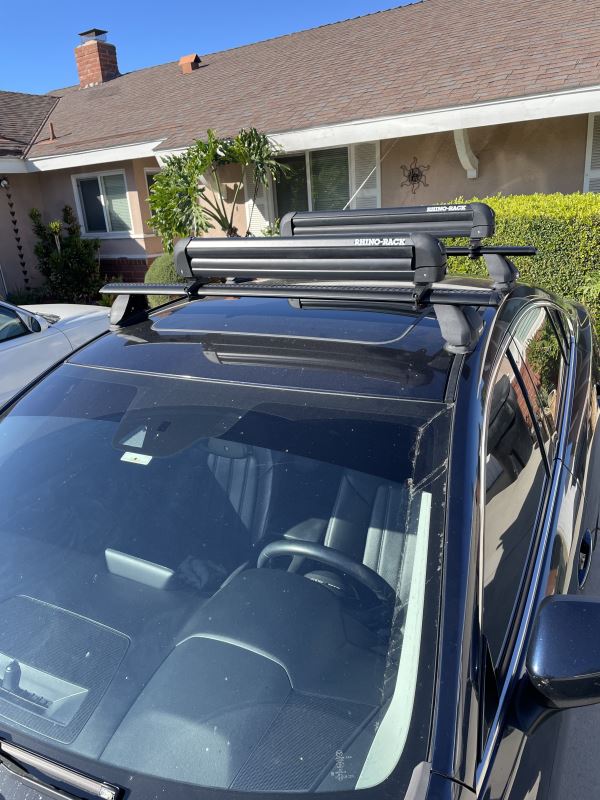
Just got my Yakima Fatcat EVO 6 ski carrier (black finish) and I am stoked. Note that this is different than the Fatcat 6 (non-EVO, previous generation) carrier. This is my first ski carrier, but I and/or my kids ski about once a week at Alta and Snowbird when the lifts are running, so I expect it to get lots of use. Etrailer shipping was fast and item was packed in a sturdy secondary box. PROS: 1. I love the sturdy build and quality finish of the carrier. 2. The design allows many micro-adjustments to fit to your vehicle and to fit the skis. For instance the spring-loaded hinge on one end and the lock on the other end can naturally accommodate different thickness skis. 3. Carrier has a usable width (i.e. width of skis side by side) of 32.75 inches (832 mm). For those that are not skiing on 75-mm-wide skis from 30 years ago, this carrier might actually allow you to fit 6 pairs! 4. Separate mounting brackets for aero or for square/circle cross bars. The aero brackets fit securely on my Acura/Honda OEM cross bars. The flat part of your skis will be about 3 inches (76 mm) above your cross bars. 5. A built-in lift bracket that lifts by an additional 3 inches (76 mm) the hinged end of the carrier, if you have really tall bindings (I don't think I'll need to use it). 6. The aero brackets use a rubber coated steel strap to wrap under your cross bars. This strap has a quick release cam on one end that can be operated when the carrier is not key-locked. This means you can remove or install the carrier without tools in about 4 minutes, once you've done the initial install-related tuning. While the carrier seems sturdy enough to leave on the vehicle all winter, I expect I'll only install it on ski days. This feature really sets this model apart and for me was its biggest selling point. 7. Yakima packages the carrier in a nice-looking sturdy cardboard box with a flap lid. I can fit the two parts of the carrier in the box, with the brackets/straps still installed, for convenient storage (see picture). CONS: None so far, though I haven't yet actually hauled skis up the mountain! After this ski season is over and eTrailer asks me for a follow-up review, I'll let you know. I'm also thinking about seeing if the ski carrier can be attached to my small hitch-mounted cargo carrier. That would make loading and unloading the skis easier than on the roof.
First off...you can't beat the service of etrailer.com. I was looking for a ski rack for my son's 2012 Subaru Impreza with the factory roof rack (base model not the sport). I could find no reviews of anybody installing one of these on one of those. I took the plunge and will say that I am very happy with the outcome. The installation is a bit tricky and four hands help, but after the first one was installed we had the hang of it and the second one went on very quickly. Even with the expedited shipping this rack was about $50 cheaper than the Subaru ski rack. Again the etrailer.com service is fantastic. I have purchased products here before and will do so again.
# 7
Rhino-Rack Ski and Snowboard Carrier - Locking - 3 Pairs of Skis or 2 Boards
I think these racks will be excellent during ski outings for many years. I attached them directly to the C-grooves on my Aero bars rather than using the provided clamps. The C-groove attachment is stronger and slightly lower profile. I love the large release buttons!.
I can't ski, I fly fish. However my oldest decided to try downhill skiing after being gifted a pair of skis. I am budget minded should the skiing not work out and after breaking many rod tips decided this might solve 2 problem. I am very pleased w/this equipment holder. It has transported skis & ski poles too and from and no longer does my oldest have to dodge skies coming over the back seat. So far it has taken abuse from the rain (& freezing rain), snow, ice, rapid warming, road salt, and upwards of 70mph and there has been no shifting, loosening, breaking of plastic or any other noticeable problems. I am excited for spring to see how it transports my fly rods.
# 8
Inno Ski and Snowboard Roof Rack - Dual Angle - Locking - 6 Pairs of Skis or 4 Boards
# 9
Thule SnowPack Ski and Snowboard Carrier - Locking - 6 Pairs of Skis or 4 Boards - Black
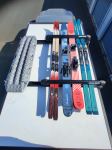
This rack easily fits 5 sets of skis for my family. It is FAIRLY easy to take on and off (could be faster if we didn't have to turn turn turn the dials). My biggest complaint is that as soon as my skis are out of it, I HAVE to remove it from my car (SUV). The noise of it empty on my roof is so loud when I am on the highway it is AWFUL! It's like it vibrates my whole car and is super loud. It only does it when there are no skis in it. It is frustrating since it would be way easier just to leave it on all winter taking my skis on and off when we need to, not the entire rack.
Just put this snowboard rack on my 2011 4runner mounted to Thule Aeroblade roof rack. Easy to install and use. Quality seems good. Like the look. No noise issues when driving. No complaints so far. Overall satisfied!
# 10
Inno Gravity Ski and Snowboard Carrier - Clamp On - Locking - 3 Pairs of Fat Skis or 2 Boards
Great product, can fit 2 pairs of wide powder skis and poles in easily. No issues, left the carrier on year round
# 11
Kuat Switch 4 Ski and Snowboard Carrier - 4 Pairs of Skis or 2 Boards
These are very easy to install and obviously high quality - just need to really loosen the part that hooks over the crossbar a lot to get it to unhook. I went on a fast highway trip yesterday and there was no noise or anything to indicate I even had a ski rack on my car.
It worked well and held 4 pairs of skis. Easy to assemble.
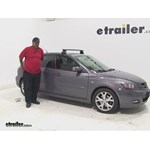
Yakima Control Tower Roof Rack Installation - 2013 Mazda 3

Today on our 2013 Mazda3. We'll be test fitting the Yakuma control tower roof rack system using the 48 inch round bars. Part number Y00408 Y00214 and two sets of Y00233. With our roof rack system assembled according to the manufactures instruction. We'll begin our test fit by removing the black plastic cover over our fix mounting points. We'll then place our landing pads over our fix mounting points, and secure them through the car using an Allen bolt. We'll do this on all four locations, and give them a shake to make sure they're secured.
Whispbar Through Bar Roof Rack Installation - 2013 Mazda 3

Today on our 2014 Ford Expedition, we're going to be test fitting the Swagman Titan, a tilting 4-bike rack for 1-1/4" and 2" hitches, part number S63410. To begin our test fit, we'll slide the shank of the bike rack into the receiver tube of our hitch. We'll line up the pin holes, thread in our anti-rattle bolt, and tighten it down with our wrench. In this position, you'll have about 21" worth of ground clearance. The closest point of the rack to the back to the back of our Expedition is about 5-1/2", and overall we've added about 20-1/2" to the length of the vehicle. Pulling the black lever at the base of the mast will allow us to tilt it away from our Expedition. As you can see, this does give us full access into our rear hatch.
Thule Podium Roof Rack Installation - 2013 Mazda 3
Today on our 2013 Mazda 3, we're going to be test fitting the Thule Podium roof rack system, part numbers THLB50, TH460, THKIT3069. We'll begin our test fit by removing the black covers over our fixed mounting points on our Mazda 3. We'll then thread in our threaded bolts, tighten them down with the supplied Allen key, and install our sleeves so they're resting on top of our vehicle and not the black trim piece. Now with our Thule Podium rack system assembled according to the manufacturer's instructions, we'll now slide our foot packs over our sleeves, then check and make sure we have even overhang on both sides. We'll grab our rear bar and repeat that same process. With our bars installed and even overhang on both sides, we'll now take the hex nuts and thread them down over our threaded bolts. We'll then tighten these down with a wrench to get a secure fit. Now, it's time to lock our bars into place.
Thule AeroBlade Podium Roof Rack Installation - 2013 Mazda 3

Today on our 2013 Mazda 3 well be test fitting the Thule AeroBlade Roof Rack System using the Thule AeroBlade Load Bars at 47 inches part number THARB47, the Thule Podium Foot Pack for Aero Bars part number TH460R and the Thule Fit Kit for podium style foot packs part number THKIT3069. To begin our test fit well remove the protective covers over the fixed mounting points on our vehicle. Now well go ahead and install the roof studs threading them into place and tightening them down with the included 3-mm Allen key. We already have our bars assembled according to the instruction, so were ready to place them on top of our roof. Well go ahead and take our front load bar and place it on the front part of our roof. We want to make sure that our roof studs go through our foot pack.
Thule Roof Rack Review - 2012 Mazda 3
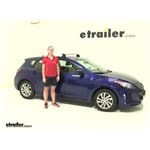
Today on our 2012 Mazda 3 we're doing a test fit of the Thule roof rack kit. These are our Aero-Blade crossbars with part number THARB47. Our foot pack is TH460R. Our fit kit, using the fixed mounting points on our hatchback version of the Mazda 3, it's going to be part number THKIT3069. Now we already have our front bar in place. We've gone ahead and removed all of our covers.
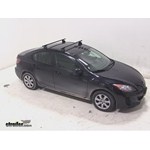
Rhino Rack Roof Rack Review - 2012 Mazda 3

Today on our 2012 Mazda 3 we're doing a test test of the Rhino Rack Roof Rack Kit. This is consisting of 3 part numbers. The first is our Vortex Aero cross bars, part number RRVA118B-2. Our 2,500 series Legs for our Vortex Aero cross bars using RRRLKVA and our fit kit for our Mazda 3, part number DK289. Now we already have our front bar on, we've taken out our spacers here at the top and installed these bolts. This is where we're going to attach our cross bars. These are simple to remove, we just use a flat blade screwdriver, pushed it back, it popped right out, and then tighten those down. We do have that front cross bar installed, we've got part of our back bar installed as well. We're going to show you how to put the last kit together and then how to install it onto our vehicle. Everything that you see here is included with our kit.
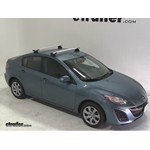
Thule Roof Rack Review - 2012 Mazda 3

Today on our 2012 Mazda 3 we're doing a test fit of the Thule AeroBlade Edge Crossbars. The part number for our crossbars today is TH7602-TH7602. Then the part number for our fit kit for this is THKIT3069. We already have our front bar put together. We're going to show you how we put our back bar together, mostly with the last foot pack, and then how we'll mount it onto our vehicle. We're going to start out with everything that you see here. All of this is included with the kit, except for our wrench here.
Thule AeroBlade Crossroad Roof Rack Installation - 2011 Mazda 3

Today on our 2011 Mazda3 well be test fitting the Thule Aeroblade Load Bar System using part numbers tharb47 for the 47 inch load bars, part number th460r for the Thule Podium Foot Pack for aerobars, and part number thkit3069 for the Thule Fit Kit for podium-style foot packs. With our roof rack assembled according to the instructions, well begin our test fit by removing the black plastic covers covering the mounting points on our Mazda 3. Once we have those removed we can take our mounting screws and fit them onto our vehicle. Well tighten them down with an Allen tool and then place the sleeve over the screw. Well grab our front bar and place it on top of our vehicle. As we set it well want to make sure that the mounting bolt fits through the appropriate hole.
Whispbar Through Bar Roof Rack Installation - 2011 Mazda 3
Today on our 2011 Mazda 3, were going to be test fitting the Yakima Whispbar System using the three bars, part number WB-S16 and the Fit Kit for this vehicle, WB-K451. The first thing we need to do is remove the fix-point covers. There are two on each side of the vehicle. Next we need to install our grub screws. On this Mazda, well be using the 60mm grub screws. These are the shorter ones included with the fit kit.
Yakima Q Tower Roof Rack Installation - 2009 Mazda 3
Today on our 2009 Mazda 3 we'll be test fitting the Yakima Round bar roof rack system using the Yakima Q Towers and part numbers Y00409, Y00699, Y00634, and Y00124. With our roof rack assembled according to the instructions, we'll begin our test fit by opening both front doors. We'll place our front bar onto the front part of our roof. To ensure we have it in the correct location, we need to measure seven inches from the leading edge of the windshield to the closest point on our foot pack. We'll do this measurement for both sides of the vehicle to ensure that our feet our in line with each other. Once we have the bar in place, we can open up the foot pack and tighten down the thumb screw. We'll do this on both sides. Then we can close the lid which will secure our clamp around the roof line of our vehicle. We'll open our rear doors and grab our rear bar and place it onto the rear part of our roof.
SportRack Semi-Custom Roof Rack Installation - 2009 Mazda 3

Today on our 2009 Mazda3, we'll be test fitting the SportRack Semi Custom Roof Rack, part number SR1010. With our roof rack assembled and preset according to the instructions, we'll begin our test fit by opening both front doors. We'll grab our front bar and set it on the front part of our roof. To ensure that we have the bar in the correct location, we need to measure 13-3/4 inches from the center of the door jam to the center of our foot pack. We'll do this measurement on both sides to ensure that our feet are in line with each other. Once we have it set, we can take the included Allen key and tighten the Allen bolt, which will secure the clamp around our roof line of our vehicle. We'll move to the other side and repeat the same process. We'll open our rear doors and grab our rear bar and place it onto the rear part of our roof.
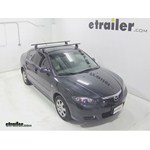
Rhino Rack Roof Rack Review - 2008 Mazda 3
Today on our 2008 Mazda 3, we're doing a test fit of the Rhino-Rack Vortex Aero Crossbar Roof Rack. The crossbar numbers are RRVA118B-2, the Rhino-Rack 25 Series Legs are RRRLKVA, and the clamps and pads are DK041. Now we have he first one already on our vehicle, I'm just going to show you how we should install the second one. Here in the table is everything you get. You have your crossbar, you have your 2500 Series Leg with the covers. This is the clamp and the pad, and this is our end cap, and the two tools that also come with it.


What our customers are saying:
"Another great purchase. Low prices, fast shipping and great customer service are always provided."