
# 1
Rhino-Rack Road Warrior Rooftop Bike Carrier - Fork Mount
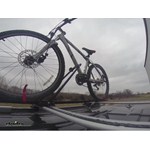
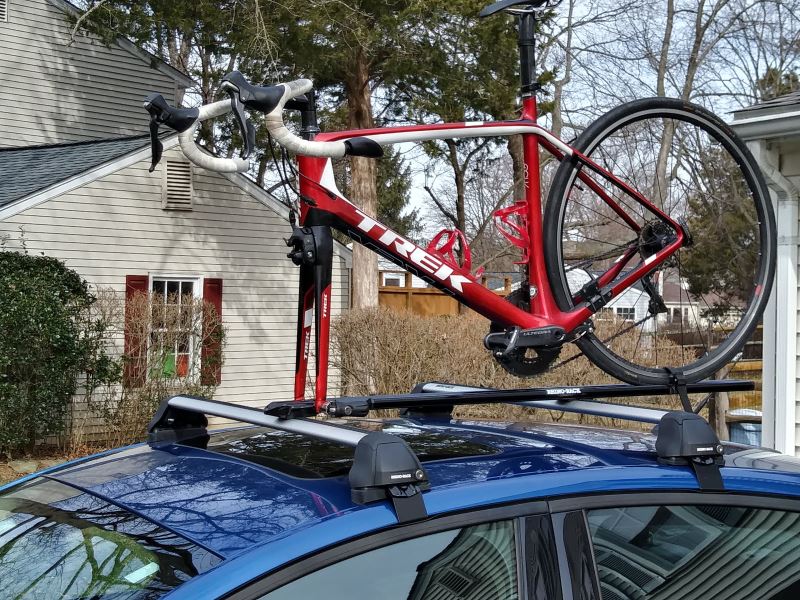
This bike carrier has a clean design and it assembled and attached to the roof rack easily. A locking front cover prevents it from being detached from the roof rack and the tray has a cut out in the front for a disc brake if my next bike has one. Once everything is snug, the bike feels solid and there's no slop.
I'm not too sure how to rate this but I'm not happy with it. Everything that happened is no fault of etrailer. I've made many purchases from etrailer, they're a great distributor. The bike rack appears to be great. The problem seems to be that they changed the design. To start, UPS damaged the box in shipping and then tried to tape the package they sent me. After walking through the parts in the box with an etrailer rep on the phone, it seemed that no parts were missing. So I proceeded to connect everything up based on the instructions. As I put it together I noticed the mounting bracket in the rear doesn't have anything to remove the slop. The rear is literally resting on a slider, which means that it would rattle when driving around. Just for kicks I took it for a drive with my bike on top. It rattled like crazy! So I looked at the installation videos on etrailer and then youtube. Every one of them showed an extra rear mounting bracket with knobs to tighten. These were not listed in the install manual so I suspect Rhino thought they could cut cost by eliminating them. I contacted etrailer to see if they had any. They didn't. So I returned it. Sadly, I still had to pay a $25 restocking fee. I'm not sure why etrailer charged me. It's not like I bought the wrong thing and didn't want it. It's actually a really nice bike carrier. Just a flaw in the design that etrailer should catch when they test it out in their videos. If anything, I've helped them out with this. Hopefully etrailer will test out what I sent them, then reach out to Rhino about this new design flaw. Again, I like etrailer as a service but I wish they had caught this before selling to me (and others). I strongly suggest that you don't buy this until the bracket issue gets resolved. Also, take a look at the last pic of the Inno XA391 on the etrailer site. They resolve the rear bracket rattle by putting in a thumb screw.
Yakima Roof Bike Racks Review - 2018 Chevrolet Impala
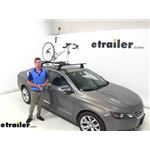
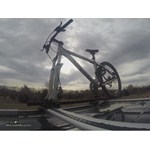
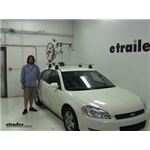
Adam: Hi everyone, Adam with etrailer.com. Today, we're going to be taking a look at the Yakima High Speed on our 2018 Chevrolet Impala. There's going to be a great bike rack for your roof rack system. In this case, we do have the Yakima core bar and it works very well. It's very easy to get your bike off the rack as well, so let's just go ahead and do that together.This is going to be a fork mount in front. So once you have that in place, it's going to clamp down on that, giving it really, really sturdy fit.
Yakima Roof Bike Racks Review - 2018 Chevrolet Impala
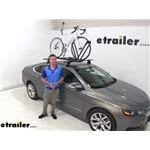
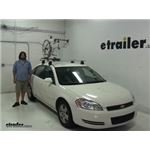
Hi everyone, I'm with etrailer.com. Today we have the Yakima HighRoad on our 2018 Chevrolet Impala. So this high road is going to be ideal for your higher end bikes. It has no frame contact, which is fantastic. It does have a pretty unique design. It clamps down on your front wheel, you get it nice and sturdy into place.
Yakima ForkLift Roof Mounted Bike Rack Review - 2014 Chevrolet Impala
Speaker: Today, on our 2014 Chevy Impala, we'll be test fitting the Yakima Forklift Roof Mounted Bike Rack, part number Y02098. With the Yakima and Q Towers Roof Racks system on our vehicle, well begin our test fit by placing the bike rack up on to the vehicles cross bars. Starting at the front, you will need to remove the skewer first so that you can slide the security cover and access the wing nut. Well need to loosen up the wing nut to position the front bracket around the underside of the front bar. With this done, well need to insert the silver T bolt into this slot on the bottom part of the bracket. Then we can go ahead and tighten it down.
Yakima FrontLoader Roof Bike Rack Review - 2014 Chevrolet Impala
Today on our 2014 Chevy Impala, we'll be test fitting the Yakima FrontLoader Roof Mounted Bike Rack. Part number Y02103. With the Yakima Q Towers Roof Rack System on our vehicle, we'll begin our test fit by placing the bike rack up onto the vehicle's crossbars. We'll need to make sure that the bar goes between the two sets of teeth at the front of the bike rack. Before tightening that down, we'll move to the rear and adjust to make sure the rear bracket is around the rear bar. Once that's done, we'll slide the silver T bolts into the slot of the bracket and turn it so it locks into place. We'll then tighten down the black wing nut to secure the rear part of the bike rack to the rear bar.
Swagman Upright Roof Mounted Bike Rack Review - 2014 Chevrolet Impala
Today on our 2014 Chevrolet Impala, we'll be test fitting the Swagman Upright roof mounted bike rack, part number S64720. With the Yakima Q-towers roof rack system on our vehicle, we'll begin our test fit by placing the bike rack up onto the vehicle cross bars. Starting at the front, we'll need to pull out our hardware and take the silver U-bolts, go around the underside of the front bar and off through the predrilled holes of the head of the carrier. We'll then take our black wing nuts that thread down onto the silver U-bolts. Once both U-bolts are installed in the front, we'll go ahead and move to the rear, where this time where we'll take the silver U-bolt to go down through the predrilled holes of the bike rack. The silver U-bolt will go through the holes in the back plate. We'll then take our black wing nuts to thread down onto the silver U-bolts.
Swagman Fork Down Roof Bike Rack Review - 2014 Chevrolet Impala
Today on our 2014 Chevy Impala, we'll be test fitting the Swagman Fork Down Roof Mounted Bike Rack, part number S64710. With the Yakima Q Towers Roof Rack System on our vehicle, we'll begin our test fit by placing the bike rack up onto the vehicle's crossbars. Starting in the front we'll take the silver U-bolts to go around the underside of the front bar, and up through the pre-drilled holes of the head of the carrier. We'll then take our black wingnuts to thread down onto the silver U-bolts. Once the front is secured, we'll move to the rear, and this time we'll take the silver U-bolt to go down through the pre-drilled holes of the bike rack. We'll take the black plate, which the silver U-bolt will go through the holes of the black plate, and we'll take the black wingnuts to thread down onto the silver U-bolts. Once everything is all tightened down and secured, we're ready to load up our bike. We'll need to double check to make sure the skewer is loose at the front and that our cam buckle strap is on down at the rear.
RockyMounts TieRod Stretch Roof Bike Rack Review - 2014 Chevrolet Impala
Today on our 2014 Chevrolet Impala, well be test fitting the RockyMounts TieRod Stretch Roof Mounted Bike Rack, part number RKY1011. With the Yakima Q-towers roof rack system on our vehicle, well begin our test fit by placing the bike rack directly onto the vehicles crossbars. Well need to remove the black plastic cover at the front. Well then bring the rubber coated steel straps around the underside of the front bar and hook them into the connection points.Once thats done, youll notice the silver bolt that runs through the head of the carrier. Well use the included allen wrench to tighten down the silver bolt, which will bring the straps tightly around the front bar. Once thats done, we can replace the black plastic cover, and move to the rear.
Kuat TRIO Roof Bike Rack Review - 2014 Chevrolet Impala
Speaker: Today on our 2014 Chevy Impala, well be test fitting the Kuat Trio Roof Mounted Bike Rack, part number RU01.With the Yakima Q Towers Roof Rack System on our vehicle, well begin our test fit by placing the bike rack directly onto the vehicles crossbars. Now move to the rear. Well loosen up the two wing nuts, so that we can position the rear bracket around the underside of the rear crossbar. Once this is done, we can reinstall our black wing nut and tighten it down to secure the rear part of the carrier to the rear crossbar.Moving back up to the front, well take the rubber coated steel U bolts to go around to the underside of the front bar, up through the predrilled holes at the head of the carrier. Well then take the cylindrical nuts, which will thread down onto the U-Bolts. Well then use the included wrench to tighten down the cylindrical nuts directly down onto the U-Bolts, which will secure the front part of the bike rack to the front crossbar.
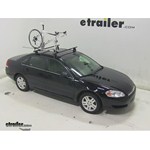
Thule Roof Bike Racks Review - 2008 Chevrolet Impala
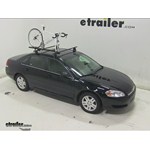
Speaker 1: Today on our 2008 Chevrolet Impala, we're going to be test-fitting the Thule ThruRide Rooftop Bike Rack, part number TH535. We already have a bike installed on the rack, so let's take a closer look at it.How this actually attaches to the bike rack, we're not going to have any frame contact at all. Instead, we're going to have a skewer mount up at the front here, which will grip your bike by the fork mounts. This can be removed and be used with Thru-Axles as well if need be.At the rear, we'll have this ratcheting strap, and this is going to move back and forth along the bike rack to accommodate bikes of different sizes. With the bike rack installed, we're not going to have any issues of clearance between our trunk and the bike rack. As you can see here, plenty of space.Let's go ahead and take the bike off and set it aside.
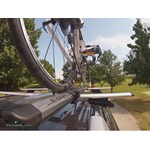
Yakima Roof Bike Racks Review - 2008 Chevrolet Impala
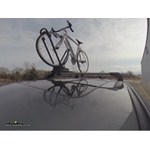
Speaker 1: Today on our 2008 Chevrolet Impala, we're going to be test fitting the Yakima High Speed Rooftop Bike Rack, part number Y02115. We already have a bike installed on the rack, let's take a closer look, and show off some of the features.How the bike is actually attached to the rack, we're going to have no frame contact at all. Instead, it's going to grip it by our front fork-mounts here with the skewer. This will also work with thru axles as well. We also have a wheel strap at the rear here and this will adjust back and forth along the bike rack to accommodate bikes of different sizes.With everything installed as it is, we're not going to have any issue of clearance between the trunk and the bike rack. As you can see here, there's plenty of space.


What our customers are saying:
"Sent out an e-mail to you earlier this week asking which hitch woudld be the best choice for installing on a 2000 Venture van for hauling a bike rack with two bikes. You suggested the one that would be easiest to install..received in a matter of days..installation went great ..very well thought out instructions. Everything went smooothly and the hitch is up nice and snug..doesn't stick out..looks great."