
Most Popular Roof Rack for Chevrolet Cruze
change vehicle# 1
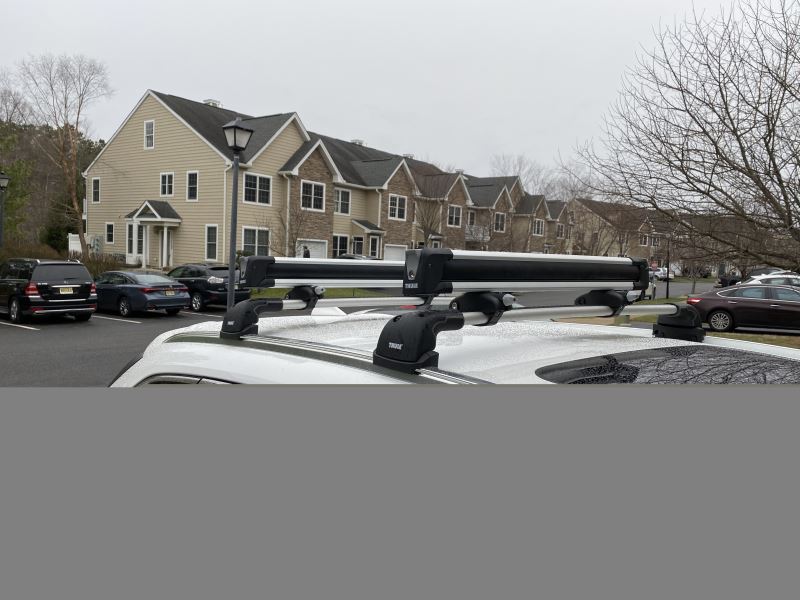
Rhino-Rack Ski and Snowboard Carrier - Locking - 6 Pairs of Skis or 4 Boards

- view all Ski and Snowboard Racks
- Roof Rack
- Clamp-On
- Fixed Height
- Board/Ski Lock
- 4 Snowboards
- 6 Pairs of Skis
- 27-9/16 Inch Long
- Fixed
- Aero Bars
Elliptical Bars
Factory Bars
Square Bars - Rhino Rack
More Information >
by: Sierra12/16/2022
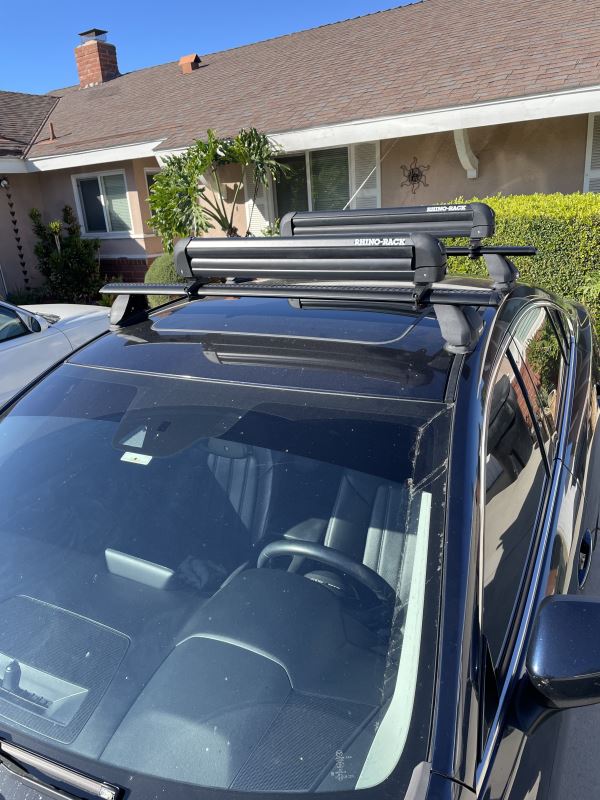
E trailer I have a 2019 Mazda6 and purchased the rhino rack series 2500 parts (fit kit #DK289, foot pack #RRRLKVA, aero crossbars#RRVA126B-2), and the rhino rack snowboard/ski carrier #RR576. My car does have fixed mounting points underneath the strip on the roof so I opted to add them to my roof and not use the clamp for kit that goes in the door jam. Every time I entered the year, make, and model of my car, the parts came up with the clamp fit kit part #DK387 which I did not want. But after some research, I found the correct fixed mounting point fit kit. The site of course told me that this part wouldn’t fit my car but after looking at the customer reviews, I saw them used on Mazdas. All of the rhino rack instructions were not the best. We did have to make some adjustments. One of the instruction packs tells you how long you’re supposed to cut the rubber pieces that go into the crossbars based on your car but unfortunately, the measurements were wrong for my car (picture- front 166mm is wrong). The front bar length was about an inch too short and I had to add more rubber to make it longer to fit the fixed mounting points on my roof. After some time of trying to interpret the instructions, and looking up whatever available instructional videos were online, we finally finished installing them and they do look really nice. At higher speeds on the highway I can definitely hear more noise. The actual snowboard carrier is fine, fits all 4 boards fine. It is a little difficult to close once I have my boards in there because you have to push the top bar all the way down and hold it down to be able to turn the key to lock it. I’m just happy I don’t have to shove the boards in my trunk. I do like that all the parts in this series come with locks and keys. So far no problems. Overall good product.


View More
View Less
by: Jen11/01/2022
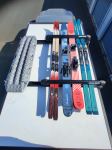
This rack works great with the four pairs of skis I lugged from Oregon to Alaska. I'm using it on the beef rack cross bars that came with my go fast camper which are very difficult to find mountings for. This one worked great though with a little bit of metal grinding on the bolts that slide into the t-slot of the rack. It locks and unlocks fairly easily (with a little bit of jangling involved), but so far so good!

View More
View Less
# 2
Rhino-Rack Ski and Fishing Rod Carrier - Locking - 2 Pairs of Skis or 4 Fishing Rods

- view all Ski and Snowboard Racks
- Roof Rack
- Clamp-On
- Fixed Height
- Board/Ski Lock
- 2 Pairs of Skis
- 15-3/4Inch Long
- Fixed
- Aero Bars
Elliptical Bars
Factory Bars
Round Bars
Square Bars - Rhino Rack
More Information >
by: Linden11/22/2023
Last year I purchased Rino ski racks from etrailer and they work great . The hardware fit my roof racks and all the fittings are tight. Ordering was easy. Shipping was fast and I even got a follow up personal email from George a year later asking how I liked them - which was impressive! I would definitely recommend etrailer as an honest and good outdoor gear company!
View More
View Less
by: Frank05/21/2023
Great product! I think it's a bit expensive but well worth it. I bought it to transport my fishing poles. So no long rods in my new SUV.


View More
View Less
# 3
Thule SnowPack Ski and Snowboard Carrier - Locking - 6 Pairs of Skis or 4 Boards - Silver

- view all Ski and Snowboard Racks
- Roof Rack
- Clamp-On
- Adjustable Height
- Ski and Rack Locks
- 4 Snowboards
- 6 Pairs of Skis
- 30-1/2 Inch Long
- Fixed
- Aero Bars
Elliptical Bars
Factory Bars
Round Bars
Square Bars - Thule
More Information >
by: Raul01/03/2021
So easy to install onto Thule AeroBlade. Quality materials and convenient design. No significant noise noticeable from wind resistance when driving. etrailer provided great shipment/notification support and was great resource for how-to videos, commentary.
View More
View Less
by: Scott01/12/2021
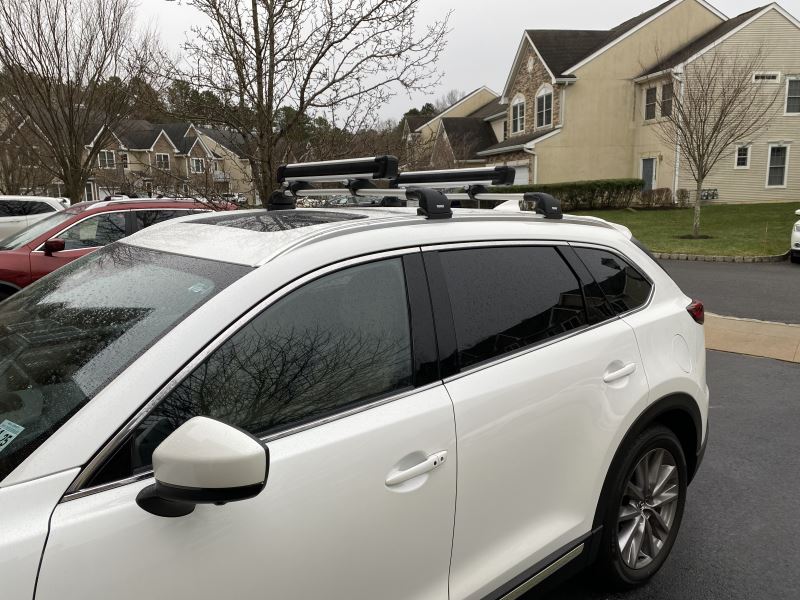
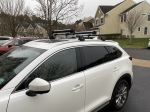
Better than I expected. Only comes with four core locks so be aware of that if you want six like I did. Bought two more locks from Thule with the same key #. Mounted this carrier on my Rhino Rack. Perfect fit and looks great. Would highly recommend.

View More
View Less
# 4
Rhino-Rack Ski and Snowboard Carrier - Locking - 4 Pairs of Skis or 2 Boards

- view all Ski and Snowboard Racks
- Roof Rack
- Clamp-On
- Fixed Height
- Board/Ski Lock
- 2 Snowboards
- 4 Pairs of Skis
- 19-11/16 Inch Long
- Fixed
- Aero Bars
Elliptical Bars
Factory Bars
Round Bars
Square Bars - Rhino Rack
More Information >
by: Brian02/27/2024
Howzit etrailer.com & staff. the rack itself is sturdy and more aero than comparable units. For my 2017 Subaru Crosstrek (OEM) Aero Bars, it was necessary to shim the (rear) lower/leading edge clamp assembly with two 1/8” x 1.5” x 1.5” (EPDM) rubber pads. The bars are shaped like a wing – and these shims helped to level the rear rack with the one in front. Overall - it looks very clean and functional. I might screw on some rubber ends over the ends of the mounting bolt to complete the project. Time to make some turns. Thank you!!


View More
View Less
by: Bertil02/21/2021
The Rhino Rack was easy to put up on a 2018 Subaru Outback. Took me about 10 minutes. The only issue is that the rack bottom bracket piece is is convex with an acute angle which makes it not fit perfectly on the Subaru crossbar that has a flat bottom. Loaded 2 pairs of skis and poles and the rack kept them securely fastened during transport on the highway. There was some noise from the rack during highway driving but it was minimal.


View More
View Less
Ski and Snowboard Racks Videos
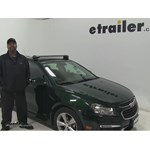
Rhino Rack Roof Rack Installation - 2015 Chevrolet Cruze

Hi everyone, it's Angeline here etrailer. And today we'll be taking a look at our Rhino-Rack Roof Rack System with the 49-inch long Vortex Aero Crossbars, and the Towers and Custom Fit Kit for naked roofs, right here on our 2015 Chevrolet Cruze. So do you have your cruise You know that your options for storage or after-market accessories might be a little limited. So honestly the easiest way is to get a roof rack on your vehicle if you wanna carry really cool items like rooftop boxes, kayaks, or even roof-mounted bike racks. So what we're gonna take a look at today is our Rhino-Rack Roof Rack system, which is gonna be one of the easier roof rack systems to install on naked roofs, and this specific one is going to be the ideal length. When I say ideal length, that's the recommended length from the manufacturer, in our case Rhino-Rack.
Rhino-Rack Vortex Aero Roof Rack Installation - 2015 Chevrolet Cruze

Hi everyone, it's Evangeline here at etrailer. And today we'll be taking a look at our Rhino Rack Roof Rack System with the 54-inch long crossbar, the towers for naked roofs right here on our 2015 Chevrolet Cruze. So for your Cruze, you don't really have that many options when it comes to carrying extra cool items. So like those rooftop boxes, if you wanna carry a kayak, if you wanna carry a roof mounted bike rack, what you first need is a roof rack system just like this. So this is gonna be the Rhino Rack Roof Rack System and this is actually my special kit where we have extra long crossbars. So if you need an extra overhang, you need an extra bar space.
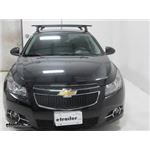
Inno Roof Rack Review - 2015 Chevrolet Cruze
Today on our two thousand and fifteen Chevrolet Cruze we're going to take a look at the N O Aero bar roof rack. The crossbar part number is I N X B one zero zero dash one zero eight. The N O feet are I N X S two zero zero, and the pad and clamp are I N K five nine nine. Now we have the first one already on. That is crossbar one zero zero. Right here is one zero eight.
Yakima Q Tower Roof Rack Installation - 2014 Chevrolet Cruze
Today on our 2014 Chevrolet Cruze, were going to be test fitting the Yakima Q-Towers Roof Rack System using the 48 inch round crossbars. These are part numbers Y00408, Y00699, Y00606 and Y00124. With our roof rack assembled according to the manufacturers instructions, well first open our front doors, grab the front half of our roof rack, and for the fit guide, were going to measure from our windshield back 8-1/2 inches. This is where the center of our foot will be. Well do this on both sides to make sure our feet are in line with each other. We can then work from side-to-side tightening down each tower and securing it to the roof. With our front crossbar secured in place, well close our front doors.
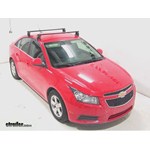
Rhino-Rack Aero Roof Rack Installation - 2014 Chevrolet Cruze
Today on our 2014 Chevy Cruze, we'll be test-fitting the Rhino Rack 2500 series roof rack with Aero Crossbars in silver, part number DA126, as well as the custom DK clamps and pads for Rhino Rack 2500 series roof rack systems, part number DK142. With everything assembled already according to the included instructions, we first begin our test-fit by undoing the front passenger and driver's side door. With this done, we'll go ahead and place the front crossbar onto the front of our roof. Now, we'll need to measure from the center of the door jam to the center of our front bar. We'll measure 340 mm on both the passenger and driver's side of the vehicle. This will ensure that the front bar is perpendicular to the roof of our Cruz.
Yakima Roof Rack Review - 2013 Chevrolet Cruze
Speaker 1: Today on our 2013 Chevrolet Cruise, we're going to be doing a test fit of our Yakima Jet Stream roof rack system. That's going to consist of our 50 inch black Yakima Jet Stream crossbars and that's part number Y00425. They also come in silver, which is part number Y00428. It's also going to consist of our baseline towers, part number Y00146 and our base clip fit kits, part numbers Y06137 and Y06127.This Yakima roof rack system is going to allow you to carry many different types of roof mounted accessories, such as bike racks or cargo boxes. They feature and aerodynamic design, which is going to make them far quieter than our traditional round or square bars.It's going to work with your clamp on accessories. It's also going to accommodate your T squad accessories.
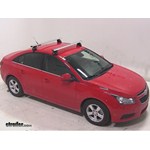
Rhino-Rack Aero Roof Rack Installation - 2013 Chevrolet Cruze
Speaker: Today on our 2013 Chevy Cruze, well be test fitting the Rhino-Rack roof rack system using part numbers DA126B and DK142. We will begin our test fit by placing the front bar onto the front of our roof. Well measure from the center of the doorjamb to the center of the front bar 13 and 3/8 inches. Well make this measurement on both the passenger and driver side of the vehicle to ensure the front bar is perpendicular to the roof of our crews. With the front bar in place, we can then use the included tightening tool to bring the clips up tightly against the roof line. Now you will need the alternate sides when tightening it down, so one side of the bar doesnt favor one side of the vehicle.With the front bar in place, well place the rear bar onto our roof.
SportRack Semi-Custom Roof Rack Review - 2013 Chevrolet Cruze

Today on our 2013 Chevrolet Cruz we'll be test fitting the Sportrack Semi-Custom Roof Rack for naked roofs, fifty inches in length, part number SR1010. We'll begin our test fit by placing the front bar onto the front of our roof. We'll then need to measure, according to the fit guide, seven inches from the center of the door jamb to the first part of the foot. We'll make this measurement on both the driver's side and passenger's side of the vehicle to ensure the front bar is correctly in place. We can use the included allen wrench to loosen up the allen bolts to fit the brackets around the roof line. With the clamps in place, we can then again use the included allen wrench to tighten down the clips up against the roof line. Quick tech tip: You'll need to alternate sides when tightening it down so the bar doesn't favor one side of the vehicle. With the front bar in place, we can now place the rear bar onto the rear of our roof and measure the load bar spread. Now the load bar spread is the measurement from the center of the front load bar to the center of the rear load bar. We'll measure twenty-four inches from the center of the front bar to the center of the rear bar on both the passenger and driver's side of the vehicle. This will ensure that both bars are parallel to each other and perpendicular to the roof of our Cruz.
Chevrolet Cruze Ski and Snowboard Racks Questions
- I recommend using the Yakima JetStream roof rack on your 2019 Chevrolet Cruze because it features a rubber strip in the T-Slot that you press down for T-Track mounted accessories which means you don't have to cut the strip and then purchase it again when you want a complete rubber strip. The parts you need include the following:
50" JetStream Crossbars - # Y00425
BaseLine Towers - # Y28TR
BaseClip - # Y06110
BaseClip - # Y06126
Attached is an installation video of this...
view full answer... - I really like the Rhino Rack roof rack part numbers # RRVA126B-2, # RRRLKVA, and # DK489 that fits your 2019 Chevy Cruze hatchback.
It's a higher quality roof rack that's easy to install and use at a much better price than the other racks that are similar in quality. The only thing else I'd recommend is a set of locks for the bars part # RRVA-LEC4 and you'd be set.
view full answer... - Yes, the etrailer kayak carrier part # e98878 that you referenced does fit the Rhino Rack ROC25 style crossbars like the part # RR67RR that fits your 2018 Chevy Cruze.
view full answer... - To my surprise, Thule does not offer a fit kit for your 2018 Chevrolet Cruze. Therefore, there would be no way to safely use the Thule AeroBlade Roof Rack you have now. The Thule Roof Rack Fit Kit for Traverse Foot Packs part 1569 that you referenced is only for a Chevrolet Cruze from 2011 - 2016 and Thule no longer makes the fit kits for that rack.
I know this is not what you were hoping to hear but you best option is to sell the system you have now and then put that towards...
view full answer... - You didn't mention what year Chevy Cruze you have specifically but the SportRack part # SR1010 that you referenced can fit 2011 to 2016 Chevy Cruze Sedans.
I attached an install video for this for you to check out as well on a similar 2013 Chevy Cruze.
view full answer... - The difference between the BaseClip Fit Kit # Y06110 and BaseClip Fit Kit # Y06126 just has to do with the length and angle of the clamps that fit to the door jambs on your 2018 Chevy Cruze. Yakima does a fantastic job at fine-tuning their fitment which is why they have a wide variety of BaseClip options and those options can vary between the front and back positions on any given vehicle.
Here are all of the parts you need to install a Yakima roof rack on your 2018 Cruze:
50"...
view full answer... - The Rhino Rack roof rack part numbers # RRVA126B-2, # RRRLKVA, and # DK489 is a confirmed fit for your 2018 Chevy Cruze Hatchback and would work well for carrying a kayak. For a kayak carrier then we have the Thule Hullaport part # TH834 which is a J-style of rack that would work well.
view full answer... - For your 2017 Chevy Cruze Hatchback, I recommend the Rhino-Rack Vortex Roof Rack consisting of:
Rhino-Rack Vortex Aero Crossbars # RRVA126B-2
Rhino-Rack 2500 Series Legs # RRRLKVA
Custom DK Fit Kit # DK489
Rhino-Rack Locking Endcaps - Metal Cores # RRVA-LEC4
This roof rack on your vehicle is rated for a max capacity of 165 lbs and will work well with your current kayak carriers. I checked your owners manual and there is not a weight capacity referenced, so the 165 lbs...
view full answer... - You are correct. I checked with Thule and they still do not have a roof rack fit for your 2017 Chevy Cruze. That said the Rhino Rack roof rack part numbers # RRVA126B-2, # RRRLKVA, and # DK489 is a confirmed fit and is a great rack.
The quality is right on par with Thule but is a little less expensive so it's a great value.
view full answer... - We do have a roof rack that will fit your 2017 Chevrolet Cruze. The roof rack will be slightly different depending on if you have the hatchback or the sedan. If you have the sedan, my roof rack recommendation will consist of the following:
Yakima CoreBar Crossbars - Steel - Black - 50" Long - Qty 2, part # Y00421,
BaseLine Towers for Yakima Crossbars - Naked Roofs - Qty 4, part # Y28TR,
BaseClip Fit Kit for Yakima BaseLine Roof Rack Towers - Qty 2, part # Y06137,
BaseClip...
view full answer... - The Custom DK Fit Kit for 4 Rhino-Rack 2500 Series Roof Rack Legs - Naked Roof # DK489 that you have is specifically for 2016-2020 Chevy Cruze with naked roof. The Rhino-Rack 2500 Series Legs # RRRLKVA are used for a large variety of vehicles with a naked roof or fixed mounting points for crossbars to attach to. This is the current leg that Rhino Rack uses for their popular Vortex Aero Crossbars. Rhino-Rack claims that they do not have a fitment list for this product as it fits...
view full answer... - I do have a roof rack that will fit your 2015 Chevrolet Cruze, but your Malone roof rack will not fit your vehicle. My roof rack recommendation will consist of the following:
Yakima CoreBar Crossbars - Steel - Black - 50" Long - Qty 2, part # Y00421
BaseLine Towers for Yakima Crossbars - Naked Roofs - Qty 4, part # Y28TR
BaseClip Fit Kit for Yakima BaseLine Roof Rack Towers - Qty 2, part # Y06137
BaseClip Fit Kit for Yakima BaseLine Roof Rack Towers - Qty 2, part # Y06127
Yakima...
view full answer... - The best fairing option for the Sportrack Roof Rack part # SR1010 is going to be the Inno Fairing part # INA261. When picking out a fairing you want to go with the size that matches the distance between the feet of the rack. So the 40 inch long Inno would be a great option.
view full answer... - There is a SportRack semi-custom roof rack that fits the 2015 Chevrolet Cruze sedan and it is part # SR1010; rack # SR1002 is not a fit for your car. Because this rack is designed to fit on many different cars, its fit on any given car will not be quite as precise as with a custom-fit rack that is designed specifically for your particular car.
The best option for a cost-effective square bar rack is the custom-fit Rhino-Rack 2500 Series, made of parts # RRVA126B-2, # RRRLKVA,...
view full answer... - Yes, the Rhino Rack Ski and Fishing Rod Carrier part # RR572 will fit the Sportrack Roof Rack part # SR1010 that you referenced.
view full answer... - The SportRack light-duty roof rack # SR1010 is a confirmed fit on your 2014 Chevy Cruze and it will be compatible with almost any roof-rack-mount kayak carrier since it uses square bars. But do please note that this rack has the lowest weight rating of all racks made for your car (90-lbs), so while it is a nice value it may not be the best choice for transporting a kayak.
If, for instance, you are planning to take just one 40 or 50-lb kayak only a short distance on local roads,...
view full answer... - The SportRack Semi-Custom Roof Rack for Naked Roofs - Square Crossbars - Steel - 50" Long # SR1010 is the confirmed fit for your 2014 Chevy Cruze. The # SR1002 will not fit because the brackets and pads are different.
I've attached a photo of the dimensions which are the same for the 2014 as the 2013 that they list. I confirmed this with my contact at the manufacturer.
view full answer... - I checked with SportRack and the semi-custom roof rack # SR1010 is a fit for your 2014 Chevy Cruze Eco. No additional parts are needed for installation.
This is a semi-custom roof rack so it will not be as good of a fit as a custom roof rack. For the most economical custom fit roof rack that will fit your Cruze you can use Rhino-Rack 2500 series rack with aero bars using the following parts:
Vortex Crossbars # RRVA126B-2
Feet # RRRLKVA
Custom clamps # DK142
view full answer... - For your 2014 Chevy Cruze the Sportrack roof rack part # SR1010 is a confirmed fit but since this is a semi-custom roof rack I have a better option for you to consider.
Instead I would recommend the Rhino Rack part numbers # RRVA126B-2, # RRRLKVA and # DK142. Custom fit racks by Rhino Rack will fit MUCH better than the Sportrack racks which are designed to fit as many vehicles as possible yet not have a perfect fit with any.
If you went with a J-style of kayak carrier like...
view full answer... - Unfortunately, SportRack doesn't offer the feet as a separate item. To fit your 2014 Chevy Cruze, you'd need to order the entire # SR1010 system.
The SportRack roof racks are known as semi-custom roof racks, meaning that this particular rack will fit a number of different vehicles. The # SR1010 rack is a fit your Cruze, but for a tighter, better fitting custom option, I'd recommend the Square Bar rack from Rhino Rack, which consists of the following parts:
Rhino Rack 2500...
view full answer...
What our customers are saying:
"Very helpful/friendly Customer Service. Competitive Pricing. Shipping was Fast."