
# 1
Swagman XTC2 Bike Rack for 2 Bikes - 1-1/4" and 2" Hitches - Frame Mount
Excellent product! No need for an additional piece to accommodate my ladies bike. I can easily open my hatchback without removing the rack.
My sister and I love this bike rack! It's so easy to use and adjust for different sized bikes. When we're not using it we simply slide it out from the hitch assembly and fold it up and put it in the trunk of the car. So happy we bought it!!
# 2
Thule Passage Trunk Bike Rack for 2 Bikes - Hanging Style
Yaay it works!!! Be prepared to spend at least an hour or so setting up for the first time. The instructions were pretty good but it still takes some effort and definitely make sure that you check the back section of the manual to see what setting will work for your specific car. My only complaint really is that there are no instructions for the anti-sway cage piece, I have ideas of what to do with it...but I'm not 100% sure. The bikes were stable without it though. Once we finally figured out what to do it worked great, didn't hear any movement, bikes seemed very sturdy. I haven't been on the highway with it yet but I think it's going to be fine. My only concern is that someone could easily steal the bike rack as the hooks just slide out so it might be a pain to keep taking it off each time you take your bikes off. I will have to update my review when I have more experience with the product. But so far so good! I don't see any scratches on my car and I think it will stay that way if I'm careful. What a relief to find a product that works for my car, now I can go on biking adventures!
# 3
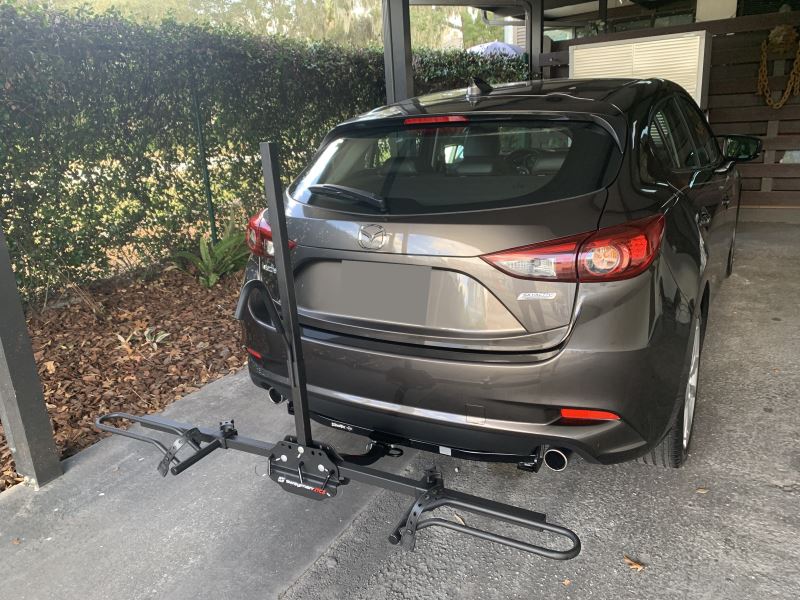
Swagman XC2 Bike Rack for 2 bikes - 1-1/4" and 2" Hitches - Frame Mount
Great product, able to fit even 29er's without a problem. One note on the Mazda 3 Sedan, you must make sure that the trunk is closed otherwise it'll hit the bike clamps.
This was a present for my daughters Mazda 3. We like how easy it is to mount the bikes and that you don't have to take the frame bag off the bike to use it. It is a good option for someone looking for an affordable entry level rack for occasional use.
# 4
Swagman Trailhead Bike Rack for 2 Bikes - 1-1/4" and 2" Hitches - Tilting

Great bike rack. Sturdy support for up to two bikes. Can rotate the support arms down when you aren't hauling a bike to minimize the obstruction of the back window.
Easy to install, saved quite a bit compared to the big brand name products. The big name products have some easier mechanisms to fold up and down but considering how much I saved, I don't have any complaints.
# 5
Thule Hitching Post Pro Bike Rack for 4 Bikes - 1-1/4" and 2" Hitches
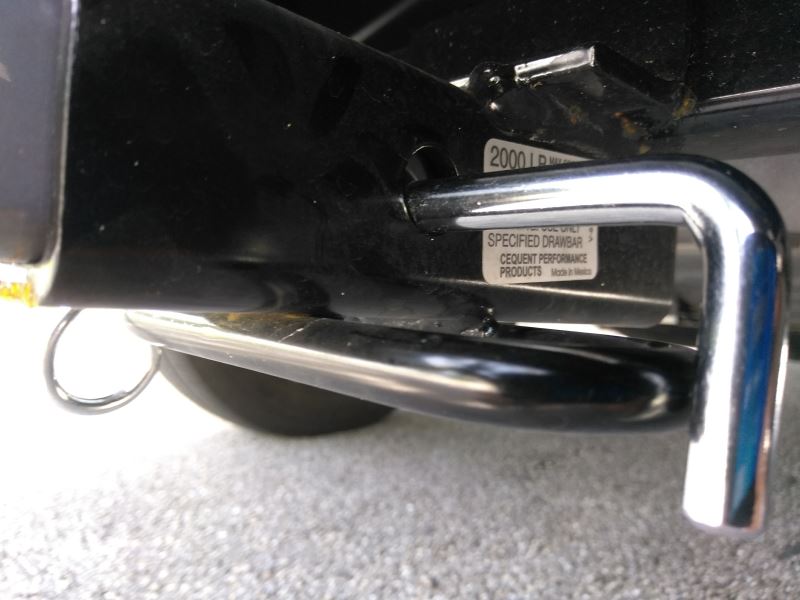
The good: I like the way the bikes are held in and the ability to add the upright adapters to the bike frame holders. The straps are quality too. For a jeep with a spare tire, this is the perfect length to clear it. This rack is 5 stars from the bike holders to the base of it. The bad: the 2"receiver adapter and bolt are insufficient. I wish they made this in a solid 2" hitch. The entire setup is held into the receiver by a very short bolt. It only goes about half way into the receiver tube. So your hitch is only "secured" on one side. A hitch pin or bolt should go through the receiver tube completely imo so it can be secured on the other end with a retaining clip or nut. Because this only goes in the one side, the entire weight of the rack plus bikes are held tight to one side of the receiver by the undersized bolt and washer. A few bumps down the road and that bolt loosens. Now instead of distibuting the weight of the rack and bikes on the receiver and post, it's completely up to the bolt to keep you from losing the rack. The bolt threads get damaged too. I took this down a dirt road and nearly lost everything. I had to buy my own bolt with hd fender washers and lock washers to correct this. Thule should've provided this from the start. The current short bolt design where only one side of the receiver secures the rack is unacceptable. This rack is 1 star at best for the connection to the receiver.
Hitch pin broke before I got it. Looks like a poor design for the locking pin, they might want to consider a different design. I got a 3/8 shear pin from Home Depot to replace and it works great. Bike rack is great!
# 6
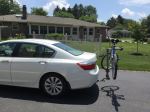
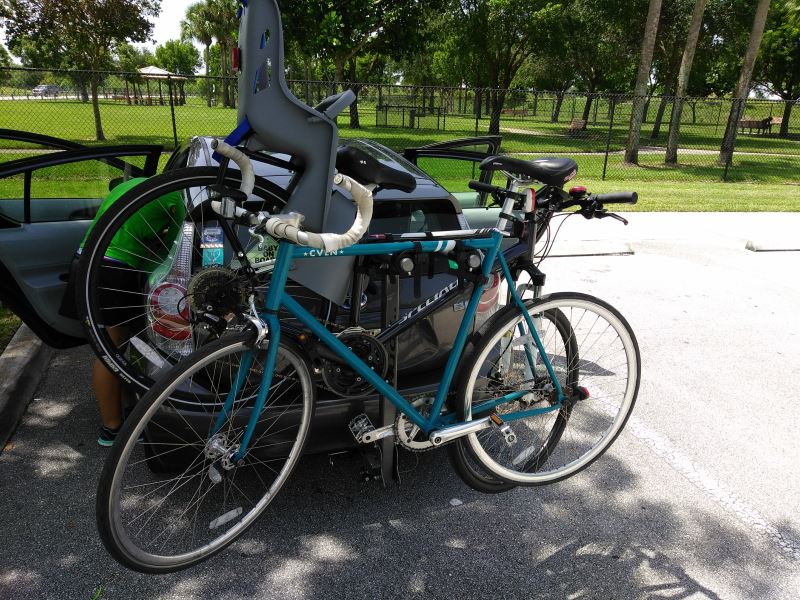
Kuat Beta Bike Rack for 2 Bikes - 1-1/4" Trailer Hitches - Tilting
I was looking for a light weight bike rack for my 2015 Honda Accord. Your videos stated that the Kuat Beta was light and easy to install. You were right. I opened the box, read the instructions, and had it installed in about 10 minutes. I don't use a rack lock. It is so easy to pop on and off the hitch that I keep the rack in my car trunk.
We've been using this bike rack with a 1.25" Draw-Tite receiver hitch (also purchased from etrailer) on a 2012 Prius C for a month with no problems. As shown on the pictures, it fits two bikes very well, even one with a baby carrier. I chose this model based on recommendations from etrailer that it can be easily detached from the car without tools. True to their word, it is very easily detachable from the hitch and folds up nicely to fit in your garage/closet/storage area. Basically, it uses a hand tightened ball bearing mechanism to secure itself into the hitch receiver, and then uses a 3/8" hand locked pin as a safety device. You can install and de-install this rack in just a few minutes. During driving, there is little noticeable vibration from this rack, even on rougher roads or speed bumps. The only downside is that the holes on the receiver hitch do not align perfectly with the holes on the bike rack (see picture). I believe a few other reviewers also noted this issue. There is enough room to fit the safety pin, but not quite enough to fit a 1/2" hitch lock. I called Kuat to ask them about this and the rep told me that not all hitches will line up with this rack. Kuat, coincidentally(?), sells a hitch lock that is also 3/8" (same size as the safety pin) and still fits.
# 7
Swagman Upright Bike Rack for 1 Bike - Roof Rack Crossbars - Frame Mount
Planning on bringing bikes while camping. I mounted 2 of the Swagman bike racks to my new Sportrack on my pop-up camper. The bikes fit perfectly. The racks seem sturdy enough. Not heavy duty, but for my needs they should be fine. Assembly was relatively fast and easy.
We have used the Swagman Roof Rack a number of times when we have needed the additional bike carrying capacity. It took a couple attempts to get the initial spacing of the bike rack properly balanced on the van’s roof rack as recommended by the instructions. But it was easy to do and once set was very easy and quick to put on and take off. The rack works great, the bike is easy to put into place and secure. The bike and rack are very stable and quiet and haven’t required any mid-trip adjustments. We always put the cheapest bike on the roof (lol) but do use a bit of duct tape to protect the finish just Incase. We are very satisfied with the rack and consider it quite a deal for the money.
# 8
Thule Passage 3 Bike Carrier - Trunk Mount
Product fit my Mazda3 perfectly. Instructions were clear and precise. Once assembled (about 5 minutes) it fit right on and is easily cinched down onto the back of the hatchback without damaging the spoiler. Comes off quickly and fits into the truck of the hatchback with no problem.
Nice Rack! Fits perfect and looks great on my Mazda3 hatch!
# 9
Swagman Trailhead Bike Rack for 3 Bikes - 1-1/4" and 2" Hitches - Tilting
Easy to install, saved quite a bit compared to the big brand name products. The big name products have some easier mechanisms to fold up and down but considering how much I saved, I don't have any complaints.
# 10
Saris Bones 2 Bike Rack - Trunk Mount - Adjustable Arms
Well built product, priced right, and quick delivery. That's all one could ask for. Recommended!
Quality as expected, Delivery on Time, Customer Service Excellent, How to Video Excellent.
# 11
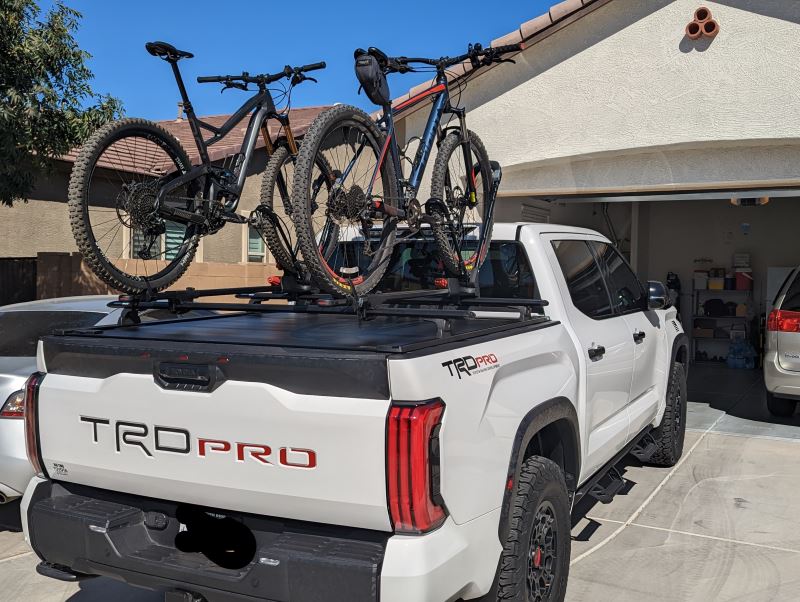
Yakima FrontLoader Wheel Mount Bike Carrier - Roof Mount
Overall I am happy with these bike carriers. They mount to the racks over the bed of my Tundra TRD Pro. Installation is simple. I think they could be just a bit sturdier because there is just a bit of wobbling when driving on bumpy roads but I'm not too worried about them coming dislodged. Take note that although they come with a cable lock to attach the bike to the carrier, the key is sold separately.
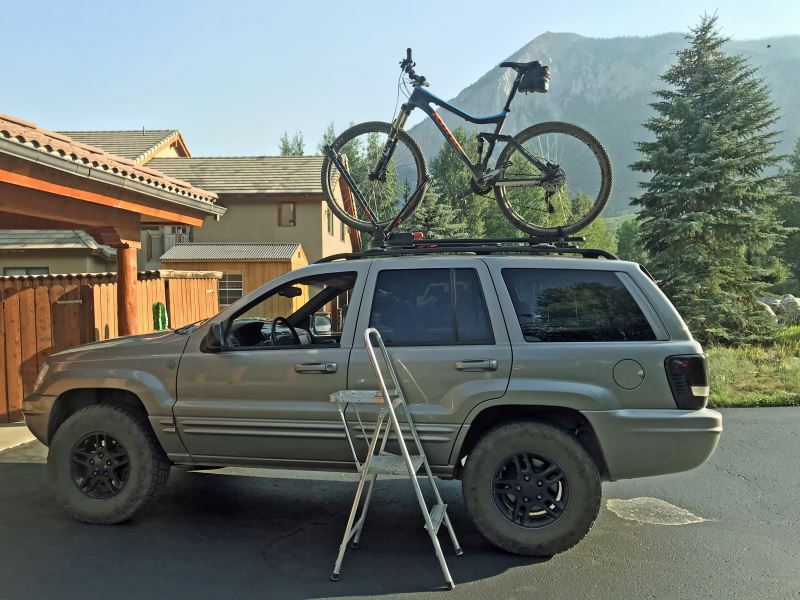
Very good product. It holds the bike securely on the roof without contacting the frame. It is easy to adjust from my road bike to my 29er mountain bike. Our drives are all relatively short, so I like that I do not need to remove the front wheel to lock in the bike. It's also nice that the SKS locking system allows me to use the same key for this rack that I use for my Yakima roof box and hitch rack. This is my first roof rack and I chose this route for a couple reasons. Some of the roads we travel to get to our trail heads are a bit rough and with a roof rack I don't have to worry about bottoming out a hitch rack hanging off the back of the vehicle. Also, it takes up less room in the garage. Our vehicle is a 2000 Jeep Grand Cherokee with an additional 4 inches of ground clearance. That makes it a bit of a reach for my 5'4" wife, so we take our two-step along to help her. This is my third time purchasing from etrailer, and each experience has been very good. They are a very customer service oriented company. I really appreciate all the additional information they provide on their products, especially all the videos they produce to aid in reviews, assembly, and use.
# 12
Hollywood Racks Express 3 Bike Carrier - Fixed Arms - Trunk Mount
Well made holds bike perfectly. Recommend it!
We have 2008 mazda 3 sedan and it fit perfect with 2 bikes. Great product!
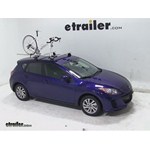
Thule Big Mouth Roof Bike Rack Review - 2013 Mazda 3
Today on our 2013 Mazda3 we'll be test fitting the Thule Big Mouth, a frame clamp roof mounted bike rack, part number TH599XTR. With our Tule podium roof rack system already installed on our vehicle we'll begin our test fit by placing the bike rack directly onto our load bars. At the front we'll loosen the two wing nuts, remove the T-bolts from the clamps, let our clamps fall down. Then we'll bring clamps around the underside of our bar, reinsert our T-bolts, and tighten them down with the wing nut. At the rear we'll remove both of the wing nuts and the metal plate. This will allow us to put a bolt down on either side of our load bar.
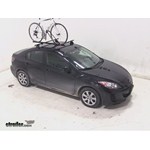
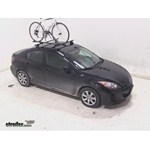
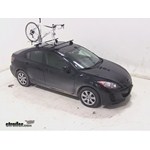
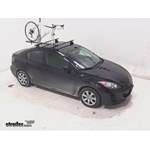
Yakima FrontLoader Roof Bike Rack Review - 2013 Mazda 3
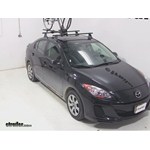
Today on our 2013 Mazda 3, we'll be test fitting the Yakima Frontloader, a wheel-mount bike rack, part number Y02103. With our Yakima Control Tower roof-rack system already installed on our vehicle, we'll begin our test fit by placing our bike rack directly on top of our load bars. At the front, we'll want our clamp to be in front and behind of our bar. Then we can use the black T-handle to secure it to our bar. With that secure, we'll move to the rear. Here, we're going to loosen the black T-handle, allowing us to remove the T-bolt from the clamp. We'll now bring our clamp around the rear load bar, re-insert the T-bolt into the appropriate slot and tighten it down with the T-handle. With our rack secure, we're ready to load our bike.
Yakima ForkLift Roof Mounted Bike Rack Review - 2013 Mazda 3
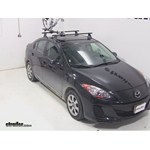
Today on our 2013 Mazda 3, we'll be test fitting the Yakima Forklift roof mounted bike rack part number Y02098. With the Yakima controlled tower roof rack installed in our vehicle, we'll begin the test fit by placing our bike rack directly on our load bars. At the front, we'll remove our skewer, side back the black cover and loose the black t-handle attached to our t-bolt. This will allow us to open our front clamp. We'll then bring our front clamp around our bar, fit our t-bolt back in to the appropriate slot and tighten the black t-handle. With this secure, we'll then slide forward our black cover and reinsert our skewer. Now, we'll move to the rear.
Thule Gateway Trunk Mount Bike Rack Review - 2013 Maxda 3
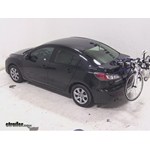
Today on our 2013 Mazda 3, well be test fitting the Thule Gateway Trunk Mounted Two-Bike Rack, part number TH9006XT. Well get started by adjusting our feet out to the correct setting which is six according to the Thule website. Well take our bike rack, place it on to the trunk of the vehicle. Next, we will attach the rack to the vehicle using the appropriate hooks and straps in the correct locations. Well secure our excess straps, then well bring our dual arms out, well do this by pulling up on the grey lever.Youll move the cradle arm in just beyond the teeth, then youll lift up to a parallel position, position back over the teeth, and then close your grey lever. You will repeat this for the other cradle arms as well.
Thule Archway Trunk Mount Bike Rack Review - 2013 Maxda 3

Today on our 2013 Mazda 3, well be test fitting the Thule Archway Truck Mounted 2 Bike Rack with Adjustable Arms, part number TH9009XT. Lets get started by adjusting the fit dial to the number 6 according to the Thule website. Well grab our bike rack, place it onto the trunk of the vehicle and attach it with the appropriate hooks. Well secure the excess straps. Next, well bring out the dual arms. Youll do this by undoing the gray lever, sliding the cradle arm away from the grooves and bringing it up to a parallel position. Youll slide it back over the grooves and then tighten down the lever.
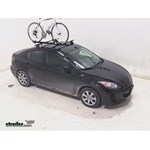
Swagman Upright Roof Mounted Bike Rack Review - 2013 Mazda 3
Today on our 2013 Mazda 3 we'll be test fitting the Swagman Upright Roof Bike Carrier part number S64720. With the Thule Podium Roof Rack System already installed on our Mazda 3 we'll begin our test fit by placing our bike rack directly on to our load bars. At the front we'll bring the two U-bolts around the underside of our load bar through the base plate and secure these using the wingnuts. With the four in the front tight we'll move to the back, at the rear we'll drop our U-bolt through the top of our rack allowing it to go around our load bar. We'll then place the metal plate on the bottom and secure this with two wingnuts. With these wingnuts secure we're ready to load our bike. We'll begin by undoing our wheel straps and opening up our frame clamp.
SportRack Frame Mount Roof Mounted Bike Rack Review - 2013 Mazda 3
Today on our 2013 Mazda 3, we'll be test fitting the Sportrack frame-mount roof bike rack, part number SR4611. With our Thule Podium roof rack system already installed on our vehicle, we'll begin our test fit by placing our bike rack directly onto our loads bars. On the head of our bike rack, we'll bring our two rubber-coated U-bolts around our load bar, through the carrier and we'll secure these using the black wing nuts. We'll want to tighten them down evenly to be sure that the head is secured to our bar. At our rear load bar, we will want the plastic piece of our clamp to be in between the metal of our rack and our load bar. We'll then drop two bolts through it, connecting those two bolts to the black rubber-coated metal plate that we'll install under our load bar. We will then use two black wing nuts to secure these into place. To prepare to load our bike, we'll want to make sure that our frame clamp jaws are open and that our wheel straps are undone.
RockyMounts TieRod Roof Bike Rack Review - 2013 Mazda 3
Today on our 2013 Mazda 3, well be test fitting the RockyMounts TieRod, a roof minded bike rack, part number RKY1014. With our Thule Podium Roof Rack System already assembled on our vehicle, well begin our test fit by placing the rack directly onto the top of our load bars. Well then take off the black plastic cover on the front of the head, bring our black rubber coated metal straps around our front bar and fit them back into the head. Well then use our Allen key to tighten the Allen bolt, securing the straps to our front load bar. Once our straps are secure, well go ahead and replace the black plastic cover. At the rear, well undo one of the Allen bolts, freeing the clamp. Well bring it around our rear load bar, reinstall the Allen bolt and tighten them up evenly to secure it to our rack. Were now ready to load our bike. Well begin by undoing our rear wheel strap and loosening our front skewer.
Kuat TRIO Roof Bike Rack Review - 2013 Mazda 3
Today on our 2013 Mazda 3, well be test fitting the Kuat Trio, a Fork Mount, Roof Mounted bike rack, part number RU01. With our Thule Podium Roof Rack system already installed on our Mazda, well begin our test fit by placing the bike directly onto the roof rack. Well take the black rubber coated U-Bolts around the bottom of our load bar, up through the head of the frame. We can then thread on our cylinder nuts. Well do this on both sides. We can then take our provided Allen key and tighten these cylinder nuts down. Well now move to the rear, remove one of the wing nuts, slide our clamp around our rear bar, then reinstall our wing nut. With our rack secure, were now ready to load our bike.
Thule Domestique Roof Bike Rack Review - 2013 Mazda 3

Today on our 2013 Mazda 3, well be test fitting the Thule Domestique Fork Mounted Bike Carrier, part number TH513. To begin our test fit, we want to have them remove the skewer for easier installation. Well place our carrier onto of our load bars, bring in our front clamp around our front load bar. Once we have the clamp into position, we can untighten the three Allen bolts that hold the front clamp into place. Well move to the rear where well bring the rear clamp underneath the rear load bar. With that clamp in position, well feed our bolt through and tighten them down using an Allen key.
RockyMounts TieRod Stretch Roof Bike Rack Review - 2013 Mazda 3
Today on our 2013 Mazda 3, we'll be test fitting the RockyMounts TieRod stretch roof-mounted bike carrier, part number RKY1011. We'll begin by placing our carrier on top of our load bars. I already removed the cover from the front part of our carrier for easier access when tightening our straps. We'll want to make sure that our rubber straps go around our front load bar, and that our rear clamp goes underneath our rear load bar. We'll secure the front part of our carrier first. We'll feed the straps around our load bar, fitting them into position, and then using an Allen key to tighten down the Allen bolt, which will secure our straps.


What our customers are saying:
"Hitch and Bike Rack were received very quickly, and were installed very easily."