
Best 2011 Chevrolet Traverse Bike Racks
change vehicle# 1
Thule Hitching Post Pro Bike Rack for 4 Bikes - 1-1/4" and 2" Hitches

- view all Hitch Bike Racks
- Hanging Rack
- Folding Rack
- Tilt-Away Rack
- Frame Mount
- Locks Not Included
- 4 Bikes
- Class 1
- Class 2
- Class 3
- Fits 1-1/4 and 2 Inch Hitch
- Fits 1-1/4 Inch Hitch
- Fits 2 Inch Hitch
- Thule
More Information >
by: George09/22/2016
Works great for standard rigid frame men's bike. It is more difficult when trying to secure newer frame designs or women's frame designs.
View More
View Less
by: Brad07/16/2014
I purchased this rack to carry our families' four bikes. There are two adult bikes and two kid bikes. It was very simple to put together and install on the vehicle! That's where the easiness stopped! It was nearly impossible for all four of our bikes to fit on this rack! It took me almost an hour the first time placing the bikes on the rack to figure out a way to position them so that they all would fit. Luckily, I manage to get them all on.. Not to mention, they rubbed each other and scratched the paint off of ne another. I think we need to purchase a 6-bike rack for our family of four..
View More
View Less
# 2
Thule Passage 3 Bike Carrier - Trunk Mount

- view all Trunk Bike Racks
- Frame Mount - Anti-Sway
- 3 Bikes
- Non-Retractable
- Locks Not Included
- Fits Most Factory Spoilers
- 6 Straps
- Adjustable Arms
- Hanging Rack
- Thule
More Information >
by: Oscar B07/11/20142014 Chevrolet Traverse
This rack was very easy to install on my Chevy traverse. Some people may be concerned about the spoiler being pulled apart, but if you follow the directions this should never happen. Make sure you adjust your dial to the correct number.
View More
View Less
by: D K02/18/20162010 Chevrolet Traverse
Thanks
View More
View Less
# 3
Curt Bike Rack for 5 Bikes - 2" Hitches - Tilting

- view all Hitch Bike Racks
- Hanging Rack
- Folding Rack
- Tilt-Away Rack
- Frame Mount
- Locks Not Included
- 5 Bikes
- Class 3
- Fits 2 Inch Hitch
- CURT
More Information >
by: David06/13/2023
It was obvious that we received a product that was returned by someone else when the box was overly taped shut, a support collar was broken, and most of the pieces were out of their ripped plastic bags. However, it was a great price to hold 5, 26" and/or 27" Trek bikes. I used a piece of the broken collar and went ahead and assembled the rack. Due to the weight of the 5 bikes it did not wobble that much when driving, as one of the bike tires was up against my car. I can only imagine that if we received an untampered product that this review would have been 5 stars. The picture is a little hard to see, but there are 5 Trek bikes on the rack on my 2020 Toyota Seinna.


View More
View Less
by: Felicia07/10/2023
We received a damaged box, damaged items, no instructions, the nuts and bolts are completely stripped and not inside a bag. This was obviously used, returned, not checked for quality and sent out. We are extremely upset.


View More
View Less
# 4
Swagman XC2 Bike Rack for 2 bikes - 1-1/4" and 2" Hitches - Frame Mount

- view all Hitch Bike Racks
- Platform Rack
- Folding Rack
- Frame Mount
- Locks Not Included
- 2 Bikes
- Class 2
- Class 3
- Fits 1-1/4 Inch Hitch
- Fits 2 Inch Hitch
- Fits 1-1/4 and 2 Inch Hitch
- Swagman
More Information >
by: Gary10/17/2018
Haven’t used my bike rack yet. However it looks great and was delivered on time.
View More
View Less
by: Dan 12/02/2020
I wish all vendors were so easy to deal with. Great product!
View More
View Less
# 5
Swagman XTC4 Bike Rack for 4 Bikes - 2" Hitches - Frame Mount

- view all Hitch Bike Racks
- Platform Rack
- Folding Rack
- Frame Mount
- Bike and Hitch Lock
- 4 Bikes
- Class 3
- Fits 2 Inch Hitch
- Swagman
More Information >
by: Mike C.07/17/2016
Outstanding product and worth the money. Unpacked this, assembled easily, and loaded it up for 1000 mile roundtrip the next day on our 2013 Chevy Traverse. Very secure and stable - no noise or rattles - everything is snug - excellent quality. Locking hitch pin and locking cable included for great security. And kudos to Etrailer - I waited until the last minute - paid for 2 day shipping and got it in about 28 hours - great service! I will be ordering the 2 bike version for my son to replace the cheap noisy one that he has.
View More
View Less
by: Jeff03/14/2024
So far I’ve just assembled it and took a quick test drive around the block. My initial thought is this thing is perfect. It’s super sturdy and easy to use. My only gripe and it’s not fault of the rack, but it’s heavy…


View More
View Less
# 6
Swagman XTC2 Bike Rack for 2 Bikes - 1-1/4" and 2" Hitches - Frame Mount

- view all Hitch Bike Racks
- Platform Rack
- Folding Rack
- Frame Mount
- Locks Not Included
- 2 Bikes
- Class 2
- Fits 1-1/4 Inch Hitch
- Fits 2 Inch Hitch
- Fits 1-1/4 and 2 Inch Hitch
- Swagman
More Information >
by: Martin K.07/05/2012
This bike rack is exactly what I was looking for. It is heavy duty, but not too heavy to lift & carry when putting it on our vehicle or camper. I feel that our bikes are very safe and will get to where ever we are going, no matter the distance. Super easy to load and lock down and easy to fold down for getting things out of the Traverse. My wife likes it much better than our old "hanging" rack and can take the bikes off with ease. Great product!
View More
View Less
by: Catherine06/10/2019
This bike rack was easy to assemble with clear instructions. It holds the bicycles securely. I have a vehicle with a rear lift gate. Once the bicycle is removed, the rack can me repositioned to open the lift gate without having to remove the rack. This rack is easy to use, versatile, and well made. Great purchase. Would purchase it again if I needed another rack.
View More
View Less
# 7
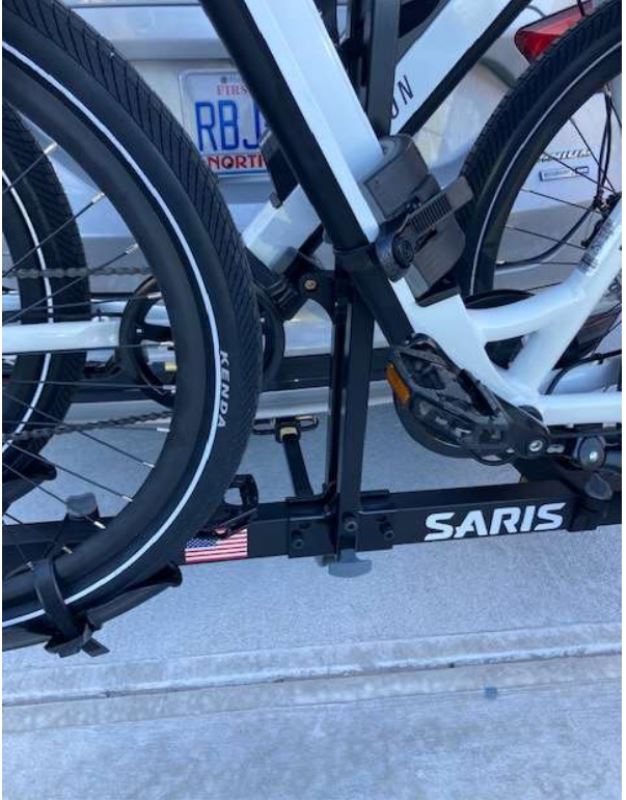
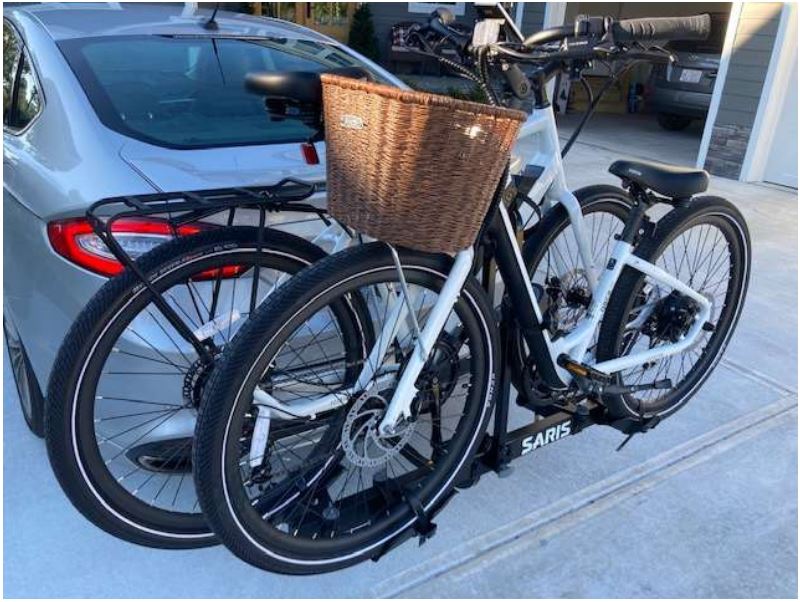
Saris Freedom Bike Rack for 2 Bikes - 1-1/4" and 2" Hitches - Frame Mount

- view all Hitch Bike Racks
- Platform Rack
- Folding Rack
- Frame Mount
- Locks Not Included
- 2 Bikes
- Class 1
- Class 2
- Class 3
- Fits 1-1/4 Inch Hitch
- Fits 2 Inch Hitch
- Fits 1-1/4 and 2 Inch Hitch
- Electric Bikes
Heavy Bikes - Saris
More Information >
by: Scott11/20/2021
I had to put my electric bikes into this rack, backwards, to make them fit. Not ideal, but it works.The receiving 'trays' that are intended to provide support for holding the bikes, by being placed under the bike tires, are forced to be moved to a location that is not directly under the bottom of the bike tires. While it works in this manner, it is not ideal.For the support that attaches to the diagonal bike frame, we had to remove it from the vertical rail of the rack. We reinstalled it, upside down, because that's the only way we could make it fit, or 'grab', the bike frame. Again, we made it work, but it's not ideal. We chose to keep the rack because it was so much less expensive than the Thule rack we considered buying. The bike shop owner didn't agree with us. He observed that we are putting $3000 worth of bikes on the rack and risking that investment. So far, no problems, other than the ill-fitting installation.


View More
View Less
by: David05/27/2023
With a few adjustments this rack has delivered. Needed to add additional strapping since the provide straps for securing the bikes to center bar were not long enough due to my ebike design (Velotric). My bikes are step through with a thick frame so provided straps won't fit. Simple adjustment with strapping resolved minor issue. Speed of 73 mph on the highway and some bumpy VT roads and this rack performed.


View More
View Less
# 8
Malone Hanger Trunk Bike Rack for 3 Bikes - Adjustable Arms

- view all Trunk Bike Racks
- Frame Mount - Anti-Sway
- 3 Bikes
- Non-Retractable
- Bike Lock
- 6 Straps
- Adjustable Arms
- Hanging Rack
- Malone
More Information >
by: Frances03/27/2022
The Malone rack adjusts to fit my 2017 Trax really snugly and securely. Once we learned how to configure the bikes for best fit, everything traveled without movement. The only downside is that this system seems designed for narrow road bikes rather than the mountain and hybrid bikes we own. Although the anti-sway cradles are sufficiently wide for mountain tires, the close proximity of the individual bike setups sometimes cause a strap to pull loose during travel, so we keep the bikes cabled to the rack frame. We are able to make it work. For narrower bikes, I would recommend this rack without reservation.
View More
View Less
by: Gerald07/14/2022
Works great! We keep it set up to one position because it's used on my car only. I'm glad we bought the lock feature because we can just leave the rack on at the trail site. This was a great purchase. I'm impressed that you follow up on your product. I recall your staff was quite helpful in making sure I purchased the correct item for my car and set it up correctly. No recent pictures of the carrier but I do have one of myself as "happy camper" on the Fox River Trail which was doable because of the carrier purchase!!


View More
View Less
# 9
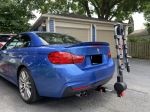
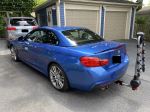
Yakima RidgeBack Bike Rack for 4 Bikes - 1-1/4" and 2" Hitches - Tilting

- view all Hitch Bike Racks
- Hanging Rack
- Folding Rack
- Tilt-Away Rack
- Frame Mount
- Hitch Lock
- 4 Bikes
- Class 2
- Class 3
- Fits 1-1/4 and 2 Inch Hitch
- Fits 1-1/4 Inch Hitch
- Fits 2 Inch Hitch
- Yakima
More Information >
by: Thomas 08/22/2021
The rack was very easy to install. Like anything you do for the first time, the next time would be much easier. Could do 5 or 6 in the time that the first install required. The bike lock was also an easy installation. The two make a nice unit.
View More
View Less
by: Ryan06/12/2022
Check out my other review on the hidden hitch for a 2015 BMW 4 Series for the majority of the review, but this thing is great. Easy setup and install, does all the things it's supposed to do. Mounting and removing bikes is a snap with the included clips (big difference from some of the cheaper variants with nylon ratchet straps). Fits very snugly in my 2" receiver, and pretty solid on the highway and over bumpy roads.


View More
View Less
# 10
Kuat Sherpa 2.0 Bike Rack for 2 Bikes - 2" Hitches - Wheel Mount - Gray

- view all Hitch Bike Racks
- Platform Rack
- Folding Rack
- Tilt-Away Rack
- Wheel Mount
- Bike and Hitch Lock
- 2 Bikes
- Class 3
- Fits 2 Inch Hitch
- Carbon Fiber Bikes
- Kuat
More Information >
by: Donald06/22/2018
The Kuat rack was easy to assemble and has performed very well. The bikes were easy to load and unload and stable on rough roads. The rack looks good folded on the back of my Traverse and folded down allowed me to access golf clubs. I recommend this rack.
View More
View Less
by: S.W.12/16/2022
So after much research into bike racks, I decided on pulling the plug on the Kuat Sherpa 2.0. I've looked into the Kuat NV and other brands, but they were just too much for my needs. If you've got "regular" bikes and not the heavier eBikes, then this rack is perfect. I wanted a hitch rack that was user friendly and not overly complicated. I have a mixed bag of bikes and this rack can handle them all, from mountain bikes, street bikes, and BMX bikes. I like that this rack comes with an adapter piece for 20"-24" wheels. Assembly of the Kuat Sherpa 2.0 is really a no-brainer. I think it's only 4-5 bolts really. Everything else is ready to go. The anti-rattle hitch ball mechanism is simple to use with just a twist of the dial, easy. The tilt pedal/lever is also easy to access should you need to open your hatch, a solid "click" assures it's in place. So far, loving this rack. Fit and finish is superb. Thanks to Jerred and etrailer for answering my questions, always helpful.


View More
View Less
# 11
Rola TX-104 4-Bike Rack for 2" Hitches - Tilting

- view all Hitch Bike Racks
- Hanging Rack
- Folding Rack
- Tilt-Away Rack
- Frame Mount
- Bike Lock
- 4 Bikes
- Class 3
- Fits 2 Inch Hitch
- Rola
More Information >
by: Eric R05/05/2019
I like this bike rack, I’ve used it a few times and it does the job it’s intended to do. Installing and removing is easy. I use it casually I take the family to the park or beach and we want to take our bikes out, the lock feature is a lifesaver. Would definitely recommend
View More
View Less
by: J05/31/2021
Decent 4-bike rack for the price. Stable side-to-side with the screw-in hitch pin (2 inch receiver version). Gets some fore-aft rocking over bumps at speed (inherent to the tilting design). Bikes need bungee cords to keep them from swinging (typical for this style of rack). I used this with two bikes, and really struggle to see how four full-size bikes could be added. Maybe if seats were removed? I added bumpers and some padding for the vertical post, and will probably relocate the retainer pin lanyard so the rack can be completely collapsed for storage. A few design improvements for 5 star rating would be: 1 - Add some bumpers for the fully lowered position, 2 -Add some padding on the vertical post for bike contact or accidental vehicle hatch lifting when in the raised position, 3 - Mount the retainer pin lanyard to one of the through-bolts or move the lanyard hole - collapsing this rack chews up the retaining lanyard. etrailer.com service was great - well packaged, and quickly shipped!


View More
View Less
# 12
Yakima RidgeBack Bike Rack for 2 Bikes - 1-1/4" and 2" Hitches - Tilting

- view all Hitch Bike Racks
- Hanging Rack
- Folding Rack
- Tilt-Away Rack
- Frame Mount
- Hitch Lock
- 2 Bikes
- Class 2
- Class 3
- Fits 1-1/4 and 2 Inch Hitch
- Fits 1-1/4 Inch Hitch
- Fits 2 Inch Hitch
- Yakima
More Information >
by: Thomas 08/22/2021
The rack was very easy to install. Like anything you do for the first time, the next time would be much easier. Could do 5 or 6 in the time that the first install required. The bike lock was also an easy installation. The two make a nice unit.
View More
View Less
by: Thomas 03/20/2024
This two bike rack has been great for the occasional bike ride outside of our home area. I like the sturdy construction, but beware that it is a little heavier than it looks (I’m retired and a bit older so maybe not as strong). Easy to fit into the factory trailer hitch on our 5 passenger SUV and no problem securing the bikes for transport. My only complaint is, the stick on Yakima Graphic started coming apart the day we got it. Sorry, no free advertising for Yakima.
View More
View Less
Bike Rack Videos
Thule Trunk Bike Racks Review - 2011 Chevrolet Traverse

Today on our 2011 Chevrolet Traverse we're doing a test fit of the Thule Raceway Pro trunk-mount 2-bike rack. That part number is TH9001PRO. Now we already have our bike secured down. We're first going to go over that. We've got two cradles in place with three straps, two on our frame here and one as our anti-sway in the back. We're going to start by lifting up, pulling down and lifting up to release those.
Thule Trunk Bike Racks Review - 2011 Chevrolet Traverse

Today, on our 2001 Chevrolet Traverse, we're doing a test fit of a Thule Gateway XT Trunk Mount 2-Bike Rack. That part number is TH9006XT. We already have our bike in place, but first we're going to show you how we do that. You've got two cradles with three straps altogether, two on our frame and one on our anti-sway in the back. We're going to start by pulling down and lifting up to release those. Then we can pull our bike off and set it off to the side. With our bike out of the way, we can take a few measurements.
Thule Archway Trunk Bike Racks Review - 2011 Chevrolet Traverse

Today on our 2011 Chevrolet Traverse we're doing a test fit of the Thule Archway XT trunk-mount bike rack. That part number is TH9009XT. Now we already have our bike secured down. We're first going to show you how we do that. There's two cradles in place with three straps, two on our frame and one as our anti-sway in the back. We're going to start by releasing that, lift our bike up, and set it to the side.
Thule Passage Trunk Bike Racks Review - 2011 Chevrolet Traverse

Today on our 2011 Chevrolet Traverse, we're doing a test fit of the Thule Passage II trunk mount bike rack. That part number is TH910XT. Now, we already have our bike secured down. We're first going to show you how we do that. We have two cradles in place with three straps altogether, two on our frame and one as our anti-sway in the back. We're just going to start by removing those and we'll lift our bike up and take it off of our rack.
Thule Hitch Bike Racks Review - 2011 Chevrolet Traverse
Today on our 2011 Chevrolet Traverse we're going to be doing a test fit on the Thule Vertex. This is a folding and tilting 4-bike rack. They've designed it for use with 1-1/4" or 2" hitches. Part number on it is going to be TH9029XT. This is a upgrade version from the old Vertex they had. A few things are slight differences in the cradles here, and our mast will actually lock in the down position as well, which is really nice. Now the rack's going to hold the bike in place using two upper frame straps and one anti-sway cradle strap.
Yakima FrontLoader Roof Bike Rack Review - 2011 Chevrolet Traverse

Today on our 2011 Chevy Traverse, we'll be test fitting the Yakima front loader roof mounted bike rack, part number Y02103. With the factory roof rack system on our vehicle, we'll begin our test fit by placing the bike rack up onto the vehicle's cross bars. Starting at the front, we'll need to loosen up the large black T handle and position the front tube brackets around the front and back side of the front crossbar. It helps if you lift the bike rack up at a 45 degree angle. Once the front brackets are in place, I'll move to the rear and position the back bracket around the rear crossbar. I'll need to insert the silver T bolt into the slot in the bottom bracket and then to give us some more room when tightening down the black wing nut I'm going to unfold the front part of the wheel hook. This allows me to tighten down the black wing nut more freely. Once the rear is tight, I'll move back up to the front and tighten down the large black T handle to secure the front part of the bike rack to the front bar. Once everything is all tightened down and secured, then we're ready to load up our bike. Since the front part of the wheel hook is already unfolded all we need to do is undo the back tray strap. We'll pick up our bike and place it onto the bike rack, sliding it forward to allow the back part of the wheel hook to come up and rest on the back part of the front tire.
Swagman Upright Roof Mounted Bike Rack Review - 2011 Chevrolet Traverse
Today on our 2011 Chevy Traverse, well be test fitting the Swagman Upright Roof Mounted Bike Rack, part number S64720. With the factory roof rack system on our Traverse, well begin our test fit by placing the bike rack up onto the vehicles crossbars. Starting at the front here, well take the silver U-bolts to go around the underside of the front bar up to the predrilled holes at the head of the bike rack. Well then take the black wing nuts to thread down onto the silver U-bolts to secure it. Once this is done, well move to the rear and this time take the silver U-bolts to go it on through the predrilled holes of the bike rack.Well then insert the silver U-bolt into the hole of the black plate and install the wing nut. Well swing and plate around in the underside of the rear bar and insert the other end of the U-bolt into the other hole in the plate.
Swagman Fork Down Roof Bike Rack Review - 2011 Chevrolet Traverse

Today on our 2011 Chevy Traverse we'll be test fitting the Swagman Fork Down Roof Mounted Bike Rack part number S64710. With a factory roof rack on our Traverse we'll begin our test fit by placing the bike rack up onto the vehicle's cross bars. Starting at the front I'll take the silver U Bolts, go around the underside of the front crossbar, and out through the pre-drilled holes in the head of the bike rack. I'll then take our black wing nuts to thread down onto the silver U bolts to secure the front part of the bike rack to the front cross bar. We'll then move to the back of the bike rack where this time we'll take the silver U bolt and go down through the pre-drilled holes of the bike rack. We'll take the black plate and insert one end of the U bolt into the hole of the black plate. Then we'll thread on our wing nut and tighten it down. Now that everything's tightened down and secured we're ready to load up our bike. Since we're already at the back of the bike rack we'll undo the cam buckle strap.
SportRack Roof Mounted Bike Rack Review - 2011 Chevrolet Traverse

Today on our 2011 Chevy Traverse, we'll be test fitting the Sport Rack Roof Mounted Bike Rack, part number SR4622. With a factory roof rack system on our Traverse, we'll begin our test fit by placing the bike rack up onto the vehicle's cross bars. Starting at the front here, we'll take the rubber coated U bolts to go around the underside of the front bar, up through the pre-drilled holes of the head of the bike rack. We'll then take our black wing nuts that thread down onto the U bolts. I'll move to the rear and take the black bolts to go down through the pre-drilled holes of the bike rack. Then I'll take the black spacer, which will go on the underside of the bike rack and the top of the cross bar. We'll need to make sure that the black bolts go down through the pre-drilled holes of the spacer. We can now take the rubber coated black plate and insert the bolts through the pre-drilled holes of the plate and we'll install our wing nut and tighten it down.
Kuat TRIO Roof Bike Rack Review - 2011 Chevrolet Traverse
Today on our 2011 Chevy Traverse, we'll be test fitting the Kuat TRIO Roof-Mounted Bike Rack, part number RU01. With a factory roof rack system on our Traverse, we'll begin out test fit by placing the bike rack up onto the vehicle's load bars. Once we get the bike rack in position, I'm going to start at the rear. I'm going to remove one of the black wing nuts so that the plate can drop off of it. I'm going to make sure the black bolts are on both the front and back side of the rear crossbar. Then I can swing the bracket around and insert the bolt into the hole of the plate. I'll then re-install the black wing nut but I won't tighten it down all the way. I'll move up to the front and take the rubber-coated U-bolts to go around the underside of the front crossbar up through the predrilled holes at the head of the bike rack.
Yakima ForkLift Roof Mounted Bike Rack Review - 2011 Chevrolet Traverse

Today on our 2011 Chevy Traverse, we'll be test fitting the Yakima Forklift Roof Mounted Bike Rack, part number Y02098. With a factory roof rack installed onto the roof of our Traverse, we'll begin our test fit by placing the bike rack up onto the vehicle's cross bars. Now, starting at the front, I'll need to position the front bracket around the underside of the front bar. Now, there are 3 settings that you set the front bracket on. I'm going to use the middle 1, then I'll insert the silver T-bolt into the slot on the bottom bracket. I'll turn the black wing nut to bring the bracket up tightly against the cross bar.
Thule Sprint Roof Bike Racks Review - 2011 Chevrolet Traverse
Today on our 2011 Chevy Traverse, we'll be test fitting the Thule Sprint roof mounted bike rack, part number TH528. With the factory roof rack system on our Traverse, we'll begin our test fit by placing the bike rack up onto the vehicles cross bars. Starting at the front, I'll bring the rubber coated steel strap around the underside of the bar and hook into the connection point. I'll then tighten down the speed link handles to tighten on the straps up against the front bar. Then move to the rear, I'll repeat the same process. Once everything is all tightened down and secure, we are ready to load up our bike.
Yakima DoubleDown Ace Hitch Bike Rack Review - 2011 Chevrolet Traverse

Today on our 2011 Chevrolet Traverse, we'll be test fitting the Yakima DoubleDown Ace 4-bike carrier for 1-1/4" and 2" hitches, part number Y02451. To begin our test fit, we'll slide the shank of the carrier into the receiver tube of the hitch, line up the pin hole, and install our attached pin. We'll move to the rear of the shank and tighten the hand knob to secure our bike rack to our vehicle and engage our anti-rattle device. Now we'll go over a few clearance measurements. We have about 16" of ground clearance. The closest point of the carrier to the rear of our Traverse is about 2-1/2".
Yakima DoubleDown Ace 2 Bike Rack Review - 2011 Chevrolet Traverse

Today on our 2011 Chevrolet Traverse, we'll be test fitting the Yakima DoubleDown Ace 2-bike carrier for 1-1/4" and 2" hitches, part number Y02450. To begin our test fit, we'll slide the shank of the carrier into the receiver tube of the hitch, line up the pin hole, and install the attached pin. We'll move to the rear of the shank and tighten the hand knob to secure the bike rack to our vehicle and engage our anti-rattle device. Now we'll go over a few clearance measurements. We have about 16" of ground clearance. The closest point of the carrier to the rear of our Traverse is about 2-1/2".
2011 Chevrolet Traverse Bike Rack Questions
- The Thule OutWay Trunk Mount Bike Rack you looked at, part # TH45JV is indeed compatible with your 2011 Traverse. The ease of installation is what makes this rack a top-seller. Rather than fumbling around with the 6 straps and buckles that need to be adjusted each time the rack needs to be installed or removed, the Raceway uses 4 cables that adjust with a twist of a knob, making installation and removal unbelievably easy.
This being said, if you're planning on holding onto...
view full answer...


What our customers are saying:
"Good experience. I already mounted the hitch and it went fine. No problems. Now I just need the bike rack which I expect will arrive just in time for Christmas!"