
Most Popular Wiring for Ford Escape
change vehicle# 1

- view all Accessories and Parts
- Wiring
- Relays
- Tow Ready
More Information >


by: Kevin B.03/14/2014
I don't normally write reviews so here goes: I searched for this part for my 2008 Ford Escape at Auto Zone, OReilly's Auto, Advance Auto, and Napa Auto with no luck. Ford wanted $30 according to their Ford parts website, but I needed three (Tail Lights, Right Turn and Left Turn for my Cargo carrier lights) and spending almost $100 was out of the question. A simple google search lead me here and I was able to get four at etrailer for the price of one from Ford. With three day shipping, they shipped on Sunday and arrived on Wednesday. I popped them right in and everything worked great (and I have a spare). Kevin B. <---Satisfied Customer


View More
View Less
by: CJ_Himself05/31/2021
Exactly what was needed in order for my 2009 Ford Escape to have woking trailer lights!!!


View More
View Less
# 2

- view all Accessories and Parts
- Trailer Wiring
- Mounting Hardware
- Brackets
- 4 Flat
- etrailer
More Information >
by: Justin E08/17/2022
Solid enough, seems to only be able to slide through one way. I put it in the other way for a cleaner look but now it doesn't hold as well. I had to put a small bead of silicone to hold it in place.


View More
View Less
by: Scott12/23/2023
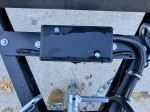
This is a handy little bracket for mounting the 4-Pole Flat connector. The Honda Pilot I am working on didn't have a good flat surface to mount to, so I cut a slot in the bracket and mounted it to the hitch. I think a factory slot would be a good improvement to this item


View More
View Less
# 3

- view all Accessories and Parts
- Trailer Wiring
- Mounting Hardware
- Brackets
- 4 Round
- 5 Round
- 6 Round
- Tow Ready
More Information >
by: Waterwalkersff03/06/2024
2019 Outback Limited 3.6 Just completed installation of Echo stealth hitch, Curt 4 way T connector, 4 to 7 way universal trailer brake controller kit, and Redarc Liberty brake controller. This was a fun and very straight forward project. The Etrailer videos were awesome. I took my time and knocked it out a couple of hours over 3 days. Im recently retired so no rush. While awaiting shipment I poked hole through rubber grommet inside engine bay. I then pushed a 3ft length of 1/4" drip irrigation tubing through to pull future brake controller wires into cabin. I had ordered the Curt 4 way T connector earlier so instalked that as well. Videos were great and made finding plug n play connection super fast and easy. Once parts arrived, I instalked Echo hitch and universal 7 way adapter kit. I picked up a torque wrench at Harbor Freight for $30 which worked great. I needed one for tightening tugs anyway so it was great timing. I ran the 7 way wiring down passanger side under plastic shield. It was easier than anticipated and virtually invisible. Most videos show mounting inline fuses near battery. With my 3.6 the passabger side was wide open so I opted to mount the fuses there. This required a trip to Home Depot for an additional 14 ft of 10 guage wire. This was used to run hot 2 wires from 40amp/29amp fuses to battery($9.00). Turns out that the irrigation tubing is the exact size for covering anchor bolts on inline fuse. Probably dont need them but keeps everything safe from accidental arching is crossed. I taped together the white trailer brake wire running from back and the 20 amp output black wire from 20 amp fuse to the piece of drip tubing I previously pushed through gromnet. I added a touch of white grease and it slid through grommet like butter. The final day I instalked Redarc controller. Installation is fairly straight forward especially after knocking out the dirty parts of install. Honestly the most troublesome part of the entire project was identifying the cold brake pedal wire. These wires are minute. The key is having the right tools which I did not. Purchase a hook probe circuit tester and save yourself all the frustration. I watched many videos and there were multiple answers as to which wire is the correct wire. Dont guess or take soneones advice, verify. A hook probe tester like the instalkers use is worth $20. I ended up dropoing by my local uhaul that does custom hitch instalkations. Base labor price $60 which was totally worth it at that point. I saved a lit of $ DIY so I had the pro identify and connect controller to proper brakewure activated when pedal is pressed. I had it all open for him so he only charged me $20. Thank the Lord he was an honest cool guy. After completing instalkation and powering up system the Redarc had no lights whatsoever. I calked Redarc and they had me check for power at black wire on input side, all good. I then disconbected both sides of controller, multi rmwire side and control knob side. After reinstalling the blue led indicator light fired up. Everything is back in place and working great. I dont have our trailer yet, but purchased a 4 way and 7 way tester and all systems are ready for launch! I ended up mounting the control knob onto the fuse cover lid on left dashboard. This was just easy and simple. Added some tacky strips to hold cover securly. This was a fun project and etrailer made it super easy. Items were delivered quickly and great quality. etrailer is my go to stop for everything towing.


View More
View Less
by: Joseph 02/12/2024
Helped to install the 7 way connetor, the only issue I had was my hitch bar was curved this off sets the 7 way plug but does not impair the use of the plug with the wireless brake controller. Love etrailer and the products they distribute.
View More
View Less
# 4
No-Drill Mount for Electrical Mounting Bracket - Short

- view all Accessories and Parts
- Trailer Wiring
- Mounting Hardware
- Brackets
- 4 Flat
- 5 Flat
- 4 Round
- 5 Round
- Tow Ready
More Information >
by: Mark08/12/2023
Package had hitch protruding out of cardboard. The wiring harness wire for the right side were short and I had to splice 3 wires to those that were short. The plug adapter was cheaply made. [online] guy said hitch could be installed with a floor jack. I would like to see him try it. Hitch appears to be of good quaility.


View More
View Less
by: Roberto02/21/2024
Came with beat up box. I already expected the hitch will be damaged, but it was worst than my expectation. It looks like the hitch was previously returned item, so it is not a new item and somebody put an effort painting the hitch to make it look like brand new, but the paint was not even and oversprayed. I did not bother opening the other box because I am already disappointed. I am returning the hitch including the accessories for the hitch.


View More
View Less
# 5
Dielectric Grease for Electrical Connectors, 2 oz.

- view all Accessories and Parts
- Trailer Wiring
- Wiring
- Dielectric Grease
- LubriMatic
More Information >
by: Dan04/18/2021
Ordered hitch receiver with wiring for bike rack installation on 2019 Ford Explorer. Everything arrived in less than a week. Crawled under the car with my burly son and finished the installation in about an hour. Toughest part was getting the exhaust hangers off. Didn't have a tool for that. Online installation video was a big help. Hitch frame rubs against right side exhaust hanger, hence the four star rating instead of five. Exhaust still appears to be level and no weird noises, so not an issue. Get the little plug in light tester. It's worth it, then keep it in the glove box. Haven't purchased bike rack yet, but no concerns about the hitch.

View More
View Less
by: Gary 02/07/2024
The dielectric grease is good . The mounting flange on the female plug broke as I was attaching it with screws. I think it could have been more substantial.
View More
View Less
# 6
Universal Wiring Adapter for Curt Trailer Brake Controllers

- view all Accessories and Parts
- Trailer Brake Controller
- Wiring Adapter
- Plugs into Brake Controller
- Universal
- CURT
More Information >
by: RenCan7302/09/2024
Not too difficult to install, but I would recommend using a car lift so you don't have to work from your back (review includes wiring harness and 4-7 Pole Adapter)
View More
View Less
by: Tom C.03/10/2014
I have the Dodge Ram Truck 94 model with factory wire 7 connector plug. This is the truck that many people can't find the blue wire under the dash. 94 model didn't come with a factory wire plug under the dash like later models have. I found the wire tape to the main wiring harness about two inches from the fire wall to the right of the emergency brake paddle. This harness worked great


View More
View Less
# 7
Replacement Brake Control Plug-In Harness for Tekonsha and Draw-Tite Brake Controller 12" Long

- view all Accessories and Parts
- Trailer Brake Controller
- Wiring Adapter
- Plugs into Brake Controller
- Universal
- Draw-Tite
More Information >
by: Michael 02/18/2023
Exactly what I was looking for and needed ! It was delivered very quick . Actually I just ordered a complete wiring harness from you tonight . Your service and follow up is great
View More
View Less
by: David11/05/20192007 Ford Ranger
Purchased a Teckonsha Voyager brake controller and the ETBC7 install kit. The instruction an video were very clear and easy to follow. Installed on a 2007 Ford Ranger Sport. Tech support was also very helpful on the one question I did have.


View More
View Less
# 8
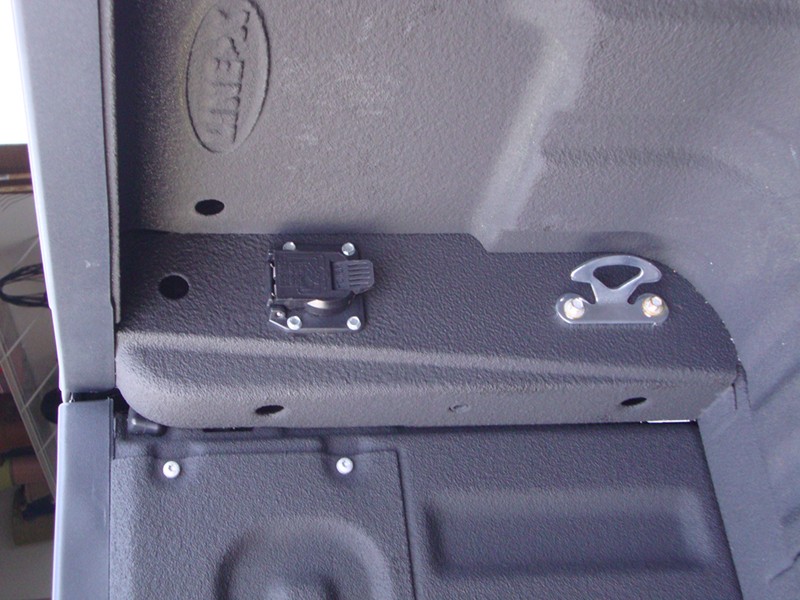
6 and 7-Way Trailer Connector Mounting Box for Round or Square Tube Hitches

- view all Accessories and Parts
- Trailer Wiring
- Mounting Hardware
- Brackets
- 6 Round
- 7 Round
- Draw-Tite
More Information >
by: Gary08/05/2023
I had this installed last year by my mechanic along with a whole electronic brake controller and I have to say this was such a good investment. It makes the install look like it belongs. No wires handing out to get caught on anything or tangled, just a clean install. Would definitely recommend and would buy again.
View More
View Less
by: Trey H 06/27/2016
Perfect for '08 Toyota 4Runner. I installed a Curt receiver hitch on my 2008 4Runner and once installed it interfered the factory 7pin trailer connector. I extended the wiring harness and this mounted box worked out perfectly. Great product!


View More
View Less
# 9
Replacement Mounting Bracket for Hopkins 7- and 4-Pole Trailer Connector Socket

- view all Accessories and Parts
- Custom Fit Vehicle Wiring
- Trailer Wiring
- Wiring
- Mounting Hardware
- Brackets
- 4 Round
- 7 Round
- Pollak
More Information >
by: Albert08/09/2021
Exactly what I needed to relocate the trailer plug on my 2019 4Runner. I had to use two spacers I made out of an aluminum tube that I already had to get the clearance from the bumper facia but this worked perfectly. The plug just snapped out of the original factory bracket and snapped right into this bracket. Now I don't have to lay under my 4Runner to plug in and unplug my boat and camper.


View More
View Less
by: Chris03/04/2024
Went on like a charm. This is my 3rd rodeo with Etrailer. Two receiver, hitches, and a weight distribution camlock. All of them were exactly as promised.
View More
View Less
# 10

- view all Accessories and Parts
- Trailer Wiring
- Mounting Hardware
- Brackets
- 7 Round
- Draw-Tite
More Information >
by: Cranky03/28/2024
This did not fit the factory connector despite etrailer's recommendation of it. My mechanic was able to modify the factory bracket to fit the hitch at a reasonable cost. When I tried to return the item etrailer would not provide a shipping label because the shipping cost was more than the item cost. I asked for a credit and they would only provide one if I returned the item at my expense.I found this to be unacceptable and will no longer do business with them. They are a definite outlier on this, in my experience.
View More
View Less
by: Javari W07/22/2023
Good sturdy bracket. The holes did not line up with my 7 way electrical connector. I fixed it by drilling new holes and now everything is attached securely.


View More
View Less
# 11

- view all Accessories and Parts
- Trailer Wiring
- Junction Box
- Spectro
More Information >
by: Michael12/26/2023
I mounted mine onto a piece of aluminum flat stock on the trailer “A” frame to reduce rock impact from Nevada’s gravel back roads. There really wasn’t good location on inside of trailer frame rails, was adding electric brakes and converting from 4 pin to seven. . I’m pretty darn happy with this junction box as it made rewiring rather straight forward. Our local 12 volt guru at the auto electric shop was duly impressed-wanted to know where I found it.

View More
View Less
by: Harvey 03/30/2024
One of the best set-ups. This is definitely the way to go with your trailer wiring. The built in labeling inside aids in installation and troubleshooting. Make sure to provide some impact protection if mounting this in and exposed area.
View More
View Less
# 12
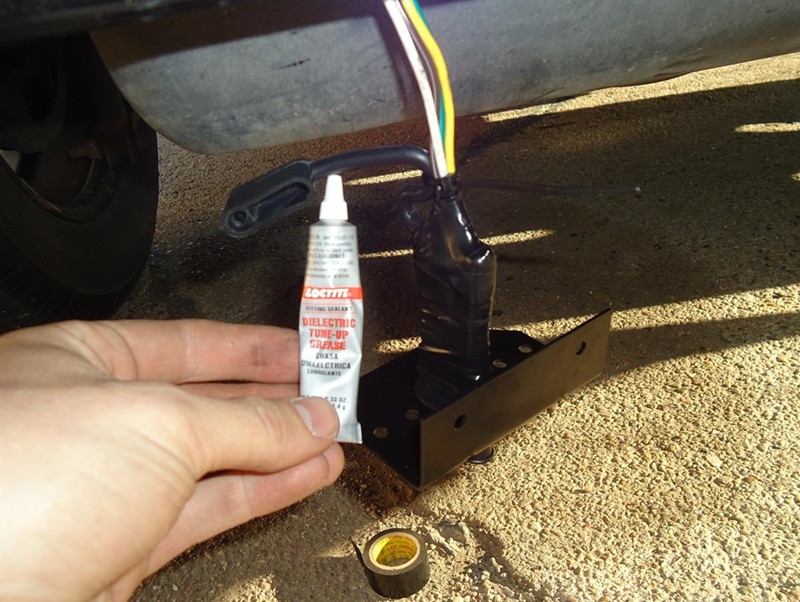
Loctite Bulb, Lamp, and Electrical Connection Dielectric Grease - 0.33-Oz Tube

- view all Accessories and Parts
- Wiring
- Dielectric Grease
- Loctite
More Information >
by: Alex L.05/02/2012
This dielectric grease is great for making permanent outdoor wiring connections. It does a great job at helping fight rust and corrosion. Used on the attaching metal parts in combination with electrical tape on the outside of the parts, it really keeps the parts working for many years into the future. I also use it on the vehicle side of trailer wiring to ensure proper connections to avoid lighting failure while heading down the road with a trailer. Just add some when necessary to keep it covered and it helps a lot.

View More
View Less
by: Thomas 09/13/2022
Thought I had a bad wire but it turned out it was some water and crud in the connector. Grease fixed it. Keep it in my trailer tool box.
View More
View Less
# 13
Curt No-Drill Bracket for 6-Way or 7-Way Round Trailer Connector Mounting Bracket - Long

- view all Accessories and Parts
- Trailer Wiring
- Mounting Hardware
- Brackets
- 6 Round
- 7 Round
- CURT
More Information >
by: Douglas04/14/2023
It does not work for the Honda Passport Trailsport. The hitch sits behind and above the bumper and there is no where that it can be mounted that would give you access to the plug. I had to use a 90 degree metal plate and then mount the bracket to the side of the hitch.


View More
View Less
by: Steve 02/08/2024
This worked great. I have a class V hitch and there is no room to put the wiring, with this was able to move the trailer wiring up out of the way. Install was easy and it seems solid so far.
View More
View Less
# 14
In-Line Circuit Breaker - 20 Amp - Perpendicular Mount Bracket

- view all Accessories and Parts
- Wiring
- Circuit Breaker
- 20 Amp
- Pollak
More Information >
by: Jim R.07/07/2014
Ordered two curt venturer brake controllers,after calling a local trailer shop that wanted $370-$400 dollars to install them I figured I'd do it myself. After watching videos from etrailer and youtube I installed one in my 2003 Ford Ranger and one in my wife's 2101 Town and Country. Everything was pretty much straight forward, just take your time and follow the video's. Very happy and saved hundred's by doing it myself. Here are some pictures of the two vehicles.


View More
View Less
by: Chris 02/12/2024
Everything was perfect.
View More
View Less
# 15
40 Amp In-Line Circuit Breaker - Perpendicular Mount Bracket

- view all Accessories and Parts
- Wiring
- Circuit Breaker
- 40 Amp
- Pollak
More Information >
by: Tom S.07/20/2016
I have never dealt with a company that is so helpful, I am extremely thankful for all your advice, both before purchase and after when I had installation questions. I highly recommend your products and services!


View More
View Less
by: Michael 04/19/2023
Right product, Great service. I always shop with them when I need anything for my rv or trailers.
View More
View Less
# 16
4' Pigtail Wiring Harness for Pollak Replacement 7-Pole RV Socket

- view all Accessories and Parts
- Trailer Wiring
- Vehicle Wiring Harness
- Universal
- 7 Blade
- Pollak
More Information >
by: Jim04/17/2024
It was easy to install and took care of the issue I had of one of the trailer light segments not working.
View More
View Less
by: William03/16/2012
New wiring harness and receptable work great. Installed in the rear of my truck bed for connecting my 5th wheel trailer...so much easier than running the RV cable over the tailgate to the 7-pin connector by receiver hitch. Thanks...

View More
View Less
Accessories And Parts Videos
Trailer Wiring Harness Installation - 2012 Ford Escape

Today on our 2012 Ford Escape we'll be installing the Curt T-Connector Vehicle Wiring Harness with 4 Pole Trailer Connector, Part Number C56160. Now we'll begin here by raising the rear hatch of the vehicle. This will give us access to the two screws on each side that hold the tail light assembly in place. We will go ahead and start here on the driver's side by removing the two Phillips-head screws. With the two screws removed we will go ahead and gently pull out on the tail light assembly, there are two additional clips on the underside of the light assembly that will come out as you gently pull outward on the light assembly. There are two plugs that we'll need to remove in order to set our light assembly aside.
What our customers are saying:
"very easy to shop"