Best Chevrolet Tahoe Watersport Carriers
change vehicle# 1
Thule Hullavator Pro Kayak Roof Rack and Lift Assist w/ Tie-Downs - Saddle Style - Universal Mount
- view all Watersport Carriers
- Kayak
- Roof Mount Carrier
- Saddle-Style
- Aero Bars
- Elliptical Bars
- Round Bars
- Square Bars
- Side Loading
- Track Mount
- Clamp On
- Load Assist
- Thule
More Information >
Bought a pair of these to go on 59" rhino rack bars on our Outback Wilderness and am really pleased. I left the bars full width - they are not a head banger on the car - and mounted the Hullavators as far outboard as possible which means the kayaks clear the side of the car and wing mirrors without folding them in. I did have to modify one Hullavator to make the Hobie Lynx fit (36" wide Lynx = 36" max Hullavator width)


Two complete shoulder implants, 75 year old combat disabled Marine who is not quite ready to easily quit something I love. This apparatus is a solution in a box. Somewhat high procurement cost is clearly mitigated by perpetuating quantity of life. That being said, I strongly recommend outsourcing assembly and installation… it proved for me to be a somewhat daunting task. “Better to burn out than rust.”
# 2
Thule Hull-A-Port Kayak Roof Rack w/ Tie-Downs - J-Style - Fixed - Clamp On
- view all Watersport Carriers
- Kayak
- Roof Mount Carrier
- J-Style
- Fixed
- Aero Bars
- Elliptical Bars
- Factory Bars
- Round Bars
- Square Bars
- Side Loading
- Clamp On
- No Load Assist
- Thule
More Information >
Arrived quickly and was very easy to assemble and attach to the roof of my Jeep. Now that I have the initial setup complete with the proper placement of the entire system, attaching and removing the kayaks will be a breeze. Will definitely make hauling our kayaks much easier and safer.
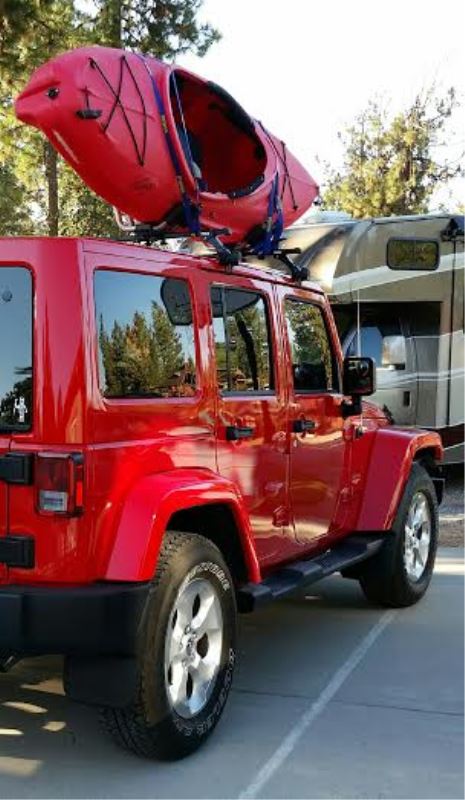
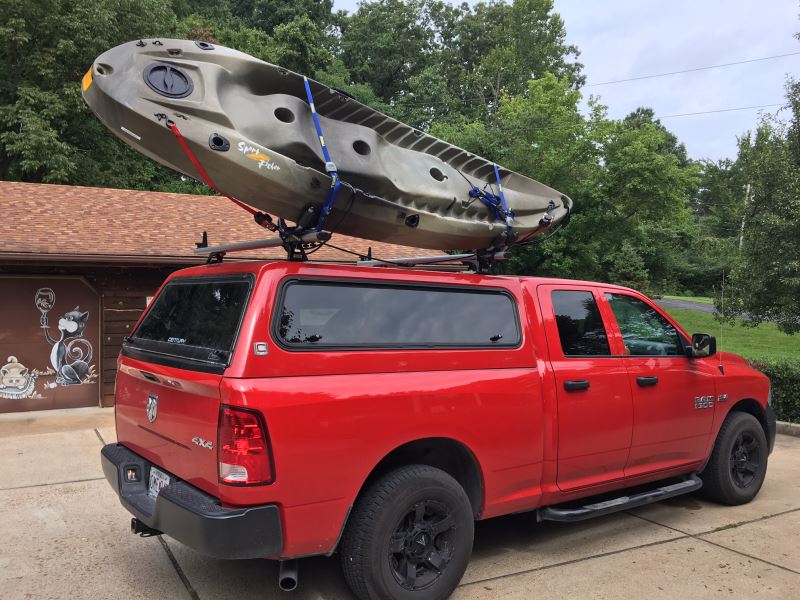
This product is excellent. I have transported my kayak on these J Hooks several times going 70+ mph down the highway. It never moves. The bolts that come with it are short. If you have a thick roof rack, you will need longer stainless steel bolts. Make sure you you orient the blue straps with the buckle on top so you can pull down to tighten it up.
# 3
Thule Portage Canoe Carrier w/ Tie-Downs - Gunwale Brackets - Side Loading
- view all Watersport Carriers
- Canoe
- Roof Mount Carrier
- Gunwale Brackets
- Aero Bars
- Elliptical Bars
- Factory Bars
- Round Bars
- Square Bars
- Side Loading
- Clamp On
- No Load Assist
- Thule
More Information >
As all Thule products the Thule universally mounted canoe carrier is great. It came with all required items for safe and easy canoe transportation. There are two straps with pull to fasten for the canoe down, two tie down ropes for each end with nice pull tight and release mechanisms for the cord as well, along with two straps to fasten to the canoe ends used with the pull to tighten cords. The Chevy traverse cross bar had to have the plastic end caps removed for use with Thule canoe carrier. This was because my canoe took up the entire cross bar width to allow for Thule mounts. It is not a big deal to remove the plastic end caps. They only provide a finished stream lined look. Happy and Safe Canoeing


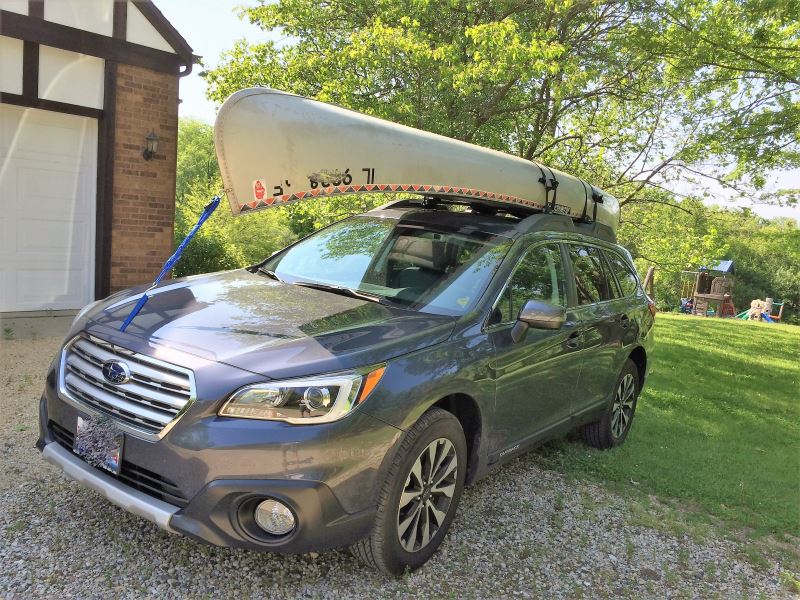
After retiring my 1999 Chevy Silverado 4x4 pickup, I purchased a 2017 Subaru Outback as a replacement vehicle. To transport my 1981 17 foot QT17C Alumacraft canoe on the factory installed roof rack crossbars that came with the Outback, I selected the Thule Portage Canoe Carrier w/ Tie-Downs - Gunwale Brackets - Side Loading - TH819 to do the trick. With one previous transport of the canoe sitting directly on the Outback roof racks, I realized those Outback roof racks were not as durable as the racks on my truck so I sought an improvement to avoid future scuffing and scratching. I did some advance research online and couldn’t be more pleased with this purchase from etrailer.com. I now have a quality product at the right price and these gunwale brackets are a simple solution for this veteran canoe man. The padded brackets grip the canoe and stopped the scratches. The high-quality load straps are nice with the rubber pad that covers the buckle and they easily snug the canoe tight to the racks. I’m also impressed with the bow/stern tie downs that have a very nice ratchet and clip on one end and I secured the supplied hook with a bowline knot to the other end of the ¼ inch rope. The Outback did not have convenient anchor points on the front or back of the vehicle for tie down locations but I found a good solution there as well by ordering the Thule Bow/Stern Tie-Downs - Qty 2 - TH530. This works well with the tie downs I mentioned previously. One limitation to be aware of with the Subaru Outback roof racks and this product is the width of your canoe. My 17-footer measures 34 inches at its widest point at the portage yoke. I had to place the four brackets up tight against the inside roof mounting to achieve the spread and accommodate the canoe placement. The canoe ended up fitting like a glove on the padded brackets. When placing the strap to hold the canoe down to the crossbars, I ran the strap through the vehicles tie down points and then under the crossbars for added security. Total product installation time including securing the canoe can easily be achieved in approximately 20 minutes. I look forward to many more years of safe and happy canoeing. I give etrailer.com an excellent rating for the entire ordering and shipping process on top of the high level of satisfaction with the products I purchased through them. Their customer service and price ensured me that I’ll do more business with them in the future.


# 4
Rhino-Rack Kayak Roof Rack w/ Tie-Downs - J-Style - Fixed - Clamp On
- view all Watersport Carriers
- Kayak
- Roof Mount Carrier
- J-Style
- Fixed
- Elliptical Bars
- Factory Bars
- Round Bars
- Side Loading
- Clamp On
- No Load Assist
- Rhino Rack
More Information >
Easy ordering and fast, free shipping. Product was $50 cheaper on etrailer.com than from Rhino Rack themselves. I will absolutely buy from here again.
I’m very happy with this product. Very solid and easily mounted to my Aero bars. Customer service was very helpful-thank you Neil.
# 5
Rhino-Rack Nautic Roof Kayak Roof Rack w/ Tie-Downs - Saddle Style - Clamp On
- view all Watersport Carriers
- Kayak
- Roof Mount Carrier
- Saddle-Style
- Aero Bars
- Elliptical Bars
- Factory Bars
- Round Bars
- Square Bars
- Rear Loading
- Clamp On
- No Load Assist
- Rhino Rack
More Information >

We are pleased with the Rhino Rack kayak rack. We are able to get 2 kayaks on our 2020 Volvo V60, and we ate using Yakima crossbars. The kayaks ride without any drama, and the orientation of the kayaks make it easy to load and unload.
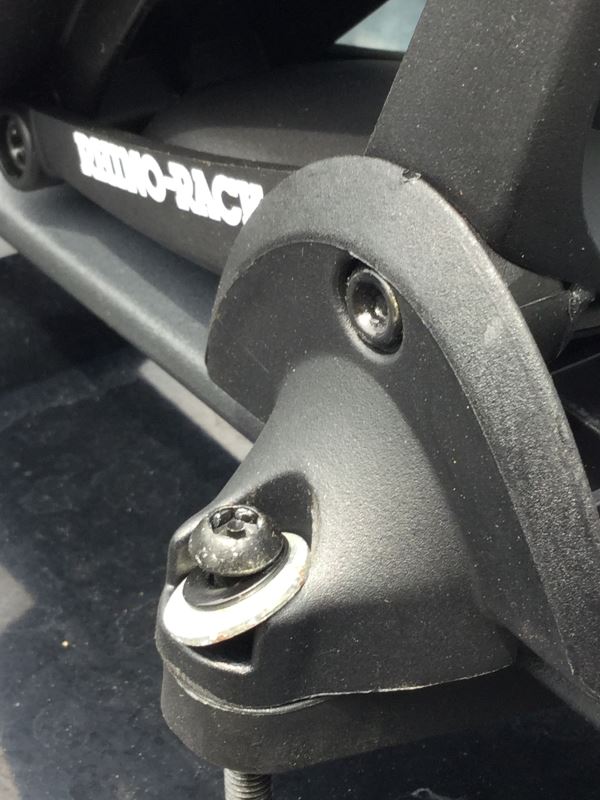
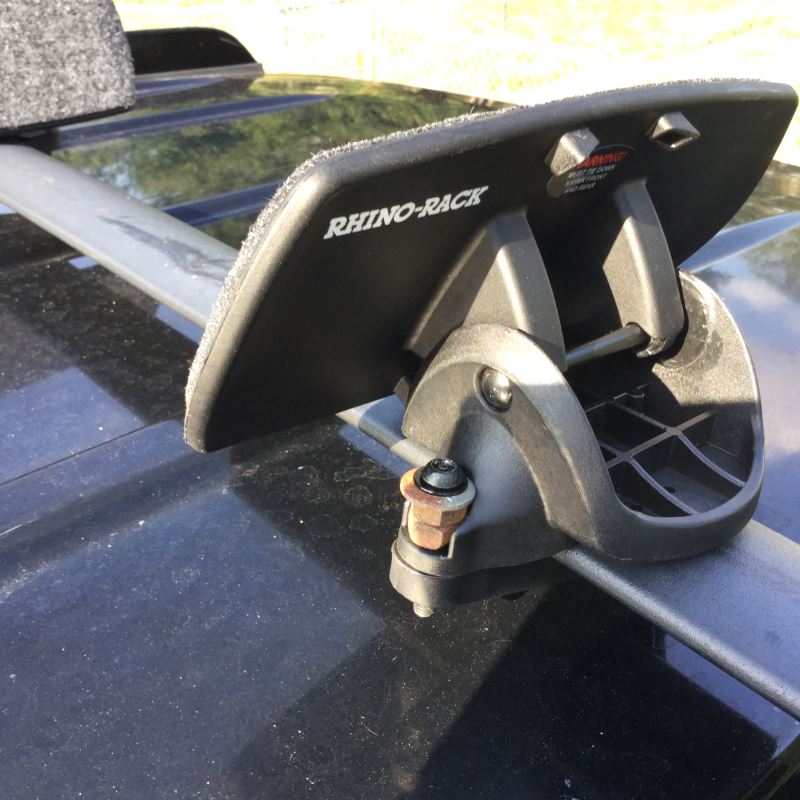
The Rhino Rack cradles, straps and hardware are all good quality and I have no complaints. The only issue I have, and the reason for only a 4 star rating, is the supplied M6 x 40mm Security Head screws are too long for the factory cross bars on my roof rack. When I first installed the cradles if I had tightened the screws all the way, the ends would have dug into the roof and paint, even before I added the weight of the kayak. In checking, I can purchase some M6 x 25mm Security Head screws from Amazon, but frankly part of me feels that for what I’ve already paid for this kit I shouldn’t have to spend another $15 for the correct length screws, plus the package has 20 screws and I only need 8. However, it appears that is exactly what I will have to do. At least they will be stainless steel, rather than the cheaper material the current screws are. Plus I will have extras for when/if the head strips out. I would suggest Rhino Rack consider included in their kit two sets of screws to meet this need. Keep the length they have, Judy add a set of 25mm. I’m still happy with the purchase but not 100%. I do like how the kayak slides easily on the rear felt lined cradles. Plus Rhino Rack includes every tie down strap that you will need, e.g. one each for the bow and stern in addition to two straps intended to secure the kayak directly to the roof rack cross bars. I would highly suggest you get in the habit of using all four straps, you really don’t need to have a gust of wind lifting the nose and tearing the roof rack off your vehicle. Can happen! My brother-in-law lost his roof rack exactly in this manner. So happy yakking and safe travels down the road. By the way I have paired these cradles with the Rhino Rack RTL002 T-Load Hitch Mounted Load Assist and Support Bar for 2” Hitches also purchased from eTrailer. I’ve attached some photos showing my first and second attempts to solve my dilemma. I need to order the replacement screws. First attempt after dark was a large flat washer, then the next day I added some nuts under the large washer. NOTE: Photos may post in reverse order.
# 6
Swagman Exo Aero Rooftop Kayak Roof Rack w/ Tie-Downs - Saddle Style - Clamp On
- view all Watersport Carriers
- Canoe
- Kayak
- Roof Mount Carrier
- Saddle-Style
- Aero Bars
- Elliptical Bars
- Factory Bars
- Round Bars
- Square Bars
- Rear Loading
- Clamp On
- No Load Assist
- Swagman
More Information >
I bought this rack to replace a Thule Dock Glide for use on my Malone Microsport kayak/canoe trailer. The Dock Glide worked fine on my rooftop wing bars but wouldn't hold my kayak in position on the trailer. Road vibrations and trailer bouncing would cause the kayak to twist no matter how tight my straps. The Swagman Exo Aero mount is an absolutely perfect fit on the Microsport crossbars with the cutout of the mount top portion and a depression in the bottom bar exactly fitting the cross bar (1 1/4") and is rock solid with no chance of shifting position. The Swagman mount is heavily constructed and the rubber strips on the wide bars hold the kayak like a vise. The boat doesn't shift at all no matter how bumpy the road. Great product.
Hi Carol, I emailed my feed back. Out here in the sticks your website couldnt load properly. It a great product. Perfect for this light duty purpose.
# 7
Yakima KeelOver Canoe Roof Rack w/ Tie-Downs - Gunwale Brackets - Clamp On
- view all Watersport Carriers
- Canoe
- Roof Mount Carrier
- Gunwale Brackets
- Aero Bars
- Elliptical Bars
- Factory Bars
- Round Bars
- Square Bars
- Side Loading
- Clamp On
- No Load Assist
- Yakima
More Information >
Great service and good quality pieces just what I was looking for and they work great. Thanks
The product was perfect but the real reason I'm happy with this purchase is your excellent web site and service.
# 8
Swagman Tajo Wall Mounted Kayak Rack
- view all Watersport Carriers
- Kayak
- Storage Rack
- Wall Mount
- Swagman
More Information >
Ordering was very easy and I really like the fact that I had reviews from others "with pictures". That helped me tremendously. The items came within 2 days (WOW). I didn't expect that. They are exactly like show and I will be installing them today. I don't expect any problems. (update after installation) I have now installed and I would have given a rating of Excellent, but I did not because of 1 problem I had. The screws that come with the product are soooo cheap that they all began to strip out as I installed them. And yes I was using the right Phillips head bit and I even had my drill set to stop if it hit resistance. The Phillips head has very small cross threads. If you look at the pics you'll see what I mean. This Phillips head is too small of threads for a larger 2" screw like this. As such, I ended up having to spend $20 on a screw extraction product (Grabit drill extraction) to get 1 of them out. I since replaced all these crappy screws with ones with better heads that are made of actual metal, not paper-mache that looks like metal. By the way, the Grabit screw extraction tool works great... Now that they're up, they look great and do perform exactly like I expected. I would definitely recommend these...


Good product, easy to install though as one reviewer mentioned, the heads of the phillips head screws easily strip out and I did so, even when forewarned. The only improvement would be if the angles were adjustable to better fit individual boats. Never-the-less the brackets are working great.

# 9
Rhino-Rack Crossbar Pads w/ Tie-Downs - Universal - 27-1/2" Long - Qty 2
- view all Watersport Carriers
- Canoe
- Kayak
- Paddle Board
- Surfboard
- Roof Mount Carrier
- Crossbar Pads
- Aero Bars
- Elliptical Bars
- Factory Bars
- Round Bars
- Square Bars
- Rear Loading
- Side Loading
- Hook-and-Loop Mount
- No Load Assist
- Rhino Rack
More Information >
Here are some more pics. Very happy with the racks, tie downs and pads. Easy to install, very secure. Love the straps. They have protection around the buckle to protect the board and built in velcro to hold the straps together when not in use.


A few more pics to shown the board on the racks. Easy to install. Feel very secure.


# 10
Rhino-Rack Nautic SUP or Kayak Roof Rack w/ Tie-Downs - Saddle Style - Clamp On
- view all Watersport Carriers
- Kayak
- Paddle Board
- Roof Mount Carrier
- Saddle-Style
- Aero Bars
- Elliptical Bars
- Factory Bars
- Round Bars
- Square Bars
- Side Loading
- Clamp On
- No Load Assist
- Rhino Rack
More Information >

They fit well and I feel my Kayak is safe tied down correctly.
After attempting to mount the individual rack pieces using the “burglar proof” button head screws with the pin in the recess and the short hex wrench with the hollowed out end I discovered that no real burglar would want the rack but would rather have the kayak so the first thing I did after spending 10 minutes trying to insert the hex into the button head screws with the pin inside the recess and attempting to turn the bolts and continually being obstructed by the support pieces and the paint interference on the bolt heads with trying to get the wrench into the recess I knew it was going to be a long frustrating process so I threw them away and purchased new button head stainless steel bolts and a 4mm extended handle hex wrench to turn them. Smartest thing I ever did. You not only have to mount the rack initially but then you have to put the kayak on the roof and remount all pieces again to fit your boat. All kayaks are different to one degree or another. Having to move the individual support and retighten them with the boat on the rack is even more difficult to do than the initial mounting with these “burglar proof” bolts and hex wrench and you will be happy you threw them away before you started the entire process. Try it for yourself at first and then go get the alternate ones. Worth the little investment and stainless steel will not rust away when you want to remove the rack system in the future. Once the rack is on your vehicle and kayak in rack the tie downs supplied are very good quality. Make sure you use the recommended tie down locations and directions, two kayak body ties and ties at front and rear. Due to numerous kayak hull designs it would be nice to have each support pod have a horizontal swivel built into it so it readily conforms to the hull shape. The overall quality of the system should be the last rack you will have to purchase. I only had issues with the supplied bolts and hex wrench. I gave this rack system a three star because of the bolts and hex tool and the individual pods not swiveling and I haven't at this point transported the kayak anywhere so I am waiting to see how it handles long trips with wind loads and constant loading and unloading performances.


# 11
LockRack Adjustable XL Watersport Carrier - Canoe, Kayak, or 2 SUPs - Side Loading - Universal Mount
- view all Watersport Carriers
- Fishing Kayak
- Kayak
- Canoe
- Paddle Board
- Roof Mount Carrier
- Saddle-Style
- Folding
- Bars with T-Slots
- Side Loading
- Clamp On
- No Load Assist
- Lockrack
More Information >
The keys are an issue (wish they were metal), but everything else is great! I go sunrise kayaking only and hate putting straps on with cold hands at 3:30 in the morning. I have a Nissan Pathfinder and was able to put this on with another set of Malone J-hooks so that I can have a second kayak when I go with someone. Once the fear subsides of it possibly falling off, you realize how quick and easy this thing is to use. It takes me 1 minute instead of 9-18 minutes to get my kayak up and secure. I have tested it at 75mph without any jiggling or issues. I sat on this in my shopping cart forever and finally pulled the trigger. If you kayak at least 10 times a year or are going at high speeds for extended periods of time in warm weather, totally worth it. If not, well, there are cheaper options out there.
I mounted it on my Yakima racks. Very easy to do (directions could really be improved by having someone describe the steps more clearly). I have not used this. Could be a month or so. However, initially, it looks good. Too bad the angled arms that hold the kayak are not adjustable depending on the angle needed.
# 12
Rhino-Rack Kayak Roof Rack w/ Tie-Downs - J-Style - Folding - Clamp On
- view all Watersport Carriers
- Kayak
- Roof Mount Carrier
- J-Style
- Folding
- Aero Bars
- Elliptical Bars
- Factory Bars
- Round Bars
- Side Loading
- Clamp On
- No Load Assist
- Rhino Rack
More Information >
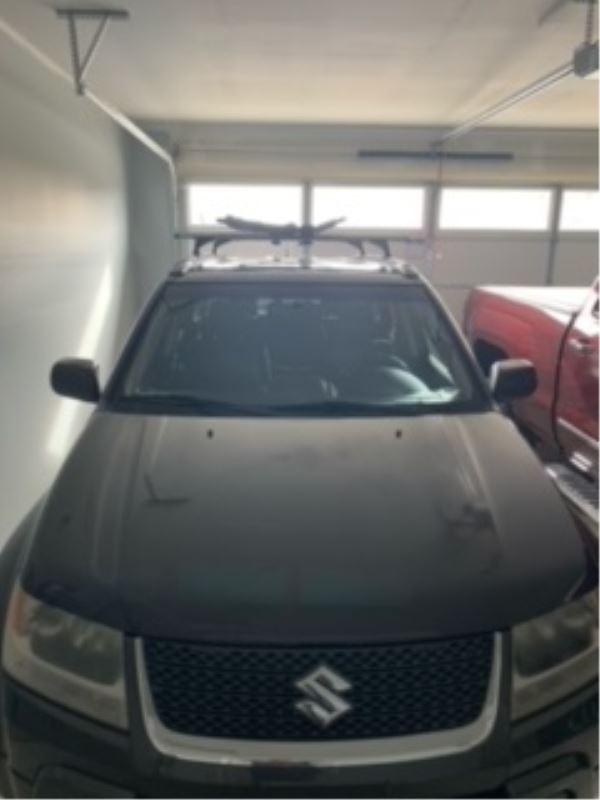
I searched a lot of websites before finding what I needed on etrailer.com for my 2012 Suzuki GV. I was looking for the proper mounts to install a Kayak rack system. Because my vehicle has a built in rail system it was very confusing what was needed. Thank you etrailer for hooking me up with the appropriate parts for the Rhino system, it worked great!
Terrific experience ordering from trailer. Highly recommend this company to anyone seeking to buy rook racks and kayak holders.
# 13
Thule Compass Kayak Roof Rack w/ Tie-Downs - J-Style - Folding - Clamp On
- view all Watersport Carriers
- Kayak
- Paddle Board
- Surfboard
- Roof Mount Carrier
- J-Style
- Post-Style
- Saddle-Style
- Folding
- Aero Bars
- Elliptical Bars
- Factory Bars
- Round Bars
- Square Bars
- Clamp On
- Thule
More Information >

We bought this Kayak rack for my mom to put on her 2016 Jeep Grand Cherokee so her and my dad could haul their kayaks easier. The mounting hardware was a little tricky at first but once we figured it out, it wasn't bad at all. It holds the kayaks in place nicely. Had no issues with them getting loose or moving around. Seems to be built well and they're very happy with it so far.
Wry disappointed in such an expensive rack and kayak carrier. It is extremely difficult to reach the carrier to place two kayaks. We are very uncomfortable transporting the kayaks for longer and highway travel. I would not recommend these to others. We likely will purchase something other in the future. I’d rather put the kayak in a car or pickup truck that they would fit in.
# 14
Yakima JayLow Kayak Roof Rack w/ Tie-Downs - J-Style - Folding - Clamp On
- view all Watersport Carriers
- Fishing Kayak
- Kayak
- Roof Mount Carrier
- J-Style
- Post-Style
- Folding
- Aero Bars
- Elliptical Bars
- Factory Bars
- Round Bars
- Square Bars
- Side Loading
- Clamp On
- No Load Assist
- Yakima
More Information >
The product seems great but I have not figured out how to get it safely attached to my bars. I have an Agricover Adarac on the bed of my truck and the crossbars are 1-1/2 x 1-1/2 inches square. I thought this would work well since it's for up to 3-1/2 x 1-11/16" crossbars, but it isn't secure on these. I'm going to try and figure out an alternate method for attachment though. Thule Hull-a-port Pro's are the perfect (mounting) solution but don't seem to be made any longer.

Great product and great customer service! Very easy to install, but I highly recommend to watch the installation video first. We used typical black office clips to clip the excess straps down since they came untangled when driving. Also, I recommend to purchase locks for the racks since we are concerned someone may steal them because they are so easy to take on and off.
# 15
Yakima ShowDown Kayak or SUP Roof Rack and Lift Assist w/ Tie-Downs - Saddle Style - Clamp On
- view all Watersport Carriers
- Kayak
- Paddle Board
- Roof Mount Carrier
- Saddle-Style
- Aero Bars
- Elliptical Bars
- Round Bars
- Square Bars
- Side Loading
- Clamp On
- Load Assist
- Yakima
More Information >
Wow is all I can say. I put the Malone cross bars on and then this went up in less than an hour. For an older very petite woman, It went up very easy. Yes, be aware shorties: you need a step stool to be able to get the rack up. I have a folding one that will go in my car. Yep so glad I did this. Thank you Paul B for the help in getting exactly what I needed.


Boxes were in rough shape from shipping but racks were in perfect shape inside. Seems well made and hopefully will be a good replacement for my hullavator which have broken gas shocks.
# 16
etrailer Kayak Carrier w/ Tie-Downs - J-Style - Folding - Clamp On
- view all Watersport Carriers
- Fishing Kayak
- Kayak
- Roof Mount Carrier
- J-Style
- Folding
- Aero Bars
- Elliptical Bars
- Factory Bars
- Round Bars
- Square Bars
- Side Loading
- Clamp On
- No Load Assist
- etrailer
More Information >
On my second attempt to find a carrying rack for a Pelican Mustang 100x recreational/fishing kayak, I took great care seeking out a rack that would provide at least six contact points for the boat. The kicker is trying to get good contact points to securely cradle the shape of the Mustang 100x "twin arched multi chine hull" while also cradling the edge of the deck. Delta kayaks calls a similarly shaped hull a "fusion hull". After doing a ton of google advanced searches for images for a racked up Mustang kayak model, I concluded a J-Style carrier seemed to be a secure solution. The etrailer J-Style - Folding carrier has solved the equation, and for a very reasonable price. Paired with a Sherpa Boat Roller, my 5' 4" wife can load and un-load her Mustang 100x kayak on her own for her afternoon paddles on nearby waterways. Now she needs a cockpit cover to keep out the rain, and her carrying system is complete. And etrailer made it an easy return of the first rack system I tried. Thanks etrailer!


Overall it was a pretty good experience. However I have three suggestions. 1. The washer and wing nut should be one piece. Trying to fit your hand under the rack holding the washer and wing nut trying to screw the two upside down is a challenge. 2. Strapping the kayak down, it’s difficult to get the strap in the middle of the top bar. Perhaps velcro on the top bar and strap would make it easier to begin the tie down. Finally a better video on the proper tie down procedure for the kayak would be very helpful. It’s maybe the most important part of transporting the kayak and the least part of the time spent on the transport instructions.
# 17
Malone DownLoader Kayak Roof Rack w/ Lift Assist and Tie-Downs - J-Style - Clamp On
- view all Watersport Carriers
- Kayak
- Roof Mount Carrier
- J-Style
- Folding
- Aero Bars
- Elliptical Bars
- Factory Bars
- Round Bars
- Square Bars
- Side Loading
- Clamp On
- Load Assist
- Malone
More Information >
Jeep wangler 2024 4xe with skyone touch top .Amazing the setup for my fishing kayak 12 feet. Everyone was looking at my setup on the road , and it was secure. Big thx to Kurt w & Paul B to recomand this kayak setup 10/10 www.Etrailer.com

I can't lift my kayak onto my roof rack like I could when I was younger. This looked like a perfect answer to keep me actively using my kayak. It is simple to use, but it does take some strength as you have to lift your kayak onto the loader and must lift the kayak up onto the roof rack as it only loads to just before the top, so keep that in mind. The legs need to be about 6" - 8" longer as mine don't touch the ground at the connectors. I can only reach the ground with them lowered to where they are almost out of the holder. They also touch the Jeep, so I am going to have to carry something to fit between the loader and the Jeep to prevent scratching the door paint. I think if the legs were longer and they fit with both the holder/connectors then I think they might not touch the Jeep. I would have given 5 stars if the legs were long enough. It works with both my moulded J rack and my fold down J rack. It works with both style of kayaks, rounded and straight hulls.


# 18
Malone DownLoader Kayak Roof Rack w/ Tie-Downs - J-Style - Folding - Clamp On
- view all Watersport Carriers
- Kayak
- Roof Mount Carrier
- J-Style
- Folding
- Aero Bars
- Elliptical Bars
- Factory Bars
- Round Bars
- Square Bars
- Side Loading
- Clamp On
- No Load Assist
- Malone
More Information >
These kayak J-style racks worked great, AFTER I went to the hardware store and spent $20 on bolts that actually fit my truck rack. It comes with 2-5/8” mounting bolts that aren’t adequate for a heavy truck rack ( mines a Best.Wyle). I had to buy 4” bolts, lock washers, and nuts). I also wish the locking teeth were mitered instead of square. That would make them less prone to breaking and easier to align.

I had the moulded downloader and needed the folding in order to fit in the garage. The top feed for the tie straps isn't as good as the moulded J-style rack, the strap came out of one, but the kayak stayed where it needed to be. It is easy to raise and lower the rack, but I am not always sure at what angle I am supposed to set them. With the moulded J-style, they are at the perfect angle for holding a kayak. I wish the clamp that goes under the bars were a better fit for the oval bars, but they do send two different size bolts and the longer ones work.


# 19
Thule MultiLift Cargo Lift and Storage System - Ceiling Mount - 220 lbs
- view all Watersport Carriers
- Fishing Kayak
- Kayak
- Canoe
- Storage Rack
- Ceiling Mount
- Thule
More Information >
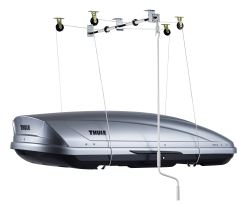
The product itself I would give 5 stars, but it took considerable effort before I could get it installed and tried out. The first obstacle I ran into is that there were no screws included. After opening the box I discovered this, read through the manual, looked at the product listing on etrailer's website, and on Thule's website. I did not see any notice that screw were not included. Finally I did see on one end of the box such a notice, and etrailer's customer service confirmed this to be the case. The second obstacle was how to install the product in my garage. The instructions were of marginal help. They are mostly devoid of words, but rather use pictures to instruct. Once I had a good idea of how all the parts were to fit together and be mounted I discovered my garage ceiling would not accommodate the parts. The ceiling rafters are installed on end, from one side of the garage to the other, and thus not wide enough for the screw holes in the pulleys or center rod mounting brackets. I improvised by installing in the garage attic two 2x8 boards perpendicular to the rafters, then three 2x4 boards snug under the garage ceiling, attached to the 2x8s by way of two 3/8 x 3.5" hex bolts on either end of the 2x4s. The 2x4s were 10', cut in half to allow room for the TH572 mounting hardware between the bolts. With appropriate structure in place (a 12-hour one man job), I started on installing the product. I used eight 1/4 x 1.5" lag screws to attach the pulleys to the 2x4s, and six #10 1.5" wood screws for the center rod mounting brackets. This part of the job took only about an hour... maybe two... it was late. Some suggestions: - make sure your garage can hand the load of the box (What you see in most attics are designed to hold the roof, not have stuff suspended from them -- I got lucky and had access to reinforced headers in the right places) - make sure your garage door can still open with whatever you are storing in place - make sure you can get your car in position under the load (rooftop box, kayak, etc) where everything is installed - make sure you can get your car out of the garage with the load attached So, my main complaints with this product are two: no screws, and minimal instructions. But with a little determination and some help from etrailer customer support, I was able to get the job done. Now I need to find someone who can make my garage door opening taller.

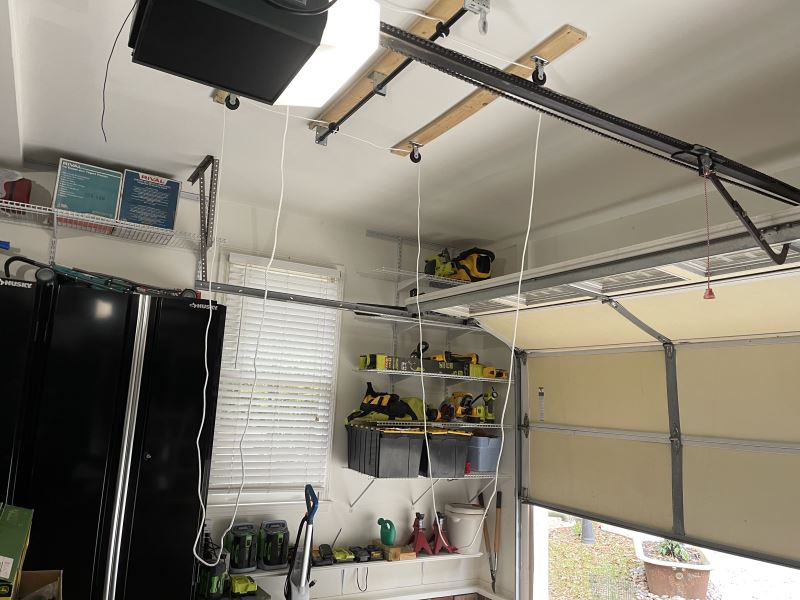
Overall I give this Thule Multilift Cargo Lift a five star rating; however installing this device takes some effort and skill. Maybe more effort and skill than the typical DYI'er can provide. The instructions provided do not have any words or dimensions, only pictures. Other than following the routing of the rope through the pullies it didn't provide me any benefit. Also, my system did not come with any screws or bolts. For me that was not a big deal as I have plenty of hardware I can use. There is one center bracket and four pullies to install. The spacing does not line up with typical dimensions so I had to improvise to get the Multilift installed. My garage ceiling has joist spacing that is 16" on center. That is typical, although some may have 24" on center spacing. Either way the spacing for the screws to secure the various components does not match. I guess you could use toggle bolts to hold the components to the ceiling sheetrock but I didn't trust that idea. What I did was to span my ceiling joists with 1"x4" wood and then attach the components to them. The kit comes with a template so getting the actual components set up on the 1"x4" wood strips was simple enough. Once all the components are installed then the rope is routed through the pullies. As you can see in the pictures I had a close clearance between the roof box and my roll-up garage door. I think it is about 2". Since I don't have a tall roll-up garage door I cannot drive my car in or out with the roof box installed. That didn't matter to me since my only goal was to store the roof box out of harms way. My last comment is that it takes two people to lift the roof box up and get the Multilift ropes in place. I tried to do it by myself but that did not work. I do like this Thule Multilift but it took some effort to install it. I really like the way it is raised and lowered by turning a mechanism with a handle. There is a less expensive lift sold on the internet but it did not use as many pullies to raise and lower the roof box and it relied on a rope to lift and lower it.

# 20
Rhino-Rack Kayak Roof Rack w/ Tie-Downs - J-Style - Folding - Clamp On
- view all Watersport Carriers
- Kayak
- Roof Mount Carrier
- J-Style
- Folding
- Elliptical Bars
- Factory Bars
- Side Loading
- Clamp On
- No Load Assist
- Rhino Rack
More Information >
Just installed it. So far so good. Ran 2 bike cables side to side with 4 pad locks to secure it for the summer,

I bought these to support an additional kayak that I purchased for my son to use. They matched a similar pair I bought earlier for my kayak. They are affixed to a roof rack that I also purchased from etrailer.com specifically for my 2015 Acura TLX. Etrailer.com is an excellent source for quality products for your vehicle.
Watersport Carriers Videos
How to Install the Malone DownLoader Kayak Roof Rack w/ Tie-Downs on a 2023 Chevrolet Tahoe
How's it going everyone It's Ethan here at etrailer. Today we're gonna be taking a look at the Malone Downloader Kayak Carrier, on our 2023 Chevrolet Tahoe. They call it the Downloader, because it does store in this downloaded position, which is nice for if you just leave this on, it's easier to transport, it's more condensed. And then it does fold up, into the J style, which is also nice, because if you want to store multiple kayaks on your crossbars, you can do that. But, before we fold it up, you're gonna want to feed the included straps through, just 'cause it's a lot easier to do now. So I'm making sure that the buckle is facing away.
Thule SUP Taxi Stand-Up Paddleboard Carrier Review - 2013 Chevrolet Tahoe
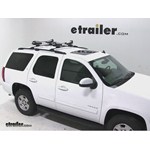
Today on our 2013 Chevy Tahoe well be test fitting the Thule SUP Taxi Stand-Up Paddleboard Carrier with a 2-board capacity, part number th810. Now to begin our test fit, well start off by placing the front part of the carrier onto the vehicles front crossbar. Well bring the rubber-coated steel strap around the underside of the crossbar and turn the gray knob to tighten down the strap to secure it to the vehicle. We will repeat these steps for both brackets on the front part of the carrier. With the front part of the carrier secured to the vehicle, well set the back part of the carrier onto the rear crossbar, bring the rubber-coated steel straps around the underside of the crossbar, and turn the gray knobs to tighten them down securing the back part of the carrier to the vehicle. Now with all parts of the carrier secured to the vehicle, well show you how to load up some gear.
Chevrolet Tahoe Watersport Carriers Questions
- Unfortunately there is no expansion kit for the Lockrack Adjustable Stand-Up Paddle Board Carrier # LR47FR and the arms are not available separately.
To carry your two boards, you'd have to upgrade your entire setup with the Lockrack Adjustable Watersport Carrier - Kayak, Canoe, or 2 SUPs - Side Loading - Universal Mount # LR24VR.
view full answer... - I do have an option for you to use one Thule Hullavator Pro Kayak Carrier part # TH898 on a 2020 Chevrolet Tahoe but you would not be able to use two because there would not be a crossbar long enough that could support this much weight.
I recommend the Rhino-Rack Vortex Aero Crossbar System part # RRVA150B-2, part # RRRCH4, and part # RRRCP43-BK. I then recommend swapping out one of the Thule Hullavator Pro Kayak Carriers for the Yakima JayLow Kayak Carrier part # Y04073.
view full answer... - The Thule SUP and Surfboard Pads for AeroCrossbars - 20" Long - Qty 2 # TH845000 you were looking at are designed to fit on both aero style bars and most factory crossbars, so these would be my recommendation. These are 20" long and have an anti-slip surface to help keep the board in place.
I also recommend using the Thule Multipurpose Locking Straps with Rubber Housings - 13' Long - Qty 2 # TH831, which will allow you to secure your board to the pads and keep them from slipping...
view full answer... - Since your 2019 Chevy Tahoe has factory side rails that the crossbars are connected to, you are able to install longer crossbars to gain the necessary 4" overhang on each side so that the Thule Hullavator # TH898 can be installed. I think your best option is to go with Rhino-Rack Vortex Aero Crossbars Silver - 59" # RRVA150S-2 (or black # RRVA150B-2) along with the necessary Legs # RRRCH4 and Fit Kit # RRRCP43-BK. This will be long enough to accommodate the Hullavator and other...
view full answer... - No problem at all! The Malone DownLoader Kayak Carrier and TelosXL Load Assist w/ Tie-Downs # MPG114MD-351XL uses standard J-Style cradles that have openings for the load-assist system to attached to. The carrier will fit around your crossbars just fine so you just need to make sure you have the carrier positioned as close to the outside of your 2019 Chevy Tahoe as you can so you can use the load-assist feature.
Attached is a review video for you to check out!
view full answer... - In order to carry your Ascend DC156 Canoe on a 2017 Chevrolet Tahoe I recommend using the Thule Portage Canoe Carrier w/ Tie-Downs part # TH819. The Thule Portage simply wraps around the crossbars and then holds the canoe in place by applying pressure to both sides. It also comes with bow/stern tie-down straps to further secure the canoe to your vehicle. I recommend that you spread the crossbars out as much as possible to dissipate the load evenly.
In order to help with getting...
view full answer... - Let's start with a roof rack for your 2016 Chevy Tahoe with factory side rails. The most cost effective option is from Inno using the following parts:
Square bars # INB165
Feet # INXP
Fit kit # INTR154
You can then use the Thule SUP Shuttle # TH811XT to carry 2 of the boards stacked. Like you said stacking 3 boards is not recommended due to instability. At the widest this carrier will take up 35 inches of crossbar space.
The square bars listed above are 65 inches long...
view full answer... - Absolutely; for a 75 lb kayak like yours, the perfect option is indeed the heavy-duty Malone MegaWing Fishing Kayak Carrier # MPG207.
This carrier has a 150 lb capacity, will fit on your Tahoe's factory crossbars, and you also mentioned a very good idea in using the Malone Channel Loader Kayak Load Assist # MAL48FR.
This will make it simpler to load up your heavy kayak, allowing you to push it up from the rear of your Tahoe.
view full answer... - Yes, the Thule Hull-A-Port kayak carrier # TH834 will fit the factory roof rack on your 2007 Chevy Tahoe. the carrier comes with straps and bow/stern tie downs so you will not need anything else to mount the kayak.
I do recommend using a tire step, # HE4040, which is going to be much safer than standing in an open vehicle doorway.
Be sure to consult the vehicle owners manual and/or Chevy for the roof rack weight capacity prior to loading.
view full answer... - Let's see if we can get you to the water safely using just one vehicle. The Thule The Stacker, part # TH830, will accommodate up to four kayaks; two per side. You will be using two sets of straps for each of the stackers, two for the stacker on the first crossbar and two for the stacker on the second crossbar. You will need a minimum cross bar spread, that is the distance between your crossbars, of 24".
Your bars need to be wide enough for two kayaks on each side of the stacker...
view full answer...













What our customers are saying:
"You folks are fast. Thank you very much."