
Most Popular 3500 Lbs GTW for 2012 Toyota Camry
change vehicle# 1
Draw-Tite Trailer Hitch Receiver - Custom Fit - Class II - 1-1/4"

- view all Trailer Hitch
- Custom Fit Hitch
- Class II
- 300 lbs TW
- 3500 lbs GTW
- 1-1/4 Inch Hitch
- Visible Cross Tube
- Draw-Tite
More Information >
by: bobby reid02/22/20072000 Toyota Camry
PERFECT FIT AND FAST...... i ordered a draw-tite class ll trailer hitch, t-one wiring harness and drawbar for my 2000 toyota camry..i had planned to have someone install it, but after seeing the instructions i did it myself in 30 minutes. great products.
View More
View Less
by: Bill03/05/2017 2012 Toyota Camry
2012 Toyota CamryGot a very good price on a trailer hitch for my '95 Camry. It was fairly simple to install (after watching etrailer.coms video). I use it to haul around my little utility trailer (Harbor Freight) and my 12 ft kayak (BassPro).
View More
View Less
# 2
Draw-Tite Trailer Hitch Receiver - Custom Fit - Class II - 1-1/4"

- view all Trailer Hitch
- Custom Fit Hitch
- Class II
- 300 lbs TW
- 3500 lbs GTW
- 1-1/4 Inch Hitch
- Concealed Cross Tube
- Draw-Tite
More Information >
by: Don F05/08/20192011 Toyota Camry
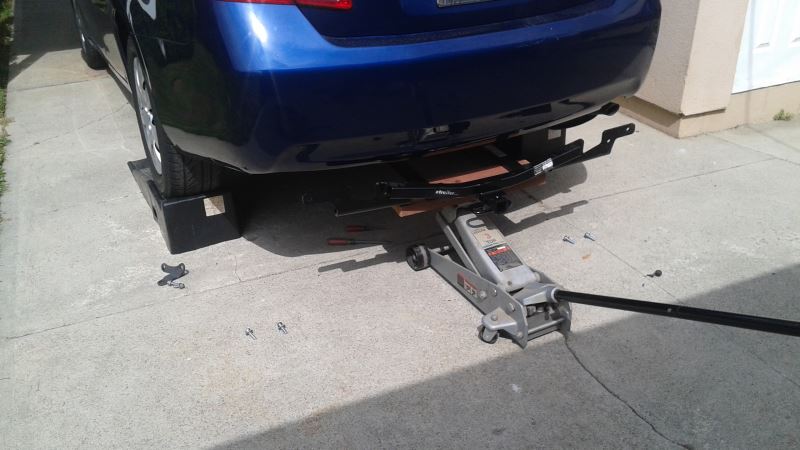
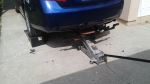
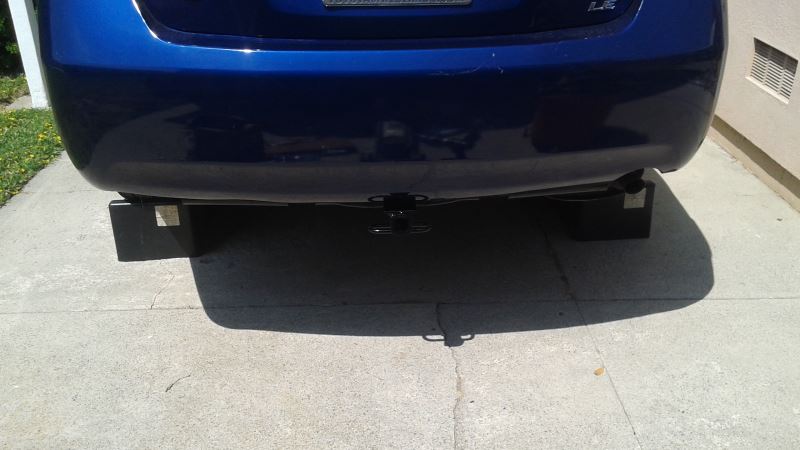
The hitch was exactly as ordered and fit perfectly. It is sturdy and a great value. It arrived quickly to CA. I really liked the videos and reviews on the site which gave me ideas and a sense of knowing I was installing everything correctly. I, like most of us, do not have access to a lift, but I used the ramps I have for oil changes on our cars. I just backed up on them and and chocked the front wheels. I also do not have lifting help and I am 71 so I set the hitch on a floor jack and my wife raised it up as I guided it in behind the bumper cover. I read a review that said he was able to install without dropping the muffler, and I did the same. Thanks for that tip, it was easy. Our Camry had weld nuts on both sides, maybe because it is one of the early 2011 models, which made it very easy. Let me say that I can see the muffler drop if you are using power tools. But if you are using good old had tools it really is not necessary. Another comment about the reviews. One review expressed concern over ware on the spare from the added bolts and the fact of permanently removing a factory bracket. This must have been a brother of mine as I had the same thoughts when I viewed the installation video before ordering. If you have a "donut" spare, like most, with it in the well look through the center hub with a flash light, the added bolts and plates are inside the rim area and never contact the actual tire. The second concern of the bracket removal, after looking at what it was bolted to, and where the added hitch, which is much stronger, is secured, I have no concerns the the bracket is now needed. After clearing the trunk, getting the tools together, and backing on the ramps. From start to final torque down of the bolts it was right at an hour. Note: My wife was very pleased with the hidden appearance of this hitch on "her" car. Always a success when the wife is happy. I recommend this model hitch and ETrailer and will refer friends.


View More
View Less
by: Joshua F.06/11/20172011 Toyota Camry
2011 Toyota CamryExcellent product. Came with good instructions for install, does require a jack, wheel chocks, possibly jack stands, wrenches and ratchet and sockets, and a drill for bracketing thru trunk basin. Does take some time and patience especially dropping the muffler to get up and under it. The hitch itself is great. I use it for my bicycle rack. Once installed it is hidden other than the receiver. Very satisfied and glad I was able to install myself with the good instructions.

View More
View Less
# 3
Curt Trailer Hitch Receiver - Custom Fit - Class II - 1-1/4"

- view all Trailer Hitch
- Custom Fit Hitch
- Class II
- 350 lbs TW
- 3500 lbs GTW
- 1-1/4 Inch Hitch
- Visible Cross Tube
- CURT
More Information >
by: James11/25/20222009 Toyota Camry
My Iowa 2009 Camry has been in a garage it's whole life, so, that helped a lot. Used [online] etrailer video for ease of work. I took longer than they did as I had to work a bit to de-rust a couple of female bolt threads enough to get a bolt on easily.


View More
View Less
by: Tim 01/24/2024Toyota Camry
Toyota CamryWe bought this 1.25" reciver hitch last year to accommodate a Kuat bike rack. The install was easy, the mounting holes lined up perfectly on our Camry, and the black painted hitch finish still looks new. We are very happy with this purchase.
View More
View Less
# 4
Curt Trailer Hitch Receiver - Custom Fit - Class II - 1-1/4"

- view all Trailer Hitch
- Custom Fit Hitch
- Class II
- 350 lbs TW
- 3500 lbs GTW
- 1-1/4 Inch Hitch
- Visible Cross Tube
- CURT
More Information >


by: Phillip12/08/20202012 Toyota Camry
I didn't cut off any underbody panel pieces. I just made a slit for the hitch to slide through. Also didn't cut off any heat shield. I drilled a hole for the 1/2" screw and torqued it to xx ftlb as instructed. Every thing worked fine. Hard to believe the video instructed to cut off that much. A bit crazy IMO. Also.. super snug fit. So snug I had trouble getting the M12 bolts to line up with the thread in the subframe. Pain the ass, but eventually got it in.


View More
View Less
by: James p10/13/20182012 Toyota Camry
Fast delivery and everything fit perfect. Easy installation after watching etrailers videos. Lowest price I found on the internet for this hitch. Thanks for the great service.


View More
View Less
# 5
Curt Trailer Hitch Receiver - Custom Fit - Class II - 1-1/4"

- view all Trailer Hitch
- Custom Fit Hitch
- Class II
- 300 lbs TW
- 3500 lbs GTW
- 1-1/4 Inch Hitch
- Visible Cross Tube
- CURT
More Information >
by: Nathan_LMD10/17/20212003 Toyota Camry
Last Friday evening (right in the middle of October) I finally installed this Curt Trailer Hitch Receiver into my 2003 Toyota Camry. This is a Class II hitch but seems like a Class III one, very sturdy, and the installation was a success. I spend a lot of time cleaning the two holes on the driver side which were exposed to the elements for the last 18 years, and then I actually drove in three old bolts which I took off from the passenger side's muffler mount, and that was preparing for the actual installation of the hitch. I just worked by myself, as my young son is not too mechanically inclined and not interested in such a thing, so I used my own technique, just tied a pleated electrical cable (3/16" diam) to the rear bumper and then I lifted up and suspended the hitch to around the middle part of the bumper. Then I screwed in one bold on passenger end first, then tightening then cable, the screwed in a bolt into the middle hole on the driver side. I used two more bolts on the passenger side, and one more on the driver side. But I have an extra hole on the driver side so I reused one old bolt for the previously never-exposed hole and then tightening all bolts properly. Then on the next day I test drive my car with this hitch and Allen bicycle carrier rack which I loaded two bikes. On thing I noticed is that the lower hanging part of the hitch around the muffler tend to hit the asphalt when came out from a parking lot due to a dip in height (difference) from sidewalk to the main road, may be I was moving a little bit fast for the shock absorber to respond sufficiently. (BTW, our bikes' tires are low in air pressure or just flat because these were not used for a very long while, since COVID-19 pandemic began, and we avoided activities at any public parks and other places, and because we live in a condominium-type of apartments, we were not as "busy bees" except to stay put in the "hive".)


View More
View Less
by: J.D. Gregory05/26/20221997 Toyota Camry
20 minutes install time. 1997 Toyota Camry LE V6. The car frame holes in back(4) were already threaded to accept supplied bolts. No need for nuts or U bolts. I recommend cleaning bolt holes to clear years of dirt/grime. The bolt fitment into threaded holes will be tight but bolts are correct. Makita rechargeable impact driver made install a snap. Use anti seize if you plan on removing at a later date.


View More
View Less
# 6
Draw-Tite Trailer Hitch Receiver - Custom Fit - Class II - 1-1/4"

- view all Trailer Hitch
- Custom Fit Hitch
- Class II
- 350 lbs TW
- 3500 lbs GTW
- 1-1/4 Inch Hitch
- Visible Cross Tube
- Draw-Tite
More Information >
by: Brett04/08/20232023 Toyota Camry
Finally got the chance to install this hitch. The written instructions are marginal. They did not cover my hybrid version. The installation videos on etrailer were more helpful. The hitch was a bit off and contacts the tire well on one side. Installation by loosening the exhaust did not work for me. Mine was too tight and I could not move it out of the way to drill. I had to remove the muffler. The instructions for trimming are a bit aggressive. I was able to get the under cover installed with about 25% of the suggested cutting. One thing the instructions left out is a rear edge trim (however, the video did mention this). I also added a strip from (the heat shield scrap) to tie the cover back together and prevent flutter noise while driving. Installed, this hitch appears sturdy. I am sure it will last. Too bad it did not come with a pin or cover.


View More
View Less
by: Glenn02/06/20212018 Toyota Camry
This is a quality product. It’s designed to fit the car perfectly. Please not though that you’ll need special tools to disconnect/drop the muffler system to install the hitch. I did not have tools to disconnect the muffler/exhaust hangers, so I wound up taking it to a mechanic that installed it for about $100.


View More
View Less
# 7
Curt Trailer Hitch Receiver with Standard Drawbar - Custom Fit - Class II - 1-1/4"

- view all Trailer Hitch
- Custom Fit Hitch
- Class II
- 300 lbs TW
- 3500 lbs GTW
- 1-1/4 Inch Hitch
- Visible Cross Tube
- CURT
More Information >
by: Glenn C.09/20/2014
Unbelievable fast delivery and securely packaged. Great price also. I was worried about purchasing something over the internet but the trailer hitch and wiring kit arrived securely packaged so there were no scratched, dents, or issues of any kind. I can't say enough positive things about my purchases. I definitely will be back to etrailer.com for more purchases.
View More
View Less
by: Richard04/20/2015
Trailer hitch and wiring arrived as scheduled. Product fits the Toyota Camry perfectly. Installation was easy. Excellent service.
View More
View Less
# 8
Curt Trailer Hitch Receiver with Standard Drawbar - Custom Fit - Class II - 1-1/4"

- view all Trailer Hitch
- Custom Fit Hitch
- Class II
- 350 lbs TW
- 3500 lbs GTW
- 1-1/4 Inch Hitch
- Visible Cross Tube
- CURT
More Information >
by: chuck08/01/2014
outstanding easy and just what I needed great product and price plus the wiring I ordered went in easy as pie
View More
View Less
by: Matt08/13/2019
A difficult installation. But, that was not because of the hitch. Once the car was apart, the hitch fit perfectly and bolted right up.
View More
View Less
# 9
Curt Trailer Hitch Receiver - Custom Fit - Class III - 2"

- view all Trailer Hitch
- Custom Fit Hitch
- Class III
- 350 lbs TW
- 3500 lbs GTW
- 5000 lbs WD GTW
- 2 Inch Hitch
- 500 lbs WD TW
- Visible Cross Tube
- CURT
More Information >
by: Bryon 02/10/2024
This also worked
View More
View Less
by: Michael08/15/2023
Very easy install and works perfectly
View More
View Less
# 10
Curt Trailer Hitch Receiver with Standard Drawbar - Custom Fit - Class II - 1-1/4"

- view all Trailer Hitch
- Custom Fit Hitch
- Class II
- 350 lbs TW
- 3500 lbs GTW
- 1-1/4 Inch Hitch
- Visible Cross Tube
- CURT
More Information >
by: Will06/18/2018
These are some of the best trailer hitches I know for the Toyota camry. Easy to install. I did order the wrong ball, had to buy another, to large of a bolt size.
View More
View Less
by: Fengxiang01/27/2018
Quality product. Worth every penny!
View More
View Less
# 11
Curt Trailer Hitch Receiver w/ Euro Drawbar - 1-7/8" Ball - Custom Fit - Class II - 1-1/4"

- view all Trailer Hitch
- Custom Fit Hitch
- Class II
- 350 lbs TW
- 3500 lbs GTW
- 1-1/4 Inch Hitch
- Visible Cross Tube
- CURT
More Information >
# 12
Curt Trailer Hitch Receiver - Custom Fit - Class III - 2"

- view all Trailer Hitch
- Custom Fit Hitch
- Class III
- 350 lbs TW
- 3500 lbs GTW
- 5000 lbs WD GTW
- 2 Inch Hitch
- 500 lbs WD TW
- Visible Cross Tube
- CURT
More Information >
by: Chuck07/30/20182018 Toyota Sienna
I installed this trailer hitch on my 2018 Toyota Sienna. It is very well-built, and fit perfectly. Customer service was very responsive when I had some questions, and responded right away, both by phone and email. The instructions were very good, but could benefit from additional information regarding cutting the car’s rear trim panel. In addition to the cut that needs to be made for the trailer hitch bolting plate to go through on the driver’s side , it also needs to be cut around the main bar / receiver area. Instead of cutting a big slot for the main bar, I cut out around the receiver plates, and put drain holes in the ends that would otherwise collect water. One shortcut that I found was that I was able to move the exhaust out of the way far enough by just removing the rearmost hanger, rather than removing the two hangers as shown in the video.


View More
View Less
by: Mike L01/07/20122011 Toyota Sienna
2012 Sienna LE FWD. Watch the 2011 installation video before you start. This 13105 hitch tucks in even prettier than I expected, and now my brother is jealous. Note I made the cutout in the underbody panel narrower, starting 1.75 inches from the hole (see photo), for a closer fit, and there is still room for torque wrench. I also cut a slit out to the front edge, so I could slip it on with the hitch in place, and for better access to my air hoses inside the left fender. I decided to add Airlift after reading reviews, since on trips I carry a maximum load. Installed single-handed, raised on jack stands.


View More
View Less
# 13
etrailer Trailer Hitch Receiver - Custom Fit - Matte Black Finish - Class III - 2"

- view all Trailer Hitch
- Custom Fit Hitch
- Class III
- 350 lbs TW
- 3500 lbs GTW
- 4000 lbs WD GTW
- 2 Inch Hitch
- 400 lbs WD TW
- Visible Cross Tube
- etrailer
More Information >
by: Ben11/04/2022
For an open box item, youd think it was brand new! Came with all the hardware and I installed it in about 10-15 minutes. Torque specs were included with directions as well. A great purchase, Im very happy. Thank you!


View More
View Less
by: Jeremy06/05/2023
I was disappointed that the hitch came slightly bent. I had to use a bottle jack to widen the bolt holes by 1/2-3/4'' in order to bolt the hitch to my car. otherwise it works fine for my 2005 Toyota highlander.


View More
View Less
# 14
Draw-Tite Max-Frame Trailer Hitch Receiver - Custom Fit - Class III - 2"

- view all Trailer Hitch
- Custom Fit Hitch
- Class III
- 525 lbs TW
- 3500 lbs GTW
- 2 Inch Hitch
- Concealed Cross Tube
- Draw-Tite
More Information >
by: Frank08/08/2023
Excellent Hitch for the 2012 Honda Odyssey. The installation is easy if you've got some mechanical skills. Watching the video was a huge help - thanks for those. With a little ingenuity, I was able to do the entire installation alone. Some notes on install. I used a set of ramps, and an ATV jack with some wood to hold the bumper as I removed/installed it. I used the same setup to hold the hitch temporarily as I mounted it using the underside bolts. When it comes to putting the bumper back over the hitch, something the install videos missed - the top bolt holes in the metal bumper have a triangle cut out, meaning you can put the bolt and washer into the top hole a few threads THEN hang the bumper on the bolts ensuring you get the bumpy washers on the inside of the bumper. Then put the front/bottom bolts through the front holes with a socket extension as shown in the video. Cutting the bumper - there is a better way if you know to use a utility knife. I propped the bumper up on sawhorses, then from the inside, I used a 12" framing square and utility knife with a new sharp blade to cut the rectangle and exhaust areas. The trick is to just score lightly first, don’t go crazy, and using the edge of the square, and then progressively cutting deeper - It looks totally pro and is way easier to cut than you may think. Rust – This was actually the hardest part. If your vehicle is older, I highly recommend running the hardware into the rusty holes (likely the exhaust side) all the way to mounting depth before attempting to install anything. Just take your time, and get this right, knowing the bolts will seat before struggling with anything. I ended up using one bolt as a tap, and the other to go to the hardware store to replace the one I modified/damaged. I also removed a very large dent from my bumper with the hot water trick while I had it off. All told, it took 3 hours, alone, and I don’t do this type of thing often. Overall, I'm super happy with the product and glad I took on this little challenge.


View More
View Less
by: Neil C.05/16/20232014 Honda Odyssey
The install process itself is easy enough to do on your own but I had problems with cross threading that added additional time and frustration. Cutting the bumper fascia can be done with just a box cutter and elbow grease. It definitely could be done in under 2 hours or even less with help. The only issue I had for not giving 5 stars is the 3 welded pieces in the center of the metal bumper really make it difficult reinstalling the bumper fascia and getting a good fit. I had to disconnect the bumper again and modify the welded pieces in order to get the bumper to fit right without having an obvious imprint on the surface, did what I could but kind of a pain to deal with. I had to use zip ties underneath where the 2 clips are supposed to go as the final alignment wasn't perfect, but it works. Satisfied with it overall.


View More
View Less
# 15
EcoHitch Invisi Trailer Hitch Receiver - Custom Fit - Class III - 2"

- view all Trailer Hitch
- Custom Fit Hitch
- Class III
- 525 lbs TW
- 3500 lbs GTW
- 2 Inch Hitch
- Completely Hidden
- EcoHitch
More Information >
by: Austin & Subjan Rex03/04/2024
Love the hitch. Took me awhile to install on my 15’ but worth it. Half day for hitch install for me and another half day for the wiring harness (because I ran a new home run power cable from battery to trunk). Also I installed a permanent 4 pin bracket on my bottom fascia of bumper. Very happy with it!


View More
View Less
by: Eric08/04/2023
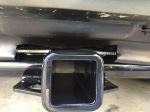
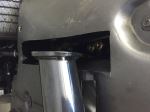
The fit is perfect. Following the video, installation took about 2 hours. I use it only to carry bikes on my 1up bike rack. This rack works well because you don't use a hitch pin, it's very hard to place the pin. Would recommend this WRX hitch over any other, the only thing hanging below any WRX in the rear should be nice sounding pipes! The picture shows the only body mod I had to do to get a perfect fit, just to make sure hitch didn't rub the rear body.


View More
View Less
What our customers are saying:
"I was very pleased with the service I received. Prices were good, shipping was cheap. I received timely feedback on the status of my order and would use your site again when I need a hitch!"