Select Year
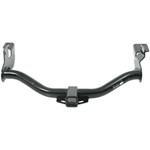
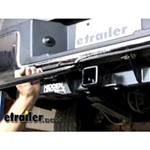
Trailer Hitch Installation - 2009 Pontiac Vibe
Trailer Hitch Installation - 2005 Pontiac Vibe - Curt
Trailer Hitch Installation - 2006 Pontiac Vibe
Should 2007 Pontiac Vibe Be Flat Towed Or Dolly Towed
Will the Blue Ox Base Plate Kit Part # BX3224 Fit 2003-2008 Pontiac Vibe All Models
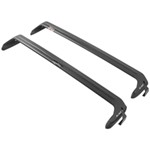
Roof Rack Option for 2010 Pontiac Vibe
Can Roadmaster Sterling Tow be Used to Flat Tow 2009 Pontiac Vibe GT
Shopping Guide
Pontiac Vibe
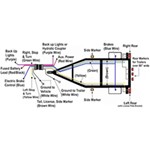
Trailer Wiring Diagrams
Trailer Hitch Classes Review
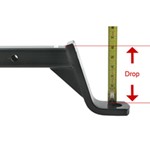
Choosing the Correct Ball Mount
How to Choose a Hitch-Mounted Bike Rack
Trailer Hitch Installation Tips
Roof Rack Information