What Second-Row Floor Liners do You Recommend for My 2013 Nissan Altima?
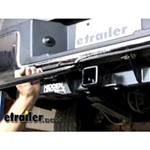
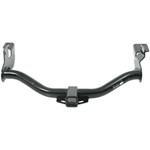
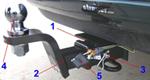
Trailer Hitch for 2013 Nissan Altima Sedan that Does Not Require Drilling to Install
Easy to Install Tire Chains for a 2014 Nissan Altima with 215/60R16 Tires
Recommended Transmission Cooler For a 2012 Nissan Altima With CVT Transmission