Suggested Q&A
Mazda 5

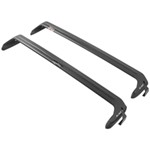
Recommended Fit Kit For Thule Roof Rack On 2008 Mazda 5 With Fixed Mounting Points
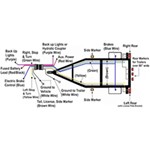
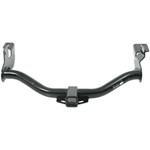
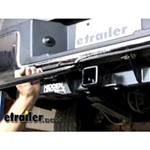
Trailer Brake Controller and 7-Way For a 2009 Mazda 5
What is the Weight Difference of the Thule Passage 2 and Passage 3 Trunk Bike Racks?
Bike Rack Recommendation for a 2007 Mazda 5 to Carry 3 or 4 Bikes
Browse All 193 Q&A >>