Select Year
Yakima Q Tower Roof Rack Installation - 2013 Kia Rio
Yakima Roof Rack Fairing Review - 2013 Kia Rio
Thule Raceway Platform Trunk Bike Rack Review - 2013 Kia Rio
How Does The UWS Standard Chest Stand Up To The Elements
Everchill RV Refrigerator w/ Freezer part # 324-000119 Compared to the Everchill WD-282FWDC
Roof Rack Recommendation for 2014 Kia Rio Sedan
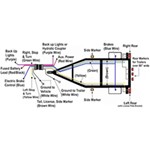
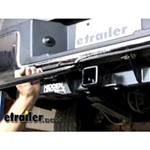
Wiring harness kit for 2013 Kia Rio EX Sedan ECO
Shopping Guide
Kia Rio
Trailer Wiring Diagrams
Trailer Hitch Installation Tips
Tips on How To Tow a Trailer
Trailer Brake Controller Information
Hitch Adapters and Extenders
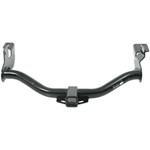
Trailer Hitch Classes Review