
# 1
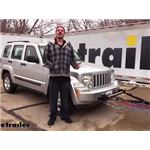
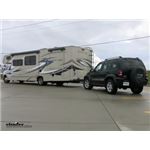
Demco Stay-IN-Play Duo Flat Tow Brake System for RVs w/ Hydraulic Brakes - Proportional
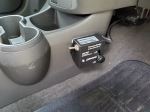
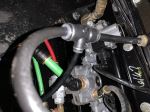
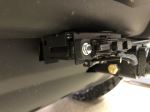
I mounted this in a 2014 Chevy Spark. Finding a spot for the main control unit was interesting, but I found a video for a 2017 Spark that I could use. I did have to drill an extra hole in the mounting flange and car. I haven't taken it on a trip as of this time, but a tow around the block indicated it was working. One note, watch about placing the LED indicator behind the tinted part of the toad window. It makes it harder to see from the camper camera.
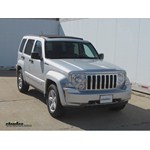
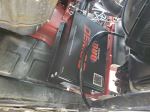
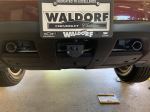
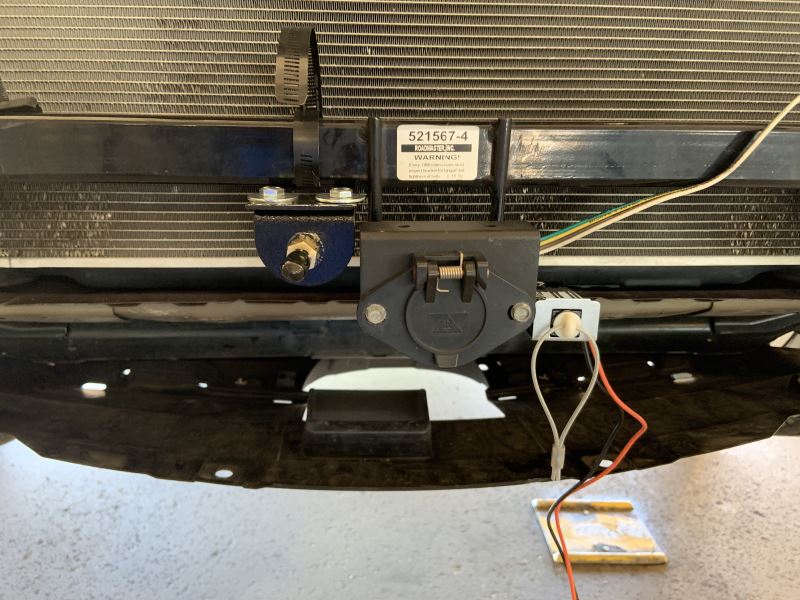
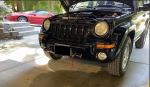
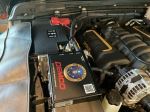
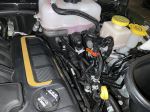
Installing on 2020 Jeep Trailhawk : Pic #0557 : Roadmaster Base Plate Kit , Demco Supplemental Braking System , Diode Wiring Kit , Demco Battery Charge Wire Kit Pic # 0548 ,0551 , 0559 Had to adjust the bracket plate to line up with the upper bolt holes Pic #6028 finished install , mounted the operating unit to the top fuse box cover using automotive Velcro . Air cylinder , controller and LED light installed . Aside from the base plate bracket not lining up with the upper bolt holes I would give it 4 stars . My son in law is a master at solving mechanical issues .
# 2
Roadmaster InvisiBrake Flat Tow Brake System - Preset

The braking system and the lights are working, one year after I bought them. However, I am towing a 2016 Keep Patriot, and about 2_500 miles after install, the system started making an annoying clicking noise when I enter the Patriot, which stops after about 10 seconds and then starts up again, usually a minute or so later, for another 10 or 15 seconds. etrailer first said that they had never heard of.such a thing, then said that there are otherwise comments for Keep Patriot owners on forums. Still have no.fix. Also, at first I did not know that to store the tow bar, it must be pulled up so that the post fitting can moe to the position where it fits into the hole.in the smaii yellow bracket, which works well when used correctly. And store the coiled.wide in your tower vehicle.to prevent corrosion which will interfere with its function.
Invisibrake on a 2014 Honda CRV I’ve been a carpenter all my life and recently finished building a custom car. After Watching the etrailer video (multiple times) it appeared to be a fairly simple installation, not so much, as getting up under the dash is very tight, mounting locations and access points are different and not much working room under dash. 1. It appears the length of the cable and air cylinder are shorter than when the video was made, so an alternate location for the cable clamp is needed. The cable direction needed to be at a 90’ angle to the pedal. . Removing all the carpet and insulation was a PIA to get a direct connection to metal. The cylinder mounted a few inches closer than the video showed and I used two clamps to attach it. The mounting point on the cable clamp ending up being behind the wheel well, so I used a couple of stainless steel bolts for attachment. 2. The hole location into the firewall was very difficult to get to. I was only able to drill a 5/8” hole. I couldn’t get my step bit in there and the brake lines are on the outside and didn’t want to risk damaging them. I just ran the power wires and vacuum line through this hole. I drilled another 3/4” hole in the floor at the back of the cylinder. I ran the plug for brake away and the lighting wires under the body and followed the lighting wires from the back to front. Covering all wires in a plastic loom 3. The plastic molding pieces required some trimming to fit the new wires and cylinder. 4. The video shows the box mounting directly though the removable carpet mat. (Not a good thing) I removed the mat prior to install and will have to modify it to reinstall. 5. All the wiring in the engine compartment and the plug was fairly straight forward and simple. It all appear to work as it should. Testing seemed to work good. I recommend making a new installation video. When I ordered it, the Amazon price was lower and etrailer couldn’t match the pricing. Two weeks later the pricing dropped to match the amazon price ( lower by $150). Sad face.. 2014 CRV Baseplate -Roadmaster 521567-5 The installation was fairly simple and the video explained it well. The bumper and grille were fairly difficult to remove and expect to break some of the clips. ( new yellow ones can be purchased on Amazon) . I would wait to replace the grille until all the plug wiring is complete. Just hind site. 2014 Honda CRV Brake switch relay. -Roadmaster 88400 Relay switch are really simple to install, but the location of the brake switch and the small wires made it really difficult. But it works as it should
# 3
Roadmaster Brake-Lite Relay Kit for Towed Vehicles
Installing on 2020 Jeep Trailhawk : Pic #0557 : Roadmaster Base Plate Kit , Demco Supplemental Braking System , Diode Wiring Kit , Demco Battery Charge Wire Kit Pic # 0548 ,0551 , 0559 Had to adjust the bracket plate to line up with the upper bolt holes Pic #6028 finished install , mounted the operating unit to the top fuse box cover using automotive Velcro . Air cylinder , controller and LED light installed . Aside from the base plate bracket not lining up with the upper bolt holes I would give it 4 stars . My son in law is a master at solving mechanical issues .
Evidently Roadmaster had made some slight alterations from the depiction, for the better. The fuse wiring was a spade end with two fuse holders built in. The holder closest to the spades was for the original circuit and the other for the new circuit. This was very handy. I had watched the installation video and thought it would be fairly easy; therefore I attached the terminals to the green, black, and white wires before even going to the CR-V. I did however purchase different spade connectors as I thought I may want to remove the brake relay switch in the future for another vehicle should I trade. Also the yellow connector is quite large and the video showed bending the wire over itself so that it would hold on the smaller wires. This was a wise decision. What was the problem was the wiring in my CR-V. The video showed similar size wiring from the brake switch. What I found was smaller wire, loomed very close to the brake switch. Evidently Honda had made some modifications. I believe the wire was 22 gauge and there was no real way the blue or yellow connectors would have worked. That said, after disconnecting from the switch, stripping the loom back to get some exposed wiring, cutting and using the 22-16 gauge connectors, drilling a hole for the ground screw, etc. the switch worked perfectly. I did vary the fuse location from the 7.5 Amp #29 Occupant Detection System (ODS) to the 15 Amp #28 Washer as I figured it would less likely interfere with any operation.
# 4
Roadmaster Even Brake Portable Flat Tow Brake System - Proportional
Ordering was easy. Delivered very promptly. Actually cheaper then what the manufacturer sells it for. Live near manufacturer and having them install all my flat towing components this month. Great service Etrailer!!
Very happy I received it, normal great service from etrailer but had a shipping issue, (shipper's fault). I will always go through etrailer first for anything RV related. I will be back!
# 5
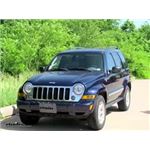
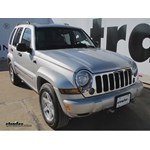
Roadmaster Stop Light Switch Kit - Jeep Liberty
etrailer is awesome to deal with, very knowledgeable and helpful. We would highly recommend this company for sales and installation.
Perfect fit. Nearly impossible to work under the dash these days but after watching the install video I was able to reach up and do the install "by feel". (note: you will need an extra deep 13mm socket for the Jeep Liberty) Had a near disaster with the brakes on the toad nearly destroyed from a malfunction of the brake controller. Hoping this will give me a heads up if there is ever another malfunction. At least a little more peace of mind.
# 6
Brake Buddy Select 3 Portable Flat Tow Brake System - Proportional
Had a problem with the connection to the unit but called etrailer and they sent me a new one after sending the other back to them. The hole process very painless and the the staff at etrailer was great to work with. Thank you etrailer for your great response.
I am still scratching my head on the placement of the Main Unit. The floorboard area of the 2024 Jeep Wrangler is very small. The 2 levels of the rear of the unit are such that I can't seem to get the right height to stabilize the unit. The seat can be brought slightly forward but does not contact or even come close to the Handle when raised. With the plunger all the way in, there is hardly one half (1/4") inch of clearance before beginning to press the brake pedal. I can't find anyone else that has installed this unit. HELP please.
# 7
Brake Buddy Classic 3 Portable Flat Tow Brake System - Preset
2017 Jeep WranglerI purchased this BB Classic 3 in October 2020 after my old BB Classic that I purchased in 2008 failed to hold pressure for the piston. I bought this for my 2017 Jeep Wrangler but due to (1) the depth and unevenness of the driver's floor board, (2) the seat adjustment bar prevents BB Classic 3 from pushing against the seat and (3) the adjustable legs are not long enough to reach the seat and brake pedal properly, the BB Classic 3 fails the auto start test every time due to not being able to level. I talked to Hopkins MFG techs several times trying to resolve the issue (wiring checks, power cord checks, etc.) but to no avail. This situation makes the BB Classic 3 dangerous to have in service because not being level it will think something is wrong and keeps the brake applied (piston will not retract after applying the brake). So after talking to other Jeep Wrangler owners I determined that a platform was needed for the floor board on which the BB Classic 3 could rest. I constructed a platform that was approximately 3" off the floor board and rested on the floor board under the seat and on risers toward the brake pedal. This platform is level on the floor board both length-wise and width-wise. After placing the BB Classic 3 on the platform with clevis and power cord installed and legs in the lowest position, I tested the auto start and had 8 successful tests in a row!!! Also the brake away test was successful too. I still need to make a short drive test while in tow behind the motorhome. Hopkins really needs to advise customers that the Classic 3 will not work properly as is on a 2017 Jeep Wrangler due to the configuration of the driver's side floor board.
Just follow the instructions and it's an easy set-up. It does its job on the road. If there was anything negative, it would be where to store it when not in use. But, that has nothing to do with its performance. Thank you etrailer for making so many things available to us!
# 8
Roadmaster BrakeMaster for RVs w/ Air or Air-Over-Hydraulic Brakes - Proportional
The install on my Ford Maverick is clean and functional, so this is more of a customer service review... excellent customer service! During the 4-day towing set-up install, the forecast was for freezing temps and my rig was not winterized. I called in mid panic and the motorhome was moved indoors. A few months after using the tow set-up, a minor problem developed. I called and the CSR apologized and said, I can see how that might be frustrating, and a replacement cable (slightly longer) was sent free of charge.
Second set on second Jeep, Brake system works great, a bit of an install with the air lines and placement of the small tank in the crowded engine compartment BUT once it is in the setting of the brake peddle arm is easy!
# 9
Demco Air Force One Flat Tow Brake System for RVs w/ Air Brakes - Proportional
I wouldn't use anything else! Once this system is installed it's literally plug-and-play. Nothing to move or install into the car, each time you tow. Just plug it into the coach's air break system and you're done. Install video from etrailer made it even easier to complete. You do need a bit of mechanical guidance/assistance as you're connecting to both your vehicles and coaches breaking system but it has worked flawlessly for over 11,000 miles and in some pretty intense traffic.
AF1 is amazing so far. I did the installation by myself. I have a 2014 Honda CR-V and bought it for towing. Watching the video helped me through it. The car installation portion was pretty straight forward. The video is better than the instructions overall, but I read through the entire instructions before beginning. I was able to install the RV tank without putting the rig on a lift. Depending on how big you are and flexibility, it can be done with the RV on the ground...it just takes longer. Also, I would recommend knowing where you are going to mount your RV tank. I mounted the tank near the rear and didn’t have enough brake tube after doing the car. Picked up an extra 20 ft at Autozone or order the tube with etrailer. The customer service center is very helpful too. Many thanks to Mariah for the outstanding assistance. Finally, I would say that if you order the brackets to mount the emergency brake away for your car, you may have to cut them down with a grinder. It is so much nicer not putting the brake buddy in the car now. Looking forward to enjoying it on trips. I drove the rig about 20 miles yesterday, and the light came on and I honestly couldn’t tell the car was back there other than looking in the video and seeing the light on the car during braking. Highly recommend this unit.
# 10
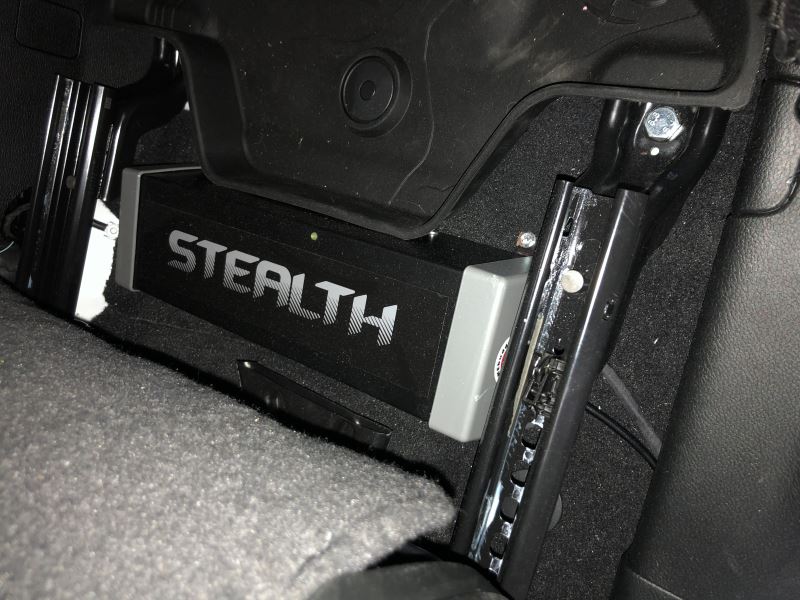
Brake Buddy Stealth Supplemental Braking System - Proportional
I am a proficient DIYer (and was an auto mechanic many years ago). The installation took a lot of time - perhaps 8-10 hours for the brake controller. The most special tool needed was a rotary cutter (e.g., a Dremel tool). A cordless impact driver was also very helpful, especially with the self tapping screws. Getting the pully in the perfect position under the brake pedal took some trial-and-error to get perfect. Also, the included bolts for the brake pedal bracket where too short to accommodate the width of the brake lever - easily remedied with slightly longer standard bolts. Be very mindful of what is on the other side of the sheet metal you are planning to drill into. The brake supplemental vacuum system was a bit of a challenge, as the instructions are very vague regarding how to mount, and the space I had to work with was surprisingly tight. I ended up creating a mount on the inside front fender, and bolting the pump to that. Also, tapping into the vacuum lines took a couple of tries to get a leak-free connection. Think ahead about this, and be prepared to get a few small parts like hose clamps or right-angle hose connectors. This would be a potential consideration for any vacuum boost added on any vacuum power-assist application with any controller. I mounted the Brakebuddy main unit under the rear seat - that was a perfect location, and much better than the often suggested location under the driver's seat. I was very pleased with the installation result. I paired this with a Nighthawk tow bar. Be warned that the tow bar's included cable will not be compatible with the Stealth, as the Brakebuddy uses a proprietary connection at the towed vehicle. The upside of this proprietary connector is that all connections are build in, including the brake away cable and the battery charging line. (I modified the Nighthawk by replacing the included cable with a 4-pin cable to power the lighting system on the bar. This is just for extra safety and cool looks - I could have just not used the tow bar's included cable). With 1,200 miles of towing behind us, I can say I am very pleased with the performance. I rarely notice any difference in braking effort or effectiveness - which is a big advantage for a proportional system. My favorite feature is the ease and speed of connecting or disconnecting the towed vehicle. I'd give this a 4.5 stars out of five if I could, because I did need to add a few parts and make a couple trips to the hardware store to complete the installation. However, the excellent performance and ease of use once installed more than makes up for the inconvenience during initial installation. Special appreciation to the people at eTrailer, especially Nicole T, who provided support and guidance from pre-sales to installation. Also, I called Brakebuddy's support line with a concern, and they immediately picked up the line, addressed my question, and offered to immediately ship any parts if needed.
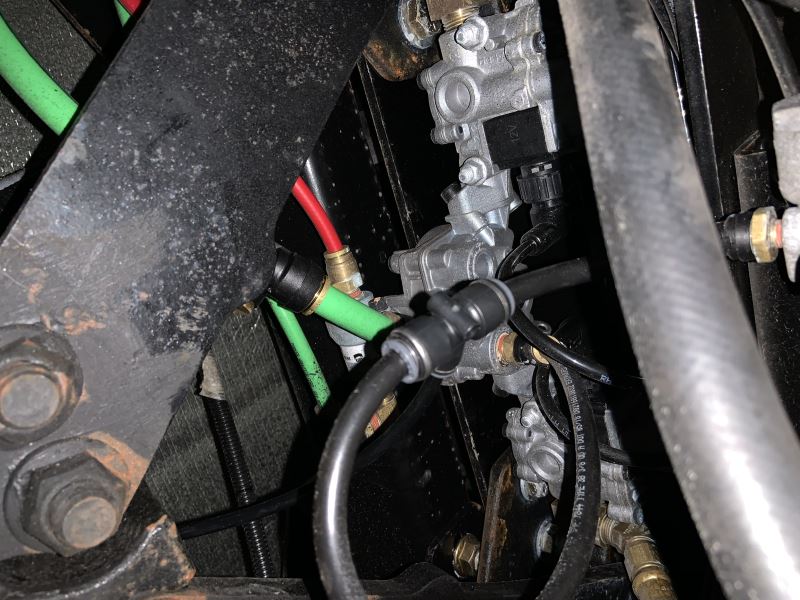
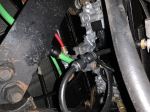
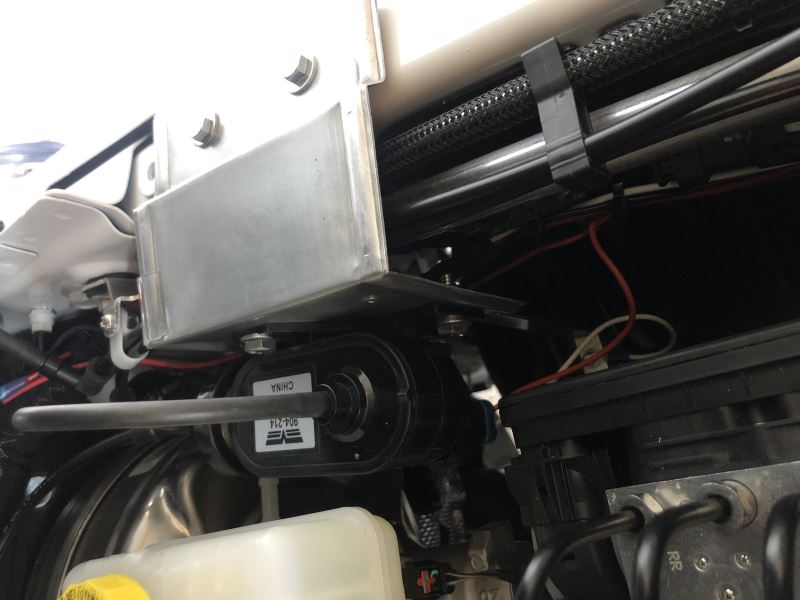
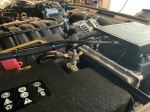
I choose the Brake Buddy Stealth for my 2021 Jeep Wrangler because I wanted a “stay in place” brake system and felt it would be a clean looking installation. I finished the toad side of the installation today and thought I’d leave some notes on what turned out to be a bigger project than I’d anticipated. Again, this is my experience on the 2021 Jeep Wrangler 2-door. Your experience on other vehicles may vary. I started this install after installing a Demco Tabless Base Plate. Right out of the blocks, there’s really no convenient location to mount the cable connector to the Demco baseplate. I chose to mount it to under side of the bumper on the driver’s side. To provide clearance and a route for the wires, I had to cut a notch into the plastic air dam. I used one of the already screw screw holes and used self tapping screws in the other three locations. For added strength I epoxied the connector to the bumper as well. Since the bumper would be unremovable if the connector were hardwired, I added a waterproof connector. The kit is stingy with wire lengths, so I substituted my own wire. The Stealth unit itself i mounted beneath the driver’s seat. Don’t be fooled into believing there is clearance when testing with the driver’s seat positioned for rear seat access. Once the seat is returned to normal operation it lowers a bit and the box keeps the seat from being move forehand aft. I solved the problem by installing 5/8” thick nylon washers under the rear end of the seat slides. I also cut away a bit of the carpet under the front, inboard corner of the box. You will need to remove the driver’s seat in order to attach the front screws of the box. Be sure to disconnect and isolate the neutral battery terminals to prevent inadvertent air bag discharge. After removing the interior trim from the A-pillar, the door sill, and the driver side foot well, The wiring and cable tucked nicely away along with the OEM wiring and wiring for my taillights. I mounted the pulley horizontally behind the brake pedal. Installing the vacuum pump was my biggest worry and challenge. Instructions are to zip tie it “somewhere”. That seemed pretty casual for a safety system. I chose, instead, to fabricate an aluminum bracket that attaches to the lip of the engine compartment and to the wheel well (this latter attachment point is necessary to keep the pump from vibrating). Finally, the kit comes with 3/8” fittings to tap into the brake booster vacuum lines. The Jeep, however, uses 8mm nylon tubing. Brake Buddy, via etrailer.com, stated that the tubing would stretch and all would be good. Again, this felt casual for a safety system. Instead, I purchased an 8mm check valve and a 8-6-8mm barbed tee through Another online retailer to do the job right. I had to heat the Jeep tubing to fit even the 8mm tee, so the is no way the larger 3/8” fittings would have worked. See photo of my finished vacuum line installation. Bottom line, it was a POA install, but looks great. Hopefully it will stop the Jeep when towing. I’ll find out soon. :D
# 11
Demco Stay-IN-Play Duo Braking System for RVs w/ Hydraulic Brakes - Wireless Monitor - Proportional
eTrailer was very helpful in choosing the correct hitch for our rv and car. They also provided a special brake application in the car that makes it super easy for toad braking. I am 72, and I hook up this toad and pull it with confidence. The instructions to hook up the toad was presented with ease. They knew exactly what they were doing, and we didn't rush through the demonstration. I would recommend eTrailer to anyone.
It took me a couple days to get this installed,I'm not as flexible as I was so that didn't help. However I followed the instruction steps and got it done.Had to adjust the sensitivity a few times until it was the way I wanted.System works good and I get a alarm when brakes are activated. This gives you peace of mind knowing your brakes are not applied when they shouldn't be. Very Happy with it,just have to flip a switch when towing.
# 12
Roadmaster BrakeMaster for RVs w/ Hydraulic Brakes - Proportional
Kit fits great! Hooked up a 2004 Workhorse to a 2002 Jeep Liberty. It might be preferable to be handy with some advanced mechanical skills and tools to install this efficiently. Directions are great but you do need to figure out your own locations for certain items like the break-away reservoir, compressor, routing lines and wires out of harms way, but not bad at all. Parts are great, everything there but added a couple different wiring splices of my own.
2012 Chevrolet EquinoxYour customer service leaves nothing lacking, and this follow-up from you is so out of character for the many web sites I have purchased from over the years. I am impressed by you and your company. I bought the tow bar and the brake system for my Equinox, and installed them my self (I am 70 years old) - and with your provided instructions and video, I had no problems (even though I was surprised by the number of parts and detail that went into the assemblies). Both systems have worked very well, with no problems. I am completely satisfied with them, and have told my friends and traveling acquaintances about your company. Thanks for your follow-up!
# 13
Demco Air Force One Flat Tow Brake System for RVs w/ Air Brakes - Wireless Monitoring - Proportional
Overall a great system, there are some intricacies to the install as it pertains to old instructions with LED light in the TOAD vs. CoachLink Wireless and also the 3 wire reed switch vs. the newer 2 wire one. But using the provided written instructions along with YouTube videos you can figure it out. My other challenge was my Jeep is a 392 model and thus the battery and fuse box are in swapped locations, as well as a different VAC line layout, but again you can figure it out…just takes some time to study and trace the routing. My only real complaint was ordering, I was quoted the wrong system for my RV (Stay and Play) vs. AF1 since I DO have air brakes. etrailer was helpful in getting the return process but wants to charge me the shipping and possibly restock fee, I am working with them on this and hope to get a good resolution.
The Air Force One Braking system just arrived. I opened the box and looked it all over. No damage to anything thanks to good packing. A friend of mine has this same braking system and he loves it. Can't give a product review because it's not installed yet but I can honestly say Dianna A in customer service helped me get my order correct.
# 14
RoadMaster Stop Light Switch Kit
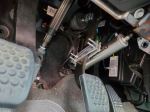
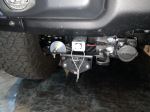
There was a challenge presented when installing the Roadmaster Stop Light Switch (Kit #751452) on my 2015 Jeep Wrangler Sport Unlimited. The kit's Black C Bracket was not able to swing around fully to allow the kit's gray stop switch to be in line with the brake pedal. This was due to blockage caused by existing jeep's stop switch gray mounting bracket. As a result, I had to cut a notch using a Dremel and a grinding bit. The area where I had the interference from the jeep's bracket and the notch to allow proper installation is indicated in the attached photo. It is imperative that the kit's stop light switch when mounted correctly is fully depressed. If not, 12 volts will be sent to the Evenbrake's transmitter which will result in an alarm and failure to use the Evenbrake system. Also in reference to the Roadmaster installation instructions, there is no removable lower plastic cover. Installation requires twisting ones body under the dashboard with limited use of my left arm (I am right handed) to use tools. I ordered the stop switch from etrailer.com. I am using a Roadmaster Evenbrake system. I do want to state a clarification concerning the battery based on what I read in etrailer's and other forums. You do not have to disconnect the jeep battery on the 2015 Wrangler Sport Unlimited Model. Jeep made a change in the second edition of the 2014 operators manual which is reflected in the 2015 manual. The earlier 2014 edition did state the disconnecting of the battery before towing. I had informed the Roadmaster tech department of this change. The 2015 Jeep Wrangler Sport Unlimited steering column does not lock. You do not have to leave the key in ignition. You can remove it when ready to tow. My 2015 jeep has the power convenience group. The vehicle has two 12 volt convenience outlets. One is only powered on when the ignition switch is on. The other outlet is connected directly to the battery via a fuse. It is on all the time. This is the outlet I use for the Evenbrake. Now, Jeep does state not to plug in devices that use more than 13 amps or 160 watts. Roadmaster as per their installation manual indicates that the maximum draw of the Evenbrake is 10.8 amps. I reviewed all the above to the Roadmaster tech department and they said I should not have a problem using the Jeep's always on 12 volt outlet. We recently went on a camping trip on Columbus Day weekend to a campground 120 miles from the house and no power problems were encountered with the Evenbrake system. One other clarification is that the Jeep's brake lights are tied into the power convenience/electronics system. The brake lights will operate for a short period of time after the ignition is turned off and/or you open the jeep's door. Use of the brake lights will time out. This is the primary reason why I chose the stop light switch bracket kit. The Roadmaster Evenbrake transmitter and the hot leg to the kit's stop light switch are fed from a dedicated 10 amp fuse protected line from the battery. This way, I avoided drilling a hole into the weather resistant under the hood fuse box plus negating the need to make rube goldberg connections to existing fuses.
Thanks to a review I was aware I might have to grind out part of bracket to get it to fit. I did have to. Roadmaster said it wasn't necessary . I think they have to update the bracket for the newer models. Etrailer was more helpful than Roadmaster.
# 15
Roadmaster Stop Light Switch Kit
# 16
Roadmaster Stop Light Switch Kit - GM Pickups/SUVs w/Adjustable Pedals
Just installed my secondary brake light switch in my motor home and truck to assist me in ensuring my brakes have been applied and releasing while towing my truck. I will test the new system in a couple of days to make sure everything is working correctly.
Great service! Light switch was delivered on time and is now installed. I am considering ordering the Even Break. Thanks
# 17
Roadmaster Stop Light Switch Kit - Acadia/Enclave/Outlook/Traverse
Better than opening the hood every time we tow.
This brake light switch was easy to install and works great with my motorhome indicator light for the auxiliary braking system.
# 18
Roadmaster Stop Light Switch Kit
This kit provide all the needed part to set up our second truck. No fault of the kit but this was not an easy installation.
# 19
Blue Ox Patriot Portable Flat Tow Brake System - Proportional
2010 Jeep PatriotCompared to my previous Blue Ox Patriot 2010, I like that it is half the weight and sets up easily. The Patriot 2010 would sometimes refuse to set up. I do not like the remote control for the new Patriot. The one for the Patriot 2010 had a knob for setting the braking force and I could quickly turn it to zero to deactivate it if it had been activated by a rough road, or if it was braking continuously on a long downhill. With the new remote, I have to press several buttons to get to the force setting, then press the button several times to change the setting. Also, the warning beep is not loud enough to hear in the noisy Class C cabin.
I bought the Patriot 3 braking system after getting a lot of good information from Will S. He is very knowledgeable and helpful. Thanks, Will!
# 20
Roadmaster BrakeMaster w/ Pressure Reducer for RVs w/ Hydraulic Brakes - Proportional
The install on my Ford Maverick is clean and functional, so this is more of a customer service review... excellent customer service! During the 4-day towing set-up install, the forecast was for freezing temps and my rig was not winterized. I called in mid panic and the motorhome was moved indoors. A few months after using the tow set-up, a minor problem developed. I called and the CSR apologized and said, I can see how that might be frustrating, and a replacement cable (slightly longer) was sent free of charge.
Second set on second Jeep, Brake system works great, a bit of an install with the air lines and placement of the small tank in the crowded engine compartment BUT once it is in the setting of the brake peddle arm is easy!
Demco Stay-IN-Play DUO Supplemental Braking System Installation - 2012 Jeep Liberty
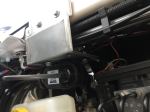
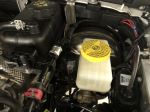
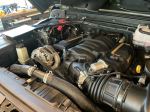
Hi there Jeep owners today in your 2012 Jeep Liberty we're gonna be taking a look at and showing you how to install Demco Stay-IN-Play Duo Supplemental Braking System. This can be purchased with either a wired LED light that goes inside your vehicle or you can get a wireless option that will plug into your motor home so it's more easier to see. Demco Stay-IN-Play Duo is a proportional braking system that will apply the brakes in your vehicle when you hit them in your motor home while you're flat-towing to help you come to a safe stop. The operating unit here uses vacuum and air pressure to do so. It actually pulls a vacuum here on our vacuum brake booster. So we get power assist in the vehicle and we're flat towing without having the engine running to provide us with that vacuum.
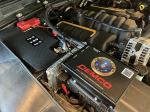
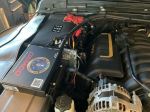
SMI Air Force One Braking System Installation - 2012 Jeep Liberty
Speaker 1: Today on this 2012 Jeep Liberty we'll be having a look at and showing you how to install the SMI Air Force One supplemental braking system for motor homes with air brakes, part number SM99243. In this particular case we're working with a 2007 Fleetwood Revolution motor home on a Spartan chassis.The Air Force One is a great solution for those of you that need a supplemental braking system to help you keep safe and legal when flat towing your Jeep Liberty behind your motor home that has air brakes. The greatest thing about the Air Force One is that there's only one difference that you have after you've already hooked your Liberty up than how you did it before and that is your air line umbilical between your motor home and your Liberty. You'll just simple remove the dust cap that protects the fitting on the back of the motor home, you'll push in the hose, pull back and make sure it's secure, and we'll do the same on the Liberty. Just like that you're now ready to tow. The Air Force One even comes with a breakaway switch and a cable to attach to your motor home so in the unlikely event that your Liberty ever became disconnected from the motor home the breakaway switch would become pulled and it would apply the brakes in the Liberty, bringing it to a stop.Here's what the SMI Air Force One looks like installed on our Liberty.
Roadmaster Even Brake Portable Braking System Installation - 2012 Jeep Liberty
Speaker 1: Today on our 2012 Jeep Liberty, we'll be reviewing and installing the Roadmaster Even Brake braking system, part number: RM-9400. And we'll be using the Roadmaster Brake-Lite Relay Kit for towed vehicles, part number: RM-88400.This is a portable, easy to adjust braking system that uses an inertia sensor in the towed vehicle to detect deceleration. Like many other modern brake systems, this one is a proportional braking system that ensures that your towed vehicle's brakes are applied with an intensity that matches the slowing or stopping action of your towing setup. The result is improved control, better stopping and less wear on the brakes of both your vehicle and your RV.This system has an easier install than some of your others that require many electrical connections and tapping into your vehicle's systems. If you are a do-it-yourselfer, then this kit will be a good one for you.The included monitor mounts in your RV and keeps you updated on the status of the Even Brake. This wireless system relies on the ICX transmitter, which is mounted in the towed car to send signals to the monitor.
Roadmaster Brake-Lite Relay Kit Installation - 2012 Jeep Liberty

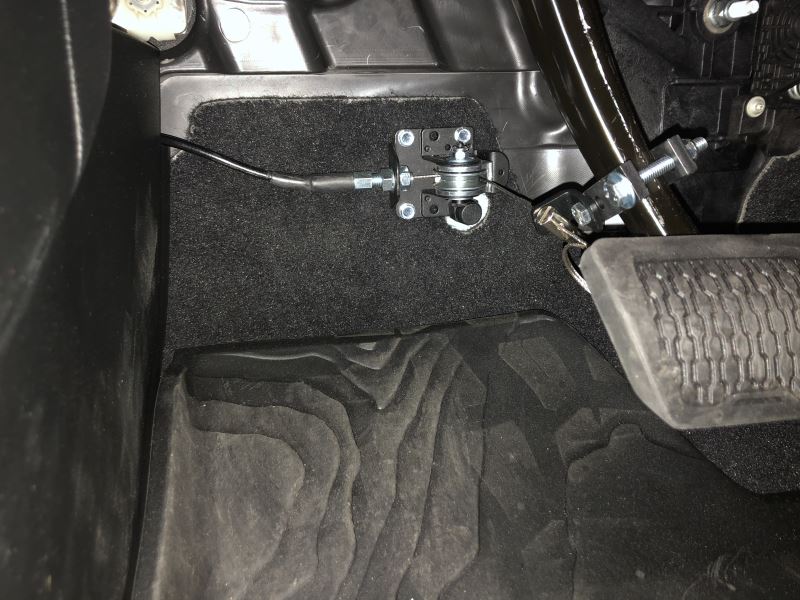
Speaker 1: Today on this 2012 Jeep Liberty, we'll be having a look at and showing you how to install the Roadmaster Brake Light Relay Kit for Towed Vehicles, part number RM-88400.When we don't have a brake light relay installed on our towed vehicle when we are towing it behind our motor home and our turn signal is on and then our brakes are depressed, we have the issue of our brake lights coming on on our towed vehicle overriding the turn signal from our motor home.Now with the brake light relay installed and operating when we step on the brakes on our RV with our turn signal on, our brake signal does not override the turn signal function when the brakes are applied inside of our tow vehicle with the supplemental braking system.Now that we've gone over some features, we'll show you how to get it installed. To begin our install, we'll find ourselves underneath the dash on the driver's side of our vehicle. We find this fabric panel that sits above where our feet rest while we're driving. We'll need to remove this. We have two plastic rivets. The way these work, use a flathead screwdriver, twist out the center section, and come behind it, and pull out the entire piece.
Roadmaster Stop Light Switch Kit Installation - 2012 Jeep Liberty
Today on our 2012 Jeep Liberty we'll be installing the Roadmasters Stop Light Switch and Bracket Kit, part number rm-751430. We'll go ahead and begin our installation by removing the undercarriage panel here. We'll undo the two screws and remove the panel. Set if off to the side for reinstallation later.We'll now go ahead and locate our stop light switch. The reason we're installing this switch is that the factory switch does not function the way we need it to for our InvisiBrake from Roadmaster. You'll notice that we have our InvisiBrake already installed on this Jeep.
Roadmaster InvisiBrake Supplemental Braking System Installation - 2011 Jeep Liberty
Hi there Jeep owners. Today in your 2011 Jeep Liberty, we're going to be taking a look at and showing you how to install Roadmasters InvisiBrake supplemental braking system. There's five main components you'll need when flat towing your vehicle with whatever you want to pull it with, whether it be a motor home or a tractor trailer. You'll need your tow bar, which is the connection between your vehicle and whatever you're towing. You'll need your safety cables, which is a supplemental connection in addition to your tow bar. You'll need your diode wiring, which takes all the lighting signals from the towing vehicle and sends them to the towed vehicle.
Roadmaster InvisiBrake Braking System Installation - 2010 Jeep Liberty
Hi there, Jeep owners. Today, on your 2010 Jeep Liberty, we're gonna be taking a look at and showing you how to install Roadmaster's InvisiBrake supplemental braking system. And this is what our braking system looks like when it's installed. That's right, with the InvisiBrake, it is a completely hidden system. You'll find our operating unit hidden here at the back in the compartment here at the back. This is where you can make your adjustments for the pressure that you'll need for your brakes, and you can increase it or decrease it.
SMI Air Force One Braking System Installation - 2009 Jeep Liberty
Speaker 1: Today on our 2009 Jeep Liberty, we're going to be taking a look at the SMI Air Force One braking system for motor homes with air brakes. That's going to be part number SM99243.Now keep in mind you will need a base plate, tow bar, wiring kit, as well as a braking system for your flat tow setup. So our Air Force One is going to be a braking system for motor homes that have air brakes on it. It's going to be a completely proportional braking system, which means that whenever we apply the brakes on our motor home, they're going to be applied to our car in the same amount of intensity.Now it's going to be a really out of the way system, and it's going to be a permanent install that we're not going to have to do any kind of adjusting or take anything in or out whenever we're not using it. The way it's going to apply our brakes is there's going to be an air actuator that's going to clamp to our brake pedal. And whenever we apply the brakes in our motor home, it's going to have a cable that's anchored to the firewall and it's going to pull the brake pedal applying the brakes.Now the operating unit is going to be rather small, and we're going to be able to mount it right underneath the hood.
Roadmaster InvisiBrake Supplemental Braking System Installation - 2008 Jeep Liberty
Today on this 2008 Jeep Liberty we're going to install part number RN-8700. This is Roadmaster Invisibrake Supplemental Braking System. The first thing we need to do is go ahead and get our vehicle ready to install our braking system. To do that we're going to remove the seat and pretty much gut the vehicle. There's a small panel on the outside here where the strap goes into. We need to go ahead and loosen that up and remove the bolts. There's a catch inside of here so it kind of helps to push down and wiggle it around and pull it loose this way. Then you have two snaps here and here. You just pull it right up. Then when you remove this torques bolt right here for our seat belt.
Roadmaster Even Brake Portable Braking System Installation - 2007 Jeep Liberty
Speaker 1: Today on our 2007 Jeep Liberty, we're going to be taking a look at and installing the Roadmaster Even Brake Portable Supplemental Braking system, part number RM-9400. Now our Even Brake is a portable, proportionate breaking system, that's going to allow us to flat tow our vehicle behind our RV. It's going to use an inertial sensor to detect the vehicle's braking or deceleration, and then it's going to match and activate the brakes with the same intensity and at the same time as you push the brakes on your motor home.It has a built in high performance air compressor, connection to actuator right here, and that's going to assure the system is ready for each stop. Now the Even Brake has a universal design, and it's going to work very well with many different applications. The feet, as well as the brake pedal clamp itself are fully adjustable and they're going to fit most vehicles. The rear brace is fully adjustable, so you have a nice secure content point against your seat.
Roadmaster Brake-Lite Relay Kit Installation - 2006 Jeep Liberty
Today on this 2006 Jeep Liberty, we're going to review and install the Roadmaster Break-Light Relay Kit for towed vehicles, part number RN-88400. We'll go ahead and hook up our jeep to our power supply, in this case it's going to be a truck, this can also be your RV. We'll plug it in and we'll go ahead and turn on the turn signal. If you look at the jeep you can see that we have a turn signal working, being powered by the towing vehicle. Now, as I step on the break peddle, you notice that it goes solid, you don't want this to happen. This is why we need a Roadmaster Break-Light Relay Kit. After we have it installed, this will allow the break system to work with the turn signal as it would normally. Let's go ahead and take a look at the parts that come with the kit.
SMI Stay-IN-Play DUO Braking System Installation - 2006 Jeep Liberty
Today, on a 2006 Jeep Liberty, we're going to show you part number SM99251. This is an SMI Stay-In-Play DUO supplemental braking system. We'll go ahead and cover some of the components of the SMI DUO Stay-In-Play. First off, we have our main unit right here that does all the work. This black box stores right inside here. It comes with all the vacuum lines and wiring and air lines needed to hook up to the rest of the vehicle. This also T's into the factory vacuum line on the vehicle. It comes with a check valve and also a T.
Blue Ox Patriot Proportional Braking System Installation - 2005 Jeep Liberty

Today on our 2005 Jeep Liberty, we're going to be installing the Blue Ox Patriot Radio Frequency Proportional Portable Braking System. This is part number BRK2012. You will see the wireless Patriot controller that's going to be mounted into the towing vehicle. It's going to indicate here that our system is on so we've got power. It's also going to show us here that our breakaway is connected. When we hit our brakes in our towing vehicle, this light is going to come on to indicate to us that our rear brakes have been engaged as well.
Roadmaster Brake-Lite Relay Kit Installation - 2004 Jeep Liberty

Speaker 1: Today on our 2004 Jeep Liberty we're going to be taking a look at and showing you how to install the Roadmaster Brake Light Relay Kit for Towed Vehicles, part number RM-88400.The main reason why you're going to want a brake light relay is that when we're going down the road towing our Jeep and we have our turn signals on, we're getting the correct signal. But, when we hit the brakes in our motor home and it applies the brakes on our supplemental braking system, the light's going to go solid and it's not going to blink anymore. Now, the reason why it goes solid is because it's overriding the signal from our RV, which is going to cause a lot of safety issues when we're driving down the road.Now, the brake light relay is going to install inside the car. Let's go ahead and make sure that it's working properly. As you can see, we have our turn signal on from our towing vehicle. If I step into our Jeep and push on the brake pedal, we can see that it's still blinking, so we know the relay is doing its job.
SMI Stay-IN-Play DUO Braking System Installation - 2002 Jeep Liberty

Today on this 2002 Jeep Liberty, we're going to install part number SM99251 from SMI. This is a Stay In Play Duo Supplemental Braking System. Before we begin our install, we'll show you how this product works already installed on this vehicle. Take the toggle switch, put it on the on position, we'll press the brake pedal and we should get an indication on our brake light. Next, we'll pull the pin for the break away switch. We'll verify operation that way and our cylinder should move. Now I'll show you how it installs. First up, find a location for our operating unit.


What our customers are saying:
"Excellent service and communication. Expect part to be excellent too!"