
# 1
Thule Hitching Post Pro Bike Rack for 4 Bikes - 1-1/4" and 2" Hitches
I received my bike rack quickly and as promised. It was easily installed, no issues there. Only a couple of comments- There were extra clips/clamps in the bag, but no clear instructions on how to use them or what they are for. I'm very mechanical, but couldn't figure out what to do with them. I also noticed that after driving a while, the clips on the tubes start slipping. With the wind, the bikes seem to move a bit. When you stop, the bikes aren't in the same position as when you started your trip. In any case, I think the price paid is certainly suitable for the unit. I would recommend it.
I needed a bike rack for my Ford Explorer that could carry 4 downhill bikes. This certainly met all my expectations and the price was awesome. I was a little bit worried about the durability of this rack, but it is built solid. No joke, this thing is rugged and built really well. No more throwing bikes in the back of my truck. I will definitely save money on fuel!
# 2
Thule Passage Trunk Bike Rack for 2 Bikes - Hanging Style
One of the bolts where the numbers are would only screw in half way. Everything else was easy to put together. The hooks that are on the side are not very stable on my Ford Explorer. They tend to slide up on to the glass back window. I tied the loose ends of those straps across and down lower to hold the hooks in lower position off the back window.
Originally bought the used bike rack, but they could not find it so they sent me a brand new one for the same price. Very friendly!
# 3
Thule Passage 3 Bike Carrier - Trunk Mount
I bought the 3 bike carrier last minute for a trip we were taking from Mass to North Carolina. The bikes were secure the whole way and definiltey would recommend this product.
One of the bolts where the numbers are would only screw in half way. Everything else was easy to put together. The hooks that are on the side are not very stable on my Ford Explorer. They tend to slide up on to the glass back window. I tied the loose ends of those straps across and down lower to hold the hooks in lower position off the back window.
# 4
Swagman XC2 Bike Rack for 2 bikes - 1-1/4" and 2" Hitches - Frame Mount
The product looks fine and shipped quickly. The biggest issue is the lack of an instruction sheet. While they do provide a video on their website on how to use the product, they do not provide help assembling it. They provide a link for finding an installer. I eventually figured it out (no help from the link to "instructions" that lead to a dead page. To date I still have "extra parts". The very minimum the manufacturer could do is list the parts and their use. Also, Unlike the picture on the Website, I got 5 flat washers instead of four, however 2 were the wrong size. (Too small for the handle bolt where I was left to GUESS where they went). Hopefully the product won't fall off my car while driving down the road because I failed to install one of the "extra parts". C'mon guys you can do better than this. The product shipped quickly. It looks to be made well. Can't you spend 5 minutes putting together a sheet that at least lists the parts and their use?
The bike rack came really fast & my hubby put it together easily! Love the way it folds out of the way to get in the back of my Explorer. Very sturdy! Huge thanks to Tammie for all her help with my purchase - she was great!
# 5
Swagman XTC4 Bike Rack for 4 Bikes - 2" Hitches - Frame Mount
After reading several reviews I went with the Swagman for my 2014 Ford Explorer. It worked best for my family, as we have varying sizes of bicycles. Being able to adjust the wheel holders is nice and keeps the bikes secure on the rack. Let me say this is one of the easiest racks to load. Although my kids bikes have the foot pegs on front and back wheels we were still able to load all 4 bikes (2 adults/2 kids) with not much trouble. We did have to put the kids bikes on the outmost mounts due to the foot pegs, but other than that it was no trouble. I have a family of 6 so, we still had to rent two beach bikes when we reached out destination. The bike shop owner commented on the rack and said it was the easiest he had seen to load and unload. Now this is a guy that rents more than 200 bikes out at a time, so he has probably seen his share of bike racks. Overall I would give this rack 5 stars for ease of loading and unloading. If getting in and out of the back of your SUV is must with bikes loaded then this is NOT the rack for you. However, once the bikes are unloaded it is easy to raise and lower the rack to get access to the back hatch. etrailer.com did a great job delivering the rack and answer my questions. I would give them 5 stars!!
Exactly as expected, got it a day early! So far, 2 out of 2 things I have purchased from etrailer.com have been early and very good products. I recommend getting a rubber mallet or hammer and block of wood to assemble the horizontal cross members. It seems that the powder coating made the fit kinda tight (better tight than loose). Other than that assembles pretty easy. Took me about 20 minutes. I love how it holds 4 bikes! It folds up nicely on a 2014 Ford Explorer and is out of the way.
# 6
Swagman XTC2 Bike Rack for 2 Bikes - 1-1/4" and 2" Hitches - Frame Mount
Carrier was fairly easy to assemble and holds 2 bikes nicely! Have not tried yet while traveling with our Explorer to see if any 'wobbling' issue as some other brand bike carriers seem to have but looks like it should be no problem as hitch has clamp that securely holds carrier in place. Overall like product very much so far and it is really nice quality & design!!
EASY TO ASSEMBLE, FIT PERFRECT ON MY FORD EXPLORER, GREAT PRODUCT
# 7
Swagman Upright Bike Rack for 1 Bike - Roof Rack Crossbars - Frame Mount
Great product. Easy to install. Went camping with the bikes on top of the vehicle. Travel approx 150 miles on State Roads and Interstate. No noise, no problems, no worries.
Planning on bringing bikes while camping. I mounted 2 of the Swagman bike racks to my new Sportrack on my pop-up camper. The bikes fit perfectly. The racks seem sturdy enough. Not heavy duty, but for my needs they should be fine. Assembly was relatively fast and easy.
# 8
Yakima FullBack 2 Bike Rack - Trunk Mount - Adjustable Arms
Great Experience! Fast Shipping! Rack fits perfectly on my car. Only thing, they could have mentioned that there is an adapter bar needed for lady bikes.
 Ford Explorer
Excellent product, couldn't be happier with the choice of rack. Fits my explorer well and is easy to put on/take off. Protects bikes and vehicle well
# 9
Curt Bike Rack for 5 Bikes - 2" Hitches - Tilting
It was obvious that we received a product that was returned by someone else when the box was overly taped shut, a support collar was broken, and most of the pieces were out of their ripped plastic bags. However, it was a great price to hold 5, 26" and/or 27" Trek bikes. I used a piece of the broken collar and went ahead and assembled the rack. Due to the weight of the 5 bikes it did not wobble that much when driving, as one of the bike tires was up against my car. I can only imagine that if we received an untampered product that this review would have been 5 stars. The picture is a little hard to see, but there are 5 Trek bikes on the rack on my 2020 Toyota Seinna.
We received a damaged box, damaged items, no instructions, the nuts and bolts are completely stripped and not inside a bag. This was obviously used, returned, not checked for quality and sent out. We are extremely upset.
# 10
Yakima FullBack 3 Bike Rack - Trunk Mount - Adjustable Arms
Great Experience! Fast Shipping! Rack fits perfectly on my car. Only thing, they could have mentioned that there is an adapter bar needed for lady bikes.
Ford ExplorerExcellent product, couldn't be happier with the choice of rack. Fits my explorer well and is easy to put on/take off. Protects bikes and vehicle well
# 11
Swagman Trailhead Bike Rack for 2 Bikes - 1-1/4" and 2" Hitches - Tilting
Excellent product. Very sturdy. Met my needs perfectly. I had a particular need for a single bike rack that I could use at different times for two different vehicles. One with a 1 1/4" receiver, and the other a 2" receiver. Also, ground clearance was a concern with the lower receiver level of my Mazda 3. The other vehicle is a Ford Explorer and both are hatchback models. Preston, the customer service rep, did a great job making sure that the rack would fit both vehicles, and that ground clearances, and bumper and hatchback door clearances would not be a problem. Fine job and Quality product!
Very sturdy built bike rack. Assembles to the 1 1/4 " hitch on my Explorer quickly. I would recommend for any SUV.
# 12
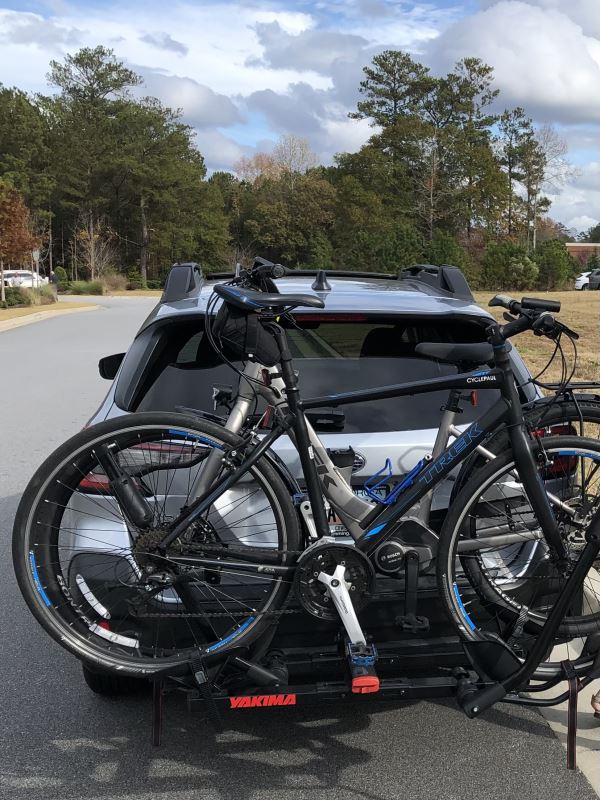
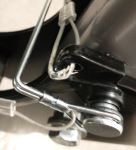
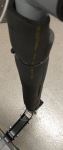
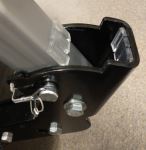
Yakima HoldUp Bike Rack for 2 Bikes - 2" Hitches - Wheel Mount
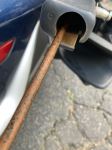
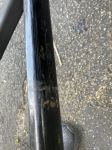
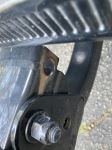
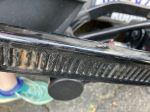
Works well for transporting two 29" wheeled mountain bikes. However, after one year it's starting to rust in several areas (see attached photos), and the front wheel arms are becoming increasingly difficult to raise and lower. Finally the locking cable is extremely rusty as you can see in the attached photo. I'm not sure how durable this rack will be long term.
We have had this bike rack for one year and use it every week-end. My wife has a Trek e-bike (52 lbs) and I have a regular Trek hybrid (23 lbs). The rack is very sturdy and I have no issues driving at highway speeds, there is no movement of the bikes. Very easy to load and unload.
# 13
Rhino-Rack Bike Rack for 2 Bikes - 2" Hitches - Tilting
Looks great, appreciative of all of the videos for the various parts I purchased.
I purchased this bike rack a year ago and I use it A LOT. I had to buy and install a stabilizer because without it, the unit would sway back and forth even without a bike on it (very noisy). This makes removal more cumbersome but since I keep the hitch on year round it doesn't matter to me. The tilting function is fabulous allowing easy use of my RAV4 hatchback. I can even tilt it down with a bike on it. I got the 2 bike hitch. Plenty of room for two bikes to fit without rubbing. Lastly, the hitch has a sizable through-hole on the bottom to thread a good sized cable so I can lock my bike up. Sturdy. I highly recommend.
# 14
Swagman Trailhead Bike Rack for 4 Bikes - 1-1/4" and 2" Hitches - Tilting
i received my bike rack last night and tried it out for the first time. I think that so far it is great.. i was even able to get a girls bike to work without using the adapter. shipping was pretty fast also. overall very happy with my experience and the products i ordered. i won't hesitate to order from etrailer again. thank you for the pleasant transaction.
Wow. This bike rack is solid. I have it installed on my truck for now and will move it to the back of our Jayco 1207 before our trip.
# 15
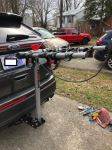
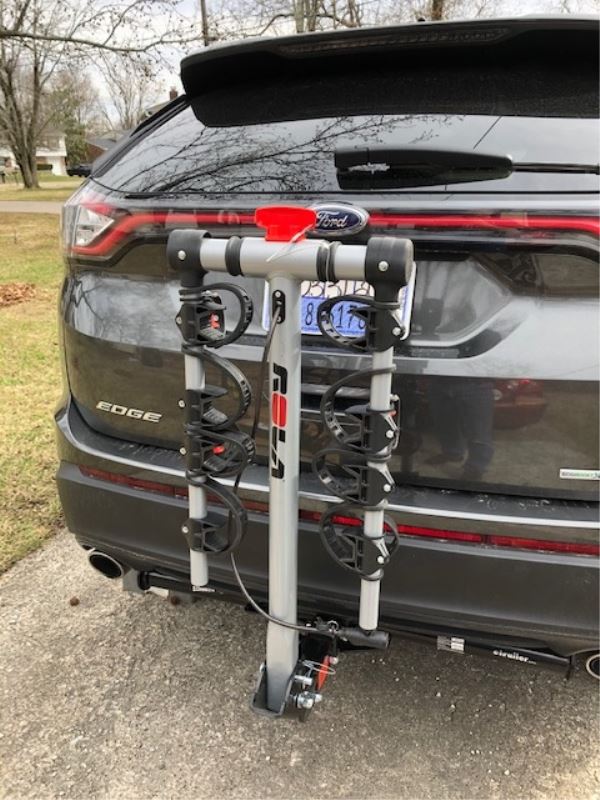
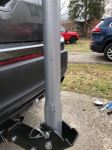
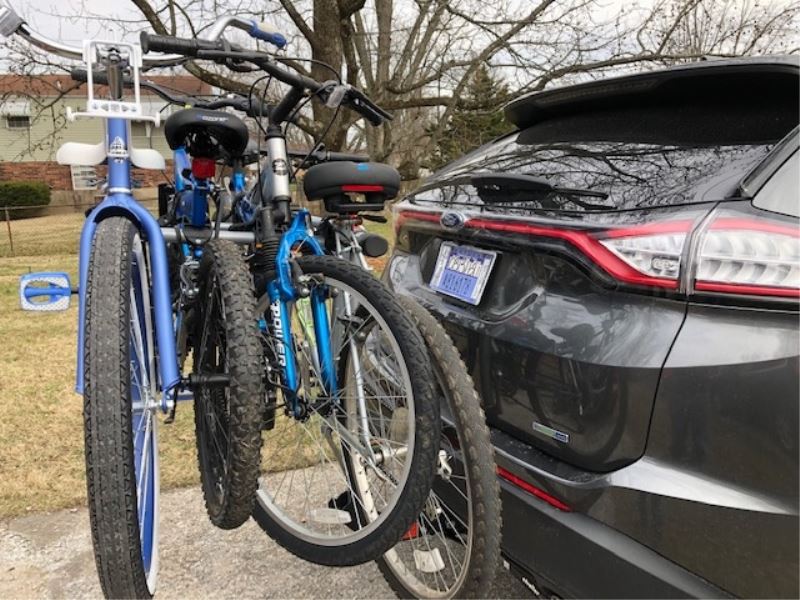
Rola TX-104 4-Bike Rack for 2" Hitches - Tilting
Decent 4-bike rack for the price. Stable side-to-side with the screw-in hitch pin (2 inch receiver version). Gets some fore-aft rocking over bumps at speed (inherent to the tilting design). Bikes need bungee cords to keep them from swinging (typical for this style of rack). I used this with two bikes, and really struggle to see how four full-size bikes could be added. Maybe if seats were removed? I added bumpers and some padding for the vertical post, and will probably relocate the retainer pin lanyard so the rack can be completely collapsed for storage. A few design improvements for 5 star rating would be: 1 - Add some bumpers for the fully lowered position, 2 -Add some padding on the vertical post for bike contact or accidental vehicle hatch lifting when in the raised position, 3 - Mount the retainer pin lanyard to one of the through-bolts or move the lanyard hole - collapsing this rack chews up the retaining lanyard. etrailer.com service was great - well packaged, and quickly shipped!
Excellent service and fast shipping by etrailer. Bike rack itself was easy to put together and install. It came in with a few scratches. It works well with large bikes. Slight problems started with the smaller bikes. The rack's arms are wide enough to accommodate the bikes, but the slides are not designed for smaller frames. If you have smaller bikes you might have to purchase the bike frame adapter bar for each bike. It's not a huge problem for us since the kids are growing up fast and soon they will have to graduate to the large frame bikes. In the mean time I will have to use extra straps to hold them together.
Saris Freedom-SuperClamp Hitch Bike Racks Review - 2014 Ford Explorer
Today in our 2014 Ford Explorer, we're doing a test fit of the Saris Freedom SuperClamp Platform Style 2-Bike Rack. That part number is FA4025-FV. This bike rake is built for fat tire bikes, so we have ours loaded up here. We're gonna go over some features, show you how we secure everything down and take a few measurements. To start off, how we secure our bike into place, we have one strap at each tire holding that down. We're just going to push in the tab on the closer side to the vehicle, and pull our strap through. This is it here, right at the front, just push on the tab, and pull the strap through.
Thule Hitch Bike Racks Review - 2014 Ford Explorer

Today on our 2014 Ford Explorer we're doing a test fit of the Thule DoubleTrack Pro platform-style 2-bike rack. That part number is TH9054. Now we already have our bike secured down. We're first going to show you how we show you how we secure it in place and go over a couple features. At the front and back tire you'll see we have straps with bushings. That's going to protect your bike from any scratches or abrasions. We're just going to push the tab on the opposite side and we can pull our strap through.
Kuat Hitch Bike Racks Review - 2014 Ford Explorer

Today on our 2014 Ford Exporer we're doing a test fit of the Kuat NV 2.0 Platform Style 2 Bike Rack. That part number is NV 22G. Now we already have our bike secured down. We're going to show you how we secure it in place as well as go over a couple more features. The first feature I really want to go over is our tilting feature. This is going to be great because we can do this while our bikes are still attached.
Thule Hitch Bike Racks Review - 2014 Ford Explorer

Today on our 2014 Ford Explorer we're doing a test fit of the Thule T2 Classic platform-style 2-bike rack. That part number is TH9044. Here we already have it loaded up onto our vehicle and we have our bike loaded up. We're going to start off by showing you how we secure our bike down and going over a couple different features. The biggest feature right now with our bike loaded up is that we can tilt it away from our vehicle. We're going to start by pulling out our pin here at the bottom and pulling down on our lever. That's going to allow us to tilt our bike rack away from our vehicle, and we're going to gain access into our back hatch area.
Thule Trunk Bike Racks Review - 2014 Ford Explorer

Today on our 2014 Ford Explorer we're doing a test fit of the Thule Raceway Pro trunk-mount 2-bike rack. That part number is TH9001PRO. Now we already have our bike secured down. We're first going to show you how we do that. We have two cradles in place with three straps, two on our frame and one as our anti-sway strap in the back. We're just going to pull down and lift up to release those.
Thule Trunk Bike Racks Review - 2014 Ford Explorer

Today on our 2014 Ford Explorer, we're doing a test fit of the Thule Gateway XT Trunk Mount Two-Bike Rack. That part number is TH9006XT. Now, we already have our bike secured down. We're first going to show you how we do that. We have two cradles in place with three straps, two on our frame and one is our anti-sway strap in the back. We're going to start by pulling down and lifting up to release those.
Thule Archway Trunk Bike Racks Review - 2014 Ford Explorer
Today on our 2014 Ford Explorer, we're doing a test fit of the Thule Archway XT Trunk Mount 2-Bike Rack. That part number is: TH9009XT. We already have our bike secured down; but flirts, let me show you how we do that. We have two cradles in place with three straps; two on our frame and one is our anti sway strap on the back. I'm going to start by pulling down and lifting up to release those then we'll be able to pull our bike off and set it off to the side. With our bike out of the way, we'll take a few measurements. First is going to be overall.
Thule Passage Trunk Bike Racks Review - 2014 Ford Explorer
Today on our 2014 Ford Explorer we're doing a test fit of the Thule Passage 2 trunk-mount bike rack. That part number is TH910XT. Now we already have our bike secured down. We're first going to show you how we do that. We have two cradles in place with three straps, two on our frame and one as our anti-sway strap in the back. We're going to pull down and lift up to release those.
Thule Hitch Bike Racks Review - 2014 Ford Explorer
Today on our 2014 Ford Explorer, we're test-fitting the Thule Vertex Swing. It's been designed for use in two inch hitches. Part number is TH9031XT. It does have an incorporated cable lock, that's something that they've recently added, that's designed to go over the frames of your bike and keep them secured to the rack. It uses a Thule One Key Tumbler System, so if you've already got some you can replace it with a matching key. If not you can start your step with whichever number shows up. The swing feature, that's always the big question: how does it work, what does it do Right here we have the large, black t-handle bolt.
Thule Hitch Bike Racks Review - 2014 Ford Explorer

Today on our 2014 Ford Explorer we're test fitting the Thule Vertex. This is a platform-style folding and tilting 4-bike rack. It's been designed so we can use it with the 1-1/4" or with 2" hitches. Part number on it is TH9029XT. Now the Vertex is a really nice solid rack. Is going to offer an integrated cable.
Yakima StickUp 2 Hitch Bike Rack Review - 2014 Ford Explorer

Today on our 2014 Ford Explorer, we are going to be test fitting the Yakima Stickup two bike platform style hitch mounted bike rack for inch and a quarter and two inch hitches part number Y02420. We'll slide the shank of the bike rack into the receiver tube of our hitch. Line up our pin hole and thread in our anti rattle bolt tightening it down with the wrench. Then we can go ahead and install the pin on the other side. Now with our bike rack in this position, we have a ground clearance of about fourteen inches. The closest point of the bike rack to the rear of our Explorer is about three and a half inches and we've added about twelve inches to the overall length of our vehicle. We'll pull the pin at the base of the bike rack and allow it to unfold. This is going to allow us to have full access to our rear hatch door.
Thule Vertex 4 Hitch Bike Rack Review - 2014 Ford Explorer

Today on our 2000 Ford Explorer, well be test fitting the Thule Vertex Four Bike Rack for 1-1/4 and 2 inch hitches, part number TH9029. Well begin our test fit by sliding the shank of the bike rack into the receiver tube of the hitch. Well line up our pin holes and thread in our anti-rattle bolt and tighten it with a wrench. This will help reduce the amount of rattle or wobble that we may have inside the hitch. With the bike rack in this position, we have a ground clearance of about 13-1/2 inches. The closest point of our Vertex to the rear of our Explorer is about 4 inches.
Thule Sprint Fork Mount Bike Rack Review - 2014 Ford Explorer

Today on our 2014 Ford Explorer we're going to be test fitting the Thule Sprint, a fork mount roof bike rack with part number TH528. With our Thule Rapid Crossroads Roof Rack System already installed on the Explorer, we'll begin our test fit by placing our bike rack directly onto our load bars. As we do this we'll want to bring our black rubber coated metal straps around the underside of our load bars. This will position our foot packs directly on top of them. Here at the front we're going to fit the strap into the foot of the carrier and tighten it using the black lever. With the front secure we'll move to the rear and we can repeat that same tightening process. With our rack secure we're ready to load up our bike.
Thule Helium Aero Hitch Bike Rack Review - 2014 Ford Explorer
Today on our 2014 Ford Explorer, were going to be test fitting the Thule Helium Aero, a tilting two bike rack for 1-1/4 and 2 inch hitches, part number TH9042. To begin our test fit, well slide the shank of the bike rack into the receiver tube of our hitch. As we do this, well hold out on the attached pin. Well line up our pin holes, allow the attached pin to fall into the pin hole, and then well tighten the black knob. This engages our anti-rattle device and further secures our rack to our vehicle. In this position, we have about 14-1/2 inches worth of ground clearance.
Thule Apex 4 Swing Hitch Bike Rack Review - 2014 Ford Explorer

Today on our 2014 Ford Explorer we'll be test fitting the Thule Apex Swing 4-bike rack for 2" hitches, part number TH9027. We'll begin our test fit by sliding the shank of the bike rack into the receiver tube of the hitch. We'll go ahead allow the included pin to fall into place, and then use the hand knob to engage our anti-rattle device and secure our bike rack to our vehicle. With the bike rack in this position we have a ground clearance of about 14-1/2". The closest point of the bike to the rear of our Explorer is about 2" away. We've added about 13-1/2" to the overall length of our vehicle. We'll go ahead and pull the lever at the top of the mast to swing out our dual arms.
Thule Apex 4 Hitch Bike Rack Review - 2014 Ford Explorer

Today on our 2014 Ford Explorer, we'll be test fitting the Thule Apex four bike rack for 1 1/4" and 2" hitches, part number Th9025. We'll begin the test fit by sliding the shank of our bike rack into the receiver tube of our hitch. We'll allow the pin to fall into place and use the hand knob to engage the anti rattle device and secure our bike rack to the vehicle. With the bike rack in this position, we have a ground clearance of about 14 1/2". The closest point of the Apex to the rear of our vehicle is about 2". We've added about 13" to the overall length of our Ford Explorer. We'll pull the lever at the base of our bike rack and allow it to tilt away from our vehicle. This give us full access to our rear hatch door. With the bike rack back in it's upright position, we'll pull the lever at the top of the mast to swing our our dual arms. With these out, we've added about 37 1/2" to the overall length of our Ford Explorer. We'll go ahead and undo our cradle straps to expose our frame cradles.
Saris Axis Tilting 2 Bike Rack Review - 2014 Ford Explorer

Today on our 2014 Ford Explorer we'll be test fitting the Saris Axis, a folding and tilting 2-bike rack designed for use in 1-1/4" and 2" hitches, part number SA832. To begin our test fit we'll slide the shank of the bike rack into the receiver tube of our hitch, line up our pin holes, thread in our anti-rattle bolt from the left to the right, and tighten it down with a wrench. We'll then secure it with the provided lock. In this position we'll have about 13-3/4" worth of ground clearance. The closest point of the rack to the back of our vehicle is about 5-3/4" away. Overall we've added about 13" to the length of our Explorer. Pulling the yellow t-handle at the base of the center mast will allow us to tilt it away from our vehicle.
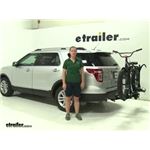
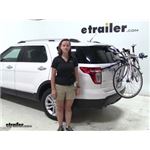
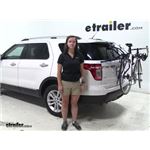
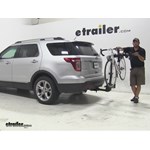
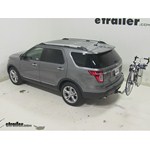
Thule Hitching Post Pro Hitch Bike Rack Review - 2014 Ford Explorer
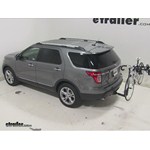
Today on our 2014 Ford Explorer we're going to be test fitting the Thule Hitching Post Pro 4-Bike Rack for 1-1/4" and 2" hitches, part number TH934XTR. To begin our test we'll slide the shank of the bike rack into the receiver tube of our hitch. We'll line up our pin hole and thread in our anti-rattle bolt, tightening it down with a wrench. With the bike rack in this position we have a ground clearance of about 13". The closest point of the back rack to the rear of our Explorer is about 7-3/4" away. We've added about 18" to the overall length of our vehicle. We'll pull the pin at the base of the back rack and allow it to tilt away from our vehicle.
Thule Big Mouth Roof Bike Rack Review - 2014 Ford Explorer

Today on our 2014 Ford Explorer we're going to be test fitting the Thule Big Mouth, a frame clamp roof Bike Rack with Part number TH599XTR with our Thule Roof Rack System already installed on the Explorer. We'll begin our test fit by placing our bike rack directly on to our load bars. Here at the front we'll remove both of the T-bolts from the lower portion of our clamp, bring both clamps under the underside of our bar, then we'll reinsert the T-bolts and tighten both wing nuts to secure both clamps around our load bar. With the front secure we'll move to the rear. Here we will loosen both wing nuts and remove one completely. We'll then position the clamp so that one bolt will come down on both sides of our load bar, replace the metal flat portion, put the bolt back through the metal flat portion and secure it by tightening down both wing nuts. With our rack secure we're ready to load up our bike. We'll first want to undo our wheel straps and make sure that our center frame clamp is open.
Swagman XTC4 Wheel Mount Hitch Bike Rack Review - 2014 Ford Explorer

Today on our 2014 Ford Explorer, we are going to be test fitting the Swagman XTC4, a platform style four bike rack for two inch hitches part number S64665. To begin our test we'll slid the shank of the bike rack into the receiver tube of our hitch, line up our pinholes, thread in our anti rattle bolt and tighten it down with the wrench. We can then secure it with the provided lock. In this position we have about thirteen and a quarter inches worth of ground clearance. The closest point of the rack to the back of our vehicle is only about an inch and a half away. However we are trying to manipulate it, we couldn't get it to make contact with our bumper and overall we've added about eight and a half inches to the length of the Explorer. Pulling the large silver pin and clip located at the base of the rack will allow us to tilt it away from our vehicle into its platform position. We'll reinsert the pin to hold it here and as you can see this gives us great access into our hatch. In the platform position our bike rack is going to offer us about twenty one inches worth of ground clearance here at the rear.
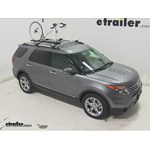
Swagman Upright Roof Mounted Bike Rack Review - 2014 Ford Explorer

Today on our 2014 Ford Explorer, were going to be test fitting the Swagman Upright Roof Bike Rack, part number S64720. With our Thule rapid crossroad roof rack system already installed on the Explorer, well begin our test fit by placing our bike rack directly onto the load bars. Here at the front, were going to bring two of the silver U-bolts around the underside of our load bar, fit it up to the head of our carrier, and thread two wing nuts onto each one.After tightening down all four wing nuts, well have the front of our rack secure. We can now move to the rear load bar. Here were going to bring one of the U-bolts down through the rack, being sure the threaded portion comes out on both sides. Well then place on our black metal plate and thread two wing nuts onto our U-bolt to hold the plate in place.
Saris Axis 3 Bike Rack Review - 2014 Ford Explorer

Today on our 2014 Ford Explorer, we're going to be test fitting the Saris Axis, a tilting 3 bike rack for 1 1/4" and 2" hitches, part # SA843B. To begin our test fit, we'll slide the shank of the bike rack into the receiver tube of our hitch, line up our pin holes, thread in our anti-rattle bolt from the left to the right and tighten it down with a wrench. We'll then secure it using the provided clip. In this position, we have about 13 3/4" worth of ground clearance. The closest point of the rack to the back of our vehicle is about 5 1/4" away, and overall we've added about 14" to the length of the Explorer. Pulling the yellow T-handle located at the base of the center mast will allow us to tilt it away from the vehicle. As you can see, this gives us full access into our hatch. With our mast back in its upright position, we'll now extend our dual cradle arms.
Swagman Fork Down Roof Bike Rack Review - 2014 Ford Explorer
Today on our 2014 Ford Explorer, we're going to be test fitting the Swagman Fork Down Fork Mount Roof Bike Rack, part # S64710. With our Thule Rapid Crossroads Roof Rack System already installed on the Explorer, we'll begin our test fit by placing our bike rack directly onto our load bars. Here at the front, we're going to bring 2 of the silver U-bolts around the underside of our load bar, fit them up through the head of our carrier, and thread 2 wing nuts onto each one. With all 4 of our wing nuts started, we'll go ahead and tighten them all down. This will secure the front of our bike rack to our roof rack. We'll now move to the rear. Here, we're going to place 1 U-bolt down through the rack, being sure that the threaded portion comes out on both sides of the load bar. We'll then place on the flat black metal plate and thread 2 wing nuts on to hold this place.
SportRack Super EZ Hitch Bike Rack Review - 2014 Ford Explorer

Today on our 2014 Ford Explorer we'll be test fitting the SportRack Super EZ Platform-Style 2-Bike Rack for inch and a quarter and two inch hitches, part number SR2901LR. We'll begin our test fit by sliding the shank of the bike rack into the receiver tube of our hitch. We'll line up our pin holes and thread in our anti-rattle bolt, tightening it down with a wrench, the anti-rattle system is going to help reduce the amount of rattle or wobble that we may have inside of our hitch. Once we have that fully tightened down, we can go ahead and install our lock on the other side. With the bike rack in this position, it's going to give us a ground clearance of about 16 inches. The closest point of the bike rack to the rear of our Explorer is about eight inches away and we've added about 25 and a half inches to the overall length of our Explorer. We'll pull the three pins at the base of our bike rack to unfold the different parts. With the bike rack in this position, it's going to allow us to have full access to the rear hatch of our vehicle.
SportRack 3 Bike Rack Review - 2014 Ford Explorer

Today on our 2014 Ford Explorer we're going to be test fitting the SportRack tilting 3 bike rack for 1 1/4- and 2-inch hitches, part number SR2403. To begin our test fit we'll slide the shank of the bike rack into the receiver tube of our hitch, line up our pinholes, thread in our anti-rattle bolt and tighten it down with a wrench. We can then secure using the provided clip. In this position we have about 13 and 3/4 of an inch worth of ground clearance. The closest point of our rack is about 4 inches away from the rear of our vehicle. And overall we've added about 11 inches to the length of the Explorer. Pulling the black pin and clip at the base of the rack will allow us to tilt the mast away from our vehicle.


What our customers are saying:
"I ordered a bike rack for my trailer hitch. It is a great product, very reasonably priced on April 10th. I installed it on my car on the 14th in time for the weekend. How can you go wrong?"