
Best 2013 Chevrolet Cruze Bike Racks
change vehicle# 1
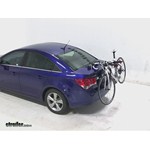
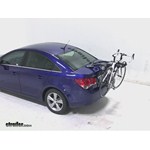
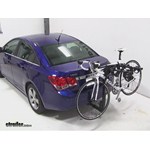
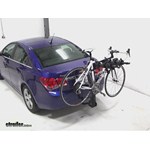
Thule Passage Trunk Bike Rack for 2 Bikes - Hanging Style

- view all Trunk Bike Racks
- Frame Mount - Anti-Sway
- 2 Bikes
- Non-Retractable
- Locks Not Included
- 6 Straps
- Adjustable Arms
- Hanging Rack
- Thule
More Information >

by: Garry E08/05/2022 2019 Chevrolet Cruze
2019 Chevrolet CruzeI ordered this rack in April of 2019 for my 2017 Cruze Hatchback, and I have been satisfied with its fit and durability. Full disclosure, I do not ride that often, maybe once a month at most.
View More
View Less
by: Jennifer06/14/2020
Excellent and prompt customer service! When I first ordered my product it wasn’t in stock— staff were quick to let me know and offered me comparable products. I ended up waiting for my original order and shipping quick and they stayed in touch with ideas! Thule: The instructions could be a little more detailed. I ended up watching YouTube videos to help me instal. Overall it was easy, and this was the first rack I’ve ever installed and I did it by myself! I was surprised to learn the bike rack is in no way secured inside your vehicle, so.. I store it in my garage when it’s on.

View More
View Less
# 2
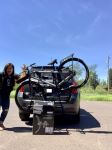
Thule Hitching Post Pro Bike Rack for 4 Bikes - 1-1/4" and 2" Hitches

- view all Hitch Bike Racks
- Hanging Rack
- Folding Rack
- Tilt-Away Rack
- Frame Mount
- Locks Not Included
- 4 Bikes
- Class 1
- Class 2
- Class 3
- Fits 1-1/4 and 2 Inch Hitch
- Fits 1-1/4 Inch Hitch
- Fits 2 Inch Hitch
- Thule
More Information >
by: Matt08/30/2022
The good: I like the way the bikes are held in and the ability to add the upright adapters to the bike frame holders. The straps are quality too. For a jeep with a spare tire, this is the perfect length to clear it. This rack is 5 stars from the bike holders to the base of it. The bad: the 2"receiver adapter and bolt are insufficient. I wish they made this in a solid 2" hitch. The entire setup is held into the receiver by a very short bolt. It only goes about half way into the receiver tube. So your hitch is only "secured" on one side. A hitch pin or bolt should go through the receiver tube completely imo so it can be secured on the other end with a retaining clip or nut. Because this only goes in the one side, the entire weight of the rack plus bikes are held tight to one side of the receiver by the undersized bolt and washer. A few bumps down the road and that bolt loosens. Now instead of distibuting the weight of the rack and bikes on the receiver and post, it's completely up to the bolt to keep you from losing the rack. The bolt threads get damaged too. I took this down a dirt road and nearly lost everything. I had to buy my own bolt with hd fender washers and lock washers to correct this. Thule should've provided this from the start. The current short bolt design where only one side of the receiver secures the rack is unacceptable. This rack is 1 star at best for the connection to the receiver.


View More
View Less
by: Cole06/02/2023
Hitch pin broke before I got it. Looks like a poor design for the locking pin, they might want to consider a different design. I got a 3/8 shear pin from Home Depot to replace and it works great. Bike rack is great!


View More
View Less
# 3
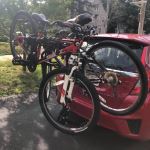
Swagman Trailhead Bike Rack for 3 Bikes - 1-1/4" and 2" Hitches - Tilting

- view all Hitch Bike Racks
- Hanging Rack
- Folding Rack
- Tilt-Away Rack
- Frame Mount
- Locks Not Included
- 3 Bikes
- Class 1
- Class 2
- Class 3
- Fits 1-1/4 and 2 Inch Hitch
- Fits 1-1/4 Inch Hitch
- Fits 2 Inch Hitch
- Swagman
More Information >
by: Shannon P.04/29/2018
1 bolt and it's fully assembled. Can't beat that. Strong straps that should last a long, long time. Highly recommend.
View More
View Less
by: Kevin07/17/2020
Draw-tite Sportframe Trailer Hitch Receiver Class I - 1-1/4 Swagman Trailhead 3 Bike Rack - Tilting The Draw-tite Sportframe class 1 trailer hitch and Swagman Trailhead 3 bike rack were ordered for a 2017 Honda Fit. The online order and shipping went just as expected. The trailer hitch and bike rack are very heavy duty. I recommend watching the trailer hitch install video before installing, whereas the video is very helpful. The bike rack has triangles that you can rotate to find the best fit for your bicycle's frame. The rubber straps are thick and secure the bicycles when you pull them tight. This bike rack will stay on the vehicle for 6 months each year. The tilt feature and folding arm feature are must haves for a smaller hatchback. I am pleased with this purchase, it appears to be good quality and good value.

View More
View Less
# 4
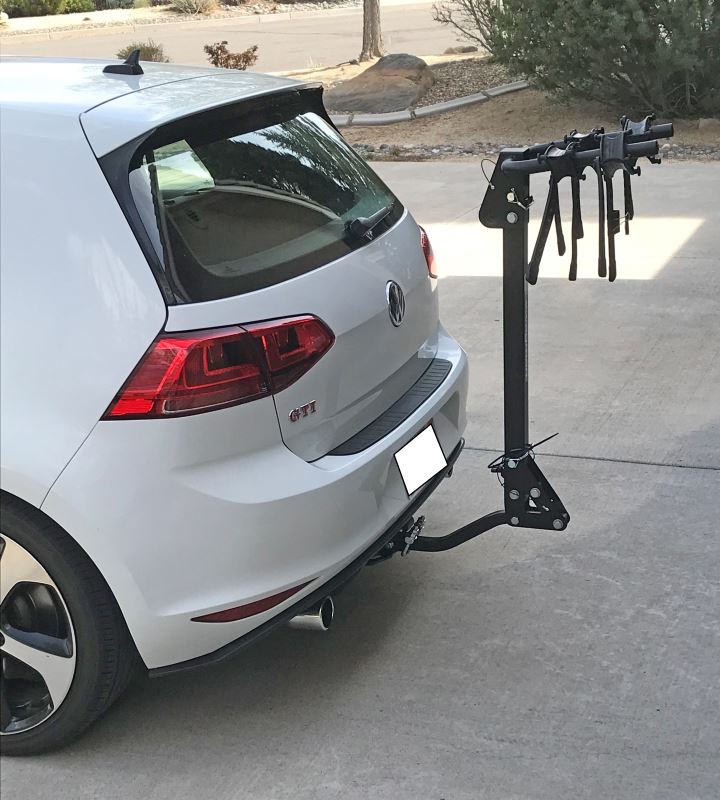
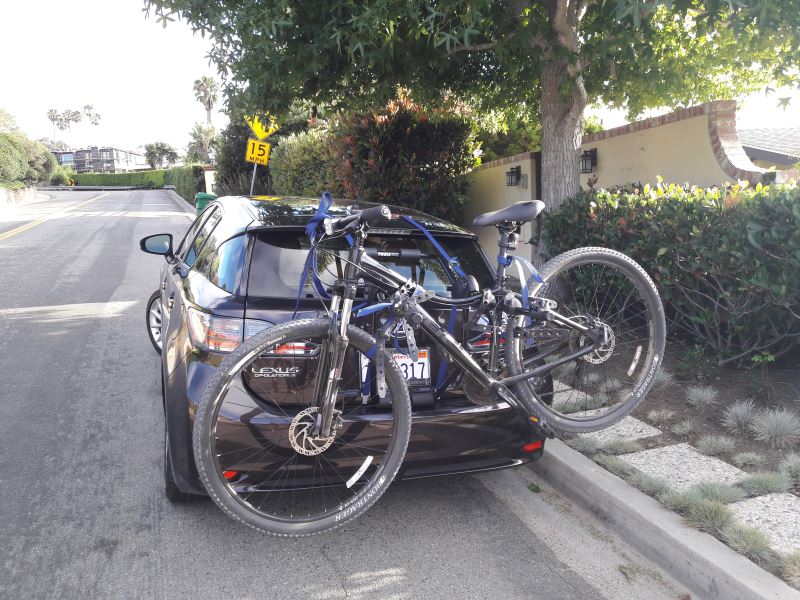
Swagman Trailhead Bike Rack for 2 Bikes - 1-1/4" and 2" Hitches - Tilting

- view all Hitch Bike Racks
- Hanging Rack
- Folding Rack
- Tilt-Away Rack
- Frame Mount
- Locks Not Included
- 2 Bikes
- Class 1
- Class 2
- Class 3
- Fits 1-1/4 and 2 Inch Hitch
- Fits 1-1/4 Inch Hitch
- Fits 2 Inch Hitch
- Swagman
More Information >
by: Shannon P.04/29/2018
1 bolt and it's fully assembled. Can't beat that. Strong straps that should last a long, long time. Highly recommend.
View More
View Less
by: Mark04/23/2021
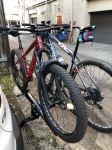
etrailer has the best pre- and post-sales customer service I've ever seen! I started out not knowing anything about hitch-mounted racks. So I wrote to etrailer telling them about my car and type of hitch I was about to have installed. Samuel wrote back with lots of great information tailored specifically to my car. He even included a photo that looked just like my 2017 white VW GTI with a hitch and rack installed. Okay something of a coincidence. But the rest of the assistance I got from the crew at etrailer was just as prophetic. I went into this a novice and came out knowing lots more about hitches and racks and finding the rack best suited to my situation. I have a small car, a class 1 hitch and a heavy mountain bike. I got exactly what I needed. As to the Swagman rack itself, it works fine. If I had a different situation I would probably buy a platform rack as they are easier to load. There's no reason to buy a bike rack anywhere else.

View More
View Less
# 5
Yakima FullBack 2 Bike Rack - Trunk Mount - Adjustable Arms

- view all Trunk Bike Racks
- Frame Mount - Anti-Sway
- 2 Bikes
- Non-Retractable
- Bike and Rack Lock
- Fits Most Factory Spoilers
- 4 Straps
- Adjustable Arms
- Hanging Rack
- Yakima
More Information >
by: Constantine Anton05/30/2023
Perfect for my 2019 RAV-4. I like this product because it allows me to drive and park without having to worry about height clearances in the city and parking was still navigable. Definitely worth the money!


View More
View Less
by: Bonnie12/12/20202015 Toyota Prius
First, etrailers.com is the BEST! Okay, this rack is amazing. If it was made in the U.S.A, I believe it would be closer to $ 800.00+, it's not, thus the incredible price point, imo. Incredible craftmanship, sturdy, versatile, nice to look at, as well. Very detailed instructions included. Fits my 2015 Prius 4 perfectly. Our beach cruises both required adaptor bars. I opted to wait on the bike rack, to ensure a good fit, etc. then purchase the adaptor bars. After much research, I went with Delta adaptors, I wish etrailers.com carried them, but they do not. Nevertheless, this rack is tops, highly recommend. Thank you for reading!


View More
View Less
# 6
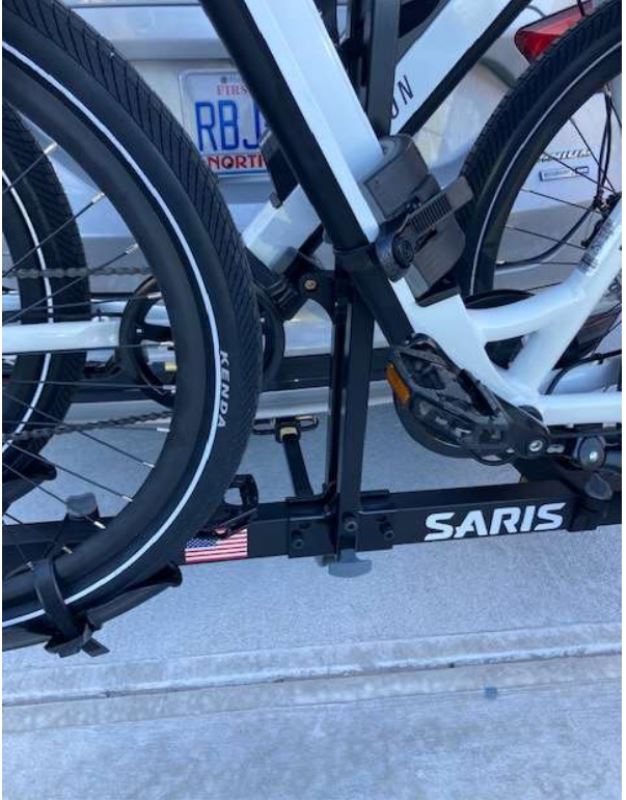
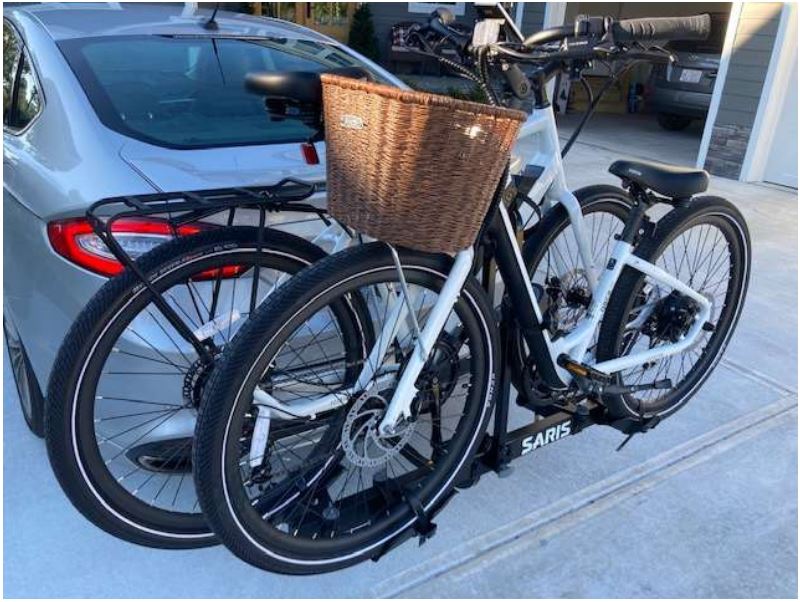
Saris Bones 2 Bike Rack - Trunk Mount - Adjustable Arms

- view all Trunk Bike Racks
- Frame Mount - Anti-Sway
- 2 Bikes
- Non-Retractable
- Locks Not Included
- Does Not Fit Spoilers
- 6 Straps
- Adjustable Arms
- Hanging Rack
- Saris
More Information >
by: Cory 03/18/20242018 Toyota Camry
Seemingly well-constructed and supported bike rack. It fits my 2018 Toyota Camry SE just fine and I haven't had any issues with sway or even feeling my bike while driving. I've only carried one bike on it and have used it a limited number of times, so I cannot speak on durability and longevity. Although you shouldn't open your trunk while the rack is attached, I have been able to do so with no issue (without the bike attached).
View More
View Less
by: Adam08/26/2019
While getting a bike rack for a sports car isn't ideal, I really wanted to transfer my bike with my own car instead of borrowing my friend's pickup truck. After hours of trying to find a bike rack that would be good for my 07 Mustang, I decided to give this one a try and I gotta say, it has been pretty good so far. It fits very well over the factory spoiler. One of my biggest concerns I was worried about when ordering a rack for my Mustang was ruining the paint, but the feet on the legs haven't left one scratch. I have used this to transfer my bike at freeway speeds (up to 80 mph) on car rides that typically last an hour and my bike was perfectly secure throughout each ride. For extra security, I wrapped both bike wheels with a ratchet strap so the wheels and pedals wouldn't shift in transit. So far, I am very pleased with this bike rack for the price and quality. I would highly recommend this if you want a rack that is affordable and durable.


View More
View Less
# 7
Thule Passage 3 Bike Carrier - Trunk Mount

- view all Trunk Bike Racks
- Frame Mount - Anti-Sway
- 3 Bikes
- Non-Retractable
- Locks Not Included
- Fits Most Factory Spoilers
- 6 Straps
- Adjustable Arms
- Hanging Rack
- Thule
More Information >
by: Garry E08/05/20222019 Chevrolet Cruze
2019 Chevrolet CruzeI ordered this rack in April of 2019 for my 2017 Cruze Hatchback, and I have been satisfied with its fit and durability. Full disclosure, I do not ride that often, maybe once a month at most.
View More
View Less
by: Kelly11/20/2017Ford Edge
Ford EdgeFits perfectly on our Lexus CT200h. Only on the old LS400, the side straps have to be fastened to the wheel arch edge, since the upper trunklid gap is to narrow for inserting the strap hooks. Mounting of two bikes is (with some routine) quickly done, and they stay safe even for longer and faster routes. For transporting three (mountain) bikes, though, the design doesn't seem big and robust enough. Nevertheless, the price-benefit-fun ratios are way better than reasonable.

View More
View Less
# 8
Yakima HangOut 2 Bike Rack - Trunk Mount - Adjustable Arms

- view all Trunk Bike Racks
- Frame Mount - Anti-Sway
- 2 Bikes
- Non-Retractable
- Locks Not Included
- Fits Most Factory Spoilers
- 6 Straps
- Adjustable Arms
- Hanging Rack
- Yakima
More Information >
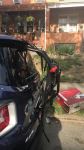
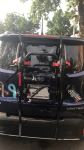
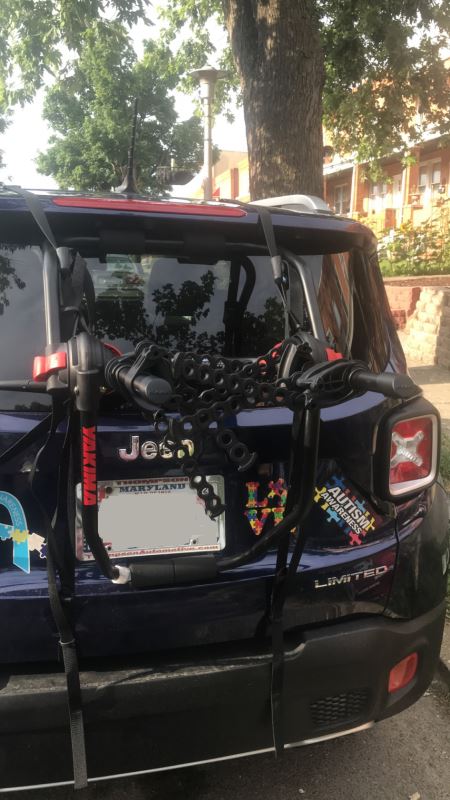
by: Timothy03/28/2023
Works great for my 2019 Jeep Renegade. I adjusted it to be open a little more, so I could use my rear wiper. It also keep pressure off the rear spoiler.
View More
View Less
by: So Happy!!07/06/2018Jeep
When I started the search for a bike rack, I was so disappointed and upset to hear that I would need to install a hitch and spend even more money to buy another bike rack for my 2016 jeep renegade. I ordered this bike rack with a little hope but got a huge surprise! Not only is it super convenient and easy to install but I can fully use my trunk and not spend a ton of money!


View More
View Less
# 9
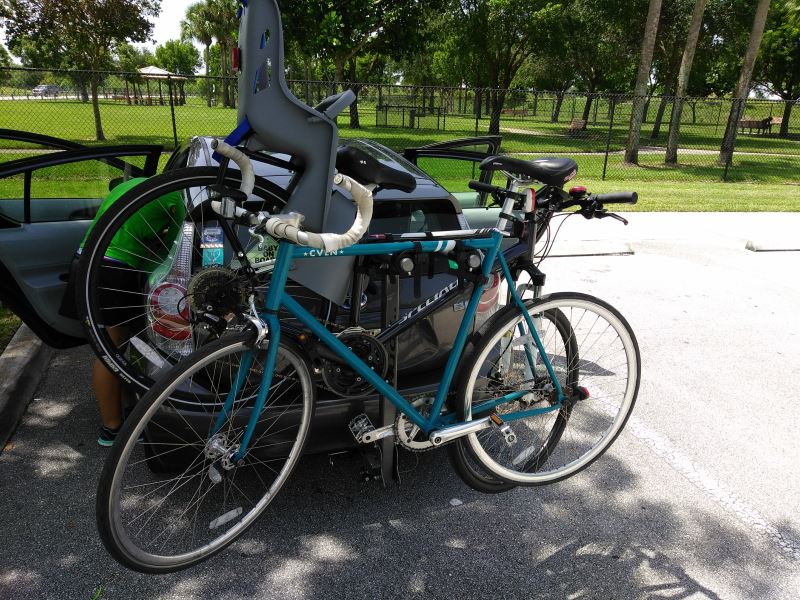
Saris Freedom Bike Rack for 2 Bikes - 1-1/4" and 2" Hitches - Frame Mount

- view all Hitch Bike Racks
- Platform Rack
- Folding Rack
- Frame Mount
- Locks Not Included
- 2 Bikes
- Class 1
- Class 2
- Class 3
- Fits 1-1/4 Inch Hitch
- Fits 2 Inch Hitch
- Fits 1-1/4 and 2 Inch Hitch
- Electric Bikes
Heavy Bikes - Saris
More Information >
by: David05/27/2023
With a few adjustments this rack has delivered. Needed to add additional strapping since the provide straps for securing the bikes to center bar were not long enough due to my ebike design (Velotric). My bikes are step through with a thick frame so provided straps won't fit. Simple adjustment with strapping resolved minor issue. Speed of 73 mph on the highway and some bumpy VT roads and this rack performed.


View More
View Less
by: Scott11/20/2021
I had to put my electric bikes into this rack, backwards, to make them fit. Not ideal, but it works.The receiving 'trays' that are intended to provide support for holding the bikes, by being placed under the bike tires, are forced to be moved to a location that is not directly under the bottom of the bike tires. While it works in this manner, it is not ideal.For the support that attaches to the diagonal bike frame, we had to remove it from the vertical rail of the rack. We reinstalled it, upside down, because that's the only way we could make it fit, or 'grab', the bike frame. Again, we made it work, but it's not ideal. We chose to keep the rack because it was so much less expensive than the Thule rack we considered buying. The bike shop owner didn't agree with us. He observed that we are putting $3000 worth of bikes on the rack and risking that investment. So far, no problems, other than the ill-fitting installation.


View More
View Less
# 10
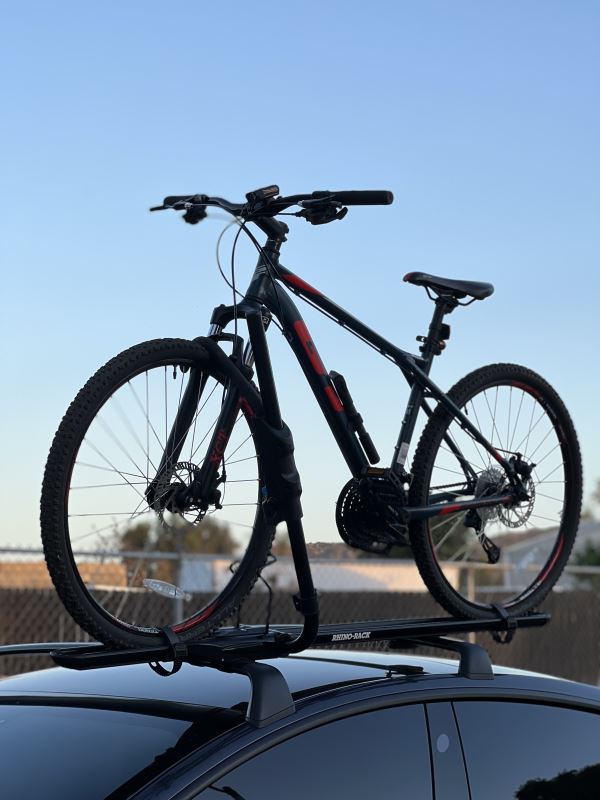
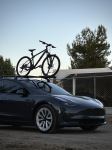
Rhino-Rack Hybrid Roof Bike Rack - Wheel Mount - Clamp On - Aluminum

- view all Roof Bike Racks
- Wheel Mount
- 15mm Fork
- 15mm Thru-Axle
- 20mm Thru-Axle
- 5mm Fork
- 9mm Fork
- 9mm Thru-Axle
- Bike and Rack Lock
- Aero Bars
- Factory Bars
- Round Bars
- Square Bars
- Disc Brake Compatible
- Clamp On - Standard
- Black
- Rhino Rack
More Information >
by: Marcovargas16_10/14/2023
Great bike carrier! Etrailer always provides me with high quality products with fast deliveries.


View More
View Less
by: Antoni Q.02/23/2020
I love the racks, instructions were understandable, one of my end caps came in bad, it can wiggle off after locking but I emailed etrailer and they arranged a replacement quick with rhino rack, pretty nice of them, comes with rhino rack decal and just have to decide where to put it, out my bike up and took it for a test drive and it was very nice, I love their package because it comes with locks and way cheaper than the competitors, very satisfied

View More
View Less
# 11
Kuat Beta Bike Rack for 2 Bikes - 1-1/4" Trailer Hitches - Tilting

- view all Hitch Bike Racks
- Hanging Rack
- Folding Rack
- Tilt-Away Rack
- Frame Mount
- Locks Not Included
- 2 Bikes
- Class 1
- Class 2
- Fits 1-1/4 Inch Hitch
- Kuat
More Information >
by: Daniel F07/06/2019
I was looking for a light weight bike rack for my 2015 Honda Accord. Your videos stated that the Kuat Beta was light and easy to install. You were right. I opened the box, read the instructions, and had it installed in about 10 minutes. I don't use a rack lock. It is so easy to pop on and off the hitch that I keep the rack in my car trunk.

View More
View Less
by: Larry08/10/2017
We've been using this bike rack with a 1.25" Draw-Tite receiver hitch (also purchased from etrailer) on a 2012 Prius C for a month with no problems. As shown on the pictures, it fits two bikes very well, even one with a baby carrier. I chose this model based on recommendations from etrailer that it can be easily detached from the car without tools. True to their word, it is very easily detachable from the hitch and folds up nicely to fit in your garage/closet/storage area. Basically, it uses a hand tightened ball bearing mechanism to secure itself into the hitch receiver, and then uses a 3/8" hand locked pin as a safety device. You can install and de-install this rack in just a few minutes. During driving, there is little noticeable vibration from this rack, even on rougher roads or speed bumps. The only downside is that the holes on the receiver hitch do not align perfectly with the holes on the bike rack (see picture). I believe a few other reviewers also noted this issue. There is enough room to fit the safety pin, but not quite enough to fit a 1/2" hitch lock. I called Kuat to ask them about this and the rep told me that not all hitches will line up with this rack. Kuat, coincidentally(?), sells a hitch lock that is also 3/8" (same size as the safety pin) and still fits.


View More
View Less
# 12
RockyMounts BrassKnuckles Roof Bike Rack for Fat Bikes - Wheel Mount - Aluminum - Black

- view all Roof Bike Racks
- Wheel Mount
- 15mm Fork
- 15mm Thru-Axle
- 20mm Thru-Axle
- 5mm Fork
- 9mm Fork
- 9mm Thru-Axle
- Fat Bike
- Locks Not Included
- Aero Bars
- Factory Bars
- Round Bars
- Square Bars
- Disc Brake Compatible
- Clamp On - Standard
- Black
- RockyMounts
More Information >
by: Andy B.05/01/2017
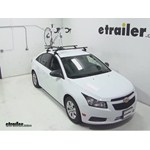
I purchases and have been using a Brassknuckles with my fat bike for a few months now and have been completely satisfied with the ease of use. I have it mounted on an aftermarket roof rack on top of my Chevy Cruze. Liked it so much I just purchased a second Brassknuckles rack so I can drive when riding with a buddy.
View More
View Less
by: Gerald A07/03/2017
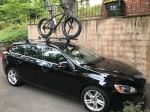
The people at etrailer are excellent in communicating and following up. The Rocky Mount BrassKnuckles Roof Rack for Fat Bikes is well designed and came with comprehensive instructions. It fit my Thule aero blade racks wonderfully. My Motobecane Sturgis now sits proudly on my Volvo wagon. I have driven up to 60 MPH with my bike on the roof with no drama what so ever.

View More
View Less
# 13
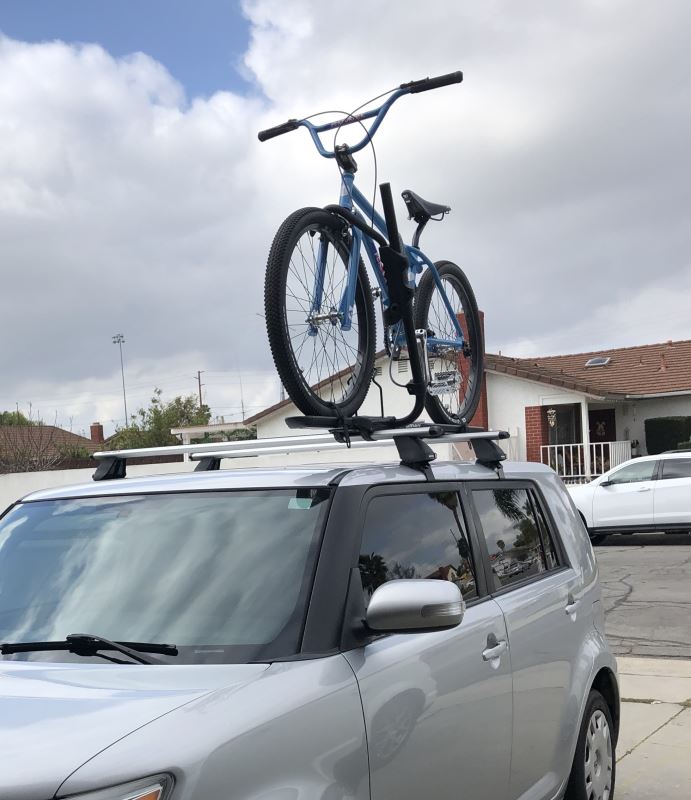
Swagman Upright Bike Rack for 1 Bike - Roof Rack Crossbars - Frame Mount

- view all Roof Bike Racks
- Frame Mount
- 15mm Fork
- 15mm Thru-Axle
- 20mm Thru-Axle
- 5mm Fork
- 9mm Fork
- 9mm Thru-Axle
- Bike Lock
- Factory Bars
- Round Bars
- Square Bars
- Disc Brake Compatible
- Clamp On - Standard
- Black
- Swagman
More Information >
by: Jamey06/28/2023
Planning on bringing bikes while camping. I mounted 2 of the Swagman bike racks to my new Sportrack on my pop-up camper. The bikes fit perfectly. The racks seem sturdy enough. Not heavy duty, but for my needs they should be fine. Assembly was relatively fast and easy.


View More
View Less
by: Larry S02/14/2020
We have used the Swagman Roof Rack a number of times when we have needed the additional bike carrying capacity. It took a couple attempts to get the initial spacing of the bike rack properly balanced on the van’s roof rack as recommended by the instructions. But it was easy to do and once set was very easy and quick to put on and take off. The rack works great, the bike is easy to put into place and secure. The bike and rack are very stable and quiet and haven’t required any mid-trip adjustments. We always put the cheapest bike on the roof (lol) but do use a bit of duct tape to protect the finish just Incase. We are very satisfied with the rack and consider it quite a deal for the money.


View More
View Less
# 14
Kuat Sherpa 2.0 Bike Rack for 2 Bikes - 1-1/4" Hitches - Wheel Mount - Black

- view all Hitch Bike Racks
- Platform Rack
- Folding Rack
- Tilt-Away Rack
- Wheel Mount
- Bike and Hitch Lock
- 2 Bikes
- Class 1
- Class 2
- Fits 1-1/4 Inch Hitch
- Carbon Fiber Bikes
- Kuat
More Information >
by: John08/23/2022
All in all pretty good. The arms that grab the front wheel have loosened a little bit and move side to side. They have never failed, just feel a little wobbly. The hitch receptacle is also hard to tighten but might be due to the receptacle it self. Used rack on a long trip and the bikes moved slightly side to side, but nothing serious.

View More
View Less
by: Katherine P09/16/2017
Car: 2017 Honda CR-V This is a great rack! There's not a lot to the assembly, other than getting the first two long bolts in, those were tricky. Once those were in there, aligned properly, the rest of the assembly was pretty easy. Attaching the rack to the hitch receiver was the easiest part of the whole thing! The rack is really nicely portable, and will easily store in our apartment during the off season. It takes less than a minute to get it loaded into the hitch receiver. The cable lock is a little bit flimsy, but should hopefully deter casual thievery. What I would have loved to have seen were locks in the retaining arms as well, so those couldn't be messed with by strangers. Otherwise, this rack is really great, and I would highly recommend it.


View More
View Less
Bike Rack Videos
Thule Archway Trunk Mount Bike Rack Review - 2013 Chevrolet Cruze

Today on our 2013 Chevy Cruze we'll be test fitting the Thule Archway trunk-mounted 2-bike rack, part number TH9009XT. We'll begin our test fit by placing the carrier onto the vehicle's trunk. The rear portion of the bike rack should rest on the upper tier of the rear bumper. We'll now take the top hooks and position them on the top portion of the trunk lid. We'll then tighten them down to help keep the carrier in place. Now on the right hand side we'll take the side strap to put it on the side of the trunk just above the tail lights and the bottom strap to the bottom portion of the trunk.
Thule Big Mouth Roof Bike Rack Review - 2013 Chevrolet Cruze

Today on our 2013 Chevy Cruz we'll be test fitting the Thule Bigmouth roof mounted bike rack, part number TH599XTR. We'll begin our test fit by placing the bike rack onto the vehicle's load bars. Starting with the rear we'll remove one of the wing nuts to position the rear bracket around the underside of the rear bar. We can then reinstall our wing nut and then slide it down. Moving up to the front, we can loosen up the black wing nuts to position the T-bolts into the slots of the brackets. We'll then tighten down the wing nuts and secure the front part of the bike rack to the front bar. Now that everything is all tightened down and secured, we're ready to load up our bike. We'll undo the strap at the front and the rear and then loosen up the frame clamp.
RockyMounts TieRod Stretch Roof Bike Rack Review - 2013 Chevrolet Cruze

Today, on our 2013 Chevy Cruze, well be test fitting the RockyMounts TieRod Stretch Roof Mounted Bike Rack, part number RKY1011. Well begin our test fit by placing the bike rack up on to the vehicles roof rack. Well then remove the black plastic cover at the front to bring our rubber coated steel straps around the underside of the front bar and hook them into the connection point. Well then move to the rear, remove one of the Allen bolt with the included Allen wrench to slide the rear bracket around the underside of the rear bar. Well then reinstall the Allen bolt and tighten it down with a wrench. Now, moving back up to the front, well use the included Allen wrench to the turn the silver bolt to tighten on the straps helping us at front bar. With everything all tightened down and secured, we're ready to load up our bike.
Swagman Fork Down Roof Bike Rack Review - 2013 Chevrolet Cruze
Today on our 2013 Chevy Cruise, we'll be test fitting this Swagman Fork Down Roof Mounted Bike Rack, part number S64710. We'll begin our test fit by placing the bike rack up onto the vehicle's bars. We'll then take the silver brackets to go on the underside of the front bar, up into the pre-drilled holes of the front of the bike rack. We'll then take the black wing nuts to thread onto the threads of our bracket to secure the front part of the bike rack to the front bar. We'll then repeat the same steps for the other bracket. Now, moving to the rear of the bike rack, we can take the silver bracket and this time, slide it over top of the bar through the pre-drilled holes in the bike rack; taking the black plate to rest on the underside of the bar and threading on our wing nuts to tighten it down. Once everything is all tightened down and secured, we're ready to load up our bike. We'll place our bike up on the bike rack, sliding the forks down onto the skewer.
Yakima FrontLoader Roof Bike Rack Review - 2013 Chevrolet Cruze

Today on our 2013 Chevy Cruze, well be test fitting the Yakima Front Loader Roof Mounted Bike Carrier, part number Y02103. Now with our roof rack system already assembled onto the vehicle, well begin our test fit by placing the carrier onto the vehicles crossbars. Well set the front of the carrier around the front crossbar and loosen up the rear bracket to bring it around the rear crossbar. Well then tighten down the rear bracket and move back up to the front of the carrier where we will turn the black T-handle to tighten down the front of the carrier to secure it to the crossbar. Now with the carrier secured to the vehicle, were ready to load our bike. Well first undo the rear strap and sat our bike onto the carrier.
Yakima QuickBack 2 Bike Rack Review - 2013 Chevrolet Cruze
Today on our 2013 Chevy Cruise, we'll be test fitting the Yakima QuickBack trunk mounted 2-bike carrier, part number Y02621. To begin our test fit, we'll place the carrier onto the vehicle. We'll place the top hooks to the top part of the trunk, the side hooks to the side part of the trunk, and the bottom hooks to the bottom part of the trunk. We'll then tighten down the straps to secure the carrier to the vehicle. After securing the excess slack, we're ready to load our bike. We'll loosen up the red knob on the right hand side of the carrier to swing the cradle arms out.
Yakima ForkLift Roof Mounted Bike Rack Review - 2013 Chevrolet Cruze

Today on our 2013 Chevy Cruise, we'll be test fitting the Yakima Forklift roof mounted bike carrier, part number Y02098. Now with the roof rack system already assembled on our vehicle, we'll begin our test fit by placing the carrier onto the vehicle's cross bars. We'll bring the front bracket around the front cross bar and tighten down the black wing nut to secure the front of the carrier to the cross bar. We'll then move to the rear of the carrier, where we will tighten down the black wing nut to secure the rear of the carrier to the vehicle. We'll then move back up to the front of the carrier, where we will remove the skewer. After tightening the wing nut, slide the black plastic cap back onto the carrier, and slide the skewer through.
Thule Vertex 4 Hitch Bike Rack Review - 2013 Chevrolet Cruze

Today on our 2013 Chevy Cruise we'll be test fitting the Thule Vertex 4-bike carrier, part number TH9029. Now to begin our test fit, we'll slide the shank of the carrier into the opening of the hitch, line up our pin holes, thread our anti-rattle bolt through the pin holes, and tighten with a wrench. With the carrier secured to the vehicle, we'll go over a few clearance measurements to see how the bike carrier and this vehicle fit together. There are about 11" of ground clearance. The closest part of the carrier to the closest part of the vehicle at the rear bumper is about 2". With the cradle arms folded down, we've added about 8-1/2" to the overall length of the vehicle.
Thule Raceway Platform Trunk Bike Rack Review - 2013 Chevrolet Cruze

Today on our 2013 Chevy Cruise we'll be test fitting the Thule Raceway platform style trunk mounted 2-bike carrier, part number TH9003. Now before we begin our test fit, we will first need to refer to the Thule Fit Guide or the included instructions to determine what number our fit dial should be at. After setting our fit dial, we'll place the carrier onto the vehicle. We'll put the top hook to the top part of the trunk, and the bottom hook to the bottom part of the trunk. You may need to open your trunk to get the bottom hooks into position. We'll then tighten down the gray knobs on the left and right hand side of the carrier to secure the carrier to the vehicle.
Thule Raceway Trunk Bike Rack Review - 2013 Chevrolet Cruze
Today on our 2013 Chevy Cruze well be test fitting the Thule Raceway two bike carrier, part number TH9001. Before we begin our test fit we will first need to refer to the Thule fit guide, or the included instructions to determine what number our fit dial should be at. After setting our fit dial well place the carrier onto the vehicle. Well put the top hook to the top part of the trunk, and the bottom hooks to the bottom part of the trunk. Well then turn the grey knobs on the left and right hand side of the carrier to tighten down the straps to secure the carrier to the vehicle. Now that the carrier is secured to the vehicle were ready to load our bike.
Thule Passage Trunk Mounted Bike Rack Review - 2013 Chevrolet Cruze
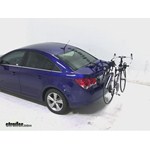
Today on our 2013 Chevy Cruze well be test fitting the Thule Passage two bike carrier, part number TH910XT. Before we begin our test fit we will first need to refer to the Thule fit guide to determine what number our fit dial should be at. After setting our fit dial well place the carrier onto the vehicle. Well put the top hook to the top part of the trunk, the side hooks to the side part of the trunk just above the taillight, and the bottom hooks to the bottom part of the trunk. You may need to open your trunk to get the bottom hooks into position. Well then tighten down all the straps to secure the carrier to the vehicle.
Thule Hitching Post Pro Hitch Bike Rack Review - 2013 Chevrolet Cruze
Today on our 2013 Chevy Cruze well be test fitting the Thule Hitching Post Pro, part number TH934XTR. To begin our test fit well slide the shank of the carrier into the opening of the hitch, line up our pin holes, thread our anti rattle bolt through the pin holes and tighten with a wrench. Now with the carrier secured to the vehicle well go over a few clearance measurements to see how the bike carrier and this vehicle will fit together. There is about nine inches of ground clearance. The closest part of the carrier to the closest part of the vehicle here at the rear bumper is about four inches. With the cradle arms folded down weve added about 13 inches to the overall length of the vehicle.
Thule Gateway Trunk Mount Bike Rack Review - 2013 Chevrolet Cruze

Today on our 2013 Chevy Cruze well be test fitting the Thule Gateway trunk mounted two bike carrier, part number TH9006XT. Before we begin our test fit, we will first need to refer to the Thule fit guide to determine what number our fit dial should be at. After setting our fit dial well place the carrier onto the vehicle. Well put the top hook to the top part of the trunk, the side hooks to the side part of the trunk just above the taillights, and the bottom hooks to the bottom part of the trunk. Well then tighten down the straps to secure the carrier to the vehicle. After securing our excess slack were ready to load our bike.
Thule Doubletrack Hitch Bike Rack Review - 2013 Chevrolet Cruze

Today on our 2013 Chevy Cruze well be test fitting the Thule Doubletrack platform style two bike carrier, part number TH990XT. To begin our test fit well slide the shank of the carrier into the opening of the hitch, line up our pin holes, thread our anti rattle bolt through the pin holes and tighten with a wrench. Now with the carrier secured to the vehicle well go over a few clearance measurements to see how the bike carrier and this vehicle fit together. With the platform folded up we have about nine inches of ground clearance. The closest part of the carrier to the closest part of the vehicle here at the rear bumper is about a half an inch. With the platform folded up weve added about seven inches to the overall length of the vehicle.
Swagman Titan Hitch Bike Rack Review - 2013 Chevrolet Cruze
Today on our 2013 Chevy Cruze well be test fitting the Swagman Titan four bike carrier, part number S63410. To begin our test fit well slide the shank of the carrier into the opening of the hitch, line up our pin holes, thread our anti-rattle bolt through the pin holes and tighten with a wrench. Now that our bike carriers secured to our Chevy Cruze well go over a few clearance measurements to see how the bike carrier and this vehicle will fit together. There are about 12 inches of ground clearance. The closest part of the carrier to the closest part of the vehicle at the rear bumper is about five and a half inches. With the cradle arms folded down weve added about 17 inches to the overall length of the vehicle.
RockyMounts TieRod Roof Bike Rack Review - 2013 Chevrolet Cruze

Today on our 2013 Chevrolet Cruse, well be test fitting the RockyMounts Tierod Roof Mounted Bike Carrier, part number RKY1014. Now with our roof rack system already assembled onto the vehicle, well begin our test fit by placing the carrier onto the vehicles crossbars. Well remove the front black plastic cap to swing the rubber coated steel straps around the front crossbar and well then use the on wrench to tighten them down to secure the front of the carrier to the vehicle. Well then replace the black plastic cap and move to the back of the carrier where we will loosen up the Allen bolts to bring that bracket around the rear crossbar. Well then tighten that down to secure the carrier to the vehicle. Now were ready to load our bike.
Hollywood Racks Traveler Hitch Bike Rack Review - 2013 Chevrolet Cruze

Today on our 2013 Chevrolet Cruse, well be test fitting the Hollywood Racks Traveller 4 Bike Carrier, part number HR8500. Now to begin our test fit, well slide the bike rack shank into the opening of the hitch, line up our pinholes and thread our anti-rattle bolt through the pinholes and tighten with a wrench. With our bike rack secured to the vehicle, well go over some clearance measurements to see how the Traveller and our Chevy Cruse will fit together. We have 9 inches of ground clearance, the closest part of the carrier to the closest part of the vehicle at the rear bumper is about is about three inches. With the cradle arms folded down, weve added about six inches to the overall length of the vehicle. Well now pull the pin at the top of the mast to swing out our cradle arms and measure from the back of the vehicle at the rear bumper at the end of the arms and get a measurement of 34 inches.
Hollywood Racks Expedition Trunk Bike Rack Review - 2013 Chevrolet Cruze

Today on our 2013 Chevy Cruze well be test fitting the Hollywood Racks Expedition trunk mounted two bike carrier, part number HRF6-2. To begin our test fit well place the carrier onto the vehicles trunk. Well use the top set of black levers to adjust the bike carrier to fit the vehicles trunk. After establishing this position well clamp them down to secure them in place. Well now put the top straps to the top part of the trunk, the side straps to the side part of the trunk just above the taillights, and the bottom straps to the bottom part of the trunk. Well then tighten down the straps to secure the carrier to the vehicle.
2013 Chevrolet Cruze Bike Rack Questions
- The Kuat Transfer V2 Bike Platform Rack # KU74FR will absolutely hold a full suspension downhill bike. The ratcheting wheel hooks will securely hold the front wheel and the wheel strap for the rear wheel will secure the bike further in place. The suspension components won't come into play as the frame is not touched by the rack.
I've attached a video to assist.
view full answer... - When we did a test fit of the Curt trailer hitch # C11282 we measured 6 inches from the center of the hitch pin hole back to the rear bumper. I have linked a video showing the installation for you. On the Thule Helium Aero, # TH9042PRO, it measures 14-3/8 inches from the center of the hitch pin hole to the back of the upright mast, 11-1/4 inches to the lever that allows the rack to tilt, and 4-1/2 inches to the anti-rattle knob.
Because the rear bumper curves up above the hitch,...
view full answer... - The Yakima HoldUp EVO # Y02480 is an excellent bike rack that I believe you'd be happy with but I do have to say that it is 50 lbs. When I looked up the online version of the owner's manual for your 2013 Chevy Cruze it stated that the max trailer weight for your vehicle is 1,000 lbs and that the max tongue weight is 10% of that (100 lbs). So even if you're using the Curt Trailer Hitch # C11282 which has a 200 lb tongue weight rating, you are limited to the 100 lbs. If your bikes...
view full answer...


What our customers are saying:
"A couple months ago, I ordered a hitch & bike rack for my new 2005 Saturn VUE. Everything about the order was fast and easy. When my father bought a 2006 VUE, he wanted the same hitch, but it was not listed on the site. I contacted customer service and quickly received a response informing me that they were waiting for details on the new model. The next day I had another email saying it was available, less than an hour later, my order was placed and I had a "shipped" email. Outstanding service!"